

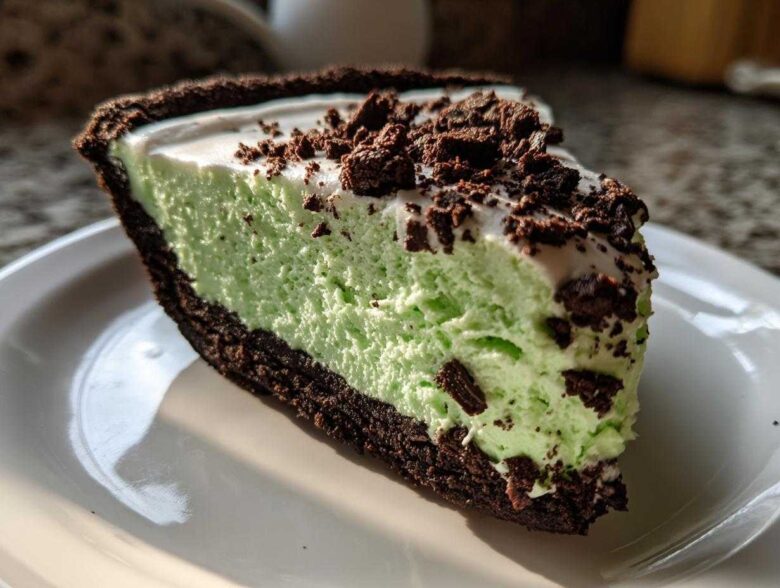
Oh my goodness, have you ever hit that wall in the middle of summer where you just *cannot* turn on the oven? I know I have! When the heat is just too much, but you still need something totally decadent to finish dinner, I always turn to this showstopper. Trust me, this is the ultimate, creamy, no-bake grasshopper pie you’ll ever meet. I made it for a massive weekend gathering last month, and people were actually asking for the recipe before the main course was even finished!
It’s light, it’s minty, it’s got that gorgeous dark chocolate crunch, and absolutely zero baking required. Seriously, if you need a refreshing mint chocolate treat that comes together faster than you can choose your Netflix binge, you’ve found your recipe right here.
Why This No Bake Grasshopper Pie is Your New Favorite Dessert
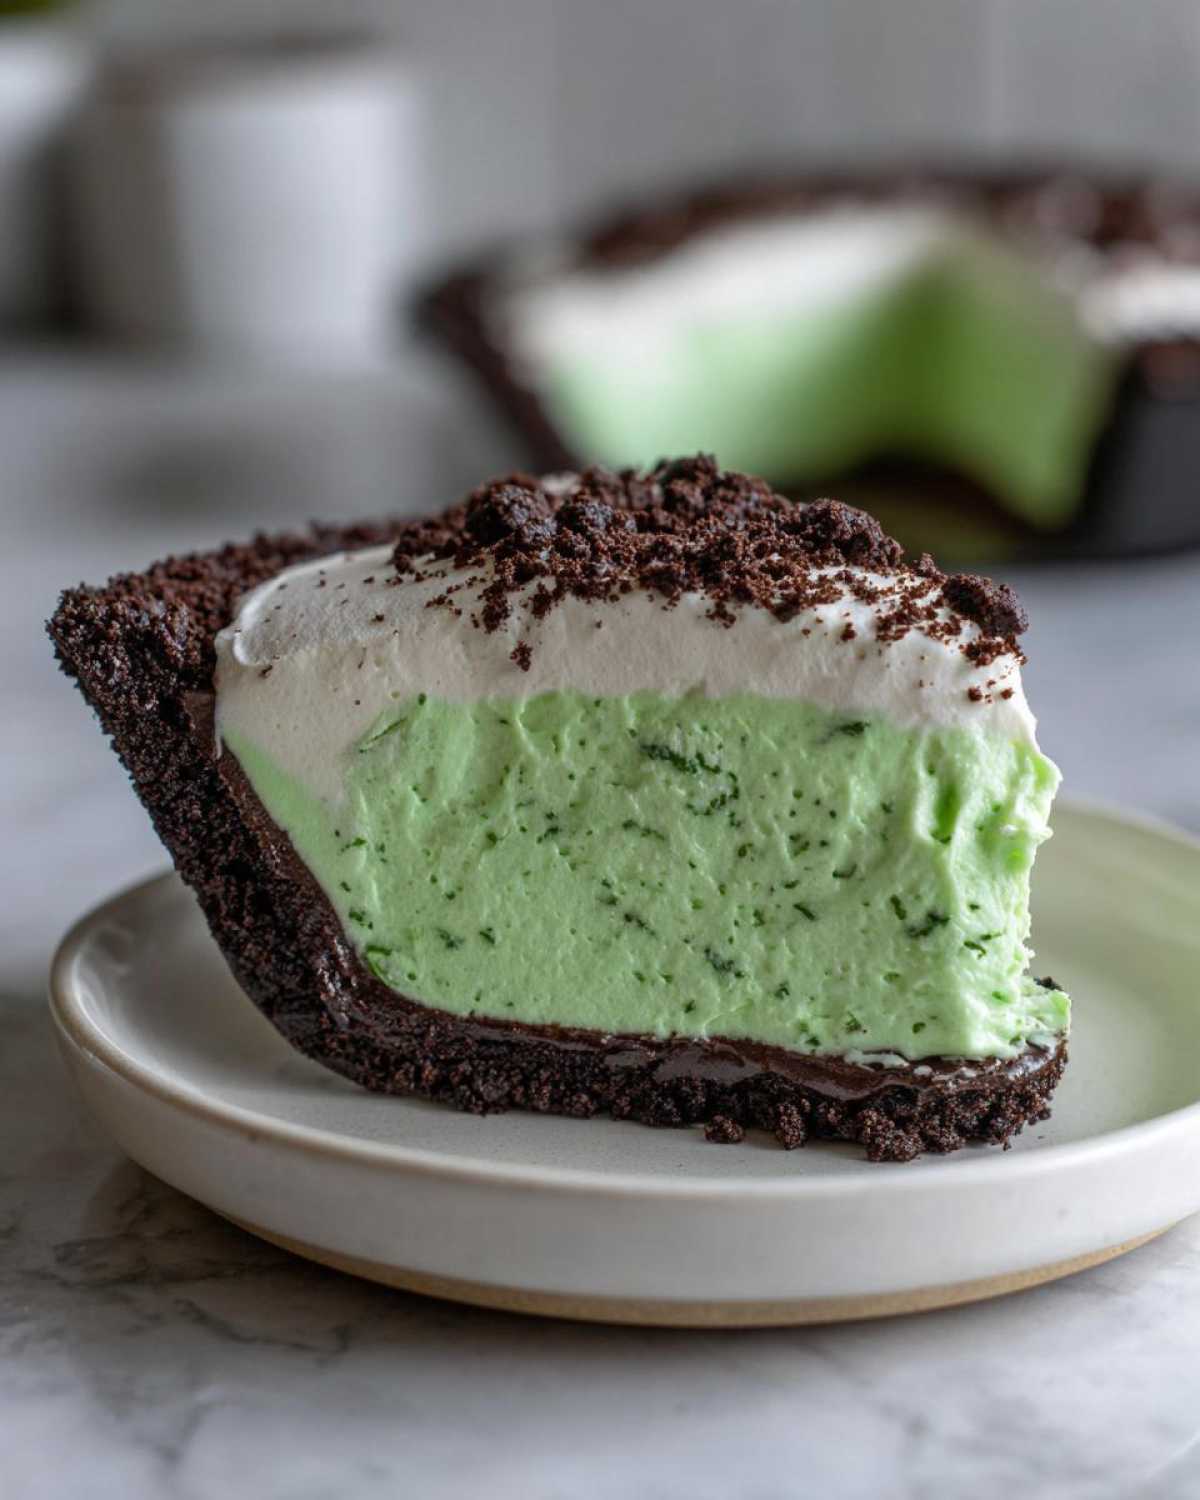
When I tell you this pie is magical, I mean it! It checks every single box for an easy, stress-free dessert. Forget fiddling with flaky pastry or sweating over a hot oven; this is pure, chilled satisfaction.
- It’s a guaranteed hit—truly a family friendly grasshopper pie that even picky eaters love because the mint isn’t overpowering.
- It looks like you worked for hours, topping that deep green filling with chocolate, but honestly, you just need a fridge!
- It’s the ultimate refreshing mint chocolate treat when the weather is boiling outside.
Perfectly Creamy Grasshopper Dessert Texture
This is where we separate the good pies from the *great* pies. We use both cream cheese for structure and tons of whipped topping folded in super gently. That folding motion is key, I promise! It traps all that air, making the filling unbelievably light and fluffy, while the structure stays firm enough to hold up perfectly when you slice it. It just melts in your mouth.
Simple Grasshopper Pie Recipe: No Oven Required
The best part? This equals zero oven time! As someone who hates turning on the stove in August, this truly delivers. Because it’s one of the best no oven desserts, you can whip this up in twenty minutes, stick it in the press, and then walk away for the rest of the afternoon. It’s ideal for those last-minute potlucks or when you just need a quick, impressive something.
Ingredients for Classic No Bake Mint Chocolate Pie
Gathering your supplies for this Oreo Crust Mint Pie is half the fun, because you know the hard part is over! You truly don’t need much to get this fantastic result. Remember, this recipe is designed to be family-friendly, so we are sticking to non-alcoholic flavorings here for that perfect minty punch.
- 1 1/2 cups chocolate cookie crumbs (I usually just crush about 25 whole Oreos, chocolate and cream filling included, they go right in!)
- 1/4 cup unsalted butter, melted
- 1 package (8 ounces) cream cheese, softened—and I mean truly soft!
- 1 cup powdered sugar
- 1 teaspoon vanilla extract
- 1/2 teaspoon peppermint extract
- 1/4 cup milk (any kind works here)
- 1/4 cup green crème de menthe syrup (the non-alcoholic kind, sweet and minty!)
- 1 container (8 ounces) frozen whipped topping (like Cool Whip), thawed completely
- Green food coloring (optional, just if you want that super vibrant dessert look)
- 1/2 cup semi-sweet chocolate chips, melted for drizzling
Ingredient Notes and Substitutions for Your grasshopper pie
Listen, getting the ingredients right is crucial for any no-bake situation. First off, that cream cheese? It absolutely has to be softened to room temperature. If it’s chilly, you’ll end up with cream cheese chunks in your filling, and nobody wants that in their creamy grasshopper dessert.
Now, about the mint flavor: that green syrup is fantastic, but if you don’t have it or want to skip it, I have an easy fix! You can substitute it by using 1/4 cup of heavy cream mixed with about a teaspoon of peppermint extract. Then, just add a few drops of green food coloring to that mixture before folding it in with your whipped topping. It gives you almost the exact same texture and taste!
How to Make the Best grasshopper pie: Step-by-Step
This is where we turn simple pantry items into something truly legendary! This process is so straightforward—it’s the definition of an Easy Grasshopper Pie. Just follow these steps closely, and you’ll have a perfect pie on your hands in no time. Don’t forget, the real secret weapon here isn’t skill; it’s patience during the chill time!
Preparing the Chocolate Cookie Crust Mint Pie Base
First things first, let’s talk crust. I take my chocolate cookies—whole, crumbs and all—and pulse them until they are fine crumbs. Mix those right into that melted butter until it looks like wet sand. Then, take a 9-inch pie plate, press that mixture firmly down into the bottom and up the sides. Really pack it in there; you want a sturdy base for that creamy filling! Pop that whole plate into the freezer while you tackle the filling. That chilling helps it set up rock solid before anything even touches it.
Achieving the Fluffy grasshopper pie Filling
Now for that beautiful green cloud! Grab a big bowl—this is where the real mixing happens. Start by beating that softened cream cheese until it’s absolutely velvety smooth. We don’t want any lumps, so take your time here! Next, beat in the powdered sugar until it’s incorporated. Then, slowly stream in the vanilla, the peppermint extract, the milk, and that green syrup. Mix it up until it’s lovely and uniformly green.
The most important part comes next: the folding! Take your thawed whipped topping and add it in maybe three separate additions. Use a rubber spatula and fold it gently—like you are tucking a baby into bed—until just combined. If you beat it now, you’ll knock all the air out, and we need that fluffiness! Pour that gorgeous mixture right into your frozen crust, spread it level, and then into the fridge it goes for at least six hours. Overnight is even better if you can wait!
Tips for Success with Your Creamy grasshopper dessert
Getting this Creamy grasshopper dessert perfect is all about those little details. Since this is one of the best No Bake Cream Pies out there, we want to make sure every slice is perfect!
When it comes to the chocolate drizzle on top, melt those chips slowly! If you rush them in the microwave, they seize up, and you’ll end up with hard little chunks instead of that beautiful waterfall look. Use low power in short bursts and stir often. If it gets too thick, add just a tiny drop of vegetable oil to loosen it up before you drizzle it over the chilled green filling.
For the best mint flavor intensity, make sure your peppermint extract is fresh. That stuff loses its punch over time! If you taste-test your filling before chilling and feel like the mint whisper could be a little louder, add just a *tiny* extra drop of peppermint extract—but be careful! That flavor kicks fast, so you always want to under-season slightly before that long chill time.
Storage and Make Ahead Dessert Recipes for grasshopper pie
One of the absolute best things about this pie is that it thrives on being made ahead of time! Because it needs that long chill to set up properly, it’s hands-down one of my favorite Make Ahead Dessert Recipes. You can easily assemble the whole thing the day before your party, cover it loosely, and let it firm up overnight in the fridge. It actually tastes better the next day; the mint and chocolate flavors really marry together beautifully.
If you need to freeze it, you totally can! Just make sure you wrap it really, really well in plastic wrap first, maybe with a layer of foil over that, to block out any freezer smells. It keeps great frozen for about a month. When you want to serve it, move it to the fridge for about four or five hours to thaw slowly before you slice it. That way, you get that slightly firmer, almost ice-cream-like texture without needing the oven at all!
Serving Suggestions for this Refreshing Mint Chocolate Treat
This Refreshing Mint Chocolate Treat is wonderful all by itself, nestled in that dark Oreo crust, but presentation is everything, right? Especially when you take it somewhere!
Beyond just the chocolate drizzle, I always keep a can of good whipped cream handy. A big dollop right on top of each slice makes it look extra fancy. Also, don’t forget fresh mint sprigs! Just tuck one or two tiny leaves right next to the drizzle—it smells amazing and really emphasizes the mint flavor.
It genuinely becomes the centerpiece of any table. If you are heading to a barbecue or a potluck, this is hands down the best way to guarantee you walk home with an empty pie plate. It’s such an easy potluck dessert idea!
Frequently Asked Questions about grasshopper pie
I know you might have a few little questions simmering away about making the perfect grasshopper pie. Since this is a no-bake situation, sometimes the structure can feel a little mysterious! Here are the things I get asked most often about this recipe.
Can I make an alcoholic version of this grasshopper pie?
That’s a fair question! We focused on keeping this recipe family friendly and non-alcoholic by using mint syrup, but you absolutely can make it boozy. If you do want that traditional kick, swap out the non-alcoholic syrup and reduce the milk slightly. You can use about 2-3 tablespoons of true crème de menthe liqueur right along with the peppermint extract. Just taste as you go, because the alcohol will change the overall liquid balance, but it sure adds a punch!
What if I do not have Cool Whip for this No Bake Mint Chocolate Pie?
Don’t panic if you don’t keep frozen whipped topping in the house! For this No Bake Mint Chocolate Pie, you can substitute the Cool Whip with heavy whipping cream. You’ll need to whip about 1 1/2 cups of cold heavy cream until stiff peaks form. Then, you treat it exactly the same way: gently fold that whipped heavy cream into your cream cheese base. It gives it a slightly richer flavor, but the fluffiness stays perfectly intact!
How firm should this dessert be before slicing?
This is key to avoiding a mess! Since we aren’t baking, the firmness comes from chilling. If you try to slice it after just four hours, it might squish out. You want it to feel quite firm to the touch, almost like cold butter, especially around the edges of the filling. Overnight chilling is my golden rule for the cleanest slices.
Can I use Oreos without the creme filling for the crust?
You can, but I really recommend keeping that white filling in for flavor and texture! If you remove the filling, you might need an extra teaspoon or two of melted butter to make sure the crumbs hold together tightly. The filling actually helps bind the crust a bit, giving you that sturdy foundation you need for slicing.
Estimated Nutritional Information for grasshopper pie
I want to be totally upfront that these numbers are just estimates, you know? They are based on standard ingredient versions and don’t account for what brand of Oreos or how fancy your butter is. But this gives you a good idea of what you’re looking at for one slice of the pie.
- Serving Size: 1 slice
- Calories: 380
- Sugar: 32g
- Fat: 24g
- Carbohydrates: 38g
- Protein: 4g
- Cholesterol: 45mg
It’s definitely a treat, but wow, is it worth every single delicious bite!
Share Your Simple Grasshopper Pie Recipe Experience
So, that’s it! You’ve made the famous grasshopper pie, and I sincerely hope it was the hit at your table that it always is at mine. Now, I really, really want to hear about it!
Did you manage to keep the kids out of the kitchen while you were folding that fluffy filling? Did you go for the extra green food coloring or stick to the pale mint color? Don’t be shy! Drop a comment below and let me know how your pie turned out. Rating the recipe is super helpful, too, so future bakers know they can trust this simple recipe!
And if you snapped a gorgeous photo of your finished, drizzled dessert—I need to see it! Tag me on social media so I can admire your work. Seeing your efforts come out perfectly creamy and set is genuinely the best part of sharing these tried-and-true recipes.
PrintClassic No-Bake Grasshopper Pie

Make this easy, creamy, no-bake grasshopper pie featuring a rich Oreo crust and a fluffy mint chocolate filling. This is a simple, refreshing dessert perfect for any gathering.
- Prep Time: 20 min
- Cook Time: 0 min
- Total Time: 6 hr 20 min
- Yield: 8 servings
- Category: Dessert
- Method: No Bake
- Cuisine: American
- Diet: Vegetarian
Ingredients
- 1 1/2 cups chocolate cookie crumbs (about 25 Oreos, filling included)
- 1/4 cup unsalted butter, melted
- 1 package (8 ounces) cream cheese, softened
- 1 cup powdered sugar
- 1 teaspoon vanilla extract
- 1/2 teaspoon peppermint extract
- 1/4 cup milk
- 1/4 cup green crème de menthe syrup (non-alcoholic)
- 1 container (8 ounces) frozen whipped topping (like Cool Whip), thawed
- Green food coloring (optional, for deeper color)
- 1/2 cup semi-sweet chocolate chips, melted for drizzling
Instructions
- Prepare the crust: Combine the chocolate cookie crumbs and melted butter in a medium bowl. Press the mixture firmly and evenly into the bottom and up the sides of a 9-inch pie plate. Place the crust in the freezer while you prepare the filling.
- Make the filling base: In a large bowl, beat the softened cream cheese until smooth. Gradually beat in the powdered sugar until fully combined.
- Add flavorings: Mix in the vanilla extract, peppermint extract, milk, and green crème de menthe syrup. If you want a more intense green color, add a few drops of green food coloring now. Beat until smooth.
- Fold in whipped topping: Gently fold the thawed whipped topping into the cream cheese mixture until no white streaks remain and the filling is uniform and fluffy. Do not overmix.
- Assemble the pie: Pour the mint filling into the chilled Oreo crust, spreading it evenly with a spatula.
- Chill: Cover the pie loosely with plastic wrap and refrigerate for at least 6 hours, or preferably overnight, until the filling is firm.
- Garnish and serve: Before serving, drizzle the melted semi-sweet chocolate chips over the top of the pie. Slice and serve cold.
Notes
- For a richer chocolate flavor in the crust, use chocolate wafer cookies instead of Oreos.
- If you prefer a slightly firmer, frozen pie, you can freeze this dessert for up to 4 hours before serving.
- You can substitute the green crème de menthe syrup with 1/4 cup of heavy cream mixed with 1 teaspoon of peppermint extract and green food coloring, if avoiding syrup.
Nutrition
- Serving Size: 1 slice
- Calories: 380
- Sugar: 32
- Sodium: 240
- Fat: 24
- Saturated Fat: 12
- Unsaturated Fat: 12
- Trans Fat: 0
- Carbohydrates: 38
- Fiber: 1
- Protein: 4
- Cholesterol: 45