

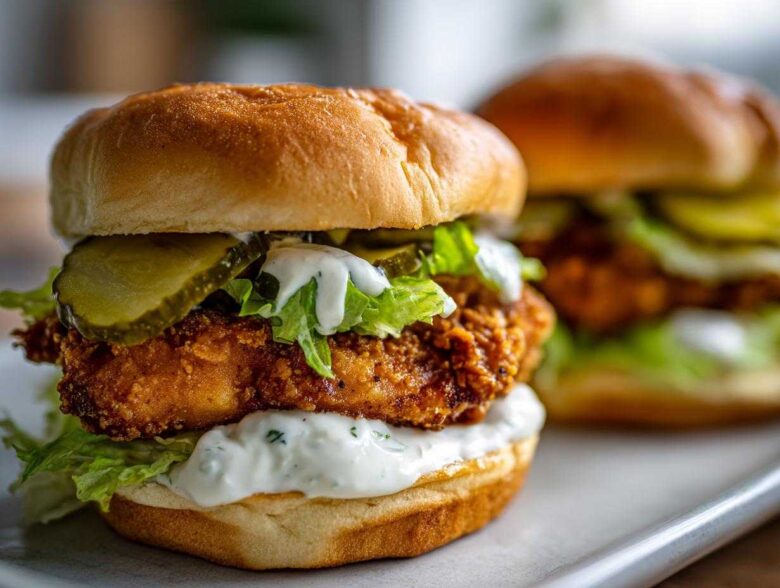
I’m going to let you in on a secret that professional kitchens guard fiercely: making a perfect, restaurant-style crispy chicken burger with garlic mayo at home is shockingly easy, provided you nail two things. First, you need that armor-like crunch on the chicken patty, and second, you must have a supremely garlicky, creamy mayonnaise to cut through all that crunch. For years, I struggled with soggy bottoms and flavorless chicken until I cracked the code on the double-dredge frying technique. Trust me, once you bite into this creation—the crackle of the coating gives way to juicy meat, all held together by that pungent homemade sauce—you will never waste money on takeout again. It’s just heaven on a bun!
Why This Crispy Chicken Burger with Garlic Mayo Recipe Works
I know you’re looking for that perfect crunch, and this recipe is built around it! It’s not just about slapping chicken in hot oil; it’s about preparation. We hit all the major checkpoints here.
- We guarantee a juicy interior because the buttermilk tenderizes the meat before it even sees the fryer.
- The coating is engineered for serious texture—think thick, craggy, and crunchy!
- That homemade garlic mayo? It’s bold, creamy, and designed specifically to stand up to rich fried food without tasting bland.
- Honestly, for how amazing this tastes, the actual cooking and assembly are surprisingly fast.
The Secret to Maximum Chicken Crispiness
If you skip these first two steps, you’re just making regular chicken, not an epic burger topper! It all starts with the buttermilk soak. Letting that chicken sit for at least two hours (or overnight if you’re feeling dedicated!) introduces lactic acid, which gently breaks down the muscle fibers. Translation? Super tender meat that stays moist even when fried hard.
Next comes the crunch factor: the double-dredge. After you pull the chicken out of the marinade, you press it hard into the flour mixture. Don’t be gentle; you want flour clinging to every bit! We dip it *back* into the buttermilk briefly—just a quick dunk—and then hit the dry flour mix one more time. This second layer creates those fantastic, uneven flakes when it hits the hot oil. Those little crispy bits are what separate a good patty from the best crispy chicken sandwich recipe!
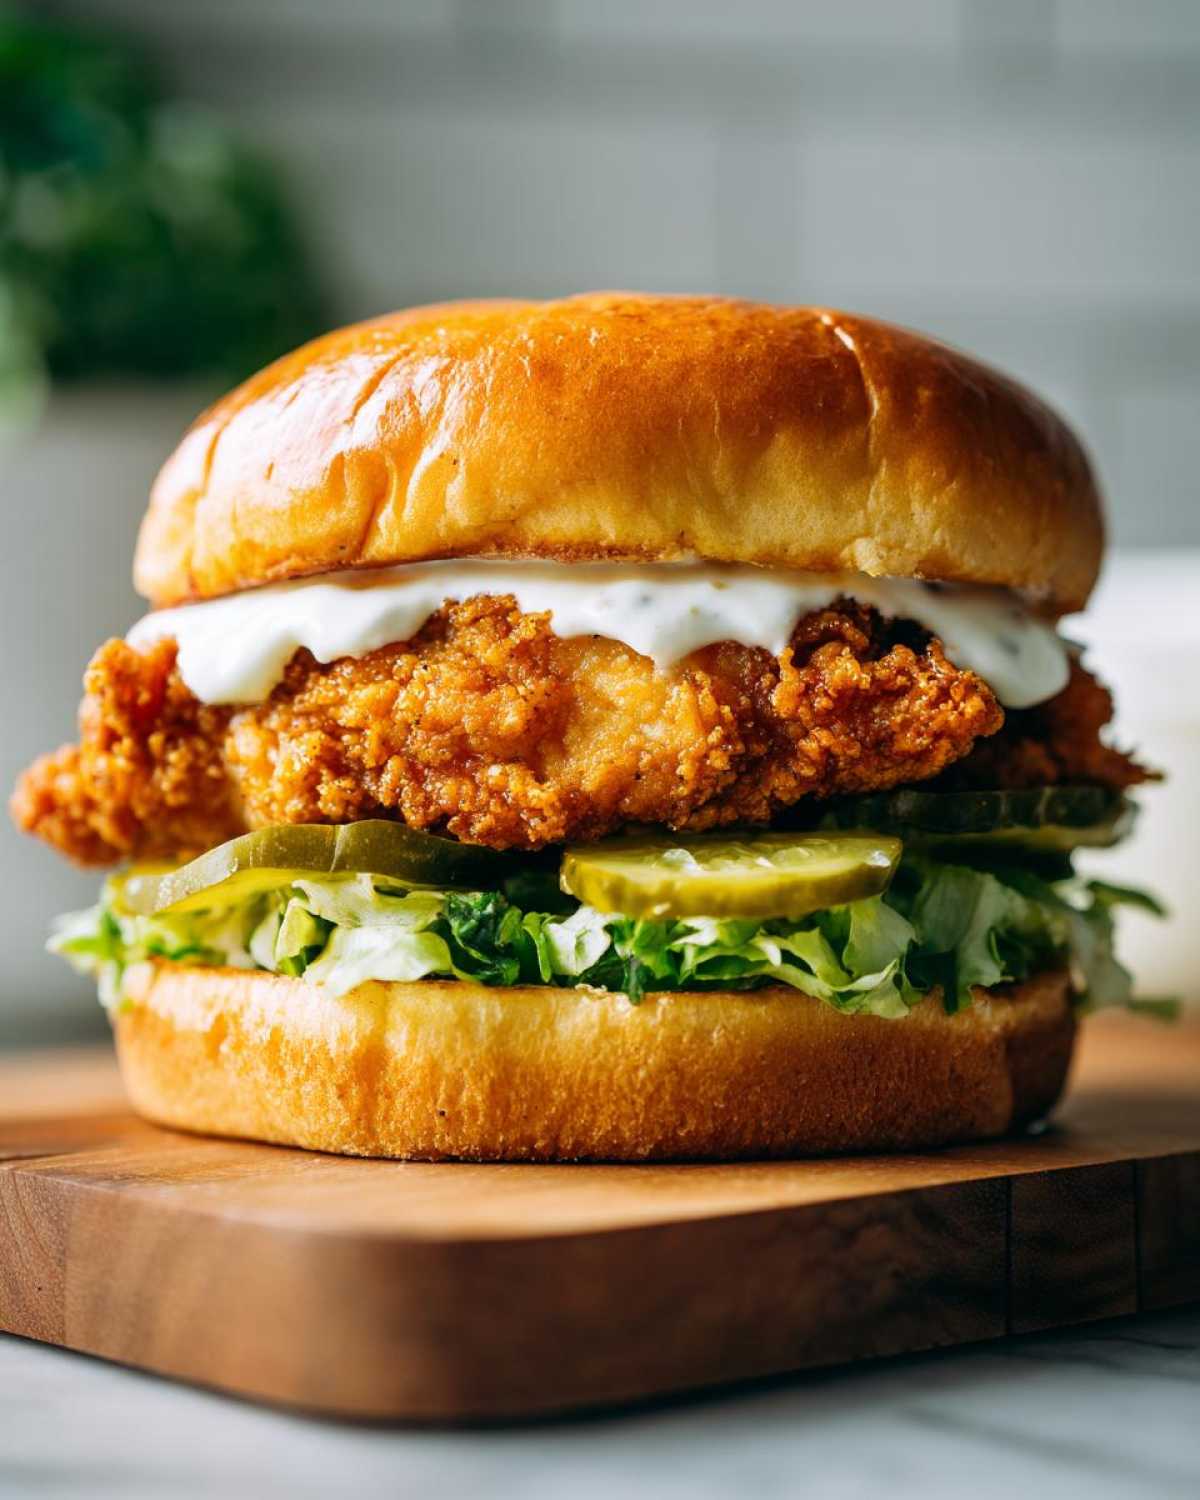
Essential Ingredients for Your Crispy Chicken Burger with Garlic Mayo
You can’t cut corners here if you want that restaurant-quality experience. Having everything ready upfront makes the frying process a breeze. Seriously, gather your mise en place before you even think about turning on the stove! The buttermilk is non-negotiable for juiciness; it’s the foundation of this flavor powerhouse.
We need three main groups of ingredients: what’s going into the chicken marinade, what’s making that amazing crust, and clearly, the star sauce. My favorite way to prep is to lay everything out so I can move quickly once the oil is hot. Don’t miss the flavor boost from the spice blend we add to the flour!
For the Juicy Chicken Patty
This section guarantees your patty won’t be dry, even if you’re using the air fryer later! That buttermilk is going to work magic, I promise you.
- 2 boneless, skinless chicken breasts, halved horizontally (this gets you nice even pieces that cook through fast).
- 1 cup buttermilk (the absolute star for tenderizing).
- 1 teaspoon salt
- 1 teaspoon black pepper
- 1 teaspoon paprika
- 1/2 teaspoon cayenne pepper (just for a tiny hint of warmth!).
The Breading Mix and Assembly Essentials
This is where we build the crunch! Always whisk your dry ingredients together well so the cornstarch is fully incorporated.
- 1 cup all-purpose flour
- 1/2 cup cornstarch
- Vegetable oil, for frying (and plenty of it!).
- 4 burger buns
- 4 slices cheese (if you like that glorious melt factor).
- Lettuce leaves
- Pickle slices
Crafting the Homemade Garlic Mayo for Burgers
This homemade garlic mayo—which is essentially a very strong creamy garlic aioli in my book—needs fresh garlic. Don’t even think about using the jarred stuff here; the flavor difference is miles apart when you’re aiming for that robust punch.
- 1/2 cup mayonnaise (use a really good quality one for best results!)
- 2 cloves garlic, minced finely (this is your flavor bomb).
- 1 teaspoon lemon juice (that little bit of acid brightens everything up).
- 1/4 teaspoon salt
Step-by-Step Instructions for Crispy Chicken Burger with Garlic Mayo
Okay, now we get to the fun part! This is the point where all that waiting pays off. Remember, technique matters more than just following the order on the page. We want everything timed perfectly so the moment the chicken comes out of the oil, the buns are toasted and the sauce is ready to go. I usually start warming the oil right after I finish dredging, that way everything lines up!
Marinating and Preparing the Chicken Coating
This starts with letting the chicken party in the fridge—you need at least two hours for that buttermilk to work its magic and make the meat tender. Once that time is up, whisk your flour and cornstarch together in a shallow dish, making sure they are completely mixed. This is simple, but crucial for an even crust.
Now for the crucial double-dredge that guarantees maximum crunch. Take the chicken right from the buttermilk, let the ugly drips fall off, and press it *firmly* into the flour mix. You need to lock that coating on. Then, give it a quick swoosh back into the buttermilk—don’t let it soak, just coat lightly—and press it hard into the flour mixture one final time. Those craggy bits are your friends; they are what will get shatteringly crispy!
Frying the Chicken Patty Perfectly
You absolutely need a thermometer here; guessing with frying is a recipe for raw centers or burnt crusts. Heat about two inches of vegetable oil in a nice heavy skillet until it hits a sweet spot of 350°F (175°C). Carefully lower the coated chicken pieces in—don’t crowd the pan or the oil temperature will crash!
You’re looking for 5 to 7 minutes per side. The color should be a deep, rich gold. But the real test? Cook until that internal temperature hits 165°F (74°C). I always check one piece first to make sure everything is cooking correctly. Once done, pull them out immediately and let them drain on a wire rack so the bottoms don’t steam.
Assembling the Ultimate Chicken Burger Assembly
While that chicken rests and drains, we get the sauce and buns sorted. Mix your mayonnaise, minced garlic, lemon juice, and salt together until it’s smooth and looks intensely flavorful. Get your cut sides of the buns lightly toasted—a dry pan over medium heat works perfectly for this!
This is how we beat sogginess: Spread a great big layer of that homemade garlic mayo on *both* the bottom and top halves of the bun. Stack your lettuce and pickles onto the bottom bun first, pile that piping-hot crispy chicken on top (add cheese right away so it starts to melt!), and cap it off. That mayo acts like a sealant protecting the bread before you even add the lettuce!
Tips for Success with Your Crispy Chicken Burger with Garlic Mayo
Listen, every cook has those little secrets they swear by, especially when dealing with something as critical as frying. My number one tip, which I mentioned briefly, is ditch the paper towels for draining! They trap steam and instantly soften that gorgeous, crispy coating we worked so hard for. Always go for a wire cooling rack set over a baking sheet. It lets air circulate underneath, keeping that bottom crust crisp while the excess oil drips away.
Also, a quick note if you’re not a deep-fry traditionalist: I get it, sometimes we want a lighter route! You can totally achieve fantastic results using your air fryer. Just spray those lovely double-dredged patties with a light coating of oil—enough to make them glisten—and pop them into the basket. I still stick to 380°F (195°C) for about 15 to 18 minutes, making sure to flip halfway through, just like following my air fryer crispy chicken sandwich guide suggests. It takes a little longer, but the crunch is amazing!
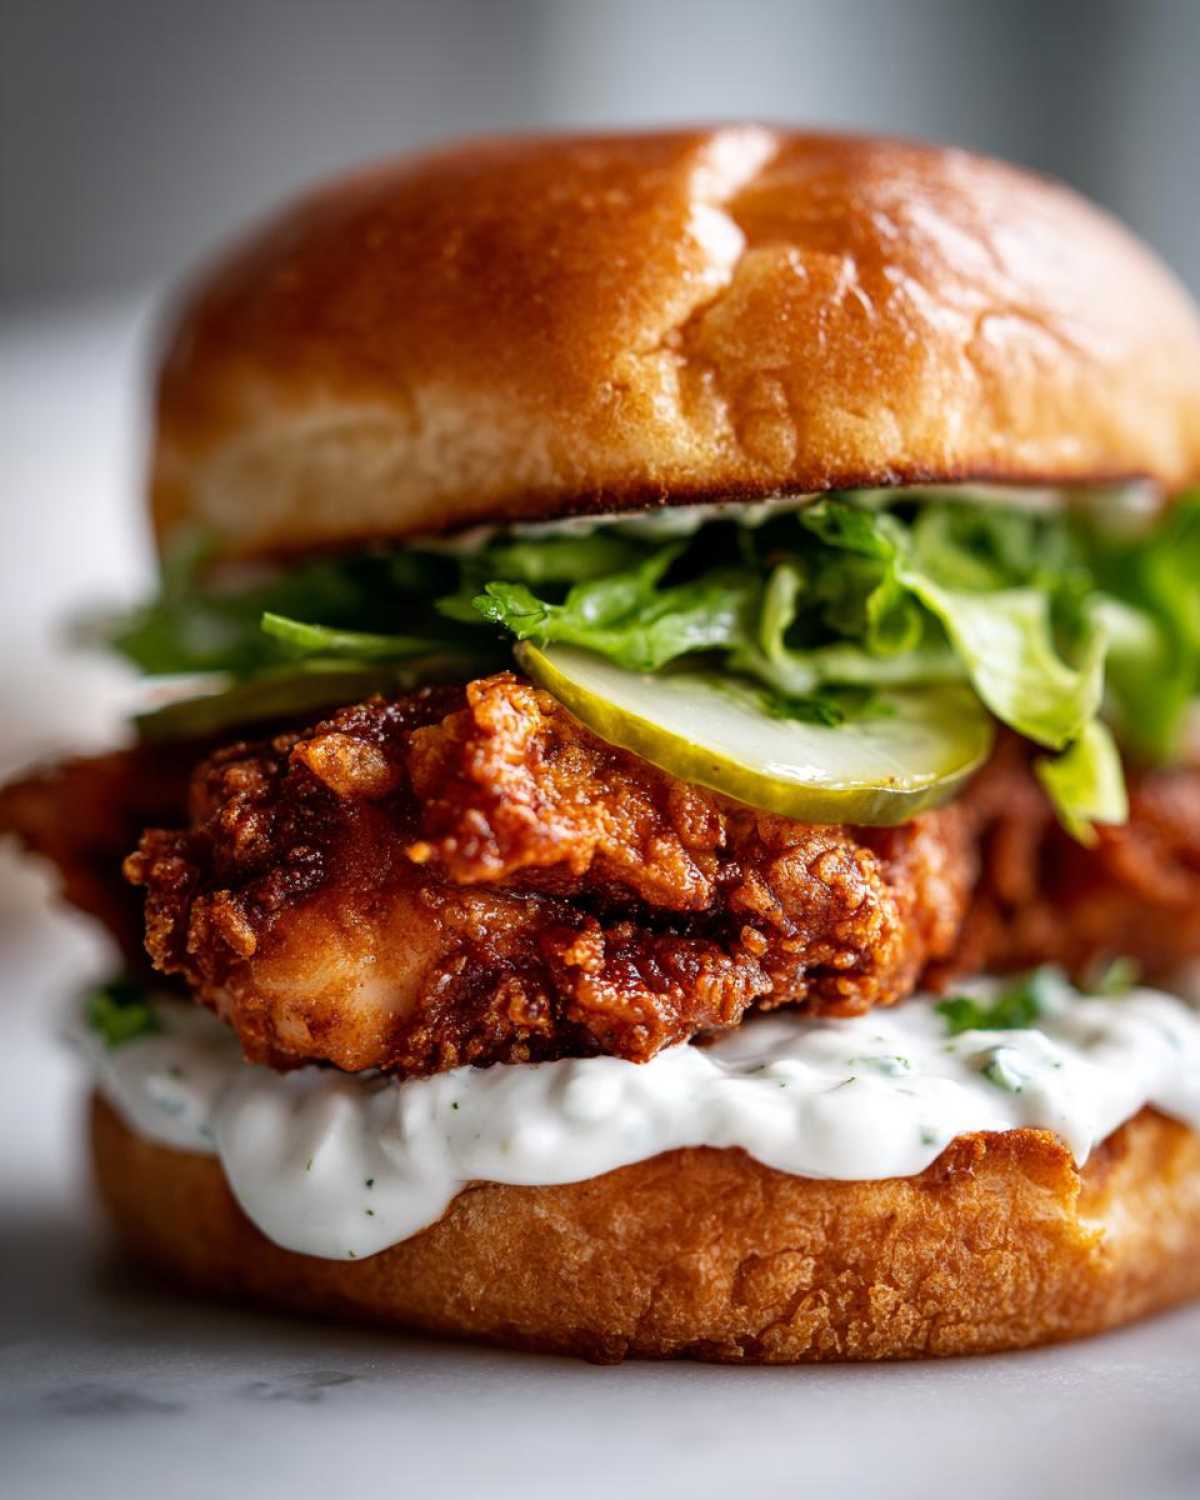
And please, use the lemon juice in that garlic mayo! It stops the garlic flavor from tasting too blunt; it really lifts the whole sauce up so it doesn’t just taste heavy.
Crunchy Chicken Sandwich Toppings Ideas
Look, lettuce and pickles are classic for a reason—they bring that necessary acidity and snap. But when you’re dealing with something as rich as perfectly fried chicken combined with that potent garlic mayo, you need toppings that can stand up to the flavor! Don’t let your incredible patty be overshadowed by plain sides. You’ve done the hard work of getting the crunch right; now let’s layer the flavor!
My go-to for balancing this huge flavor profile is always something sharp or something vinegary. You want that refreshing contrast every time you bite down. Here are a few things I always keep stocked when I’m making this ultimate chicken burger assembly:
- Sharp Cheddar Cheese: Okay, so cheese is optional in the main recipe, but using a seriously sharp cheddar on top of that hot patty melts down beautifully and its tang cuts through the fat from the frying oil and the mayo. It’s better than mild cheese, trust me—you need that bite!
- Tangy Red Onion Slices: Forget those huge, sweet raw rings. Slice your red onion paper-thin. If I have time, I soak those slices in ice water for about ten minutes, which takes away some of the harsh bite but keeps a lovely little zing. They add visual appeal and crunch without overpowering the garlic.
- Vinegary Slaw: This is my secret weapon for the absolute best experience. Instead of a creamy coleslaw—which would be too much sauce layering on sauce—just mix shredded cabbage (and maybe a little carrot) with a splash of apple cider vinegar, a tiny bit of sugar to balance, and salt. It’s crisp, cold, and acidic, which cleanses your palate between bites of that rich, spicy chicken.
- Spicy Pickled Jalapeños: If you’re looking for a spicy crispy chicken sandwich variation, these are it! They bring heat, but more importantly, they bring a deep vinegary brine. They layer beautifully with the saltiness of the pickles we already put in.
No matter what you choose, make sure whatever wet topping you use—like slaw or heaps of pickles—goes between the chicken and the top piece of lettuce. That way, your mayo barrier on the top bun stays clean, and your bottom bun doesn’t get instantly waterlogged!
Best Buns for Crispy Chicken Burgers
Choosing the right bun is just as important as getting the chicken coating right! I know it seems minor, but a flimsy, soft white bun will dissolve into mush the second that beautiful homemade garlic mayo touches it. We need structural integrity here, folks. We are building a monument to fried chicken, not a tower of soggy regret!
When I’m shopping for the ultimate chicken burger assembly, I always gravitate toward buns that have a little substance. Potato rolls are fantastic because they are soft enough to yield a good bite but have enough fat and structure built in to resist absorbing too much liquid immediately. Brioche is another favorite, though sometimes it’s a bit too sweet for my personal taste when paired with that savory patty. If you go brioche, make sure it’s on the denser side.
Another great, often overlooked option is a good Kaiser roll or even a slightly rustic French roll if you want that chewier texture. The main rule is simple: If you press it with your thumb and it immediately springs back too easily, put it down. It needs to be able to handle the weight and the moisture of the patty and all those toppings we talked about.
And I have to remind you one more time because this is vital: Toasting is not optional! After you’ve found that perfect sturdy bun, slice it open and toast the cut sides until they are perfectly golden brown. I like to do this in a dry skillet—no butter needed since the garlic mayo is doing the heavy lifting—until they have a slight, crisp texture. That mild toast is your final defense line against bun sogginess. You can check out my thoughts on rustic baking when you have some extra time, like when you’re making those bakery-style bread bowls, but for burgers, sturdy and toasted is the mantra!
Storage and Reheating Instructions for Crispy Chicken Burger with Garlic Mayo
So, you managed to hold yourself back and didn’t eat all four burgers in one sitting? Good job! Now, let’s talk about leftovers. The absolute biggest mistake you can make is storing the assembled burger. Trust me, the moment that lovely crispy coating meets the lettuce (or heaven forbid, the garlic mayo), you’ve lost the fight. The key here is *deconstruction*.
Keep everything separate! Store the leftover chicken patties, the homemade garlic mayo, the buns, and any assembled toppings like pickles or lettuce in completely different airtight containers in the fridge. I’ve found the mayo actually tastes even more garlicky and fantastic the next day, but it really needs to be kept separate from the bread items.
Reheating That Crispy Chicken Patty
If you try to reheat the chicken patty in the microwave, you’re going to end up with a tough, weirdly chewy piece of meat, and all the beautiful work we did with that double-dredge will be for nothing. Microwaves are a crispy coating’s mortal enemy because they generate internal steam!
You need dry heat, and you need it fast. The oven is a solid backup, but honestly, the air fryer is king for resurrection:
- Preheat your air fryer to about 375°F (190°C). If you have one of those nice little wire racks you can use inside the basket, pop it in! This lets air circulate all around the patty—just like we did when draining the oil.
- Place the cold chicken patty in the basket, ensuring it’s not touching any other food.
- Cook for about 5 to 7 minutes, checking after 4 minutes. You should hear it sizzling again. It will come back to that perfect, shatteringly crisp texture in no time.
If you must use the oven, set it to 400°F (200°C) and bake the patties directly on a wire rack over a foil-lined baking sheet for about 10 minutes. Keep an eye on them, because they heat up fast!
Reviving the Burger Assembly
When you’re ready to eat the leftover burger, assemble it FRESH. Toast those buns again—even if they were toasted yesterday, a second quick toast sets them right. Re-spread the gorgeous garlic mayo barrier on both sides. Then, pile on your toppings, add your perfectly reheated crispy chicken, and maybe throw a fresh slice of cheese on top of the hot meat so it melts just a little when you close the bun. It’s basically as good as fresh, I promise you!
Frequently Asked Questions About Making a Crispy Chicken Burger with Garlic Mayo
I totally get it; sometimes the process seems too simple, or maybe you’re just worried about that one little step that could ruin everything! Frying can be intimidating, and folks always have questions about keeping things crisp. I’ve pulled together some of the most common things people ask me when they are trying to nail that perfect crispy chicken sandwich recipe at home. Hopefully, these clear up any last-minute doubts before you fire up that oil!
Can I make the Homemade Garlic Mayo ahead of time?
Oh yes, you absolutely can! That’s one of the best parts about this recipe—you can make the sauce days in advance. Since this recipe is basically a concentrated garlic aioli, it keeps wonderfully. I find the flavors actually deepen nicely after a night in the fridge. Keep it sealed up tight in an airtight container. It lasts easily for up to a week in the refrigerator. Just remember to take it out about 15 minutes before you plan to assemble your burgers so it isn’t ice cold; that makes it much easier to spread as a moisture barrier!
What is the best way to prevent the chicken from getting soggy during assembly?
This seems to be the #1 panic point for everyone, and honestly, it’s all about creating impermeable barriers between your wet ingredients and your perfect crunchy coating. You need two main defense layers! First, you have to lightly toast the cut sides of your buns until they are just golden brown. That heat dries out the surface, making it resistant. Second, and this is crucial for this particular recipe, spread a good, thin layer of that homemade garlic mayo on both the top and the bottom bun halves. That mayo acts as an almost waterproof shield! Then, put your lettuce right on top of that mayo barrier before adding the chicken. As long as the bun isn’t directly touching any pickles or tomato juice, you’re golden!
I don’t want to deep fry—can I still get a crunchy coating?
You definitely can! While deep frying gives you that ultimate, authentic crackle because the entire surface is submerged in perfectly hot oil, the air fryer is your best friend for a crispy chicken sandwich guide approach. You use the exact same buttermilk and double-dredge coating process. The key change is oil application. Instead of submerging it, you need to spray the coated chicken patties really well with oil—aim for a misty spray rather than a heavy pour. That oil, combined with the blasting hot air, creates a fantastic crunch. Just keep an eye on the time if you go this route! It’s a little slower than frying, but the results are fantastic for a leaner meal.
How thick should the chicken breasts be cut?
For this recipe, we are intentionally trying to make a thick, satisfying patty, but we also need it to cook through without burning the crust. That’s why the instructions say to halve the chicken breasts horizontally. If you have a very thick breast, aim for pieces that are about 1/2 to 3/4 of an inch thick after slicing. If they are too thin, they’ll overcook before the breading browns up properly. If they are too thick, you risk undercooked meat, which we absolutely cannot have, especially when frying!
Recipe Details and Nutritional Estimate
I’ve pulled all the necessary stats together for you here so you know exactly what you’re tackling time-wise and what you’re getting into nutrient-wise. I always think it’s good to have a snapshot of how long a recipe really takes, especially when deep frying is involved! It turns out, making this whole restaurant-style affair comes together quicker than you might think once you have your buttermilk soaking away back in the fridge.
This whole process, from pulling the chicken out of the marinade to taking the final bite, is surprisingly efficient, clocking in at about 40 minutes total cook time. We get a solid yield of four incredible burgers out of one batch, which is perfect for family dinners or intentionally making leftovers that you can revive the next day!
Remember, these numbers are just estimates, so if you use a thicker slice of cheese or load up extra pickles, things will shift slightly. For the full formal rundown, you should always check out our standard disclaimers, but this gives you a great idea of what you’re enjoying!
Here’s the quick breakdown:
- Prep Time: 20 min
- Cook Time: 20 min
- Total Time: 40 min
- Yield: 4 servings
- Category: Main Course
- Method: Frying (But you know you can use the air fryer too!)
- Cuisine: American
- Diet: Low Lactose (Because the buttermilk is processed, most of the lactose is usually okay, but maybe skip it if you’re highly sensitive!)
Now for the heavy hitters—the estimated nutrition based on one burger, assuming all the garlic mayo is used and the cheese is included. It’s rich, because hello, it’s fried chicken, but look at that protein content! That’s a serious meal.
- Serving Size: 1 burger
- Calories: 650
- Sugar: 7g
- Sodium: 950mg
- Fat: 35g
- Saturated Fat: 7g
- Unsaturated Fat: 28g
- Trans Fat: 0g
- Carbohydrates: 45g
- Fiber: 2g
- Protein: 40g
- Cholesterol: 120mg
See? Forty grams of protein! That’s why this is my favorite weekend recipe. It feels indulgent, but it’s totally balanced out with a fantastic main ingredient profile. Enjoy every crunchy, garlicky bite!
PrintCrispy Chicken Burger with Garlic Mayo
Follow this recipe to make a restaurant-style crispy fried chicken burger featuring a juicy patty and homemade, pungent garlic mayonnaise.
- Prep Time: 20 min
- Cook Time: 20 min
- Total Time: 40 min
- Yield: 4 servings
- Category: Main Course
- Method: Frying
- Cuisine: American
- Diet: Low Lactose
Ingredients
- 2 boneless, skinless chicken breasts, halved horizontally
- 1 cup buttermilk
- 1 teaspoon salt
- 1 teaspoon black pepper
- 1 teaspoon paprika
- 1/2 teaspoon cayenne pepper
- 1 cup all-purpose flour
- 1/2 cup cornstarch
- Vegetable oil, for frying
- 4 burger buns
- 4 slices cheese (optional)
- Lettuce leaves
- Pickle slices
- For Garlic Mayo: 1/2 cup mayonnaise
- 2 cloves garlic, minced finely
- 1 teaspoon lemon juice
- 1/4 teaspoon salt
Instructions
- Place the chicken pieces in a bowl and cover them with buttermilk, salt, pepper, paprika, and cayenne pepper. Marinate in the refrigerator for at least 2 hours or up to 8 hours.
- In a shallow dish, whisk together the flour and cornstarch.
- Remove chicken from the buttermilk, letting excess drip off, but do not wipe dry.
- Dredge each piece thoroughly in the flour mixture, pressing the coating onto the chicken. For extra crispiness, dip the coated chicken back into the buttermilk briefly, then dredge again in the flour mixture, ensuring a thick, craggy coating.
- Heat about 2 inches of vegetable oil in a deep skillet to 350°F (175°C).
- Carefully place chicken in the hot oil, ensuring not to overcrowd the pan. Fry for 5-7 minutes per side, until golden brown and the internal temperature reaches 165°F (74°C). Remove and drain on a wire rack.
- While the chicken cooks, prepare the garlic mayo: Mix the mayonnaise, minced garlic, lemon juice, and salt in a small bowl. Stir until combined.
- Toast the cut sides of the burger buns lightly in a dry pan or under the broiler.
- To assemble the burger, spread a generous layer of garlic mayo on both halves of the bun.
- Place lettuce and pickles on the bottom bun. Top with a crispy chicken patty and cheese (if using). Place the top bun on the chicken.
Notes
- To prevent a soggy bun, lightly toast the buns and spread a thin layer of garlic mayo on both sides before adding wet toppings.
- For an air fryer method, spray the coated chicken lightly with oil and cook at 380°F (195°C) for 15-18 minutes, flipping halfway through.
- Use fresh garlic for the best flavor in the mayonnaise.
Nutrition
- Serving Size: 1 burger
- Calories: 650
- Sugar: 7
- Sodium: 950
- Fat: 35
- Saturated Fat: 7
- Unsaturated Fat: 28
- Trans Fat: 0
- Carbohydrates: 45
- Fiber: 2
- Protein: 40
- Cholesterol: 120