

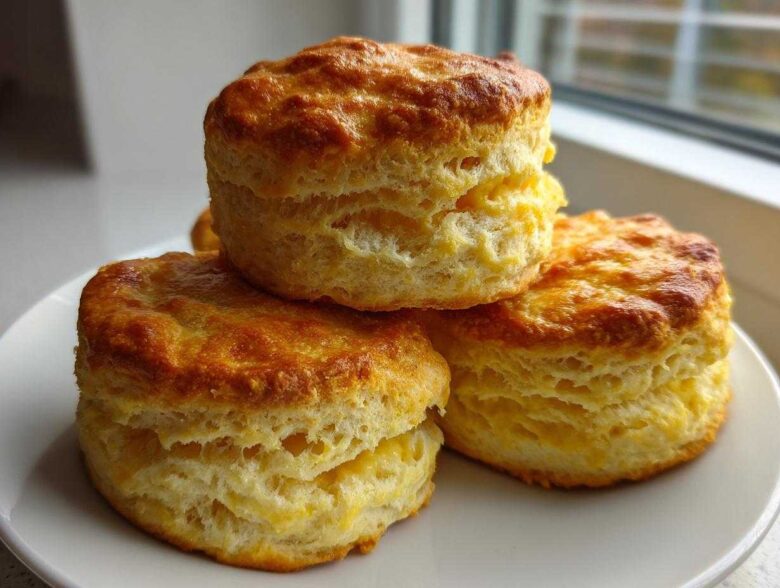
Forget those dense, dry hockey pucks you sometimes get at the grocery store; when I talk about scones, I mean flaky, tender clouds that practically float right off the baking sheet. Mastering them felt huge at first, like I needed some secret handshake just for afternoon tea. But honestly, the magic behind the best homemade scones isn’t complicated—it’s all about the cold technique. Once you respect the cold, you get those unbelievably tall, beautifully layered results that mimic the best bakery style scones at home. Trust me, these classic buttermilk scones are exactly what you need when you’re ready to elevate your brunch game or host a truly proper cream tea recipe experience!
Why This Classic Buttermilk Scones Recipe Works So Well
If you’ve ever made scones that turned out dense or crumbly, I know the frustration! The secret to avoiding that dry texture isn’t about adding more liquid at the end; it’s about respecting physics in the mixing bowl. This recipe is built on a foundation of cold, creating steam pockets that push the layers apart, giving you that amazing height you see in bakeries. Keeping things chilly is the number one scone making tip and trick you’ll ever hear.
- When the cold butter hits the hot oven, it melts rapidly, turning instantly into steam. That steam puffs up the layers between the flour, which is exactly how you get that open, light texture.
- Using buttermilk instead of regular milk adds a tiny bit of necessary acid. This helps tenderize the gluten, meaning your dough is less likely to get tough.
Achieving Fluffy Scones Light Texture with Cold Ingredients
You simply cannot cheat this part, promise! Everything—your butter, your buttermilk, even your hands if you can manage it—needs to be straight from the fridge. The butter chunks are what create the space for that fluffy scones light texture we are chasing. If the butter starts to get soft while you’re cutting it in, just pop the whole bowl back into the freezer for five minutes before proceeding. That icy temperature is your best friend for a truly risen masterpiece.
The Folding Technique for Layered Scones
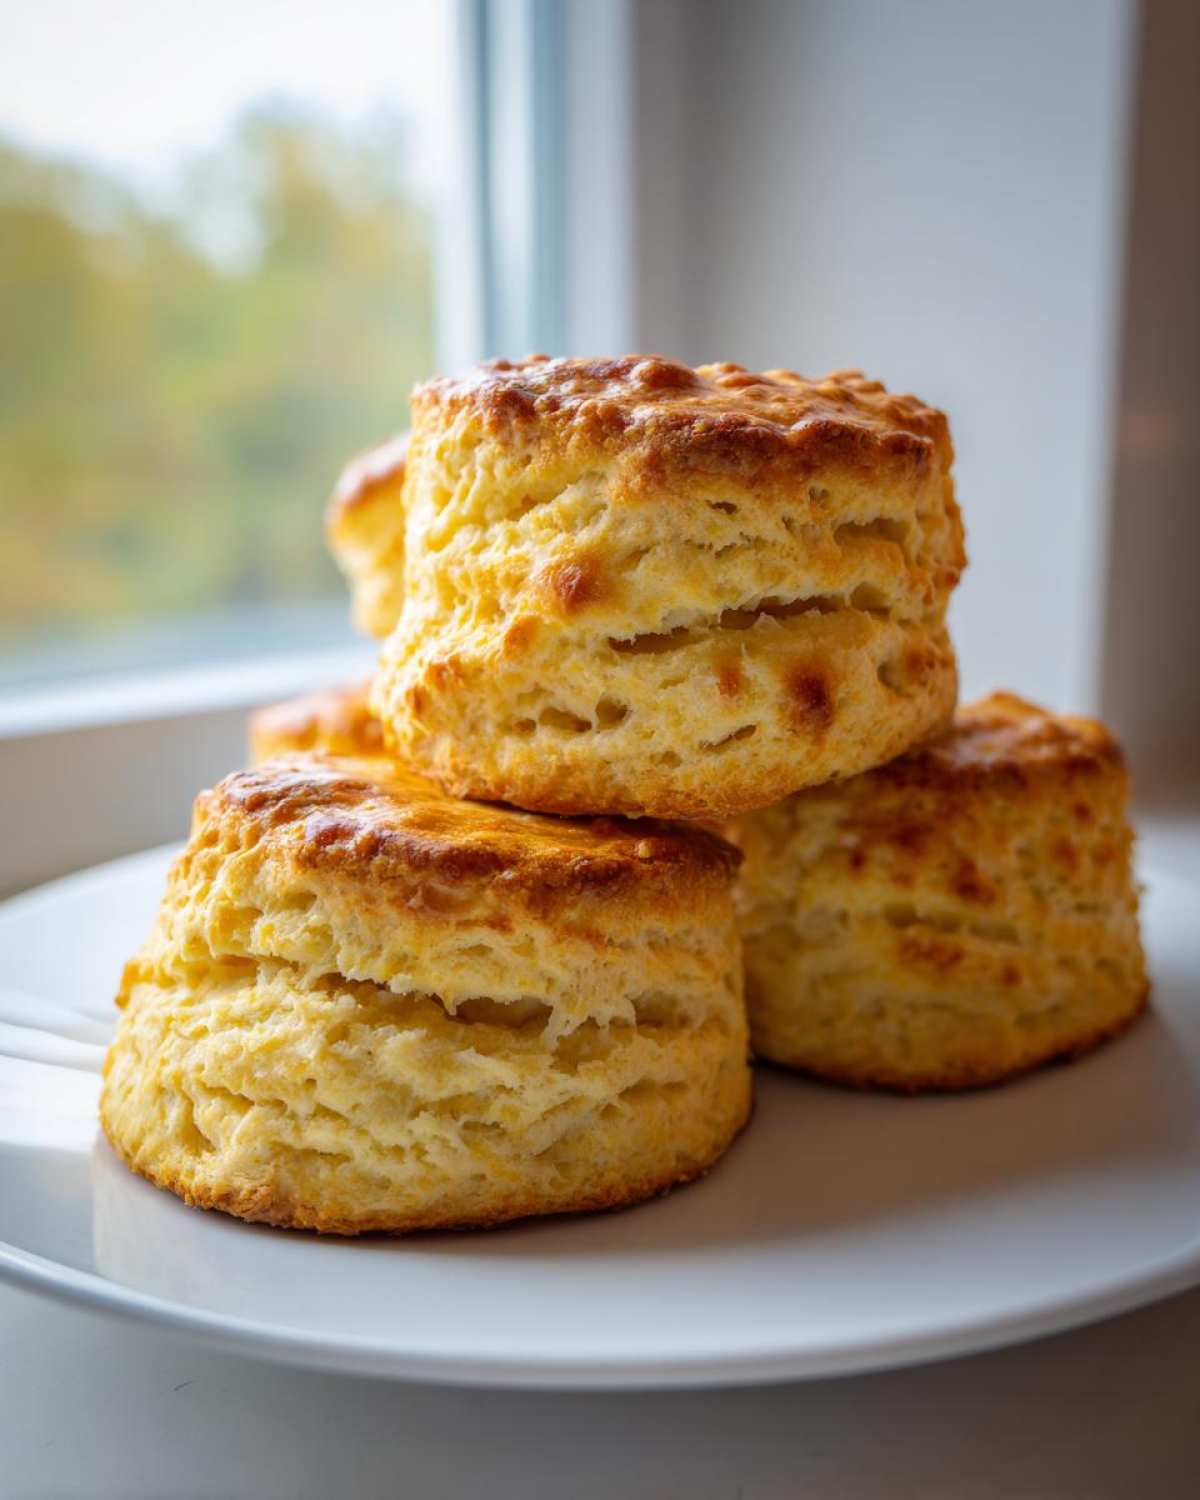
This recipe demands a little bit of gentle kneading, but not for traditional reasons—we are building structure here! By gently patting the dough into a rectangle and folding it (Step 5 and 6 in the instructions), you are creating natural, flaky layers. Think of it like making quick puff pastry. When you place these layered pieces close together on the tray, those layers push against each other in the oven, forcing the scones to rise UP instead of spreading OUT. That’s how you get those beautiful, straight sides.
Essential Ingredients for Perfect Buttermilk Scones
Before we dive into the actual assembly (which is so quick!), let’s talk about what you need on hand for these buttermilk scones baking sessions. This short ingredient list is why this is such an easy scone recipe, but every single item needs to be exactly right. We aim for simplicity, which means we can’t skimp on quality or temperature. You’ll find the full list in the recipe card in the breakfast category, but the real wisdom comes in understanding *why* we use these specific things for the classic scone recipe.
Here’s a little peek into what you’ll grab from the pantry and fridge before you start mixing everything up for your delights.
Ingredient Notes and Substitutions for Your Scones
If you look in my fridge and don’t see buttermilk, I’m usually panicking slightly! Buttermilk is crucial for tenderizing the gluten, so if you’re out, don’t sweat it. Just take one tablespoon of white vinegar or lemon juice, put it in a measuring cup, and then top it off with regular milk until you hit the 3/4 cup line. Let it sit for five minutes to curdle—that’s your buttermilk substitute! The one thing you absolutely cannot substitute, though, is that cold butter. If you don’t use cold, cubed butter, you’re not going to get the lift you need for perfect scones; it is what makes or breaks the entire texture!
Step-by-Step Instructions for Bakery Style Scones at Home
Okay, the prep work is done, everything is cold, and now we get to assemble these beauties! The whole point of making amazing bakery style scones at home is that the active time is lightning fast—seriously, 15 minutes total before they hit the oven. First things first: make sure your oven is already roaring hot, 425°F is the ticket, and get that parchment paper ready. We’re going to move quickly from here on out. Remember, the folding step is where the magic happens, so don’t rush that part! Once they are cut, we brush them gently with the egg wash you whipped up; this gives them that beautiful, professional golden shine. You can read more tips over on the main blog page about getting your baking timing just right!
We bake them hot and fast for about 12 to 15 minutes. You want the tops golden brown, and if you peek, you should see them starting to puff up nicely away from each other on the tray. That’s the sign of success!
Mixing the Dough: Avoiding Overworking for Tender Scones
When you pour in that cold buttermilk, stop thinking about your normal cake mixing. Grab a fork, not the electric mixer! The goal here is barely, barely combined. You want a shaggy, messy-looking dough—honestly, it should look a little too dry and chunky. If you mix until it’s smooth, you’ve already overworked it, and you’ll end up with tough scones that don’t rise well. We stop mixing as soon as the flour streaks disappear. That slight lumpiness is the secret to a truly easy scone recipe.
Making the Best Homemade Scones for Afternoon Tea
Now that these perfect bakery-style scones are gloriously golden brown and out of the oven, they need just a moment to cool on the rack before the best part begins! This stage is what separates a good baked good from the ultimate afternoon tea scones experience we’re aiming for here. You absolutely must serve these warm—lukewarm is fine, but piping hot is better—to really appreciate that tender, layered crumb. The scent alone is practically begging for a proper cup of tea!
Don’t forget that gorgeous wash we brushed on top; it bakes up into a delicate shine that looks so professional. Honestly, once you master this base recipe, you’ll realize how simple it is to achieve that incredible texture that usually only shows up in fancy tearooms. If you enjoy this layered approach, you might want to check out my recipe for apple turnovers; it uses a similar appreciation for pastry layers to get that perfect structural lift!
Serving Suggestions for Your Classic Scones
For a true cream tea recipe presentation, you need the holy trinity: incredibly thick, rich clotted cream and a lovely sweet preserve. Strawberry jam is traditional, but raspberry works wonderfully too. If you’re feeling festive, a nice tart lemon curd is divine with these buttermilk scones because the slight acidity cuts through the richness of the cream. No matter what you choose, make sure you have a robust black tea ready to go—these pastries deserve the best pairing!
Savory Scones Ideas and Sweet Scones Variations
Now that you’ve mastered the foundational classic scone recipe, I want you to feel empowered to start experimenting! This base dough is begging to be customized whether you need brunch pastries ideas or something special for the holidays. We can take these buttermilk beauties in so many directions, which is why they’re fantastic for year-round baking instead of just being limited to holiday scones recipes or just one type of fall baking ideas.
The main rule to remember when you’re adding things to your dough is this: heavy, moist additions might require you to add just a tiny splash more buttermilk, maybe a teaspoon at a time, so the dough stays firm enough for a good rise. You don’t want them weighing down the lift!
Incorporating Flavor into Your Scones Base
If you’re leaning toward sweet scones variations, try folding in 1/2 cup of dried cranberries mixed with orange zest—the resulting **cranberry orange scones** are just divine with breakfast. For something truly autumnal, swap out the sugar for brown sugar and add a teaspoon of pumpkin spice mix, turning these into perfect **pumpkin spice scones**! If you want to go savory, which is often overlooked, stir in about 1/2 cup of grated sharp cheddar and finely chopped chives right before the final mix. Those **savory scones ideas** are amazing served warm alongside a hearty soup instead of bread!
Storage and Reheating Instructions for Scones
Even the most perfect batch of scones rarely lasts past breakfast here, but if you managed to save some, you need to treat them right! They are best eaten the day they are baked, but they keep perfectly well for up to two days stored in an airtight container at room temperature. Don’t put them in the fridge; they get hard fast! If you’re reheating them just to restore that fluffy texture we worked so hard for, pop them in a 350°F oven for about five minutes. That brief blast of heat reactivates any moisture and makes them taste freshly baked again—trust me, it works!
Frequently Asked Questions About Making Scones
Can I use regular milk instead of buttermilk in these scones?
You certainly can if you must, but honestly, I wouldn’t recommend skipping the buttermilk if you want the absolute best rise and tenderness in these scones. Regular milk just doesn’t have that acidity to tenderize the gluten like buttermilk does. If you’re in a pinch and need an easy scone recipe right now, just take a tablespoon of white vinegar or lemon juice, mix it with your regular milk until you have 3/4 cup total, and let it sit for five minutes. That little bit of acid does wonders!
Why did my scones spread out instead of rising tall?
This is the most common heartache when trying to achieve that lofty height! If your scones flattened instead of towering up, it almost always points back to two things. First, were your butter and milk thoroughly chilled? If the butter was starting to melt before it hit the oven, the steam couldn’t build up properly to push those layers. Second, when you cut the rounds, did you twist the cutter? Twisting seals the edges, preventing them from rising cleanly. Remember those crucial scone making tips and tricks—press straight down, lift straight up! If you have more questions, feel free to reach out on our contact page!
Estimated Nutritional Information for Buttermilk Scones
Here is a quick look at the estimated nutritional breakdown for one serving of these delightful buttermilk scones. Remember, baking is just wonderful, but exact measurements depend on what brand of flour or size of egg you use, so consider these lovely numbers a general guide!
- Serving Size: 1 scone
- Calories: 250
- Fat: 13g
- Carbohydrates: 29g
- Protein: 5g
- Sugar: 5g
These values are just estimates based on the ingredients listed in the recipe card, so for strict dietary tracking, you might want to run them through your favorite nutrition tracker. See our full disclaimer page for more details on our estimates.
Share Your Experience Making These Scones
So, that’s my whole philosophy on getting ridiculously tall, tender scones every single time! I really, truly hope you give this recipe a try next time you’re planning a weekend brunch or just craving something warm and buttery. Knowing I helped someone achieve bakery-level results right in their own kitchen makes my whole day!
I’d love to hear how they turned out for you! Did you stick to the classic jam and cream, or did you sneak in some cheese and herbs? Head over to the comments below and leave me a five-star rating if these became your new go-to recipe. If you have any final questions about the folding technique or anything else, feel free to check out our Terms and Conditions page for more site info, but really, just tell me how buttery and light your scones were!
PrintClassic Buttermilk Scones for Afternoon Tea

A straightforward recipe for tall, fluffy buttermilk scones with a light texture, perfect for serving with jam and cream.
- Prep Time: 15 min
- Cook Time: 15 min
- Total Time: 30 min
- Yield: 8 scones
- Category: Breakfast
- Method: Baking
- Cuisine: British
- Diet: Vegetarian
Ingredients
- 2 cups all-purpose flour
- 1/4 cup granulated sugar
- 1 tablespoon baking powder
- 1/2 teaspoon salt
- 1/2 cup (1 stick) cold unsalted butter, cut into small cubes
- 3/4 cup cold buttermilk
- 1 large egg, beaten (for egg wash)
- 1 tablespoon milk or cream (for egg wash)
Instructions
- Preheat your oven to 425 degrees Fahrenheit. Line a baking sheet with parchment paper.
- In a large bowl, whisk together the flour, sugar, baking powder, and salt.
- Add the cold butter cubes to the dry ingredients. Use a pastry blender or your fingertips to cut the butter into the flour until the mixture resembles coarse crumbs with some pea-sized pieces remaining.
- Make a well in the center and pour in the cold buttermilk. Mix gently with a fork until just combined. Do not overmix; the dough will look shaggy.
- Turn the dough out onto a lightly floured surface. Gently pat the dough into a 3/4-inch thick rectangle.
- Fold the dough into thirds, like a letter. Turn the dough 90 degrees and gently pat it down again to about 3/4-inch thickness. This folding creates layers for a better rise.
- Use a 2-inch round biscuit or scone cutter to cut out the scones. Press the cutter straight down without twisting to keep the edges clean and tall.
- Place the cut scones close together on the prepared baking sheet.
- In a small bowl, whisk the egg and milk/cream together for the wash. Brush the tops of the scones lightly with the egg wash.
- Bake for 12 to 15 minutes, or until the tops are golden brown and the scones are risen.
- Transfer the scones to a wire rack to cool slightly before serving warm.
Notes
- Keep all wet and dry ingredients very cold to achieve a light, fluffy texture.
- For the tallest scones, press the cutter straight down and do not twist the cutter.
- Serve immediately with clotted cream and your favorite jam for a proper cream tea experience.
Nutrition
- Serving Size: 1 scone
- Calories: 250
- Sugar: 5
- Sodium: 280
- Fat: 13
- Saturated Fat: 8
- Unsaturated Fat: 5
- Trans Fat: 0
- Carbohydrates: 29
- Fiber: 1
- Protein: 5
- Cholesterol: 55