

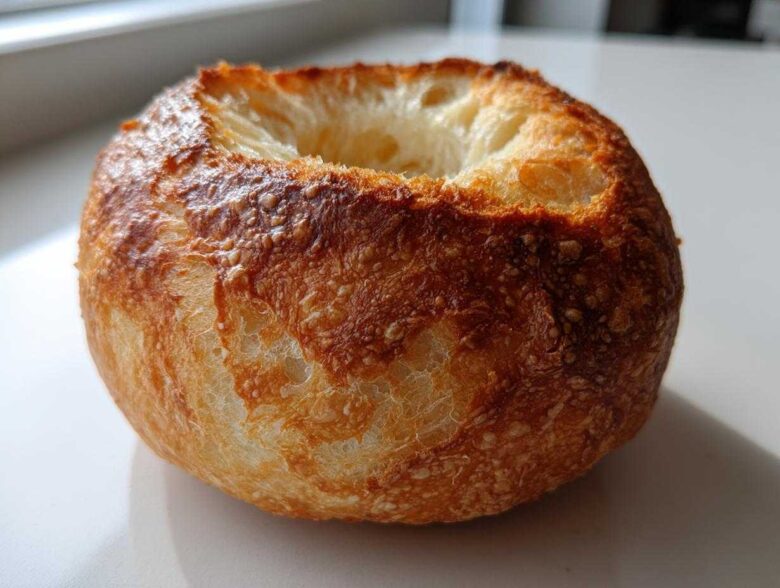
Oh my goodness, there is nothing, and I mean nothing, that screams comfort food louder than a thick, steaming bowl of chowder scooped right out of an edible container. For years, I thought making those amazing, sturdy bakery-style bread bowls at home was impossible—too fussy, too much precision needed. Well, I spent entirely too much time in the kitchen mastering this recipe, but I finally cracked the code! This yeast dough recipe is the one. I perfected this yeast dough after what felt like a hundred attempts to get that perfect balance. Trust me when I say these homemade bread bowls are everything: crusty on the outside, pillowy soft on the inside, and strong enough to handle the thickest chili you can dream up. If you want to know more about my kitchen philosophy, you can check out my baking journey here. Forget the store-bought stuff; we’re making showstoppers today!
Why This Is the Best Recipe for Homemade Bread Bowls From Scratch
I know, I know—everyone claims their recipe is the best! But honestly, this specific formula for Easy Yeast Bread Bowls just works out every single time. We aren’t just making bread; we are engineering edible vessels! The main difference, and the secret to my Crusty Soft Bread Bowls Tutorial, is how we treat them during the final bake. Most home bakers skip the crucial step that makes the exterior shatteringly crisp while keeping the inside tender beyond belief.
These are definitely sturdy enough to handle heavy stew or cheesy pasta. You won’t have little soggy puddles forming halfway through dinner, I promise you that.
Achieving Restaurant Style Bread Bowls Baking Results
That bakery crunch comes 100% from steam. When you bake bread in a steamy environment, the crust stays pliable long enough to expand fully before drying out. That expansion is what gives you those gorgeous, crackly fissures on top and the nice, firm pull when you bite in. The interior crumb structure is made soft because we are using a balanced amount of olive oil, which tenderizes without weighing the loaf down. It’s all about timing that steam release perfectly!
Ingredients Needed for Perfect Bread Bowls
When you’re making Homemade Bread Bowls From Scratch, having the right ingredients ready makes the whole process smooth. You’ll need one packet of active dry yeast, which is about two and a quarter teaspoons. Make sure your water is warm—between 105°F and 115°F—and you’ll need one teaspoon of sugar to wake up that yeast. For the bulk of the dough, start with three and a half cups of all-purpose flour, but be ready to add up to four cups total. Don’t forget two teaspoons of salt and about two tablespoons of olive oil, plus extra for greasing the bowl later on.
Ingredient Notes and Substitutions for Bread Bowls
If you are looking to make Sourdough Bread Bowl Recipe versions, just swap out the yeast and sugar for an equal amount of active sourdough starter. It might need a little more liquid, so keep an eye on that dough! For amazing flavor, try turning these into Cheesy Garlic Bread Bowls Recipe by brushing the tops before that final rise. Just mix up a little melted butter with some roasted garlic powder and Parmesan cheese, and brush it on generously. That topping locks in flavor beautifully, making these especially great for dipping.
Step-by-Step Instructions for Baking Perfect Crust Bread Bowls
Okay, this is where the fun—and the magic—really happens! Getting these bread bowls right takes just a little patience, especially waiting for the dough to do its thing. Follow these timings, and you’ll have incredible loaves ready for your favorite soup or dip. If you want to see what else is cooking on the blog, you can always sneak a peek at the main recipe index!
Mixing and First Rise for Your Yeast Bread Bowls
First things first: we need to wake up that yeast! Get your sugar dissolved in the warm water, then sprinkle that yeast right on top. If you see foam in about ten minutes, you’re golden! In goes the salt and olive oil. Now, start mixing in the flour, starting with about three cups. You’ll mix until you get what I call a ‘shaggy dough’—it looks messy, but trust the process. When the dough starts refusing to stick to the sides of the bowl, turn it out onto a lightly floured surface.
Kneading is my stress relief! I work it for a good solid six to eight minutes until it feels smooth and springy, that perfect elastic texture you want. Pop that smooth ball into an oiled bowl, make sure it’s snug, cover it up, and stick it somewhere warm. It needs a full hour to an hour and a half to double in size. Don’t rush this part; that rise time is crucial for the interior structure of your Simple Dinner Bread Bowls.
Creating Steam for Bakery-Style Bread Bowls Baking
This is the big secret for that deeply golden, shatteringly crisp exterior we love from the bakery. You absolutely cannot skip this part if you want perfect Baking Perfect Crust Bread Bowls. While the dough is doing its final puff, set your oven to 400 degrees Fahrenheit. Crucially, slide a shallow metal pan onto the bottom rack while the oven heats up.
Once the oven is hot, brush your puffy dough balls lightly with plain water. You’ll place them on the rack, and then—carefully, please!—pour a full cup of boiling hot water into that shallow pan below. Close that door immediately! That flash of steam is non-negotiable; it gives the crust the moisture it needs to stretch before it sets hard. Bake for about half an hour until they sound wonderfully hollow when you tap them.
How To Make Edible Bread Bowls Sturdy and Ready for Filling
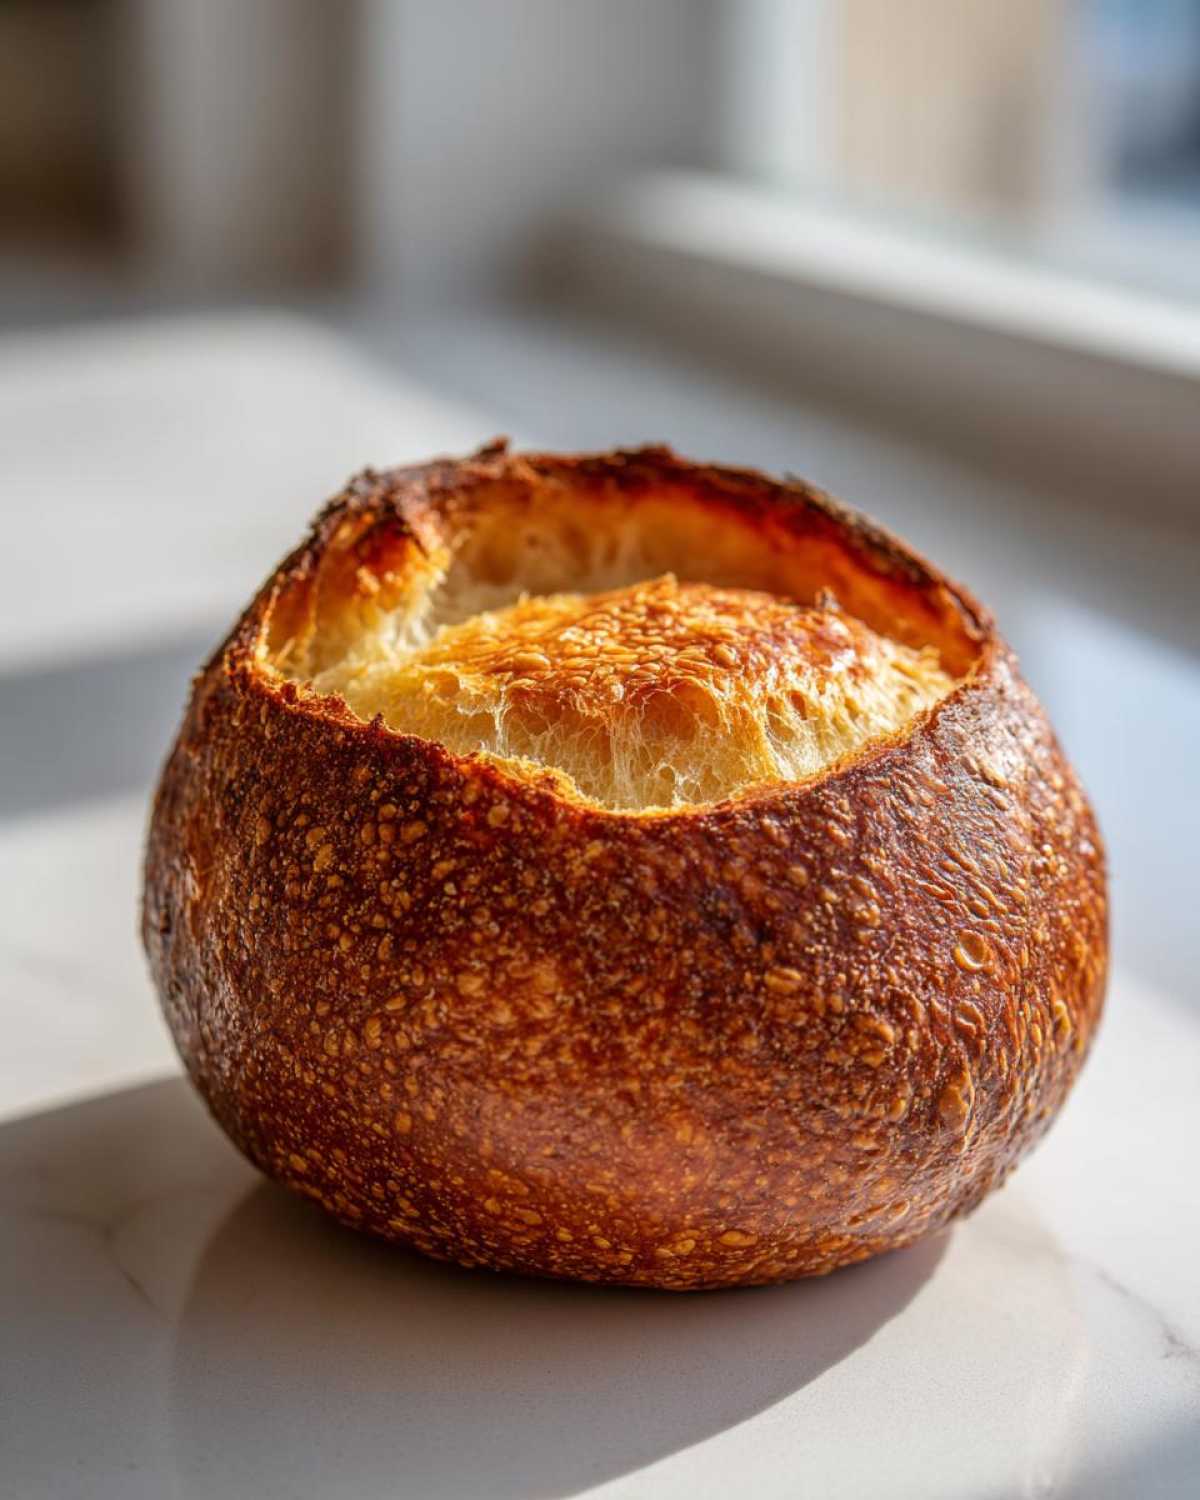
Once those beautiful loaves have cooled down—and you must let them cool, trust me, you’ll burn your fingers if you try too soon—it’s time to turn them into proper vessels. This is the final stage of making How To Make Edible Bread Bowls that won’t collapse when you pour in that hearty stew. After they are completely cool, grab your sharpest serrated knife. We need to cut the tops off, but we’re keeping the lids!
The key to sturdiness is thickness. You want to use the knife to slowly carve out the soft interior bread, but stop when you have a solid, one-inch wall all the way around, including the bottom. Don’t scoop too deep, or you’ll end up with a soggy floor! Save that soft interior bread you pull out; it’s perfect for dunking or making croutons later. Now they are ready for action at the dinner table!
Bread Bowl Filling Ideas: Best Bread Bowl Recipe for Soup
Okay, you did it! You’ve got four perfect, crusty containers cooling on the rack. Now for the best part: what are we going to put inside? This recipe truly shines when paired with something rich, thick, and wonderfully messy. Forget watery broth; these loaves need substance to soak up! These are your ultimate Comfort Food Bread Bowls, so we need serious filling power.
You asked about the Best Bread Bowl Recipe for Soup, and my answer is anything that requires a spoon and maybe a bib! Chili is a natural fit here—the bread absorbs those rich tomato and bean flavors perfectly. And of course, thick seafood chowders or hearty beef stews are practically begging to live inside one of these loaves.
If you feel like leaning in a different direction than soup, these work fantastically for rich pasta dishes too! I love making a quick chicken Alfredo sauce and serving it right in the bowl, sometimes topping it with a sprinkle of parsley. It’s incredibly decadent. If you wanted to branch out and try a fantastic sweet and savory dish sometime, I highly recommend checking out my Teriyaki Beef Stir Fry, just to get some ideas flowing on flavor combinations!
Serving Suggestions for Comfort Food Bread Bowls
Here are the top things that I serve in my bread bowls that never fail to impress anyone at the table:
- Thick Tortellini Soup: The pasta stays nicely suspended without making the bottom soggy too quickly.
- Spinach Artichoke Dip: Spread it thick and serve it hot, letting guests tear off pieces of the wall for dipping instead of using crackers.
- Creamy Smoked Salmon Chowder: A slightly fancier touch where the rich dough complements the smoky fish beautifully.
- Spaghetti and Meat Sauce: Yes, seriously! Spoon a small amount of heavily sauced pasta right in the middle for a fun, contained dinner.
Make Ahead Bread Bowls and Storage Instructions
One of the best things about these bread bowls is that they are fantastic for planning ahead! If you’re thinking about parties or just busy weeknights, you can absolutely bake them ahead of time. Once they are completely cooled down—this is important, don’t store them warm—wrap each loaf tightly in plastic wrap, and then maybe a layer of foil. They keep perfectly like this on the counter for about two days.
If you need longer, freezing works wonders! Yes, you can freeze your Make Ahead Bread Bowls this way. When you are ready for them, take them out of the freezer and let them thaw on the counter for a couple of hours. To get that fantastic crust back, pop them straight into a 350°F oven for about 10 minutes. They’ll crisp right up, good as new and ready for whatever hearty meal you’ve planned!
Frequently Asked Questions About Bread Bowls
You folks always ask the best questions! Baking bread can sometimes feel like a mystery, but once you know the tricks, it’s simple science, I promise. Here are a few things I hear often when people are trying out this Crusty Soft Bread Bowls Tutorial for the first time. If you have more questions after reading these, feel free to shoot me a note anytime on my contact page!
Can I use bread flour instead of all-purpose flour?
That’s a great query! Since we are aiming for Comfort Food Bread Bowls that are sturdy but still soft inside, all-purpose flour is generally perfect because it has a moderate protein level. If you swap to bread flour, which has more protein, your resulting loaves might be slightly chewier, which isn’t a bad thing, but they might also be a little tougher. If you do use it, start with less flour overall, as bread flour generally absorbs more liquid than AP flour.
Why didn’t my yeast bread bowls rise during the second proof?
Oh, the dreaded flat loaf! Usually, this comes down to two main things. First, check the water temperature when you started—if it was too hot, it killed the yeast instantly. If the water was perfect, then the second stage (the final proofing) might just have needed more warmth. My kitchen can get chilly, so sometimes I put the covered pan in the oven *with the light on* but the oven itself turned off. That gentle warmth is usually all they need to get nice and puffy.
I’m in a huge hurry—can I skip the steam step when baking?
Look, I get the rush, but if you skip the steam, you are skipping the secret to Restaurant Style Bread Bowls Baking! If you skip pouring that hot water into the bottom pan, you will end up with a dull, pale, and slightly tough crust instead of that gorgeous, crispy shell you need to hold chili in. You’ll still have bread, but they won’t be the magnificent Giant Bread Loaf Bowls we are aiming for. It only takes five extra minutes of careful work!
Can these bread bowls be filled with cold dips instead of hot soup?
Absolutely! They are versatile little guys. After they cool completely, you can hollow them out just the same. The bread itself is dense enough that it won’t immediately get saturated by something like a cold spinach dip or a great veggie dip. Just try not to let the dip sit inside for longer than a few hours before serving, especially if the dip has high water content, to keep that bottom firm!
Estimated Nutritional Data for Simple Dinner Bread Bowls
I always get asked about the ‘nutrition’ because, let’s be honest, these aren’t exactly diet food! But hearing the numbers can sometimes help you balance out the rest of your week. Here is what you can generally expect from one of these bread bowls before we start loading them up with chunky stew or creamy Alfredo. Remember, this is just for the bread itself, not the delicious things you fill it with!
- Serving Size: 1 bread bowl
- Calories: 300
- Carbohydrates: 60g
- Protein: 9g
- Fat: 3g (with only 0.5g being saturated fat)
- Fiber: 3g
- Sugar: 3g
Please keep in mind that these figures are what I calculated based on the basic ingredients list, so they are just an estimate. If you use a higher protein flour or add garlic butter on top like we talked about for the cheesy version, those numbers will shift a little. For a complete rundown on how I calculate my estimates and what that means for you, check out my official nutritional disclaimer page. When we’re talking about Simple Dinner Bread Bowls, these figures give you a great starting point before the real calorie count comes in with the fillings!
Share Your Perfect Bread Bowls Experience
Well, if you made it this far, you have successfully conquered the art of making incredible, bakery-quality bread bowls right in your own kitchen! I put so much passion into teaching you exactly how to get that perfect texture and crust, so I really hope you loved the process as much as I do.
If you followed those steps—especially that quick steam bath—I would be absolutely thrilled if you could leave a rating for this recipe below. Five stars if you felt like you were pulling these straight out of a professional oven! Knowing that my tips helped you create those sturdy, amazing final products makes all my kitchen experiments worthwhile.
I absolutely live to see what you all create! Seriously, snap a picture of your filled-up Giant Bread Loaf Bowls—whether it’s filled with chili, dip, or that decadent Alfredo sauce—and share it on social media, tagging me! I love scrolling through and seeing your culinary successes. It truly makes my day!
And hey, while you’re here, please take a moment to look over the site’s privacy policy so you know how we handle all your lovely feedback and interactions. Happy baking, everyone, and enjoy every last crumb!
PrintBakery-Style Homemade Bread Bowls
Make sturdy, crusty bread bowls with soft interiors perfect for holding soup, stew, or dip. This recipe is straightforward for achieving bakery quality at home.
- Prep Time: 20 minutes
- Cook Time: 30 minutes
- Total Time: 2 hours 5 minutes
- Yield: 4 servings
- Category: Baking
- Method: Baking
- Cuisine: American
- Diet: Vegetarian
Ingredients
- 1 packet active dry yeast (about 2 1/4 teaspoons)
- 1 1/2 cups warm water (105°F to 115°F)
- 1 teaspoon sugar
- 3 1/2 to 4 cups all-purpose flour, plus more for dusting
- 2 teaspoons salt
- 2 tablespoons olive oil, plus more for greasing
Instructions
- Activate the yeast: In a large bowl, dissolve the sugar in the warm water. Sprinkle the yeast over the top and let it sit for 5 to 10 minutes until foamy.
- Mix the dough: Stir in the olive oil, salt, and 3 cups of flour into the yeast mixture. Mix until a shaggy dough forms. Add the remaining flour gradually until the dough pulls away from the sides of the bowl.
- Knead: Turn the dough out onto a lightly floured surface. Knead for 6 to 8 minutes until the dough is smooth and elastic.
- First Rise: Lightly grease a large bowl with olive oil. Place the dough in the bowl, turning to coat. Cover the bowl with plastic wrap or a clean towel. Let it rise in a warm place for 1 to 1 1/2 hours, or until doubled in size.
- Shape the bowls: Gently punch down the risen dough. Divide it into 4 equal pieces. Shape each piece into a tight, round ball.
- Second Rise: Place the dough balls on a baking sheet lined with parchment paper, leaving several inches between them. Cover loosely and let them rise for 30 to 45 minutes until puffy.
- Preheat and Steam: Preheat your oven to 400°F (200°C). Place a shallow pan on the bottom rack while the oven heats.
- Bake: Brush the tops of the dough balls lightly with water. Place the baking sheet in the oven. Carefully pour 1 cup of hot water into the shallow pan on the bottom rack to create steam. Immediately close the oven door.
- Bake for 25 to 30 minutes, or until the crust is deep golden brown and the internal temperature reaches 200°F (93°C).
- Cool: Remove the bread bowls from the oven and let them cool completely on a wire rack before hollowing them out for filling.
Notes
- For a Cheesy Garlic variation, brush the tops of the shaped dough balls with melted butter mixed with garlic powder and grated Parmesan cheese before the final rise and baking.
- To make Sourdough bread bowls, substitute the yeast and sugar with an equal volume of active sourdough starter and adjust the liquid slightly as needed.
- Fill your bread bowls with thick chili, creamy clam chowder, or Alfredo sauce mixed with chicken.
- To hollow the bread, use a serrated knife to cut a circle in the top crust, then gently pull out the soft interior bread, leaving a sturdy wall about 1 inch thick.
Nutrition
- Serving Size: 1 bread bowl
- Calories: 300
- Sugar: 3
- Sodium: 350
- Fat: 3
- Saturated Fat: 0.5
- Unsaturated Fat: 2.5
- Trans Fat: 0
- Carbohydrates: 60
- Fiber: 3
- Protein: 9
- Cholesterol: 0