

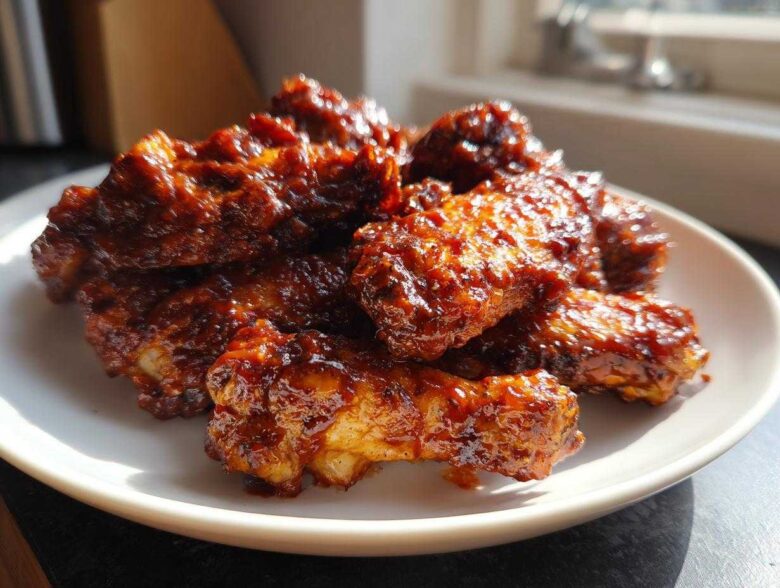
Listen, I know the struggle. You want those glorious, deep-fried-level crispy chicken wings, but you want them coming out of your regular oven, *without* the giant mess or the extra oil. For years, I thought it was a myth—that oven wings were doomed to be slightly chewy, sad little things only good for soaking up sauce? Nope! After what felt like a decade of experimenting with powders, racks, and temperatures that almost set off my smoke alarm, I finally cracked the code for the ultimate Sticky BBQ Chicken Wings Crispy Oven Style.
This isn’t just *a* recipe; it’s *the* technique. We’re talking about getting that shatteringly crisp skin that holds up perfectly under a thick, sweet, tangy glaze—all using nothing but foil and a wire rack. If you’ve ever needed help nailing that crispness, check out my guide on crispy baked chicken wings recipes! Trust me, when you pull these out, you’ll swear they came from a fryer, but your clean-up time will be a fraction of the effort. Get ready, because these are finger-licking good, and I can’t wait for you to try them!
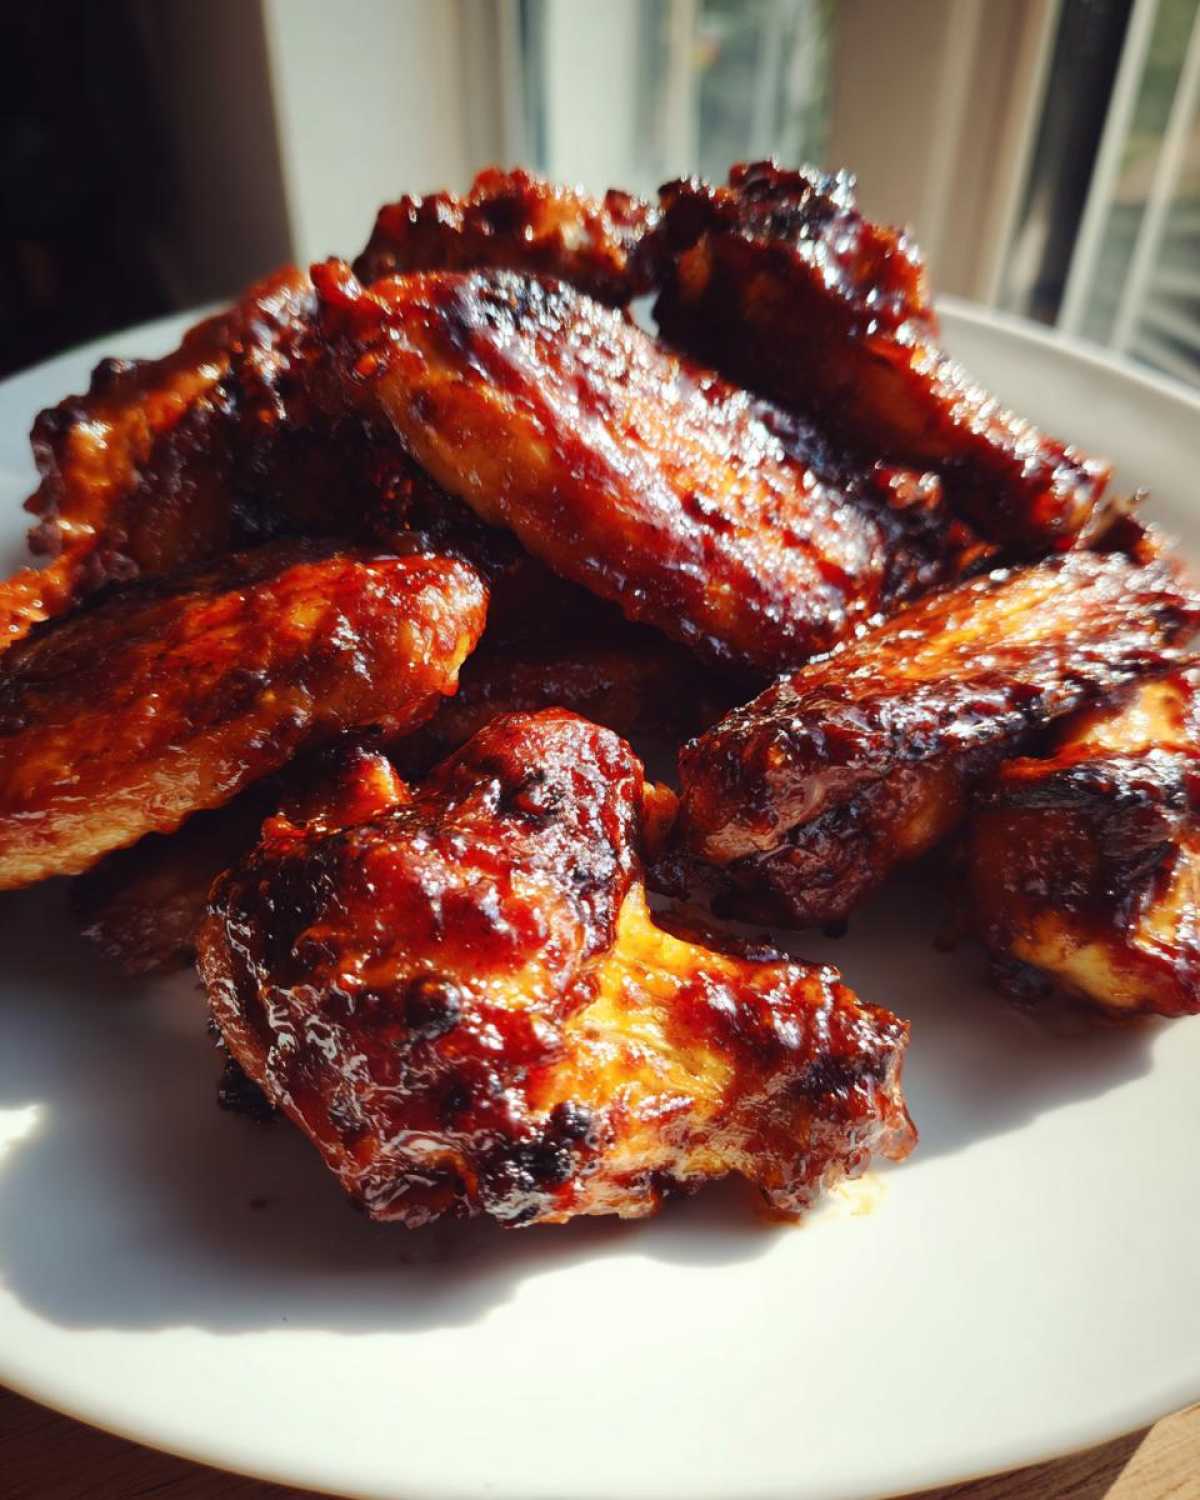
Why This Sticky BBQ Chicken Wings Crispy Oven Style Recipe Works
I know, I know. Oven wings sound like a guaranteed flop when you’re chasing that crunch factor. But this method isn’t kidding around! We sneak in a couple of non-negotiable steps that trick the skin into drying out quickly and crisping up just like magic. It’s all about physics, really, but it tastes like witchcraft!
- We use a secret non-fat ingredient to wick moisture away from the skin, setting the foundation for a true crunch.
- We ensure maximum heat penetration by elevating every single wing piece off the hot pan surface.
- The sauce only touches the wings *after* the hard work of crisping is done, locking in that beautiful sticky coating.
If you’re looking for more techniques on keeping things juicy, peek at my recipe for juicy chicken marinades, but for wings, crispiness comes first!
The Secret to Crispy Oven Baked Chicken Wings Recipe
The main weapon here is baking powder, not baking soda—don’t mix them up! The powder raises the pH level on the skin, which encourages rapid drying and browning in the high heat. You *must* pat those wings bone-dry first, too. If there’s any surface water, it just steams instead of crisps up.
Achieving the Perfect Sticky BBQ Wings Without Frying
High heat is key, but the wire rack is your best friend! By lifting the wings, hot air circulates underneath them completely. This stops the bottom from sitting in any rendered fat or juices—the main cause of soggy bottoms on standard Sticky BBQ Chicken Wings Crispy Oven Style. It keeps them perfectly taut until we toss them in that thick, gorgeous sauce.
Ingredients for Sticky BBQ Chicken Wings Crispy Oven Style
Okay, gathering your supplies is the easy part! For this masterpiece, you don’t need a million fancy items, just the good stuff. Make sure you grab the baking powder—it’s non-negotiable for the texture we are chasing! Trust me, weighing out your sauce proportions makes a difference when you want true stickiness.
- About 3 lbs of chicken wings—I use a mix of flats and drumettes, whatever looks good at the market!
- 1 full tablespoon of baking powder. If you have aluminum-free, go for it, as it gives a cleaner taste.
- 1 teaspoon of salt and just a half teaspoon of black pepper for seasoning foundation.
- 1 cup of your very favorite thick BBQ sauce. Don’t use something watery; we need cling!
- Optional, but highly recommended: 2 tablespoons of honey or dark brown sugar if you like that extra lacquer look.
Essential Equipment for the Best Crispy Wing Recipe Oven
You can’t build a masterpiece without the right tools, right? Luckily, this setup is super simple. We’re keeping it straightforward—no need to pull out that bulky deep fryer for these wings!
Here is the shortlist of what you absolutely need before you start prepping those glorious wings:
- A large rimmed baking sheet. The rim is important in case anything drips, though our rack should stop most of the mess!
- A wire cooling rack that fits inside your sheet pan. Seriously, this is 50% of the crispiness secret! It lets the heat travel all the way around the chicken.
- One really big mixing bowl. You need space to toss those wings with the baking powder mixture without everything flying out onto your counter.
- Aluminum foil. Yes, you must line the pan underneath the rack. This makes cleanup nearly instantaneous, which is a huge win after an afternoon of baking!
Having this gear ready means you can focus on the fun part—the seasoning!
How to Make Crispy Wings in the Oven: Step-by-Step Instructions
Okay, let’s get down to business! Making Sticky BBQ Chicken Wings Crispy Oven Style is all about following these steps precisely, especially the timing. Don’t rush the heat, and don’t skip the drying phase. I learned the hard way that being impatient here means soggy wings, and nobody wants that after all this work! We’re aiming for that perfect balance of crunch followed by a thick, lick-your-fingers glaze. If you need a break from wings but want something flavorful, my recipe for stovetop chili is always a winner!
Preparation and Coating: The Key to Crispiness
First thing: crank that oven up to 425°F (that’s 220°C for my metric friends). Line your pan with foil for easy cleanup, and set that wire rack right on top. Now, this is vital: grab a stack of paper towels and pat every single wing completely dry. I mean it—damp wings are enemies of crispness! Once they are dry, toss them in your big bowl with the baking powder, salt, and pepper. Give it a good mix so you see that pale dust coating every piece. This is your foundation for that amazing Perfectly Crispy Wings Baking Powder texture!
The Two-Stage Baking Process
Arrange those coated wings on the wire rack; give them space so the hot air can circulate freely around them. Slide that sheet pan into the hot oven and let them go for a solid 25 minutes. Seriously, don’t peek too much! After 25 minutes, flip every single wing—it’s tedious, but necessary for even browning. Pop them back in for 20 more minutes or until they look beautifully golden and you can hear them crackling a bit when you tap them.
Saucing for Maximum Stickiness
While those wings are finishing up their baking session, gently warm your BBQ sauce in a small saucepan on the stove—maybe stir in that optional honey or brown sugar if you want an extra lacquer look. Once the wings are out and crispy, drop them right into that bowl with the warm sauce. Toss quickly until they are beautifully coated. If you want that extra-thick glaze effect—that Thick Glaze Chicken Wings Oven look—you can absolutely return the sauced wings to the rack and slide them under the broiler for just 3 to 5 minutes. Just watch them like a hawk because that sugar burns fast!
Expert Tips for Perfectly Crispy Wings Baking Powder
Even though our recipe outline is straightforward, there are a few little tricks I’ve picked up over dozens of batches that take these from ‘great’ to ‘I need to lick the plate clean.’ Seriously, these details matter if you’re serious about achieving that incredible texture in your Sticky BBQ Chicken Wings Crispy Oven Style batch. My biggest learning curve was definitely when I thought I could skip one of the mandatory steps.
I remember one time, I was rushing before a big game, and I figured, “Eh, I’ll just give the wings a quick pat down instead of a thorough drying session.” Oops! Big mistake. The baking powder coating didn’t adhere properly, and the wings baked up steaming themselves in their own moisture. They still tasted good smothered in sauce, but they were definitely floppy, not crispy. I learned right then that moisture is the enemy!
So, here are my absolute must-know tips for making sure your technique shines through:
- Don’t Skimp on the Rack Space: When you arrange those wings on the rack, pretend they are shy teenagers at a school dance—make sure they have plenty of personal space! If they are touching, that zone won’t crisp up. Air circulation is your best friend here.
- Clean Those Wings First: If you buy wings that still have excess fat or dangling bits of skin attached, trim them off before you start seasoning. Excess flapping skin just burns or gets chewy instead of crisping nicely.
- The Broiler is Optional, But Fun: Remember I mentioned returning the sauced wings for a quick blast under the broiler? Only do this if your sauce is already thick. If your BBQ sauce has high amounts of sugar that haven’t been cooked down much, the broiler will blacken them quickly! It’s a risk/reward situation.
If you’re looking for another amazing oven-baked delight that’s lighter and relies on different flavor profiles, you have to try my garlic butter chicken bites next time. But for game day, these sticky wings are the champions!
Serving Suggestions for Game Day Chicken Wing Recipes
Honestly, once these sticky wings come out of the oven, they are usually the star attraction, and people just dive right in! But every great spread needs a few supporting actors, especially when you’re watching the big game or having friends over. You need things that are cool, creamy, or just plain crunchy to balance out the intense sweet-and-tangy punch of that BBQ glaze.
My absolute must-have pairings start with the classic veggie crudités. You simply have to have celery sticks and maybe some carrot sticks thrown in there. They aren’t just for show; they’re the perfect palate cleanser when your fingers get too sticky from licking off all that amazing sauce!
And speaking of dips? Forget the store-bought stuff if you can manage it! A good, sharp, blue cheese dressing is non-negotiable for me; it cuts right through the heaviness of the BBQ sauce beautifully. If you have folks who don’t like blue cheese, a cool, homemade ranch dressing always wins. If you’re looking for something a little more adventurous to serve alongside the wings for your party setup, you HAVE to make my creamy jalapeno popper dip! It’s fantastic for dipping either the wings (if you dare!) or those leftover veggie sticks.
For something slightly heartier but still easy to eat while standing up, try making a big bowl of fresh coleslaw. A vinegary, crunchy slaw works wonders against the sweet BBQ flavor. Keep it simple, keep it cool, and keep your hands ready for grabbing the next wing!
Storage and Reheating Sticky BBQ Chicken Wings Crispy Oven Style
Oh, the eternal question: what do I do with the delicious leftovers from my perfect batch of Sticky BBQ Chicken Wings Crispy Oven Style? First off, hide a few pieces for yourself before anyone else gets to them—they taste almost as good the next day!
Storing them is easy enough. Once they’ve cooled down completely, you want to get them into an airtight container or a zip-top bag. Try not to crowd them too much, but the main thing is getting them sealed up within two hours of cooking. They’ll keep nicely in the fridge for about three to four days. Honestly, they are best within the first two days, but four is the max I’d push it.
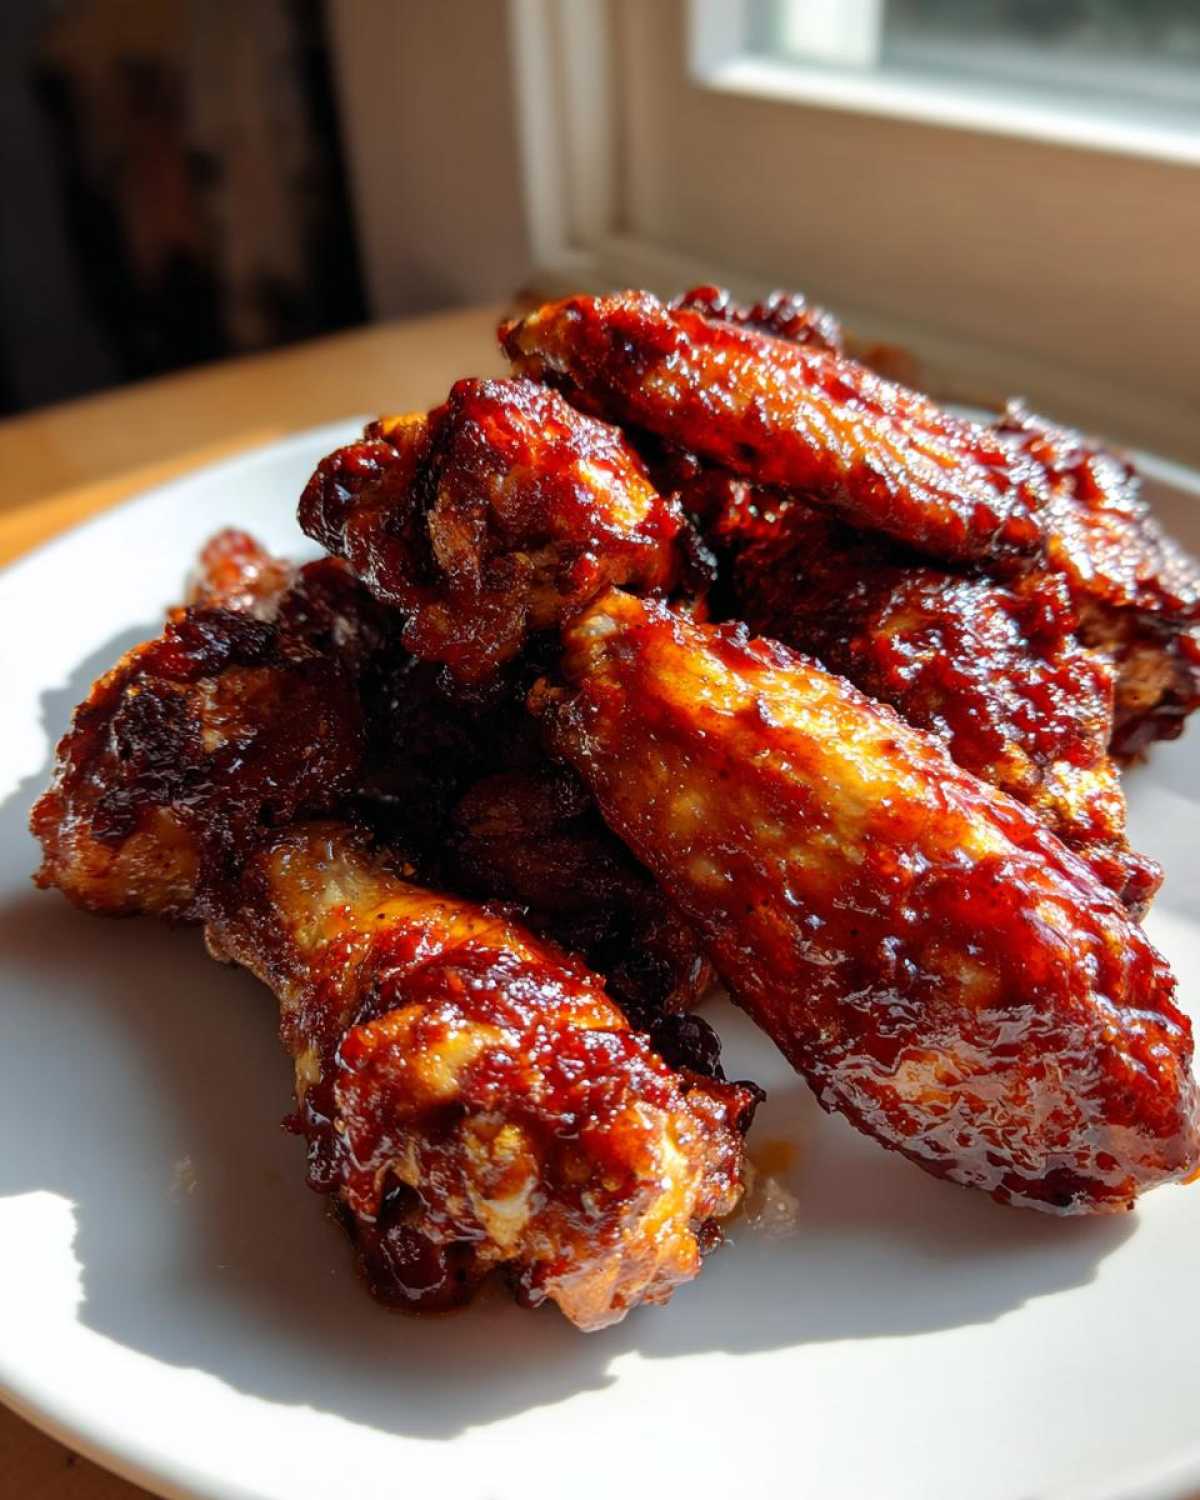
The War on Soggy Wings: Reheating Properly
Now, here is where most people ruin the magic. The microwave is the enemy here! It re-steams the wings, turning that gorgeous crispy skin we worked so hard for into mush. You worked too hard getting that baking powder crust crusty to surrender to a microwave zap!
If you want to bring those Sticky BBQ Chicken Wings Crispy Oven Style back to life, you need dry heat again. I find the toaster oven or a conventional oven works best. Pop them on a wire rack set on a baking sheet—yes, the rack again!—and bake them at about 350°F (175°C). Give them about 8 to 10 minutes. They heat through, and the skin actually firms up again a bit!
Do I need to worry about the sauce when reheating?
Because our sauce went on after the initial crisping bake, it behaves a little differently than wings baked *in* the sauce. If you find your reheated wings look a little dry on the outside (the sauce sometimes absorbs back into the skin), don’t panic! You can thin down a tiny dollop of your favorite BBQ sauce with a few drops of water or apple cider vinegar, warm it on the stove, and give the wings a quick toss right before serving again. It just refreshes that beautiful, sticky lacquer coating perfectly!
Frequently Asked Questions About Sticky BBQ Wings Without Frying
It’s totally normal to have a few lingering questions when you’re trying a new technique, especially when we’re trying to trick chicken skin into getting crispy in the oven! I’ve compiled the handful of things that always seem to pop up when people try my method for these Easy Oven Baked Chicken Wings. Hope this helps you nail that perfect texture! For more general cooking wisdom, I always recommend diving into my full blog archives.
Can I use regular baking soda instead of baking powder?
Oh, this is a common one! You really shouldn’t swap them out—they do totally different things chemically. Baking soda needs an acid to activate, and while our sauce has some acid, we need baking powder for this specific trick. Baking powder already contains the acid it needs, so when it hits the heat, it creates those necessary bubbles to dry out the skin and help everything brown up nicely. If you use baking soda alone, you risk getting an off-putting, soapy flavor, and you definitely won’t get the results you’d expect for a Best Crispy Wing Recipe Oven!
What is the best way to make Homemade Sticky BBQ Sauce for Wings if mine is too thin?
This happens! Sometimes store-bought sauces or even homemade ones end up running a little thin, which won’t give you that beautiful, clinging glaze we want. If your sauce is too loose when you warm it up, don’t worry, we can fix that! The best, quickest fix is simple simmering. Just let that sauce bubble gently on low heat for about 5 to 10 minutes, stirring occasionally, until you see it thicken up and cling a bit more to the back of a spoon. If you’re in a huge rush or it’s still too thin after simmering, mix one teaspoon of cornstarch with two teaspoons of cold water—that’s a slurry. Whisk that slurry right into your warm sauce and let it cook for one minute until it thickens perfectly for your Sweet and Tangy Baked Wings.
Can I prepare the wings ahead of time before baking?
Yes, you absolutely can, which is fantastic news for Game Day planning! The preparation step—patting them dry and tossing them in the baking powder, salt, and pepper mixture—is actually a great thing to do in advance. You can prep them, place them on the wire rack over the foil-lined pan, cover the whole setup tightly with plastic wrap, and stick them in the fridge. I find they actually get *crispier* if they dry out a little more in the fridge overnight! Go ahead and prep them up to 24 hours ahead. Just make sure you pull them out of the fridge about 20 minutes before they go into the preheated 425°F oven so they lose the initial chill.
Nutritional Estimate for Sticky BBQ Chicken Wings Crispy Oven Style
Alright, let’s talk numbers for those Sticky BBQ Chicken Wings Crispy Oven Style. Now, I always want to throw a big disclaimer out there: this is just an educated guess! Your BBQ sauce brand can change the sugar and sodium content wildly, and the size of those wings varies, so take this as a general guide, not a doctor’s order. But hey, we’re getting that fantastic crispy texture without frying, so we’re already ahead of the game, right?
This estimate is based on roughly 4 wings per serving, which is a light appetizer portion, depending on how hungry your guests are!
- Calories: Around 350 per serving. That’s pretty solid for something this satisfying!
- Fat: We’re looking at about 18 grams. Because we baked them instead of dunking them in oil, we keep the saturated fat manageable at around 5 grams.
- Protein: Great news here! You’re getting about 24 grams of satisfying protein.
- Carbohydrates: This runs around 25 grams, mostly coming from that delicious, thick BBQ sauce glaze.
- Sugar: Expect about 20 grams due to the sauce and the optional honey we added for extra stickiness.
- Sodium: This one is always high because of the salt we add for the crisping step and the salt already in the store-bought sauce, hitting near 550mg.
So, there you have it! A tasty, finger-licking good estimate for our No Fuss Crispy Wing Technique. Enjoy these beauties!
PrintSticky BBQ Chicken Wings Crispy Oven Style
Follow this recipe to make perfectly crispy, sticky BBQ chicken wings using only your oven. This method uses baking powder to help achieve a crisp exterior without frying.
- Prep Time: 15 min
- Cook Time: 45 min
- Total Time: 60 min
- Yield: 4 servings
- Category: Appetizer
- Method: Baking
- Cuisine: American
- Diet: Low Fat
Ingredients
- 3 lbs chicken wings (flats and drumettes)
- 1 tablespoon baking powder (aluminum-free preferred)
- 1 teaspoon salt
- 1/2 teaspoon black pepper
- 1 cup your favorite thick BBQ sauce
- 2 tablespoons honey or brown sugar (optional, for extra stickiness)
Instructions
- Preheat your oven to 425 degrees Fahrenheit (220 degrees Celsius). Line a large baking sheet with aluminum foil for easy cleanup, then place a wire rack on top of the foil.
- Pat the chicken wings completely dry using paper towels. This step is crucial for crispiness.
- In a large bowl, combine the dried wings with the baking powder, salt, and pepper. Toss until every wing piece is evenly coated with the powder mixture.
- Arrange the coated wings in a single layer on the wire rack, ensuring there is space between each wing for air circulation.
- Bake the wings for 25 minutes.
- Flip the wings over. Return the pan to the oven and bake for another 20 minutes, or until the skin is visibly crispy and golden brown.
- While the wings finish baking, warm your BBQ sauce in a small saucepan over low heat. If using honey or brown sugar, stir it into the sauce now.
- Remove the crispy wings from the oven. Place them in a large, clean bowl. Pour the warm BBQ sauce over the wings.
- Toss the wings gently until they are fully coated in the sticky sauce.
- Serve immediately while hot.
Notes
- Using a wire rack allows heat to circulate underneath the wings, which helps them crisp evenly on all sides.
- Do not skip drying the wings thoroughly; excess moisture prevents crisping.
- If you prefer a thicker glaze, you can return the sauced wings to the oven for 3-5 minutes under the broiler (watch carefully to prevent burning).
Nutrition
- Serving Size: 4 wings
- Calories: 350
- Sugar: 20
- Sodium: 550
- Fat: 18
- Saturated Fat: 5
- Unsaturated Fat: 13
- Trans Fat: 0
- Carbohydrates: 25
- Fiber: 1
- Protein: 24
- Cholesterol: 90