

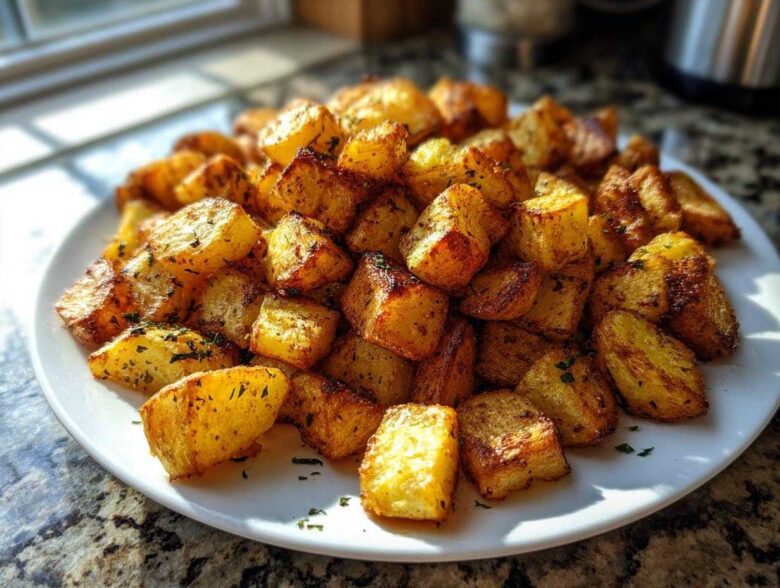
Oh my goodness, friends, let’s talk about the quest! I spent years chasing that mythical diner texture—you know, the one where the exterior snaps when you bite it, but the inside melts like savory clouds? I used to fry mine in the skillet, and honestly, I usually ended up with sad, steamed potato mush swimming in oil. Don’t make my mistakes! Seriously, getting truly excellent breakfast potatoes felt impossible until I embraced the oven. This recipe isn’t just a recipe; it’s the method I finally landed on that guarantees ultimate crispiness without standing over the stove begging them to brown. If you want to know the secret sauce behind how we do things around here, you can always check out our little corner of the internet! Trust me, once you see these golden beauties come out, you’ll never go back to the soggy life!
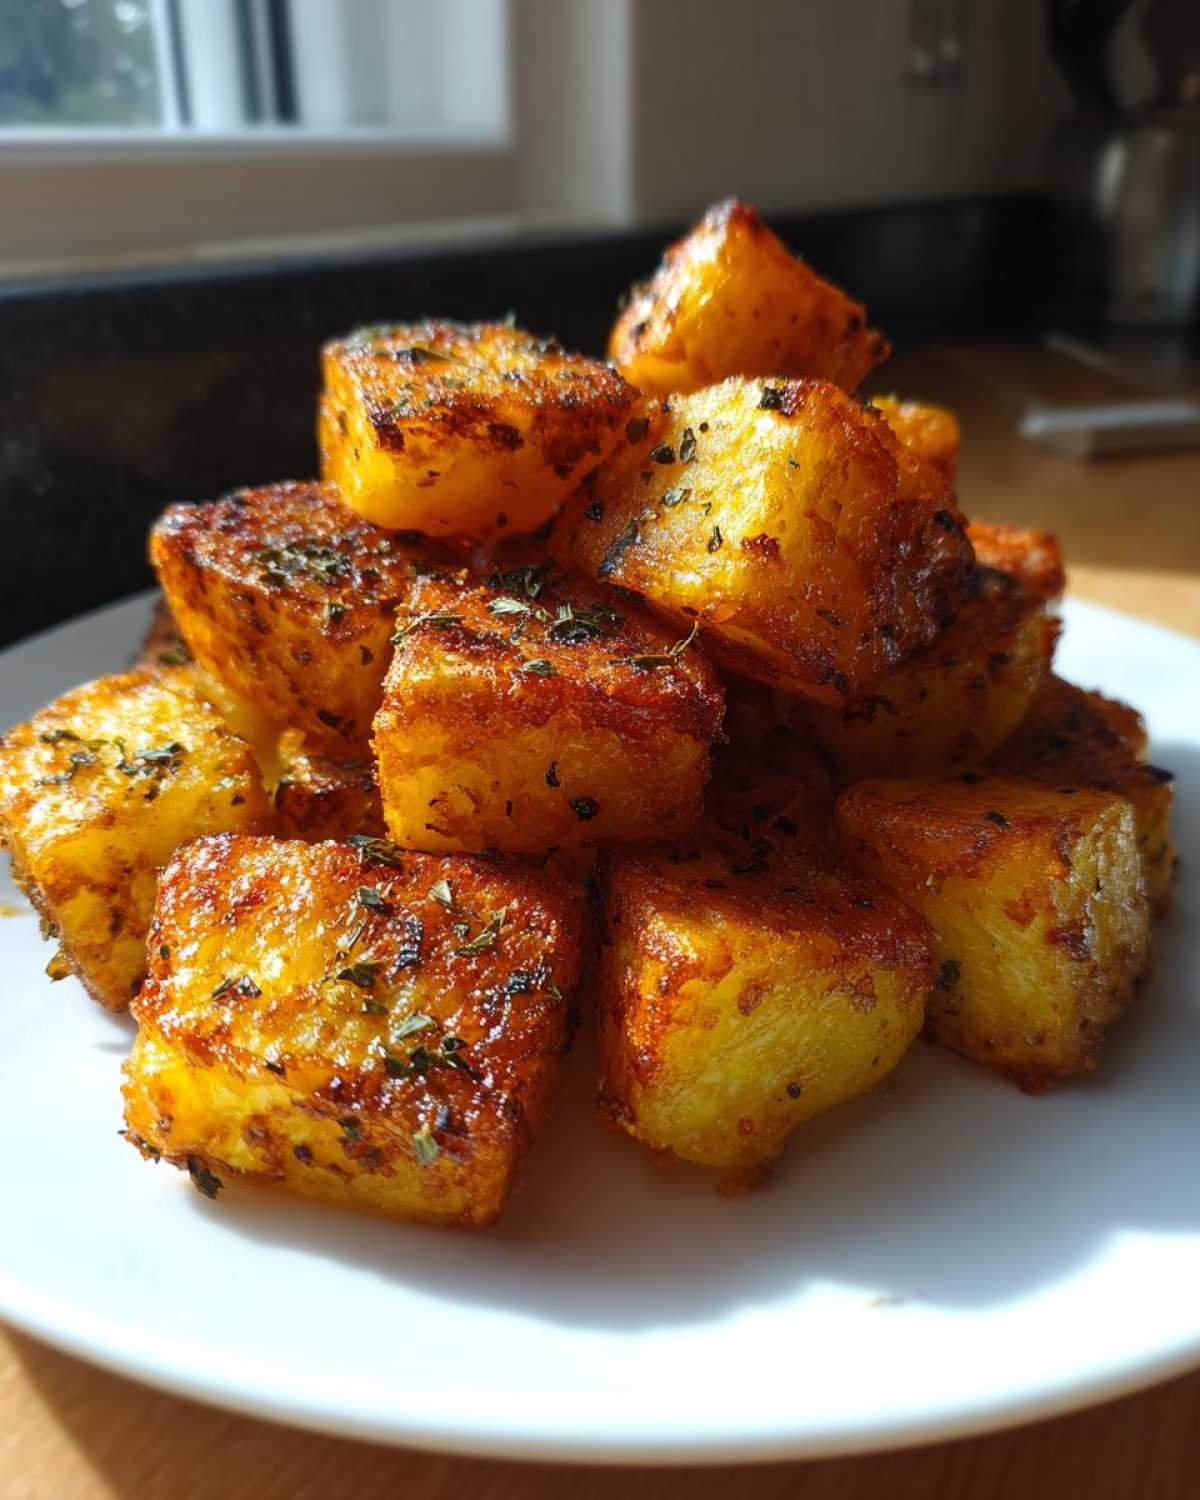
Why This Ultimate Crispy Breakfast Potatoes Recipe Works
Folks look at these potatoes and think I used some fancy fryer or spent hours flipping them, but the biggest secret is actually physics! We are working hard to remove two things that stop crispness in their tracks: starch and moisture. High heat is key, but if you just dump everything on one pan, you end up steaming everything instead of roasting it. The oven allows us to use high, dry heat, turning those edges golden brown while the insides steam perfectly from their own moisture.
That’s why these breakfast potatoes are so utterly reliable. Following this method ensures you get that beautiful snap every single time. It just takes a little bit of prep work!
- We use a screaming hot oven—425°F gets the job done right.
- We use the right kind of potato that crisps up beautifully.
- And we use a single layer, which is non-negotiable for air circulation!
The Secret to Tender Inside Crispy Outside Potatoes
Okay, let’s talk about that crucial pre-soak step I mentioned in our notes. I know it feels like an extra step when you’re trying to get a quick morning meal ready, but soaking those diced Russets in cold water for at least 30 minutes pulls out the surface starch. When that starch is gone, it can’t turn into a gummy layer when it hits the heat! Russet potatoes are the winners here because they are already naturally high in starch.
Waxy potatoes just don’t give you that fluffy interior we adore in our perfect breakfast potatoes. Make sure you dry them completely after soaking—I mean *completely* dry—before the oil goes near them!
Gathering Your Ingredients for Flavor Packed Breakfast Potatoes
Now that we know *why* this method works, let’s look at what you actually need to pull these beauties together. Transparency is everything in my kitchen, so here are the exact measurements. Remember, baking is chemistry, but roasting is more forgiving—still, don’t eyeball the seasoning here!
You’ll start with 2 lbs of those beautiful Russet potatoes, diced nice and neat into half-inch cubes. Then, we use 3 tablespoons of olive oil to coat everything. For the seasoning blend—this is where the flavor explodes—you need 1 teaspoon of salt, 1/2 teaspoon of pepper, 1 teaspoon of garlic powder, 1 teaspoon of smoked paprika (don’t skip that smoky depth!), 1/2 teaspoon of dried rosemary, and 1/4 teaspoon of onion powder. That little bundle of spices transforms simple potatoes!
You can find more great ideas for your next morning meal right here on the site.
Ingredient Notes and Substitutions
A quick word on oil: because we are roasting at 425°F, you need an oil with a high smoke point. Olive oil works perfectly fine, but if you have avocado oil, go ahead and use that instead! It handles the heat like a champ.
And please, please, please, use *smoked* paprika. Sweet paprika is fine in a pinch, but the smoky element is what gives these flavor packed breakfast potatoes that subtle campfire taste that pairs so well with eggs. It truly makes a difference in the final savory profile.
Step-by-Step Guide to Oven Roasted Potatoes Breakfast Perfection
Alright, this is where the magic really happens! We’ve soaked and seasoned, so now we just need to give these cubes the space they need to transform into peak deliciousness. The absolute first thing you HAVE to do is crank that oven up. We need 425 degrees Fahrenheit—no cheating! If your oven isn’t fully hot when the potatoes go in, you’re already losing the battle against sogginess. Once the oven is ready, grab that rimmed baking sheet.
The most critical thing I learned making Oven Roasted Potatoes Breakfast style is to avoid overcrowding the pan. Seriously, if your potato cubes are stacked on top of each other, they steam. We want them in a single, lonely layer, not cuddled up! If you have to use two pans, please, use two pans. That beautiful air circulation is what guarantees that lovely exterior crust we are aiming for.
If you want more great tips on timing and technique, I share all my secrets over on my personal blog page!
Preparing and Seasoning Your Breakfast Potatoes
After you’ve tossed those potatoes thoroughly in the oil and then sprinkled them with our amazing spice mix, take a minute to ensure every single surface has been touched by flavor. I actually use my hands here instead of a spoon because I can feel when they are evenly coated. Remember that 425°F temperature—it’s high, fierce heat that sets up that initial crust right away. Get them into the oven quickly once they are seasoned!
The Crucial Flip for Maximum Crispiness
Don’t just set your timer and walk away! We need two distinct cooking phases here. After exactly 20 minutes, pull the pan out. You’ll see some color starting to develop, but they won’t be done yet. Now, this next part is non-negotiable for achieving those beautiful Crispy Breakfast Potatoes: Use a sturdy spatula and flip every single cube over. We want the second side to get just as much quality exposure to that dry heat as the first side did. Pop them back in for another 15 to 20 minutes until they are totally golden brown!
Tips for Making Crispy Breakfast Potatoes Every Time
So, you’ve followed the recipe, but you still want that extra edge of shattering crispness? I totally get it! Achieving peak crispness in your morning potatoes is all about technique, not just ingredients. My biggest lesson learned was about the pan size. If you try to jam 2 pounds of potatoes onto a standard jelly roll pan, they all touch, and boom—you’re steaming again! I learned the hard way that I needed a wider commercial sheet pan to give my breakfast potatoes enough elbow room.
If you don’t have a huge surface area, use two pans, even if that means the cooking time is slightly shorter on one than the other. Also, don’t open the oven door too much while they roast, because that drops the temperature fast. That initial blast of 425°F needs to stick around! A little patience during that second roasting phase pays off immensely in the final texture of your breakfast potatoes.
Variations: Turning Simple Breakfast Potatoes into a Meal
These oven-roasted breakfast potatoes are amazing as a side for your eggs, but let’s be real—sometimes you need a main course! If you’re whipping up a big brunch spread, you can easily turn these into something spectacular, maybe what I call ’em: fully ‘loaded’ spuds. About five minutes before they are totally done roasting—when they are golden but still have a ways to go on the flip side—toss in some sliced bell peppers, chopped onions, or even toss the whole pan with a cup of shredded cheddar cheese.
Seriously, topping them lets that cheese melt beautifully while the potatoes finish crisping up underneath. It turns them from a side dish into the star of the plate. I love looking at all the different ways people dress these up; have you seen the incredible spicy sloppy joe sliders? We could put a scoop of those on top!
Quick Morning Potatoes: Skillet Method Alternative
Now, I always recommend the oven because you get that superior, even crispness. But I know life happens, and sometimes you only have 20 minutes before you need to run out the door. If you’re in a huge rush, you can absolutely use the skillet method for Quick Morning Potatoes, but heads up: they’ll be slightly softer.
Cube your potatoes, boil them for about 8 minutes first to get them tender, drain them super well, and then sauté them in well-oiled, hot cast iron until they brown. You lose some crunch, but you gain precious time in the morning!
Storage and Reheating Instructions for Leftover Breakfast Potatoes
I rarely have any leftovers because these breakfast potatoes vanish the second they come out of the oven, but on the rare occasion I have some, storing them correctly is everything! Don’t just leave them in the open air; they’ll turn leathery fast. Scoop any cooled potatoes into a sturdy, airtight container and keep them in the fridge for up to three days.
The microwave is your enemy here—it brings back all the mush you worked so hard to banish! When you’re ready to eat them again, you absolutely must reheat them in the oven at about 375°F until they start getting hot again and the edges crisp up. If you have an air fryer, even better! A quick five minutes at that temperature brings back that amazing, just-made texture. You’ll be shocked how good day-two breakfast potatoes can taste!
Frequently Asked Questions About Your Breakfast Potato Recipe
I always get so many questions when readers first try this method for making crispy potatoes! It’s totally understandable; getting that perfect texture can feel like high-level cooking, but it’s actually super easy once you know the tricks. Here are a few things people ask most often when they are trying to decide on the best potatoes for breakfast in the first place.
What are the best potatoes to use for crispy breakfast potatoes?
Hands down, you want a high-starch potato like a Russet (Idaho) or maybe a Yukon Gold if you want a slightly creamier interior. Waxy potatoes, like red potatoes, hold onto their shape but they won’t get that fluffy, soft inside that contrasts so nicely with the crisp shell. Russets are the top choice for achieving that classic diner texture in your breakfast potatoes recipe.
Can I make these vegan or gluten-free?
This base recipe is naturally vegetarian, so it’s already super close to being vegan! The only thing to watch is the final toss. If you replace the olive oil with a vegan butter spread or just use a heartier vegetable oil, you’re good to go on the vegan front. And yes, every spice we used is naturally gluten free breakfast side friendly, so no worries there! Just make sure to check your store-bought spice blend labels, just in case.
How can I prep these ahead of time? Say, for a big brunch?
That’s my go-to move for big weekend brunches! You can absolutely dice your potatoes and soak them the day before. Just keep them submerged in cold water in the fridge. The key is to drain and dry them thoroughly right before you toss them with oil and seasoning—don’t skip the drying part! You can even do the full roasting cycle and then just reheat them using the crisping method I mentioned earlier. They hold up really well!
Estimated Nutritional Data for These Savory Breakfast Sides
Look, I’m a baker, not a scientist, so take this with a grain of salt! These numbers are just my best estimate based on the 2 lbs of potatoes and the oil and spices we used here for four servings. They show they are delightfully low in sugar, which is nice for a morning dish. These statistics are based on the recipe ingredients provided and serving four people.
- Calories: 280
- Fat: 11g
- Carbohydrates: 42g
- Protein: 5g
- Sodium: 450mg
Since we are using simple, whole ingredients, this is a fantastic base for any healthy meal, and of course, it stays Gluten Free Side friendly!
Share Your Perfect Breakfast Potatoes
Now that you have the keys to the kingdom—truly crispy, perfectly seasoned breakfast potatoes—it’s your turn to shine in the kitchen! I am genuinely so excited for you to try this method for your next brunch or Sunday morning routine. Tell me, did your oven deliver that perfect snap right when you bit into them? I want to hear all about it!
Please, do me a huge favor once you’ve finished eating them all: come back here and leave a star rating for this Breakfast Potato Recipe. Did you manage to keep them in a single layer? Did the smoked paprika win your heart?
If Instagram or Facebook is more your jam, snap a picture of your gorgeous, golden sprouts and tag me! Seeing how you serve these savory breakfast sides always makes my day. For questions or just to swap other fun kitchen tales, you can always reach me direct through the Contact page. Happy cooking, friends!
PrintUltimate Crispy Oven-Roasted Breakfast Potatoes
Follow this method to make breakfast potatoes with a perfectly crisp exterior and a tender inside using simple oven roasting.
- Prep Time: 15 min
- Cook Time: 40 min
- Total Time: 55 min
- Yield: 4 servings
- Category: Side Dish
- Method: Oven Roasting
- Cuisine: American
- Diet: Vegetarian
Ingredients
- 2 lbs Russet potatoes, scrubbed and diced into 1/2 inch cubes
- 3 Tbsp olive oil
- 1 tsp salt
- 1/2 tsp black pepper
- 1 tsp garlic powder
- 1 tsp smoked paprika
- 1/2 tsp dried rosemary
- 1/4 tsp onion powder
Instructions
- Preheat your oven to 425 degrees Fahrenheit (220 Celsius).
- Place the diced potatoes in a large bowl.
- Drizzle the olive oil over the potatoes. Toss them well to coat every piece evenly.
- In a small bowl, mix the salt, pepper, garlic powder, smoked paprika, rosemary, and onion powder.
- Sprinkle the spice mixture over the oiled potatoes and toss again until the seasoning is distributed.
- Spread the seasoned potatoes in a single layer on a large, rimmed baking sheet. Do not overcrowd the pan; use two sheets if necessary for maximum crispness.
- Roast for 20 minutes.
- Remove the pan from the oven and flip the potatoes using a spatula.
- Return the pan to the oven and roast for another 15 to 20 minutes, or until the potatoes are deep golden brown and crispy.
- Serve immediately as a side dish.
Notes
- For the crispiest results, soak the diced potatoes in cold water for 30 minutes before drying them completely. This removes excess starch.
- Use Russet or Yukon Gold potatoes; avoid waxy varieties for this recipe.
- If you prefer a softer texture, reduce the final roasting time by 5 minutes.
Nutrition
- Serving Size: 1/4 of recipe
- Calories: 280
- Sugar: 1
- Sodium: 450
- Fat: 11
- Saturated Fat: 1.5
- Unsaturated Fat: 9.5
- Trans Fat: 0
- Carbohydrates: 42
- Fiber: 4
- Protein: 5
- Cholesterol: 0