

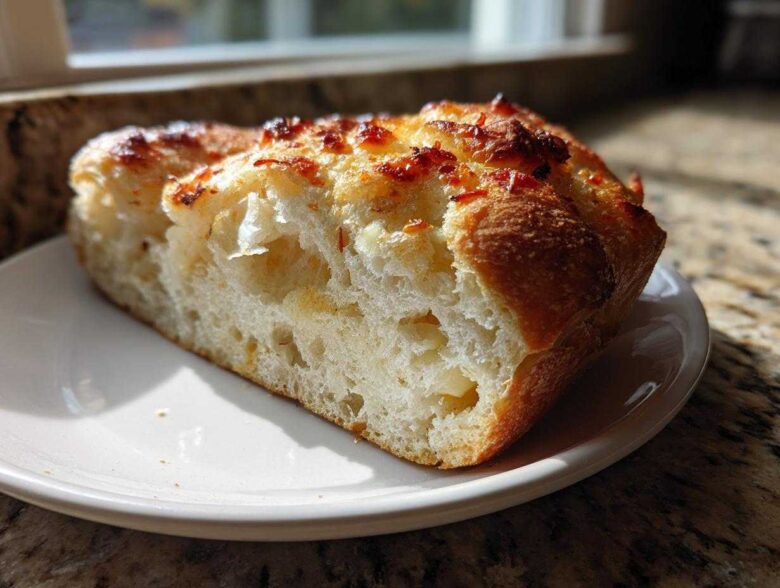
Oh my goodness, you have to try this! I swear, for years, the idea of making artisan bread at home felt like something only seasoned bakers accomplished in secret. I was always terrified of yeast, thinking I’d end up with a dense brick instead of that perfect loaf. But trust me, that era is over! This Easy No Knead Garlic Parmesan Bread changed everything for me. It’s that magical combination of bakery-quality crust and minimal effort. Seriously, you mix it, forget it for a day, and come back to the best simple bread you have ever tasted. No kneading required, just amazing results!
Why This No Knead Garlic Parmesan Bread is the Best No Knead Bread
If you’re looking for that show-stopping, crackly crust that makes you feel like a real artisan, this is your recipe. Honestly, this might be the crusty bread baking breakthrough you’ve been waiting for. It hits every single mark for a fantastic loaf of homemade bread.
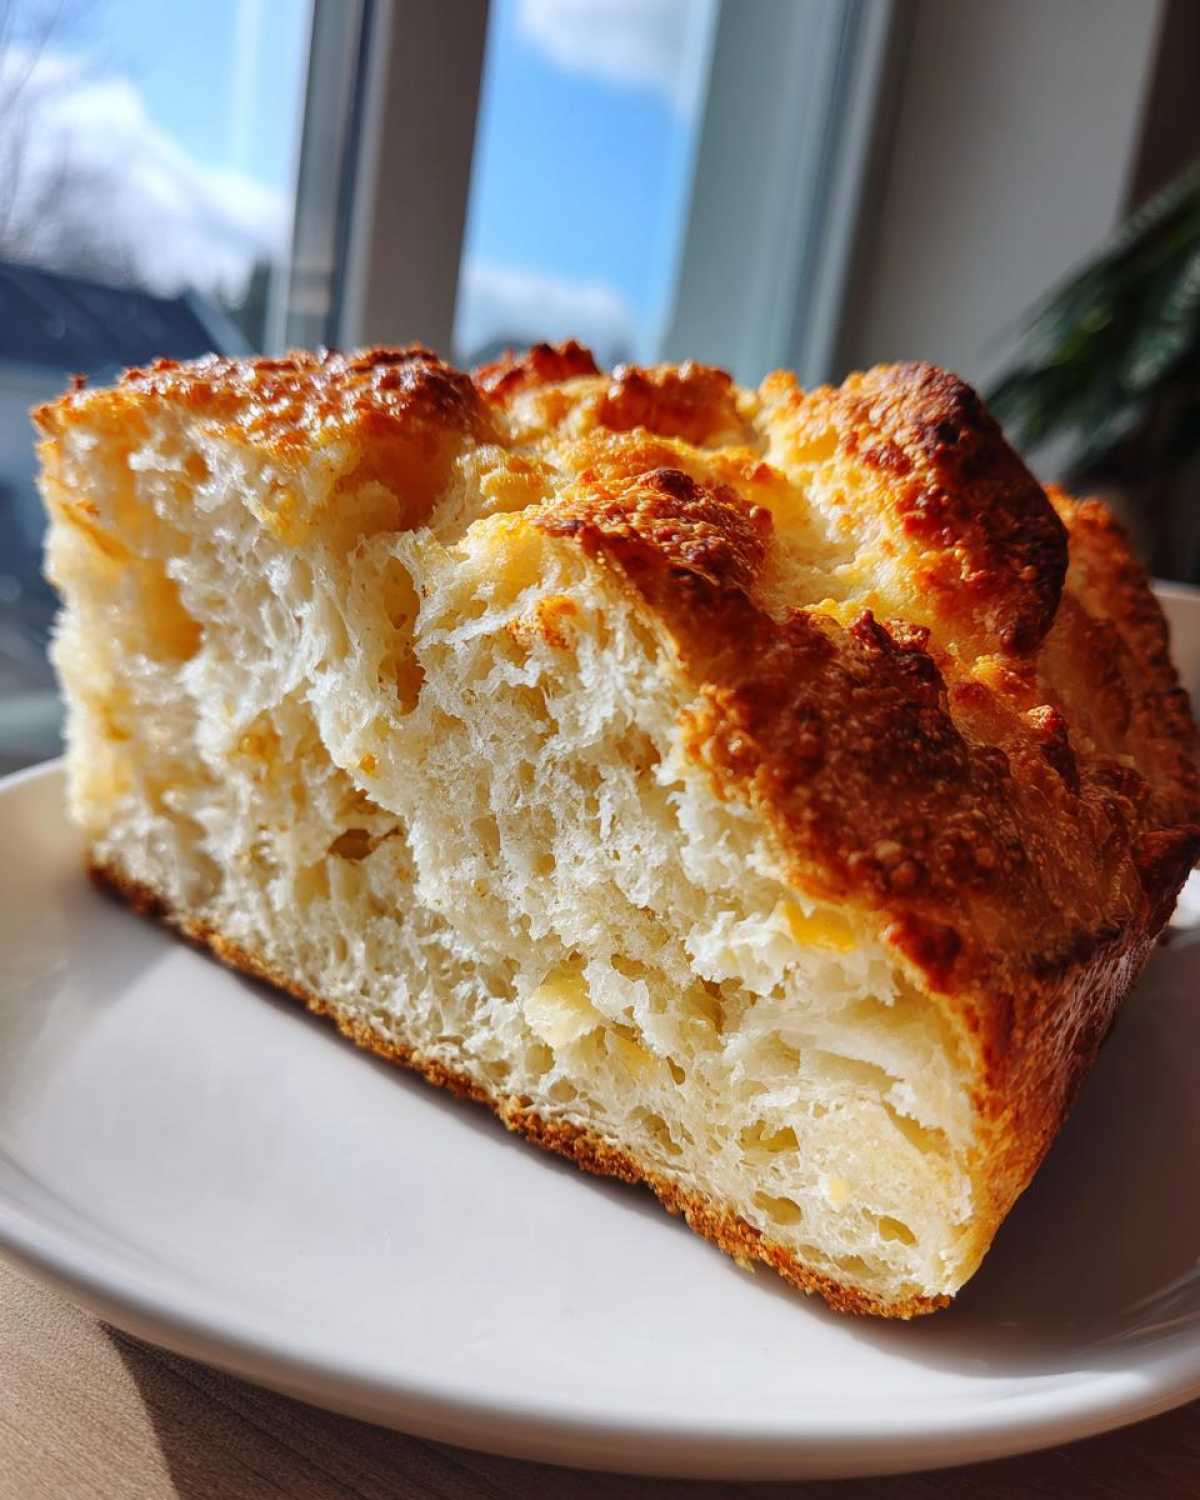
- That shatteringly crisp crust that sings when you cut it.
- The inside? Insanely soft, airy, and tender—the perfect texture!
- It adds that amazing savory twist to the classic no-knead base.
Minimal Effort Bread: The No-Knead Advantage
The real magic here, friends, is the time, not the effort. We aren’t wrestling dough into submission! The long, slow fermentation—that 18-hour bath the dough takes—is what builds incredible depth of flavor where kneading usually does the heavy lifting. It lets the yeast work its slow magic, delivering complex tastes you usually only find in expensive bakery loaves.
Savory Flavor Profile: Garlic Parmesan Bread
While the no-knead method is fantastic for a standard white bread, I decided we needed a flavor punch! Folding in that fragrant minced garlic, the sharp Parmesan cheese, and the aromatic Italian herbs elevates this from beginner bread to true comfort food status. It smells heavenly while baking, and the Parmesan melts right into the crust for those addictive, salty edges!
Gathering Ingredients for Your Easy Homemade Bread
Okay, before we get to the long, lovely resting period, we need our supplies! Remember, this is easy homemade bread, so don’t stress about exotic flour, but quality matters here, especially for that cheesy crust. I always lay everything out on the counter first so nothing gets missed during the quick mix. Seriously, check out this guide for easy homemade bread tips beforehand if you’re nervous! We are only mixing briefly, so make sure your Parmesan is finely grated and those garlic cloves are seriously minced!
Here is what you’ll need for one magnificent loaf of savory bread:
- 3 cups all-purpose flour
- 1 1/2 teaspoons salt
- 1/4 teaspoon instant yeast (this is important!)
- 1 1/4 cups cool water
- 1/2 cup grated Parmesan cheese – don’t use the green shaker stuff!
- 2 cloves garlic, minced fine
- 1 tablespoon olive oil
- 1 teaspoon dried Italian herbs
Ingredient Notes and Substitutions for Perfect Bread
The yeast choice is key for this recipe—it has to be instant yeast. If you only have active dry, you need to dissolve it in a tiny bit of warm (not hot!) water first, but instant just gets tossed right in with the dry stuff. Use standard all-purpose flour; don’t waste your money on bread flour here. For herbs, if you don’t have Italian seasoning, a combination of dried oregano and rosemary works beautifully in place of the cheese if you wanted to make a savory herb bread instead!
Step-by-Step Instructions for Dutch Oven Bread Baking
Alright, this is where the magic truly happens, but remember: patience is not just a virtue here, it’s literally an ingredient! We are using the dutch oven bread baking method, which gives us that amazing oven spring and the crust we crave. It’s super simple, just requires planning ahead for that long sleep the dough takes. Don’t worry about checking it; it’s taking care of itself!
Mixing and the Long Rise for Your Bread
First up, just whisk your flour, yeast, and salt together in a bowl. Dump in the cool water and grab a wooden spoon—you want a shaggy, messy dough. We are aiming for just combined, people! Do not overwork it into a smooth ball, that’s the whole point of no-knead bread. Cover that bowl TIGHTLY with plastic wrap and put it somewhere out of the way. It needs a good 12 to 18 hours to really develop that flavor deep in the structure of your loaf.
Incorporating Flavor and Final Proofing of the Bread
When your dough has doubled (or tripled!) and is nice and bubbly, turn it out onto a lightly floured counter. Now we add the fun stuff: sprinkle that Parmesan, garlic, oil, and herbs right over the top. Gently fold the dough over only a few times, just enough to tuck the flavorings in. No slapping or punching, please! Shape it into a loose ball, cover it with a clean towel, and let it relax for just 30 minutes while your oven gets screaming hot.
Baking the Crusty Bread: Lid On, Lid Off
You MUST preheat that Dutch oven inside the oven at 450 degrees Fahrenheit for the full 30 minutes before you bake. This pot needs to be hotter than the gates of heaven! Carefully lower your dough into the screaming hot pot—use parchment paper underneath if you’re nervous about sticking! Pop the lid on and bake it for 30 minutes; that trapped steam creates a bakery-quality crust. Then, take the lid off and bake for another 15 to 20 minutes until it’s that deep, gorgeous golden brown.
Tips for Success When Making Artisan Bread Recipe
Even though we aren’t kneading, there are still a few little things that can make or break your bread experience! The biggest secret to getting that perfect, easy lift is ensuring your long rise is uninterrupted. Don’t peek or poke that dough too much while it’s resting overnight; treat it gently like a sleeping baby!
When it comes to getting the loaf out of the Dutch oven, I suggest two things for those perfectionists among us who are trying out this artisan bread recipe. First, use a sling made of parchment paper under the dough—it lets you lift the hot loaf right out without burning your fingers.
Second, to get that extra, super-crispy shell that bakeries charge extra for, try lightly spraying the inside bottom of your hot Dutch oven with cooking spray right before you drop the dough in. It seems small, but that little bit of extra fat helps the crust really set hard and crunchy. Trust me, this little trick is a game-changer for my homemade bread!
Storing and Reheating Your Homemade Bread
We all know that freshly baked bread is perfection, but this savory loaf is so good you’ll want it around for a couple of days! The bad news is that because it’s so moist, it’s truly best eaten within two days of baking. If you manage to have leftovers past that, just store any uneaten bread tightly wrapped in a clean kitchen towel or paper bag at room temperature—never the fridge, which makes it go stale faster!
When you’re ready for a slice, don’t even think about eating it cold the next day! To bring that amazing garlic Parmesan crust back to life, just lightly spritz the slice with a little water—just a quick mist—and pop it under the broiler for about 60 seconds. It’s like magic; the crust crackles again, and the inside warms up beautifully. Instant comfort!
Serving Suggestions for Garlic Parmesan Bread
Honestly, this bread is practically a meal all by itself, especially when you get those crispy, cheesy corners! But why stop there? This savory loaf shines brightest when paired up with something hearty. Since it’s packed with Parmesan and herbs, it cuts through rich flavors perfectly.
My absolute favorite way to enjoy a slice fresh from the cooling rack is dunked into a seriously slow-cooked soup. Think about serving it alongside a big bowl of my slow-cooker beef barley soup—the savory broth soaking into the airy crumb? Heaven!
If you’re having it for dinner, you can’t go wrong with a drizzle of good quality olive oil mixed with a tiny bit of balsamic vinegar for dipping. Or, just tear off big chunks and serve it right next to a big platter of spaghetti and meatballs for dipping up all that extra tomato sauce. It’s too good to waste!
Frequently Asked Questions About Making Bread
I get so many questions when people first try making bread this way, which is totally understandable! It feels like bending the rules of baking, but it works! I figured I’d tackle a few things I hear all the time about this yeast bread making process. Hopefully, this clears up any wobbles about jumping into no-knead territory!
Can I use active dry yeast for this recipe instead of instant?
Yes, you absolutely can, but you have to wake that yeast up first! Instant yeast is super easy because you just toss it in with the flour. If you have active dry, take about half a cup of your measured water, warm it up slightly—it should feel warm, not hot, against your wrist—and stir in the yeast and maybe a pinch of sugar. Let it sit for 5 to 10 minutes until it gets foamy and bubbly on top. That means it’s alive and ready! If it doesn’t foam, toss it and grab fresh yeast, because that foam is essential fuel for your bread!
What if I don’t have a Dutch oven? Can I still make crusty bread?
Oh, the dreaded missing Dutch oven! Don’t let that stop you from making this incredible loaf of bread. If you have a heavy, oven-safe pot with a tight-fitting lid, that works too. If you don’t have any deep-lidded pot, try this: Place a metal baking pan on the bottom rack while preheating. When it’s time to bake, carefully pour a cup of boiling water into that hot pan on the bottom rack—this creates a steamy environment, mimicking the Dutch oven. Bake your loaf right on the middle rack, and remove the steam pan after the lid-off baking time starts.
How do I know when this easy homemade bread is finished baking?
This is the make-or-break question! Visually, you want that deep, deep golden brown color—it might look almost burnt, but that’s where the flavor is! The outside should look firm and beautifully crackled. If you are still worried, gently tap the bottom of the loaf with your knuckle. If it sounds hollow, like a drum, it’s done. If it sounds dull or dense, give it another 5 minutes uncovered.
My dough didn’t really rise after 18 hours; what happened?
Did you use cool water? That’s usually the culprit! If the water was too cold, the yeast struggled to wake up, especially if your kitchen is chilly. If your kitchen is cold (below 70°F), you need to find a warmer spot, maybe near a pilot light or on top of the fridge. A slow rise after 18 hours means the flavor development is still happening, even if it looks a little flatter than expected. Bake it anyway! Sometimes the oven will give it that final boost.
Estimated Nutritional Data for This Bread Loaf
I always try to keep track of what’s going into my family’s tummies, even with something as simple as this glorious garlic Parmesan bread. Now, I’m not a nutritionist, heaven forbid, so please take these numbers as a very helpful starting point!
These estimates are based on dividing the whole loaf into 12 slices, which is usually about right for dinner portions, but you might slice it bigger or smaller, right?
- Calories: 210 per slice
- Fat: 4g
- Carbohydrates: 38g
- Protein: 7g
- Sugar: A tiny 1g!
- Sodium: 350mg
Since we are mixing in real Parmesan cheese and olive oil, you get some good healthy fats, but remember that sodium level is something to watch if you eat half the loaf in one sitting! Enjoy this amazing bread!
Share Your Bread Baking Experience
I just can’t wait to hear how this bread turned out for you! Honestly, seeing photos of your crusty loaves makes my whole week. Did the cheese melt just right? Hop over to the comments below and drop a rating for this recipe—it helps other folks feel brave enough to try it!
If you snap a picture of your amazing Garlic Parmesan bread, tag me on social media! I love seeing how everyone tailors this simple recipe to their own kitchen. Happy baking, friends, and don’t forget to check out more of my favorite recipes over on my home baking page!
PrintEasy No Knead Garlic Parmesan Bread
Make a crusty artisan loaf with minimal effort using the no-knead method and a Dutch oven. This recipe results in soft bread with a savory garlic and Parmesan flavor.
- Prep Time: 10 min
- Cook Time: 50 min
- Total Time: 13 hours 0 min
- Yield: 1 loaf
- Category: Baking
- Method: Baking
- Cuisine: American
- Diet: Vegetarian
Ingredients
- 3 cups all-purpose flour
- 1 1/2 teaspoons salt
- 1/4 teaspoon instant yeast
- 1 1/4 cups cool water
- 1/2 cup grated Parmesan cheese
- 2 cloves garlic, minced
- 1 tablespoon olive oil
- 1 teaspoon dried Italian herbs
Instructions
- In a large bowl, whisk together the flour, salt, and yeast.
- Add the cool water and mix with a wooden spoon until just combined into a shaggy dough. Do not overmix.
- Cover the bowl tightly with plastic wrap and let it rest at room temperature for 12 to 18 hours.
- After the long rise, gently scrape the dough onto a lightly floured surface. Sprinkle the Parmesan cheese, minced garlic, olive oil, and Italian herbs over the dough. Fold the dough over itself a few times to incorporate the additions without kneading vigorously.
- Shape the dough into a rough ball. Cover it with a clean kitchen towel and let it rest for 30 minutes.
- About 30 minutes before baking, place a 5 to 6-quart Dutch oven with its lid inside your oven. Preheat the oven to 450 degrees Fahrenheit (232 degrees Celsius).
- Carefully remove the hot Dutch oven from the oven. Gently place the dough inside the hot pot. Cover with the lid.
- Bake for 30 minutes with the lid on.
- Remove the lid and continue baking for another 15 to 20 minutes, or until the crust is deep golden brown.
- Carefully remove the bread from the Dutch oven and let it cool completely on a wire rack before slicing.
Notes
- For an extra crispy crust, you can lightly spray the inside of the Dutch oven with cooking spray before placing the dough inside.
- If you do not have instant yeast, use active dry yeast and dissolve it in a small amount of warm water (not cool) before adding it to the dry ingredients.
- This bread is best eaten within two days of baking.
Nutrition
- Serving Size: 1 slice
- Calories: 210
- Sugar: 1
- Sodium: 350
- Fat: 4
- Saturated Fat: 2
- Unsaturated Fat: 2
- Trans Fat: 0
- Carbohydrates: 38
- Fiber: 2
- Protein: 7
- Cholesterol: 10