

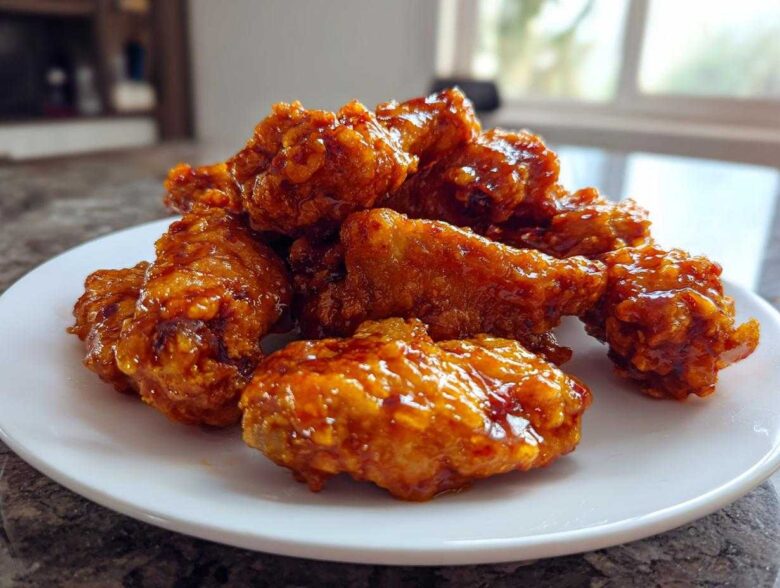
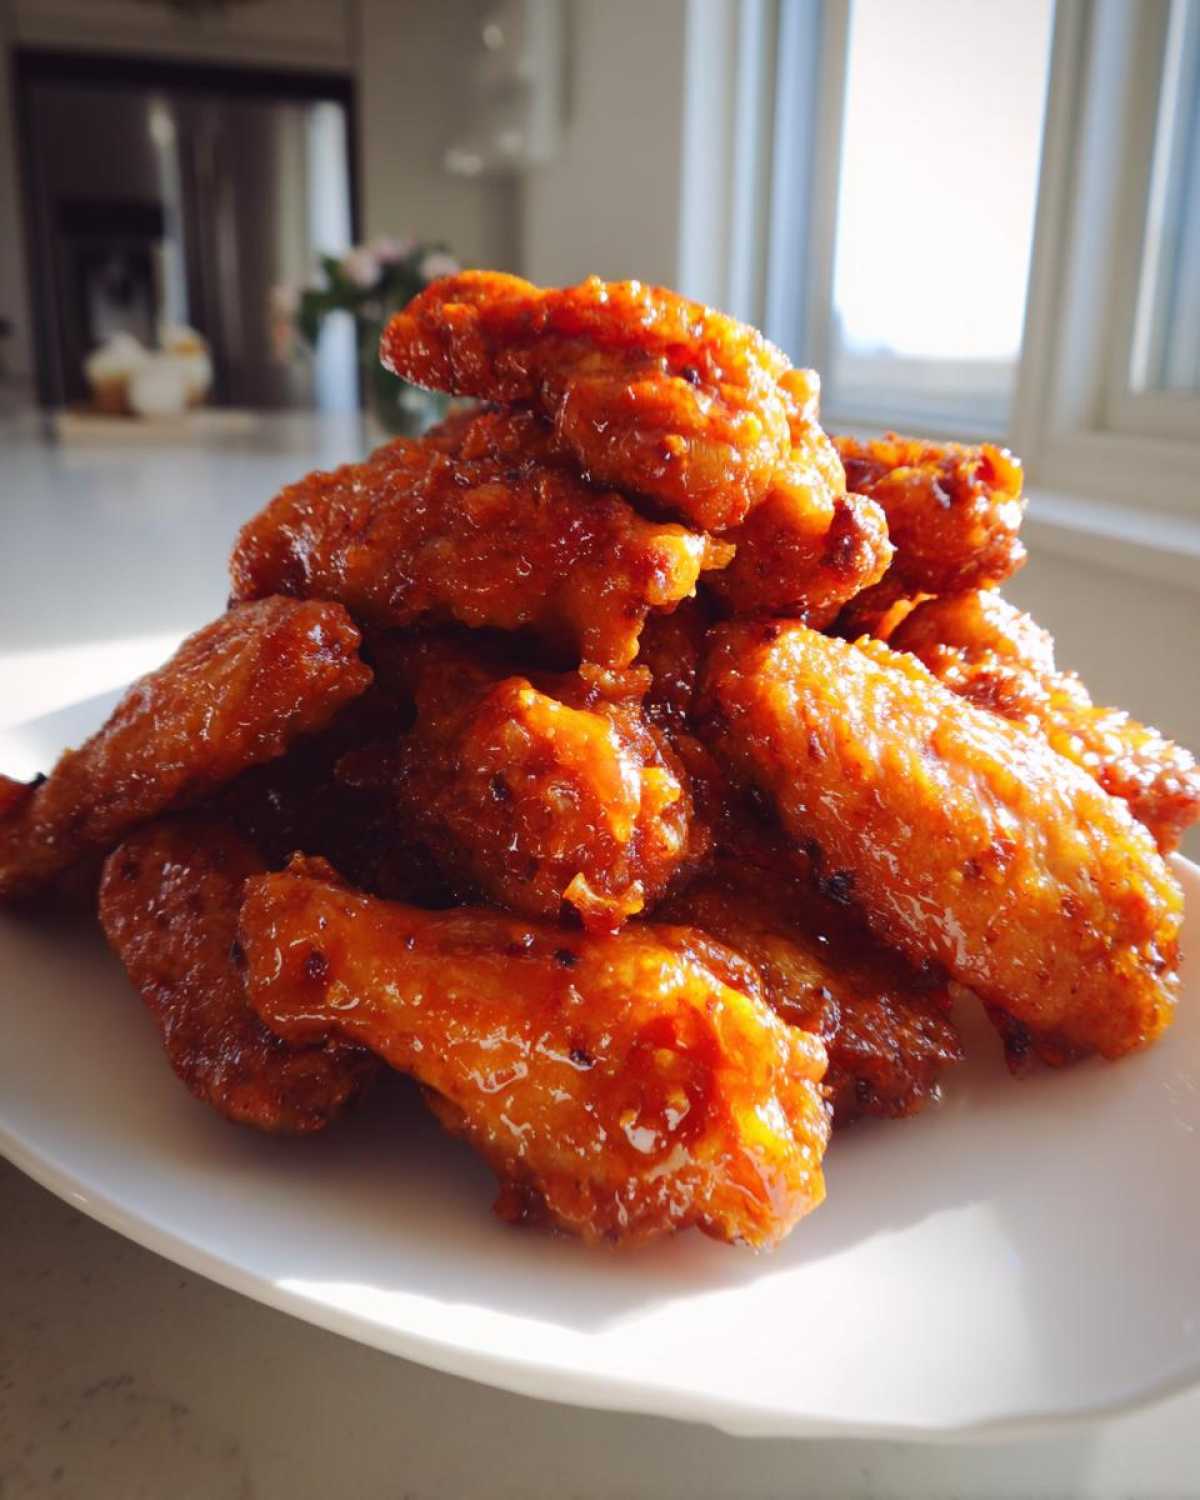
If you’re anything like me, you know hosting game day or having friends over means you need wings that disappear instantly. Forget those dry, crumbly efforts! I finally cracked the code on what I call the absolute ‘best orange chicken wings’—they are impossibly crispy on the outside, but coated in this gorgeous, thick, sweet-and-tangy shell. Getting that perfect sticky coating took me a few tries, I’m not going to lie. But trust me, the result is the phenomenal Sticky Orange Chicken Wings with Honey Glaze you deserve.
Forget flimsy sauces that slide right off. We are building texture here! This recipe nails the crisp-then-glaze technique so every single wing is smothered in that irresistible coating. I’ve linked a great recipe for crispy breakfast potatoes right here—crispy breakfast potatoes—because honestly, who can just eat wings?
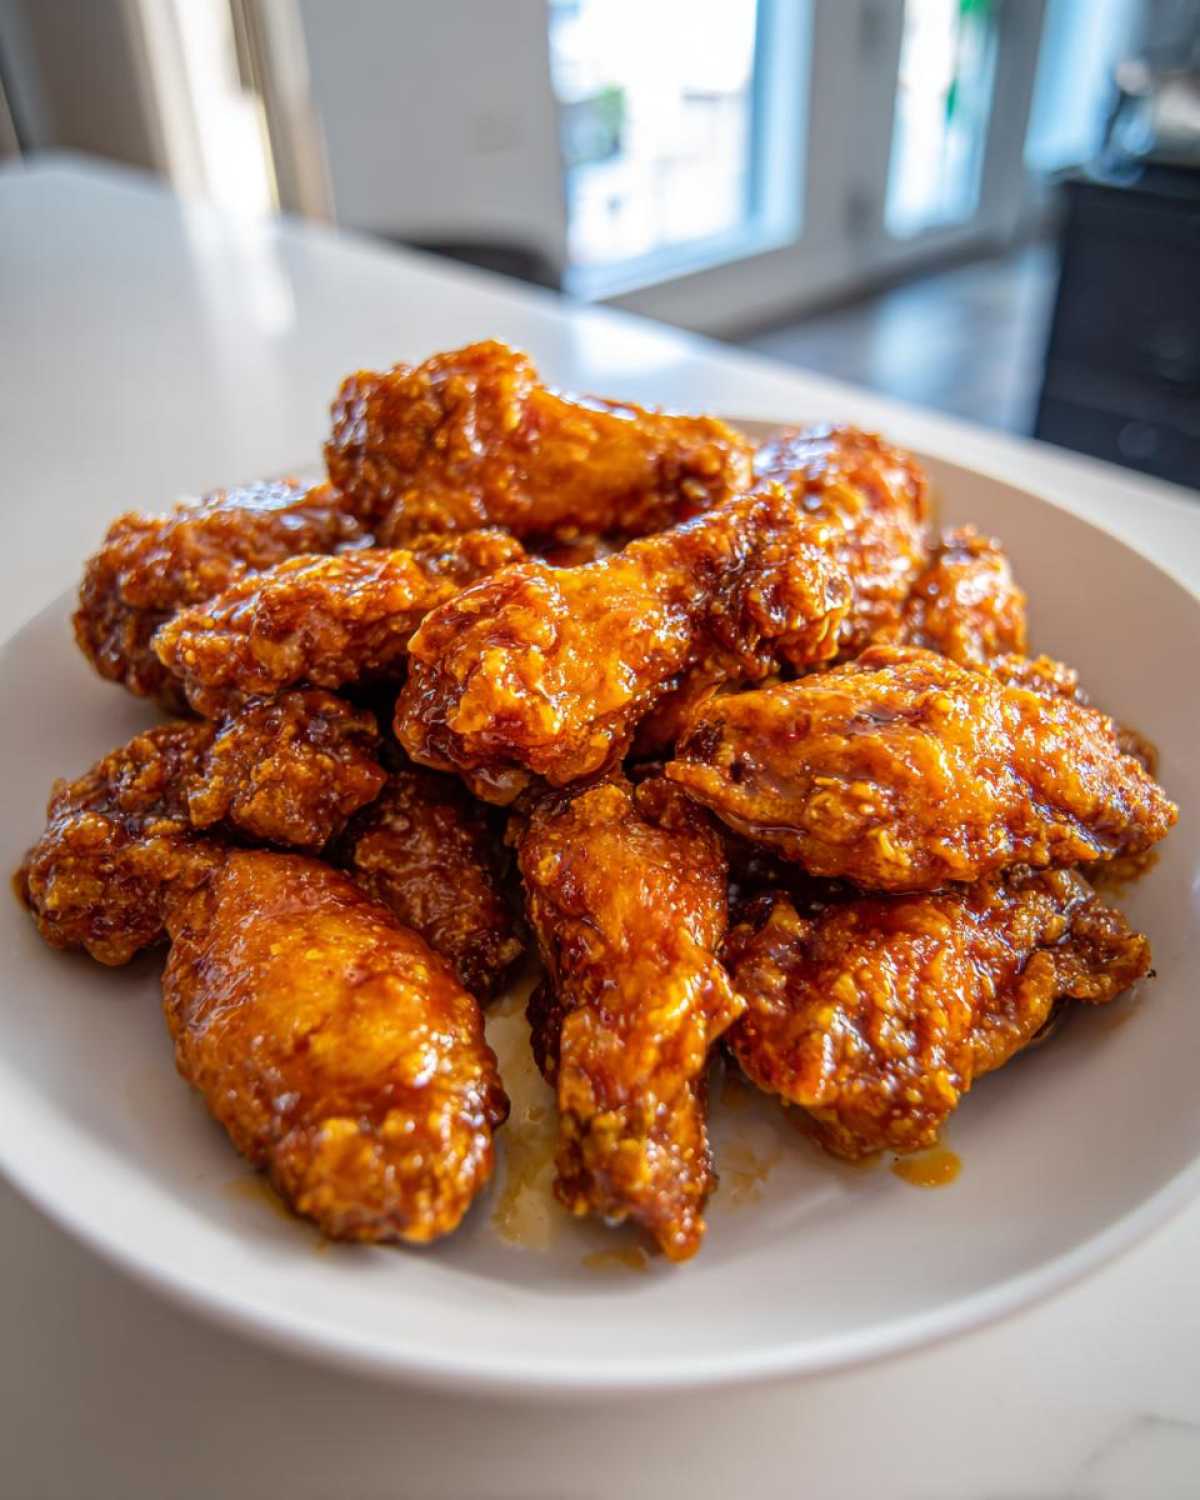
Why You Will Love These Sticky Orange Chicken Wings with Honey Glaze
Honestly, what isn’t there to love about these wings? They hit all the right notes. I’ve made so many party wing variations, but this one always wins. You’re getting serious texture and flavor payoff with surprisingly little effort, which is exactly what I look for in a great snack!
- Serious Crispiness: That initial bake on the rack locks in crunch that holds up even under the heaviest glaze.
- The Ultimate Sticky Texture: That honey-cornstarch slurry works magic to create a thick, non-drippy coating. Perfection!
- Sweet Meets Tangy: The fresh orange flavor cuts through the richness of the honey glaze beautifully. It’s complex but totally addictive.
- Easy Assembly: It’s mostly hands-off baking time, leaving you free to organize the rest of your party wing ideas.
Essential Ingredients for Sticky Orange Chicken Wings with Honey Glaze
You don’t need a massive shopping list for these wings, which is fantastic! The magic lives in combining simple things—like honey and fresh citrus—in just the right way. I always stock up on good quality soy sauce because it really deepens the umami flavor in this Asian Inspired Chicken Wings recipe.
Make sure you grab the freshest ingredients you can find, especially for the glaze components. I linked my favorite guide on making an ultimate all-purpose chicken marinade too, though we are just using simple seasoning here pre-bake!
- 2 lbs chicken wings, separated into flats and drumettes (This is the key structure!)
- 1 tablespoon olive oil (Just enough to help the seasoning stick and promote crisping.)
- 1 teaspoon salt
- 1/2 teaspoon black pepper
- 1/2 cup honey (The thickener and sweetener core.)
- 1/2 cup orange juice, fresh squeezed preferred (Seriously, use fresh juice! It makes a huge difference in that bright, tangy flavor.)
- 1/4 cup soy sauce
- 2 tablespoons rice vinegar
- 1 tablespoon grated fresh ginger (Use fresh, not powdered!)
- 2 cloves garlic, minced
- 1 teaspoon orange zest (Don’t skip this! It’s pure orange oil flavor.)
- 1 tablespoon cornstarch (This is our secret weapon for true stickiness!)
- 2 tablespoons cold water (To mix with the cornstarch.)
Equipment Needed for Perfect Sticky Glazed Wings Recipe
Listen, you don’t need a smoker, a deep fryer, or anything fancy for these Crispy Honey Glaze Wings. We’re using the oven, which means most of what you need is probably already hiding in your drawers. Having the right gear makes sure the wings bake up crispy, which is half the battle before we even get to the glorious sauce!
I always make sure I have these items ready to go before I even start seasoning the chicken. It’s all about being prepared so you don’t frantically search for a whisk when the sauce is ready to thicken!
- A big mixing bowl for tossing the raw wings—you need space here!
- A sturdy baking sheet.
- A wire cooling rack that fits inside your baking sheet. This is non-negotiable for crispy baked chicken wings; it lets the air circulate underneath so the bottoms don’t get soggy. If you need inspiration on using your oven well, check out my guide on the best crispy baked chicken wings recipe.
- A small saucepan for building that thick glaze.
- A whisk for mixing up the cornstarch slurry and ensuring your sauce doesn’t clump when you add it in.
- Tongs for flipping those wings halfway through baking—it’s way easier and safer than using a fork!
How to Prepare Oven Baked Sticky Orange Chicken Wings with Honey Glaze
Okay, this is where the real fun starts! We’re going to bake these wings first—this is crucial so they get genuinely crispy before we smother them in that beautiful sauce. Remember, crispy wings are the foundation of any great oven baked glazed wings experience. We’re using a two-step cooking process here to lock in the texture, just like I learned from trial and error!
Crisping the Chicken Wings First
First things first: Preheat that oven to 400°F (200°C). Set up your baking sheet lined with foil (easy cleanup later, thank goodness!) and top it with that wire rack. Now, toss your wings with the oil, salt, and pepper right in that big bowl. Spread them out on the rack so they aren’t touching—air circulation is everything here. We bake them for 25 minutes, flip them over gently, and bake for another 15 to 20 minutes. You want them golden brown and feeling firm!
Making the Thick Honey Glaze Recipe
While the wings are getting nice and cooked, we make the star of the show: the Thick Honey Glaze Recipe. Dump the honey, orange juice, soy sauce, vinegar, ginger, garlic, and zest into a small saucepan. Bring that to a simmer over medium heat. Let it bubble for about 5 minutes until you see it just starting to simmer down a bit. Now, the secret to supreme stickiness: mix your cornstarch and cold water together separately—that’s your slurry. Whisk that slurry right into the simmering sauce. Keep whisking! It thickens fast, usually within 1 to 2 minutes until it coats the back of a spoon. Pull it off the heat right away!
Glazing and Final Set
Take those perfectly crispy wings out of the oven and dump them into a clean bowl. Pour about two-thirds of that thick, glorious glaze over them. Toss, toss, toss until every piece is glistening! Now, put them back on the baking sheet and pop them in for just 5 more minutes. Those 5 minutes are vital for setting that glaze so it doesn’t just drip everywhere. Keep an eye on them, though! Honey loves to burn if you look away for a second. If you want next-level crisp, try a 2-minute blast under the broiler at the very end—but seriously, watch them like a hawk!
Tips for the Best Orange Sauce Chicken Success
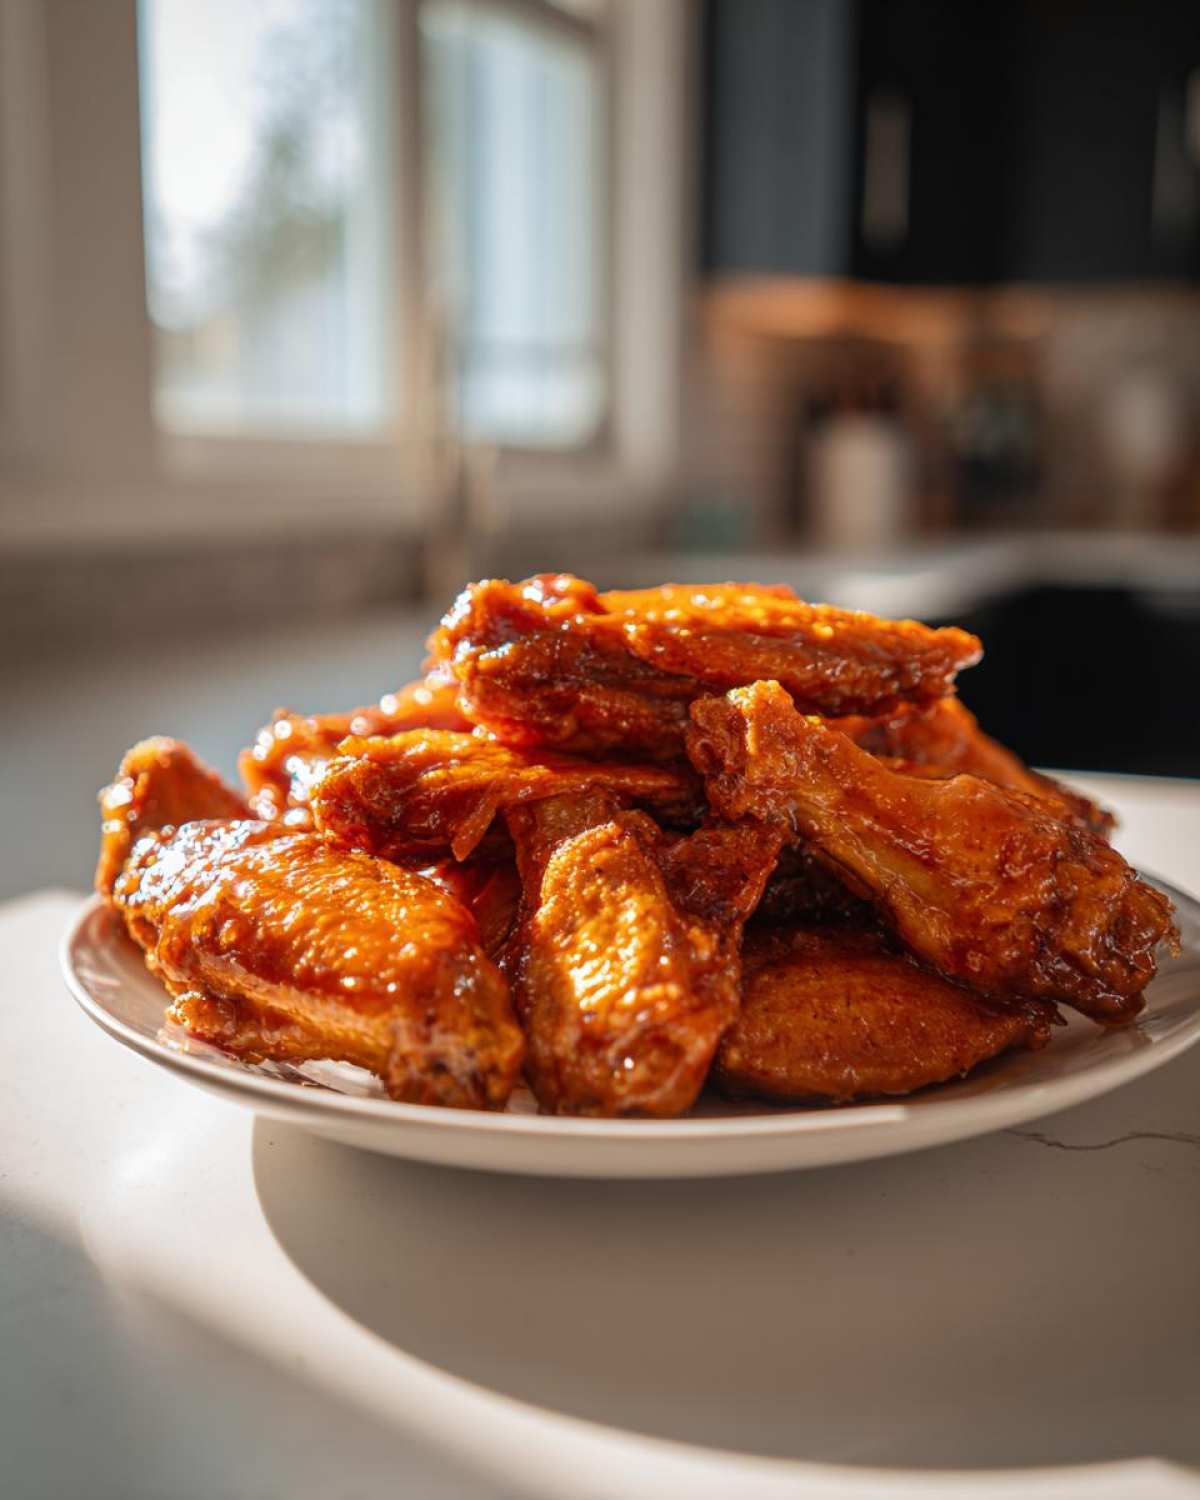
Even with a solid recipe, sometimes things go a little sideways, right? That’s why I always want to give you my best trouble-shooting secrets for these Easy Orange Sauce Chicken wings. The biggest potential fail point is always that beautiful honey glaze—it’s pure sugar, so it burns faster than you can blink!
The absolute key is timing. Never rush the initial baking of the wings. If the skin isn’t crisp before you toss them, the moisture from the sauce will just steam them, and you’ll end up with soft, soggy wings instead of that perfect sticky coating.
If you’re worried about the glaze setting up too thin, just pull the sauce off the heat and let it sit for five minutes before adding the cornstarch slurry. Sometimes it just needs a moment to cool slightly before it accepts the thickener properly. If it’s still too thin after adding the slurry and cooking? Just whisk in another 1/2 teaspoon of cornstarch mixed with a drop of cold water and whisk furiously over low heat until it grabs.
Air Fryer Versus Oven: Which Keeps Them Crispiest?
I know so many of you are obsessed with your air fryers, and honestly, I get it! They make fast work of crisping things up. If you’re going that route instead of the oven, I have a whole guide on the air fryer sticky orange wings process! The main difference is temperature and time. You’ll want to cook your seasoned wings at about 380°F (195°C) for about 20 minutes total, flipping them halfway through.
The final glazing step is the same: toss them in the sauce, and then return them to the air fryer basket for just 2 quick minutes right at the end. This sets the glaze without overcooking the chicken. Seriously, two minutes is enough, because that honey is going from sticky to burnt in seconds!
Working with the Honey Glaze Texture
If you made your sauce ahead of time, don’t panic when you pull it out of the fridge! It will be totally stiff, almost like taffy. That just means your reduction worked! You must reheat it gently on the stove over low heat, stirring constantly, until it loosens up again before you toss the wings. If it thickens too much while reheating, splash in a teaspoon of hot water or a little extra orange juice to loosen it back up to that perfect pourable-but-thick consistency.
Remember what I said about the final bake? It’s so important! That last 5 minutes in the oven isn’t really about cooking the chicken anymore; it’s entirely about caramelizing that honey glaze onto the skin so it sticks beautifully and doesn’t smear everywhere when you try to grab a wing. That’s the best trick for truly sticky wings!
Ingredient Notes and Substitutions for Honey Orange Chicken Wings
Okay, I know sometimes you’re making these Honey Orange Chicken Wings last minute, and you realize you’re out of fresh juice or maybe you need a specific sweetener swapped out. That’s fine! Homemade recipes need flexibility. But I need to give you a little heads-up on where you *can’t* really cheat if you want that amazing orange flavor profile that sings.
For the orange components, please, please try to use fresh juice and fresh zest if at all possible. When you’re cooking, the difference between store-bought, concentrate juice and freshly squeezed orange juice is night and day. Fresh zest is basically pure, concentrated orange oil sitting right there on the outside of the skin. That’s what gives us that vibrant, tangy punch that cuts through the richness of the honey. Bottled juice often tastes a little dull or metallic once it cooks down, taking away the brightness we need in this Sweet and Tangy Chicken Wings recipe. You can see how important fresh citrus is in my chicken piccata recipe too—it just elevates everything!
Honey vs. Maple Syrup Substitutions
This is a common question I get about recipes that call for honey! If you’re out of honey, you can definitely swap it for maple syrup. Maple syrup is liquid gold, so it works beautifully as the primary sweetener here. The flavor profile of the final wing will shift just a little—it becomes a hair more earthy and perhaps less floral, but it’s still delicious.
If you use maple syrup, you might want to increase the fresh orange zest slightly, maybe by half a teaspoon, just to punch up that citrus kick that honey usually helps balance. Now, can you use agave? Yes, you can substitute agave nectar cup-for-cup, but be careful, because agave is much sweeter than honey. If you use it, I’d start by reducing the amount by about 2 tablespoons until you taste your sauce because it can easily turn these wings too sweet, pushing them past that perfect sweet/tangy balance.
Dealing with Soy Sauce Alternatives
The soy sauce in this recipe is important! It brings that necessary salty, savory depth that keeps the glaze from tasting like simple syrup. If you are dealing with a gluten allergy or just don’t have any soy sauce on hand, you have a couple of options.
Tamari is a direct, 1:1 substitute—it’s fantastic because it provides the same salty depth. If you’re worried about sodium, coconut aminos are also a great option. Coconut aminos are naturally a bit sweeter and less salty than traditional soy sauce, so if you use those, make sure you put back a little extra salt when you season the raw wings—maybe a pinch more—to compensate for that loss of savory flavor in the sauce.
The Cornstarch Slurry: Making it Work
Remember, the cornstarch slurry is non-negotiable if you want truly sticky wings that cling to the chicken. If you wanted to make this gluten-free without using cornstarch, you could make a reduction of arrowroot powder mixed with cold water instead. Use the exact same ratio: 1 Tablespoon powder to 2 Tablespoons cold water.
Arrowroot thickens beautifully and gives a lovely sheen, very similar to cornstarch, which helps achieve that signature glossy, Sticky Glazed Wings Recipe look. Don’t try to substitute baking soda or flour for thickening the sauce, trust me. It gives you weird clumps or a cloudy, pasty texture that we definitely don’t want for these party favorites!
Serving Suggestions for Your Sweet and Tangy Chicken Wings
So, you’ve got the absolute best Sweet and Tangy Chicken Wings sitting hot and sticky on your platter—what are you going to serve them with? Since these wings have such a big, bold flavor profile—all that sweet honey, tart orange, and savory soy—you need sides that are either simple or cooling. We don’t want anything fighting with that amazing glaze!
This is classic game day food, right? So usually, people are just reaching for napkins, but if you’re serving these as a proper appetizer spread or a fun, casual dinner, a couple of simple things on the side make the whole experience better. I always think about balancing the richness. These wings are rich and sticky, so we need something crisp or light to refresh your palate between bites!
If you’re looking for a fantastic, totally neutral base that lets the wings shine, you should try my recipe for easy fluffy rice pilaf. Seriously, a little scoop of plain rice is perfect for soaking up any rogue bits of sauce left on the plate!
Cooling Sides for Heat Balance
Even though these aren’t specifically spicy wings, the richness of the glaze sits heavy on the tongue, so a cool, acidic crunch is the perfect counterpoint. Don’t overthink it! A creamy, slightly tangy coleslaw is my favorite.
- Simple Slaw: Just shredded cabbage and carrots with a light vinaigrette dressing, maybe spiked with a tiny bit of apple cider vinegar. Keep the sugar low here; we have plenty of sweetness in the wings!
- Cucumber Salad: Thinly sliced cucumbers marinated quickly in vinegar, a little salt, and maybe a dash of sesame oil. It’s watery, cool, and unbelievably refreshing.
- Yogurt Dip: Keep a bowl of plain Greek yogurt mixed with a little salt, pepper, and fresh dill nearby. It acts like a cool dressing for anyone who’s going a little sauce-crazy. Sometimes I add a tiny squeeze of lime juice to make it zesty.
For a Heartier Meal: Pairing with Steamed Greens
If you want to stretch these wings to make them feel more like an actual meal rather than just a snack, you need a vegetable component. Steamed greens are ideal because they cook fast and don’t require a heavy sauce that would clash with the orange glaze.
I usually steam some broccoli florets or Chinese broccoli until they are just tender-crisp. Then, I hit them with just a drizzle of sesame oil and a sprinkle of sea salt. That’s it! The sesame oil plays really nicely with the ginger and soy notes already in the sauce. It feels healthier, but it still keeps the focus squarely on those beautiful, sticky appetizers.
Serving Presentation Tips
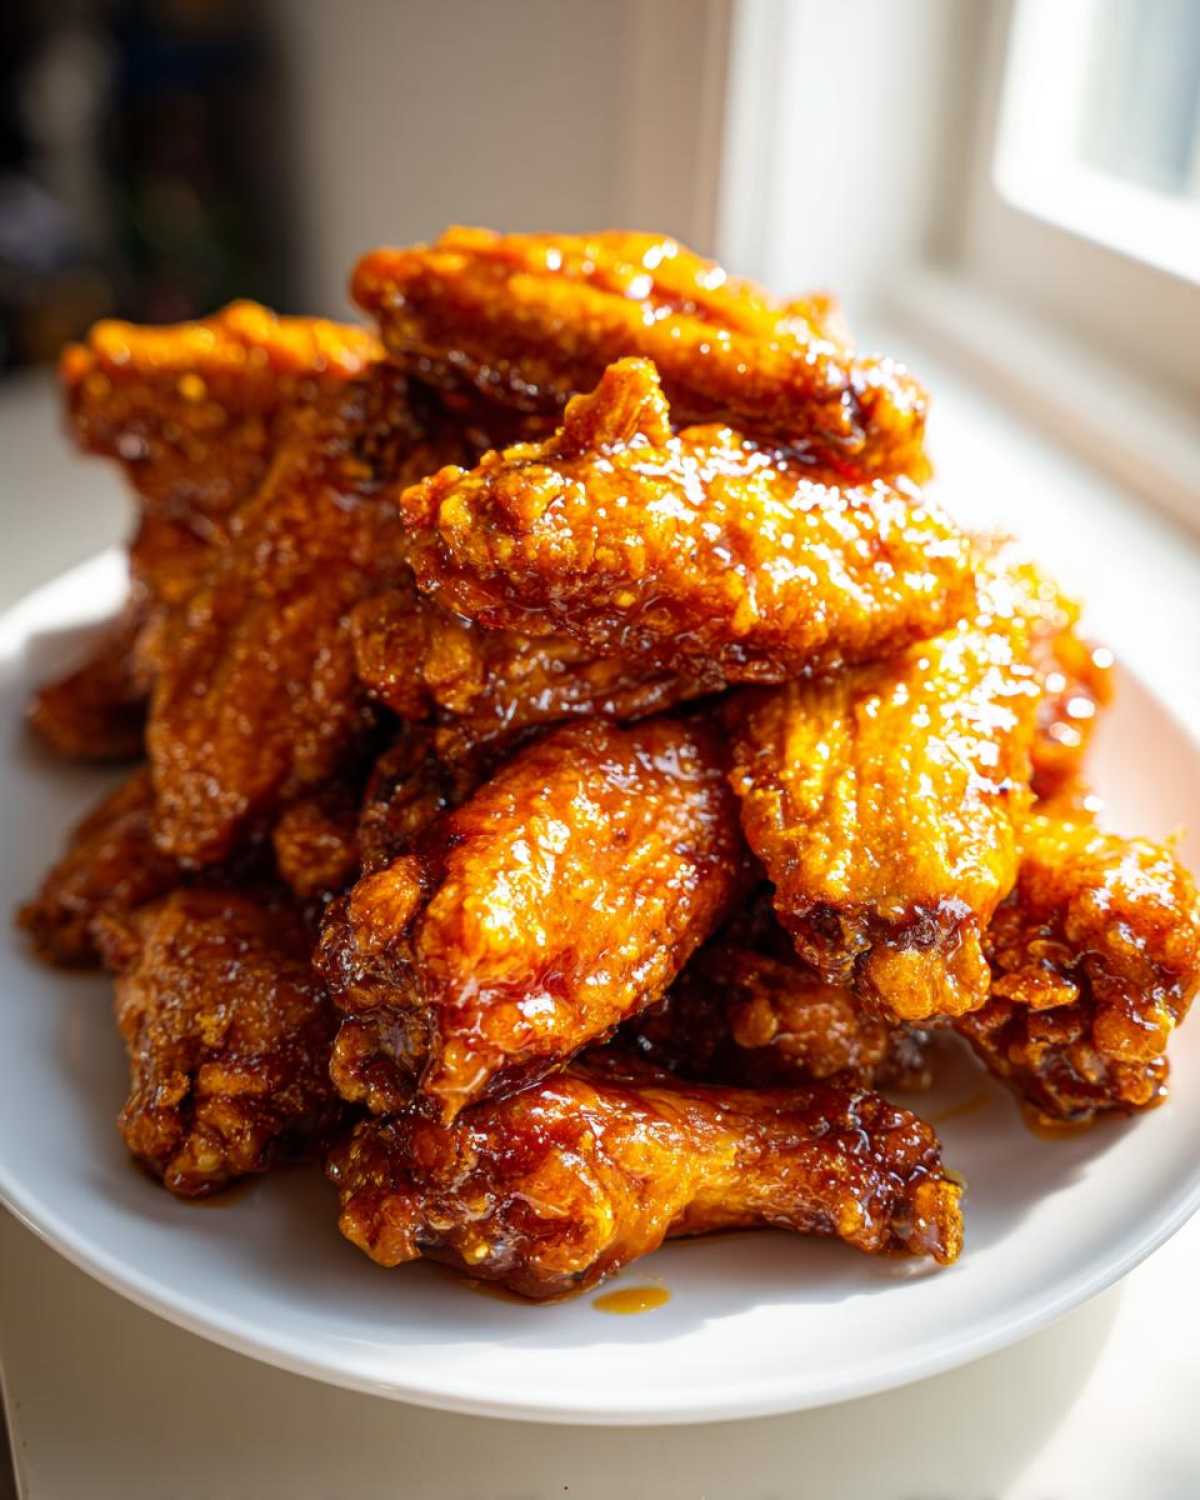
For party settings, presentation is everything! Pile the wings high on a platter. You don’t want them lying flat so the sauce settles weirdly. Sprinkle the top pile generously with toasted sesame seeds and some finely chopped green onions (scallions). The green onions give you a pop of color right at the end, and the toasted sesame seeds add a little extra nutty texture that contrasts beautifully with all that stickiness.
Make sure you have plenty of extra napkins rolled up nearby or maybe even some small forks if you’re worried about sticky fingers! Enjoy watching everyone grab these!
Storage and Reheating Instructions for Sticky Glazed Wings Recipe
Alright, the hard part is over—you’ve made the world’s best Sticky Glazed Wings Recipe! Now, if you manage to have leftovers (which is rare in my house, trust me), you need to know how to treat them right. You can’t just toss them in the fridge and expect them to taste the same the next day.
The biggest thing to know about these honey-glazed wings is that the sauce’s amazing, thick stickiness tends to soften once it hits the cold air of the refrigerator. The glaze will probably feel a bit gooey or slightly wet when you pull them out the next day. That’s totally normal! But we need to get that texture back, and the microwave is absolutely *not* our friend here.
If you’re thinking about making these ahead, I’ve linked my general notes on storing pasta dishes, like my chicken scampi with garlic parmesan rice, because knowing how to store food properly is half the battle! But for wings, we need heat and dry air to re-crisp them.
How to Store Uneaten Sticky Glazed Wings
The secret to storing these is letting them cool down a little bit before they go into their container, but you don’t want them sitting on the counter for hours—that’s how the sauce gets messy. Once they are room temperature, put them in an airtight container.
Here’s a little trick I use: I try to line the bottom of the container with a paper towel before I put the wings in. The paper towel helps wick away any little bit of moisture that the glaze might sweat out overnight. Seal it up tight and stick it in the fridge. They are good for about three, maybe four days max before the texture really starts to change too much.
Reheating to Restore Crispiness
I cannot stress this enough: Avoid the microwave! Microwaving wings turns that wonderful outer crisp into sad, steamy skin, and the glaze gets all watery. We are aiming for the exact opposite of that failure!
Your two best friends for reheating these are the oven or the air fryer. Both methods bring back that lovely crisp crust and help set the glaze firm again:
- Oven Method: Preheat your oven to about 375°F (190°C). Spread the leftover wings out on a wire rack set over a baking sheet—yes, use the rack again! Bake them for about 8 to 10 minutes. You’ll see the glaze tighten up and look glossy again.
- Air Fryer Method: If you’re using the air fryer, set it to 370°F (185°C). Cook them for about 4 to 6 minutes, shaking the basket halfway through. This is usually the fastest way to get that perfect texture back without turning the oven on for forever.
If you find the glaze looks a little dull after reheating, you can absolutely brush on a tiny bit more of that reserved sauce (if you saved any!) or even just a drizzle of honey right before they come out of the oven for that extra glistening finish. They taste almost as good as fresh!
Frequently Asked Questions About Making Sticky Orange Chicken Wings
I know when you’re cooking for a crowd or for game day, you need certainty! You might have a few little questions bubbling up about technique or substitutions when trying to master these Sticky Orange Chicken Wings. Don’t worry at all; I’ve gathered the questions I get most often from friends trying this recipe for the first time. It’s all about ensuring you get that perfect sticky coating every single time!
We want these to be the star of your spread. If you’re planning the rest of your menu, I have a fantastic creamy one-pot chicken tortilla soup recipe that would be a great cooling contrast to these wings!
Can I use a different cooking method besides baking for these wings?
Absolutely, you can! As I mentioned briefly before, the air fryer is a superstar for these. You toss them with the seasoning and cook them at about 380°F (195°C) until they are crispy, then toss them in the glaze and cook for just two more minutes to set it. That method gives you fantastic results with minimal oil!
Now, if you’re thinking about deep frying? Yes, you can dive them into 350°F oil until they are golden and cooked through—this will make them even crispier than baking! However, make sure they are fully drained and cooled slightly before tossing them gently in the sauce. If you skip that cooling step, the high heat from the just-fried wings can cause the honey glaze to break or become too thin too fast.
How can I make this recipe Spicy?
I love that you want to add a little kick! While these are inherently Sweet and Tangy Chicken Wings because of the orange and the honey, boosting the heat is super easy. You have a couple of options depending on how much fire you want.
- In the Glaze: The easiest way is to add a teaspoon of Sriracha or about half a teaspoon of red pepper flakes right when you add the ginger and garlic to the saucepan. Let it simmer with the sauce to infuse the flavor. Don’t overdo it at first; you can always taste and add more before you thicken it!
- As a Garnish: For some folks (like my brother!), I like to keep the main sauce batch totally mild, and then I’ll toss the final wings with a light dusting of dried cayenne pepper or very thinly sliced fresh red chilies right before serving. This lets everyone customize their own heat level.
How do I ensure they are extra sticky?
This is the million-dollar question for any glazed wing recipe! The secret to that unbelievable, clinging texture is twofold: the initial crispiness and the cornstarch slurry proportion. If your wings aren’t crispy first, the sauce just steams them soft.
Once you add the cornstarch slurry to your simmering sauce, you must let it cook for that full minute (or two if needed) until it visibly coats the back of your whisk. If you rush this thickening step, you end up with a runny glaze that pools on your plate instead of sticking to the wing. Also, remember that final 5-minute bake after tossing? That time sets the outer layer of the sauce, locking in that perfect stickiness. Don’t skip that final bake!
Can I make the sauce ahead of time?
Yes, you absolutely can make the sauce ahead of time! I often recommend it, actually, because it means less last-minute hovering over the stove when you should be chatting with your guests. Once you make the sauce, bring it to a full simmer, add the cornstarch slurry, and cook until it’s thick. Then, remove it from the heat and let it cool down completely.
Store the thickened glaze in an airtight container in the fridge. Just remember what I said above: when you pull it out, it will be super stiff. You’ll need to gently reheat it on the stove over low heat, stirring constantly, adding a teaspoon of water or orange juice as needed until it loosens back up to that gorgeous, thick consistency before you toss your hot, crispy wings in it.
Estimated Nutritional Data for Sticky Orange Chicken Wings
Hey, I’m a home cook, not a registered dietitian, so take these numbers with a grain of salt! But since so many of us are curious about what we’re eating, especially when serving appetizers, I’ve run my general recipe through a nutritional calculator. This gives you a good ballpark figure for what you’re looking at per serving. Remember, if you bake instead of fry, or if you use less honey, these numbers will shift!
I’ve provided estimated numbers based on using the baking method outlined in this recipe. These values are based on a regular serving size of 4 wings.
- Serving Size: 4 wings
- Calories: 350
- Fat: 18g
- Saturated Fat: 5g
- Protein: 25g
- Carbohydrates: 22g
- Sugar: 20g (Yes, that honey adds up!)
- Sodium: 550mg
If you’re looking for lighter sides to balance that sugar intake, check out my chicken corn chowder guide—it’s comforting but doesn’t overload on cream!
PrintSticky Orange Chicken Wings with Honey Glaze
A recipe for making crispy chicken wings coated in a thick, sweet, and tangy orange and honey glaze.
- Prep Time: 15 min
- Cook Time: 50 min
- Total Time: 65 min
- Yield: 4 servings
- Category: Appetizer
- Method: Baking
- Cuisine: Asian Inspired
- Diet: Low Fat
Ingredients
- 2 lbs chicken wings, separated into flats and drumettes
- 1 tablespoon olive oil
- 1 teaspoon salt
- 1/2 teaspoon black pepper
- 1/2 cup honey
- 1/2 cup orange juice, fresh squeezed preferred
- 1/4 cup soy sauce
- 2 tablespoons rice vinegar
- 1 tablespoon grated fresh ginger
- 2 cloves garlic, minced
- 1 teaspoon orange zest
- 1 tablespoon cornstarch
- 2 tablespoons cold water
Instructions
- Preheat your oven to 400°F (200°C). Line a baking sheet with foil and place a wire rack on top.
- Toss the chicken wings with olive oil, salt, and pepper. Arrange the wings in a single layer on the wire rack.
- Bake the wings for 25 minutes. Flip them over and bake for another 15 to 20 minutes, until the skin is golden and crisp.
- While the wings bake, prepare the glaze. In a small saucepan, combine the honey, orange juice, soy sauce, rice vinegar, ginger, garlic, and orange zest.
- Bring the mixture to a simmer over medium heat, stirring occasionally. Cook for 5 minutes until slightly reduced.
- In a small bowl, whisk together the cornstarch and cold water to create a slurry.
- Pour the slurry into the simmering sauce, whisking constantly. Continue to cook for 1 to 2 minutes until the sauce thickens significantly into a sticky glaze. Remove from heat.
- Once the wings are cooked, transfer them to a large bowl. Pour about two-thirds of the glaze over the hot wings. Toss well to coat every piece evenly.
- Return the glazed wings to the baking sheet. Bake for an additional 5 minutes to set the glaze.
- Remove from the oven, toss with the remaining glaze if desired, and serve immediately.
Notes
- For extra crispiness, you can briefly broil the wings for the last 2 minutes after glazing, watching carefully to prevent burning.
- If you prefer an air fryer method, cook the seasoned wings at 380°F (195°C) for 20 minutes, flipping halfway, then toss with the glaze and cook for 2 more minutes.
- Substitute maple syrup for honey if you prefer a different sweetness profile.
Nutrition
- Serving Size: 4 wings
- Calories: 350
- Sugar: 20
- Sodium: 550
- Fat: 18
- Saturated Fat: 5
- Unsaturated Fat: 13
- Trans Fat: 0
- Carbohydrates: 22
- Fiber: 1
- Protein: 25
- Cholesterol: 90