

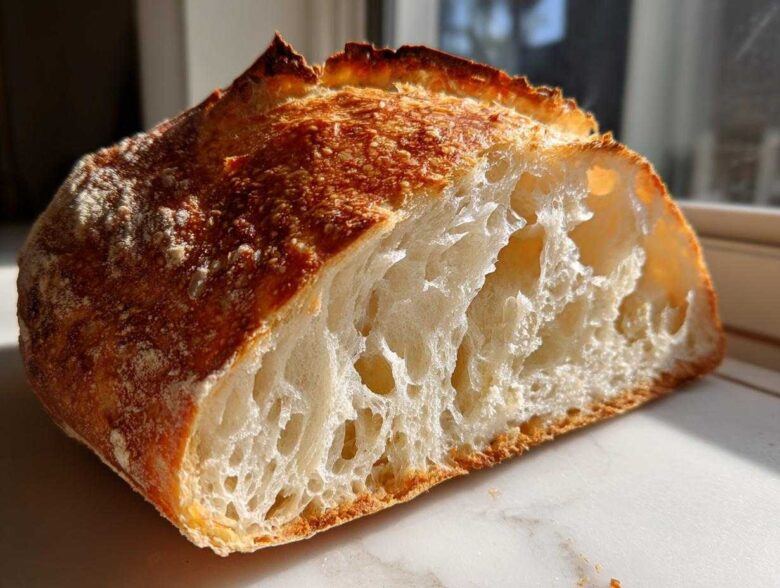
Okay, listen up, because I’m about to save you from those sad, floppy loaves you get from the oven sometimes. I truly struggled for years! Every time I tried to make real, bakery-style bread at home, it either turned out dense as a hockey puck or so sticky I needed three hours just to clean up. Then I found the magic: the no-knead method combined with a trusty Dutch oven. This isn’t just another simple bread recipe; this is your secret weapon for making perfect, crusty homemade bread! Trust me, the long, slow fermentation time does all the heavy lifting for your structure. You just mix four basic things, walk away, and come back the next day to bake the best artisan bread you’ve ever had. If you’re looking for an easy artisan baking method that delivers that professional look every single time, you’ve found it right here. I guarantee this foolproof artisan bread recipe will change how you feel about baking bread forever. Check out my main blog for more inspiration right here: More Bread Adventures.
Why This No Knead Artisan Bread Recipe Works So Well
The entire genius of this no knead bread lies in patience, not pounding! We skip the messy kneading because the yeast has a marathon, not a sprint, to work with. Letting that dough sit—those 12 to 18 hours—is what builds incredible flavor and gives the flour time to relax and form strong gluten networks all on its own. It sounds like magic, but it’s just slow science at work, making this simple bread recipe so reliable.
But the real star? That heavy cast iron Dutch oven bread tool. When you preheat that pot until it’s screaming hot, you are essentially creating a tiny, perfect steam environment for the dough. That steam is crucial because it keeps the outside of your loaf flexible just long enough for the bread to puff up dramatically inside the oven. That puff is what gives you that beautiful oven spring! Once the steam escapes, BAM! You get that gorgeous, shatteringly crusty homemade bread that usually only pros achieve.
Achieving the Perfect Soft Crumb Bread
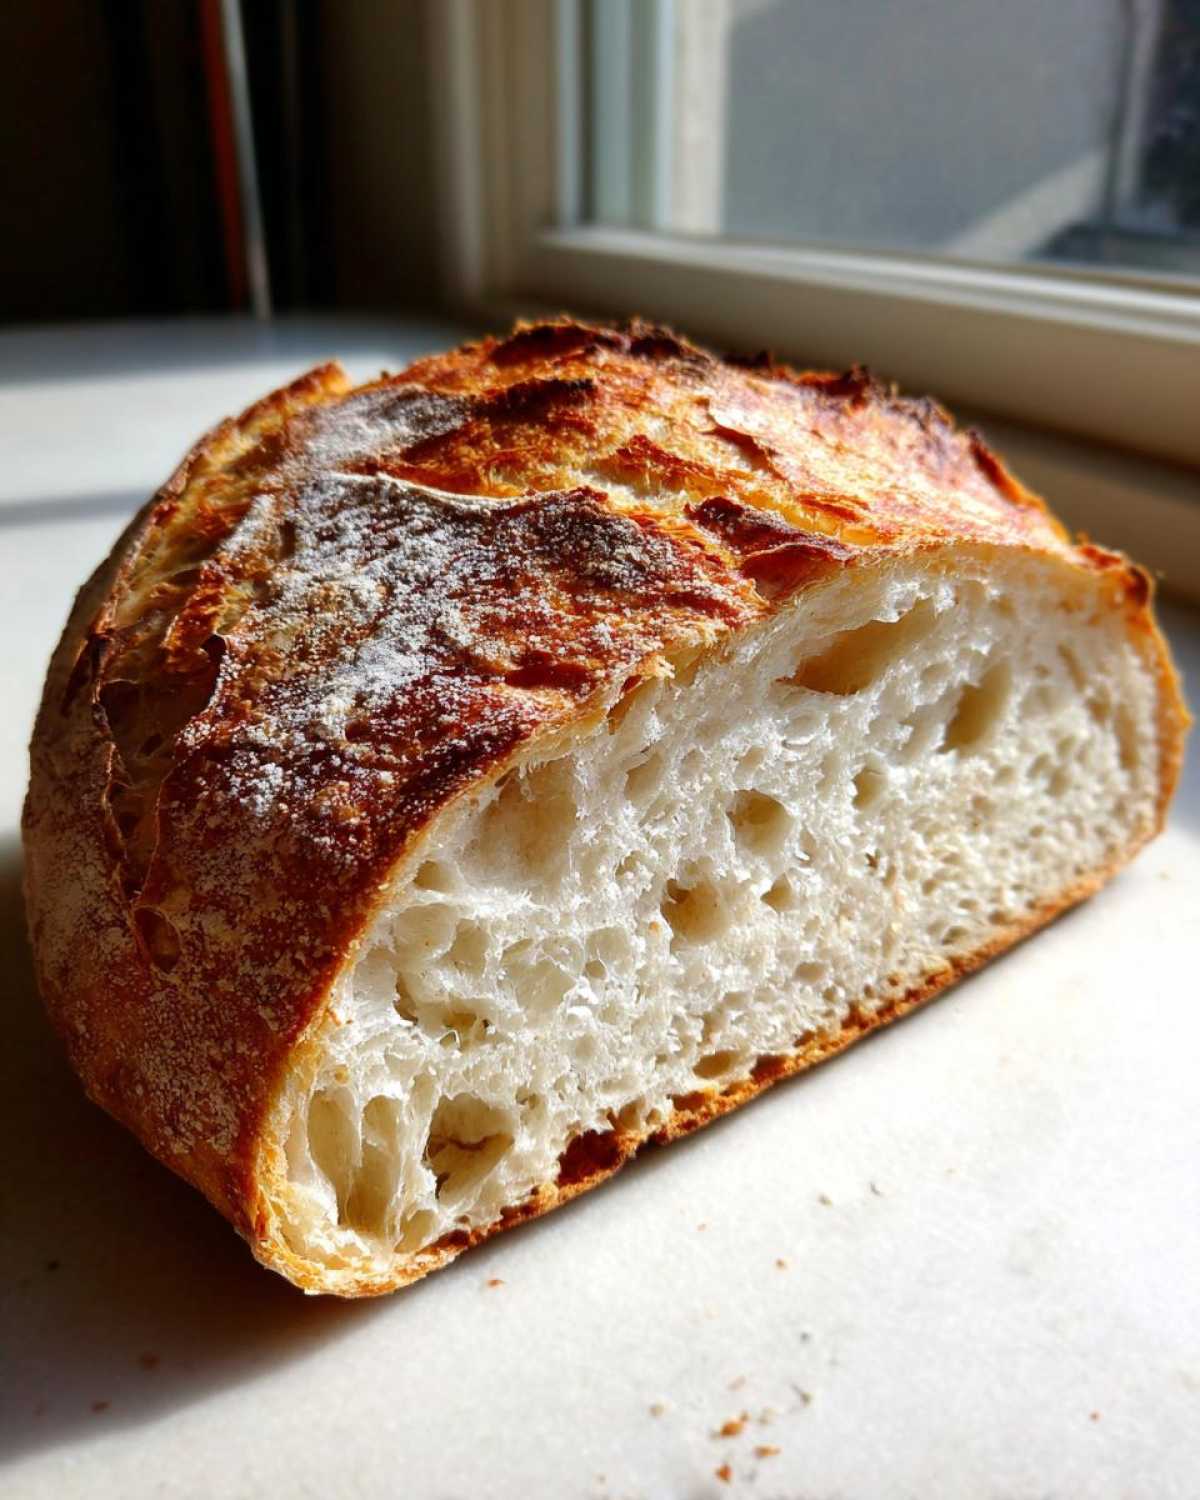
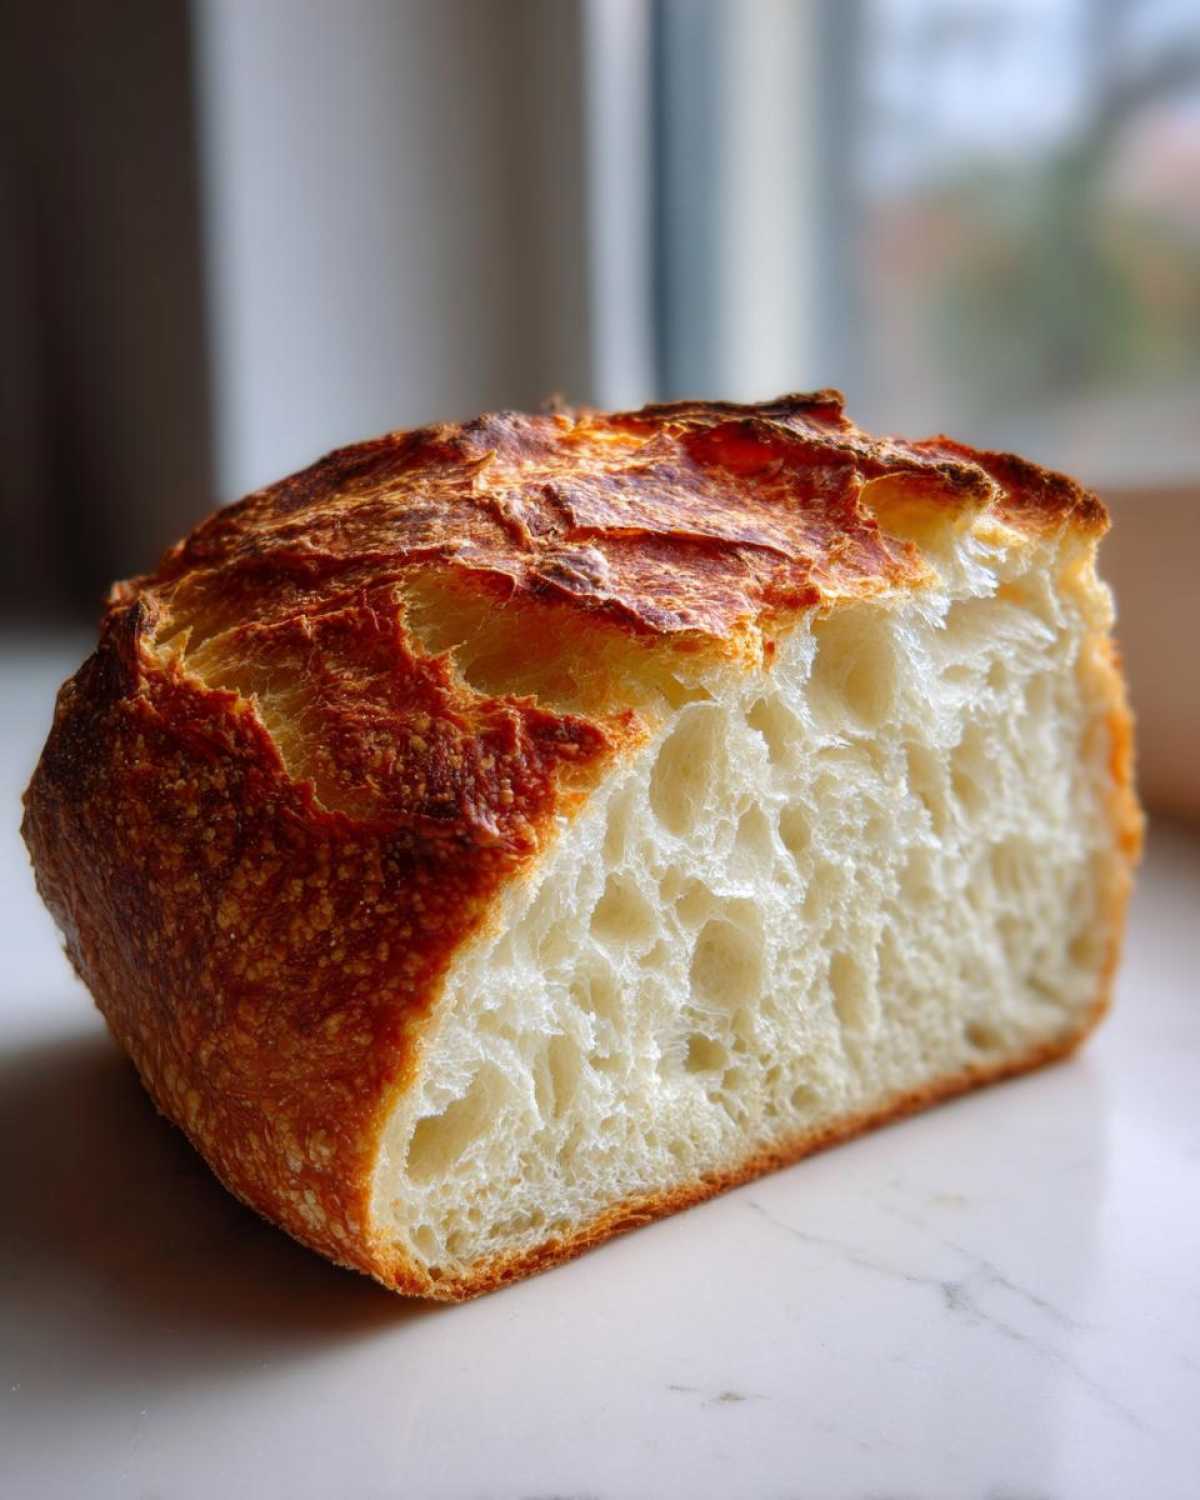
People think ‘crusty’ means ‘dry inside,’ but that’s rarely true with this method. Because the gluten develops slowly during that long, cool rest—that’s the secret to the soft crumb bread texture you crave. The yeast works slowly, creating tiny, consistent gas bubbles without any rough handling from your hands. When you finally bake it enclosed, the internal dough steams itself soft and airy. It’s the best of both worlds: maximum crispy crust outside, cloud-like interior inside. If you’re looking for other slow-fermented favorites, check out my take on Irish Soda Bread—it’s a different approach but relies on great texture too!
Essential Ingredients for Your Artisan Bread
Seriously, doesn’t it feel great that this amazing recipe only calls for four things? No weird dough conditioners needed here! I’ve listed exactly what you need below. Make sure you get the water temperature right—cool water is key, not warm, even though it sounds counterintuitive for a yeast bread recipe easy like this one.
- 3 cups all-purpose flour (just the standard bag from the grocery store works!)
- 1 1/2 teaspoons salt (use regular table salt, nothing fancy needed)
- 1/4 teaspoon instant yeast (Not active dry! Instant is the key for no knead bread.)
- 1 1/2 cups cool water (Straight from the tap is usually perfect.)
That’s it! That’s the start of your incredible homemade loaf bread. It’s so simple it feels like cheating, but trust me, the time does all the work for us simple bread recipes!
Step-by-Step Guide to Making Artisan Bread
Are you ready? Because this is where the magic happens, and I promise, there’s no complicated kneading involved whatsoever! We’re going to follow these steps exactly, and you’ll have a beautiful loaf ready for tomorrow. Remember, with this artisan bread recipe, preparation today means perfect results later.
Mixing and the Long Rest for No Knead Bread
First things first, grab your biggest mixing bowl. Whisk those dry ingredients—the flour, salt, and instant yeast—together really well. Then, pour in the cool water all at once. You’re aiming for a shaggy, messy-looking dough. Don’t even think about kneading it out smooth! Just use a wooden spoon or spatula until you don’t see any more dry flour bits hiding out. It should look rough, like a really sad tennis ball batter.
Now for the crucial part that makes this a true no knead bread success: the rest. Cover that bowl *super* tightly with plastic wrap—you don’t want any air drying out the top layer. Then stick it on your counter, away from strong drafts, and leave it alone for 12 to 18 hours. Seriously, walk away! This long rest is what lets the gluten develop naturally, giving you that amazing texture without breaking your back.
Shaping and Preheating for Dutch Oven Bread
Once your dough has rested and looks bubbly and sticky, dust your clean counter heavily with flour. Gently scrape that gooey mass out onto the flour. Now, you’re not kneading! You’re just gently folding it over itself maybe three or four times—just enough so it looks like a rough, slightly tighter ball. This tightens the surface tension a bit.
Place that dough ball onto a big square of parchment paper—this is your handle for moving it later. Cover it loosely and let it hang out for a quick 30 minutes; that’s the second rest.
While that’s resting, get your oven hotter than the surface of the sun! Place your empty Dutch oven—lid and all—inside your oven. Crank the heat up to 450 degrees Fahrenheit (232 Celsius). You need that cast iron ripping hot for the best crusty homemade bread finish. We are aiming for pure, roaring heat! If you want those extra crispy edges, consider checking out how I build steam in my bread bowl recipe, which uses a similar high-heat trick.
Baking Your Crusty Homemade Bread
Okay, be careful now! Open the oven slowly and use two sets of heavy oven mitts to lift that blazing hot Dutch oven out onto your stovetop. Take the lid off—steam is coming! Now, grab the corners of your parchment paper sling, and gently lower the whole dough blob right into the hot pot. It should sizzle when it hits the bottom!
Put the lid back on right away and slide it back into the oven for 30 minutes. This covered bake is the steam phase—this is what locks in moisture and lets the bread expand fully. After those 30 minutes are up, carefully take the lid off. Now we lose the steam and start building that deep golden-brown color on your finished loaf! Bake it uncovered for another 15 to 20 minutes until it sounds hollow when you knock on the bottom. Once it’s done, use that parchment paper again to lift your beautiful loaf out and immediately put it on a wire rack to cool. Don’t slice it too soon, or you’ll crush that perfect soft crumb bread!
Tips for the Best Artisan Bread Recipe Results
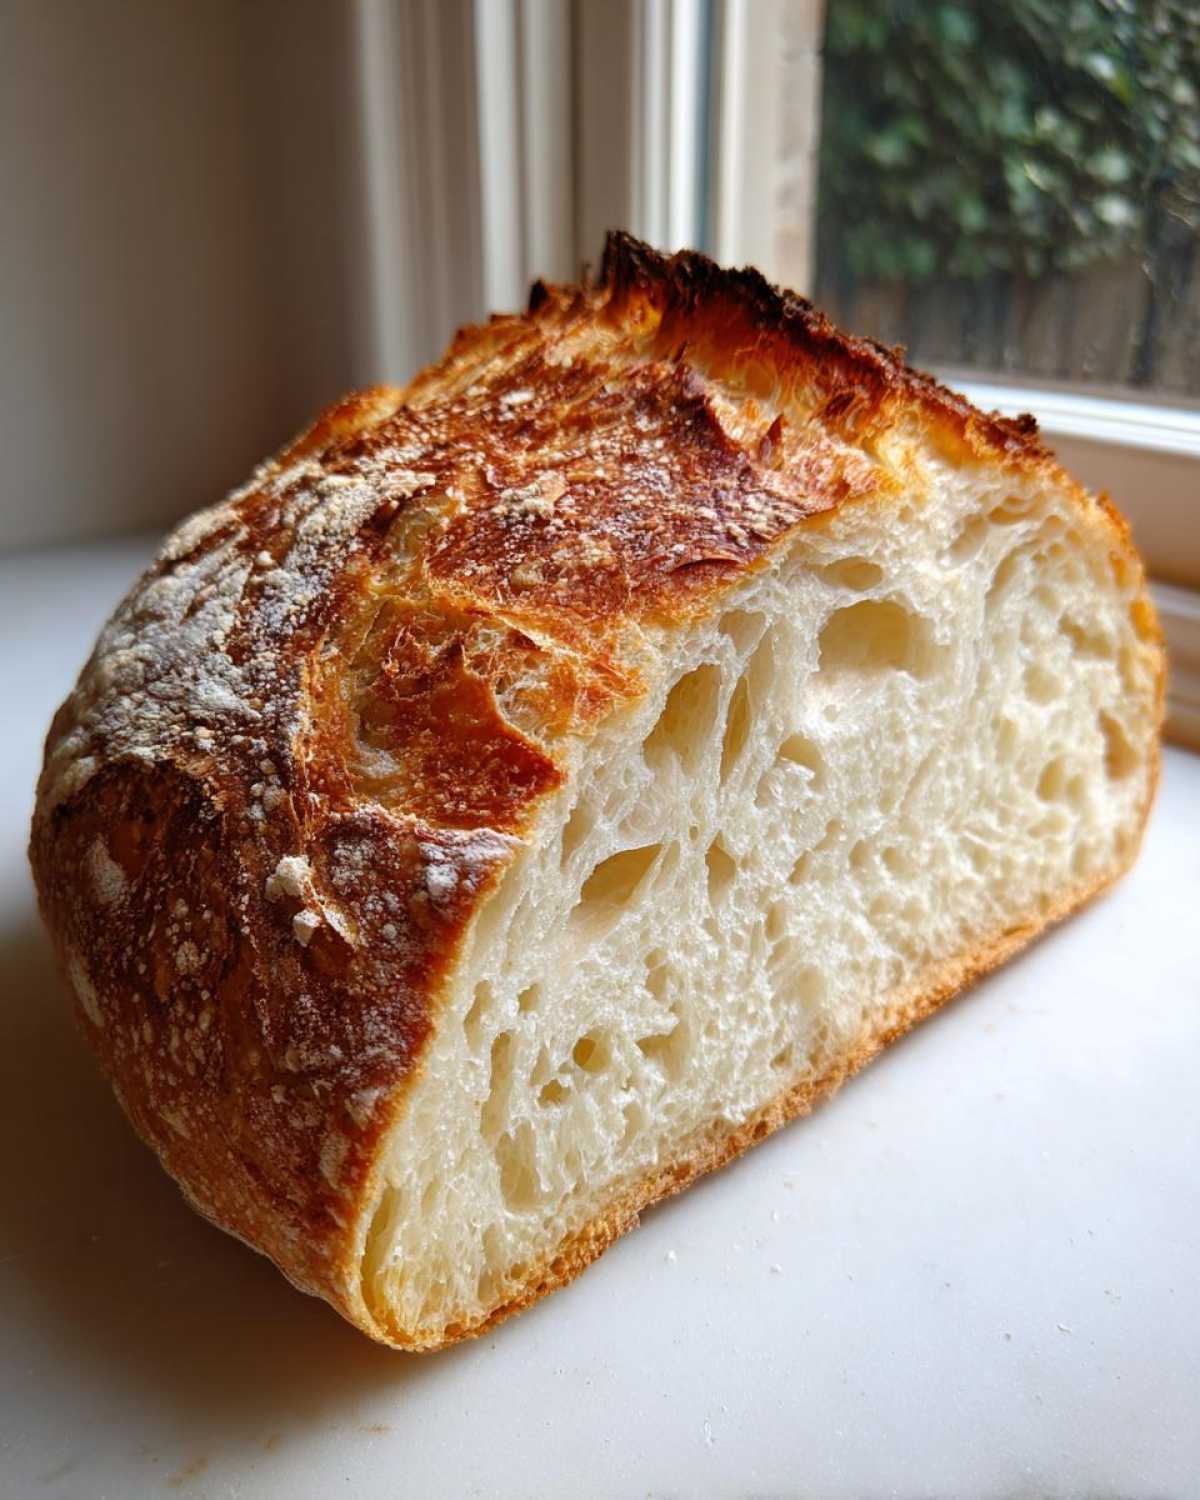
Even though this is called the easy artisan baking method, there are a couple of little secrets that take this rustic bread recipe from ‘good’ to ‘I can’t believe I made this at home’ good. Baking bread with a crispy crust requires you to think about steam, steam, and more steam! My method ensures maximum oven spring and that gorgeous crackly shell you see in bakeries.
The biggest win for achieving that bakery style bread at home is definitely building extra humidity during that first half of the bake in the Dutch oven. If you want a truly shatteringly crisp crust, borrow this trick: while the oven is preheating, toss a shallow metal pan on the bottom rack. The second—and I mean *immediately*—you slide your dough into the hot Dutch oven, carefully pour about a cup of boiling hot water into that bottom pan. Be super careful, that’s going to puff up a huge cloud of steam! That steam keeps the dough exterior soft so it can expand fully, and when it finally dries out, that crust sets hard and crisp. It’s one of my favorite baking bread secrets!
What if your dough spreads too much and looks flat, even after resting? That usually means your dough was a little too wet or maybe you overworked it during that gentle folding step—always err on the side of less folding for a true no knead crusty loaf. Also, make sure you are using instant yeast; active dry yeast needs to be proofed first and changes the whole chemistry slightly. Stick to the cool water, too; warm water wakes up the yeast too fast, weakening the final structure for the soft crumb bread you want.
If you are worried about sticking—and who isn’t when dealing with highly hydrated dough?—don’t skip that parchment paper sling! That paper is your savior. You use it to lower the dough in, and you can even leave it under the loaf for the first 15 minutes of the covered bake, or carefully slide it out just before you remove the lid. Parchment paper makes getting this gorgeous homemade loaf bread out of that super-hot pot a breeze!
Simple Artisan Baking Variations: Flavoring Your Loaf
Once you’ve mastered the base recipe, which happens almost accidentally thanks to that long rest, you can start dipping your toes into those truly amazing artisan bread variations everyone raves about! We’re talking about turning that simple **artisan bread recipe** into something special enough for a dinner party.
The most important rule for adding flavorings—like garlic powder, dried herbs, or sharp cheese—is *when* you add them. Don’t throw cheese or nuts in during the initial mixing phase! They get lost during the 18-hour rest, and the cheese can dry out badly. You want to wait until that very short moment when you scrape the dough gently onto the floured counter for shaping.
This is your window! When you’re doing those few gentle folds—just tightening the dough into a basic ball—that’s when you sprinkle in your goodies. Think of it like giving the dough its final, messy hug. The folding action incorporates the flavors right into the outer layer of the dough, which will end up being the crust and the beautifully textured interior of your **homemade loaf bread**. Try folding in some shredded sharp cheddar or even finely diced sun-dried tomatoes!
Making Rosemary Sea Salt Bread
For a classic, rustic bread experience, rosemary and coarse sea salt are unbeatable. This combination is fantastic on its own or served alongside soup. When you go to gently fold your dough after its long rest, incorporate about two tablespoons of fresh, finely chopped rosemary and a generous sprinkle of flaky sea salt right onto the dough surface.
Fold it in gently, maybe just twice, to keep the structure intact. You want those bright green flecks visible. When this bakes up in the Dutch oven, the rosemary toasts slightly, giving off the best smell—it truly makes you feel like you’re in a Tuscan bakery! If you want a full recipe breakdown just for this, I have a deep dive on my Garlic Parmesan version which uses the same folding technique for inclusions.
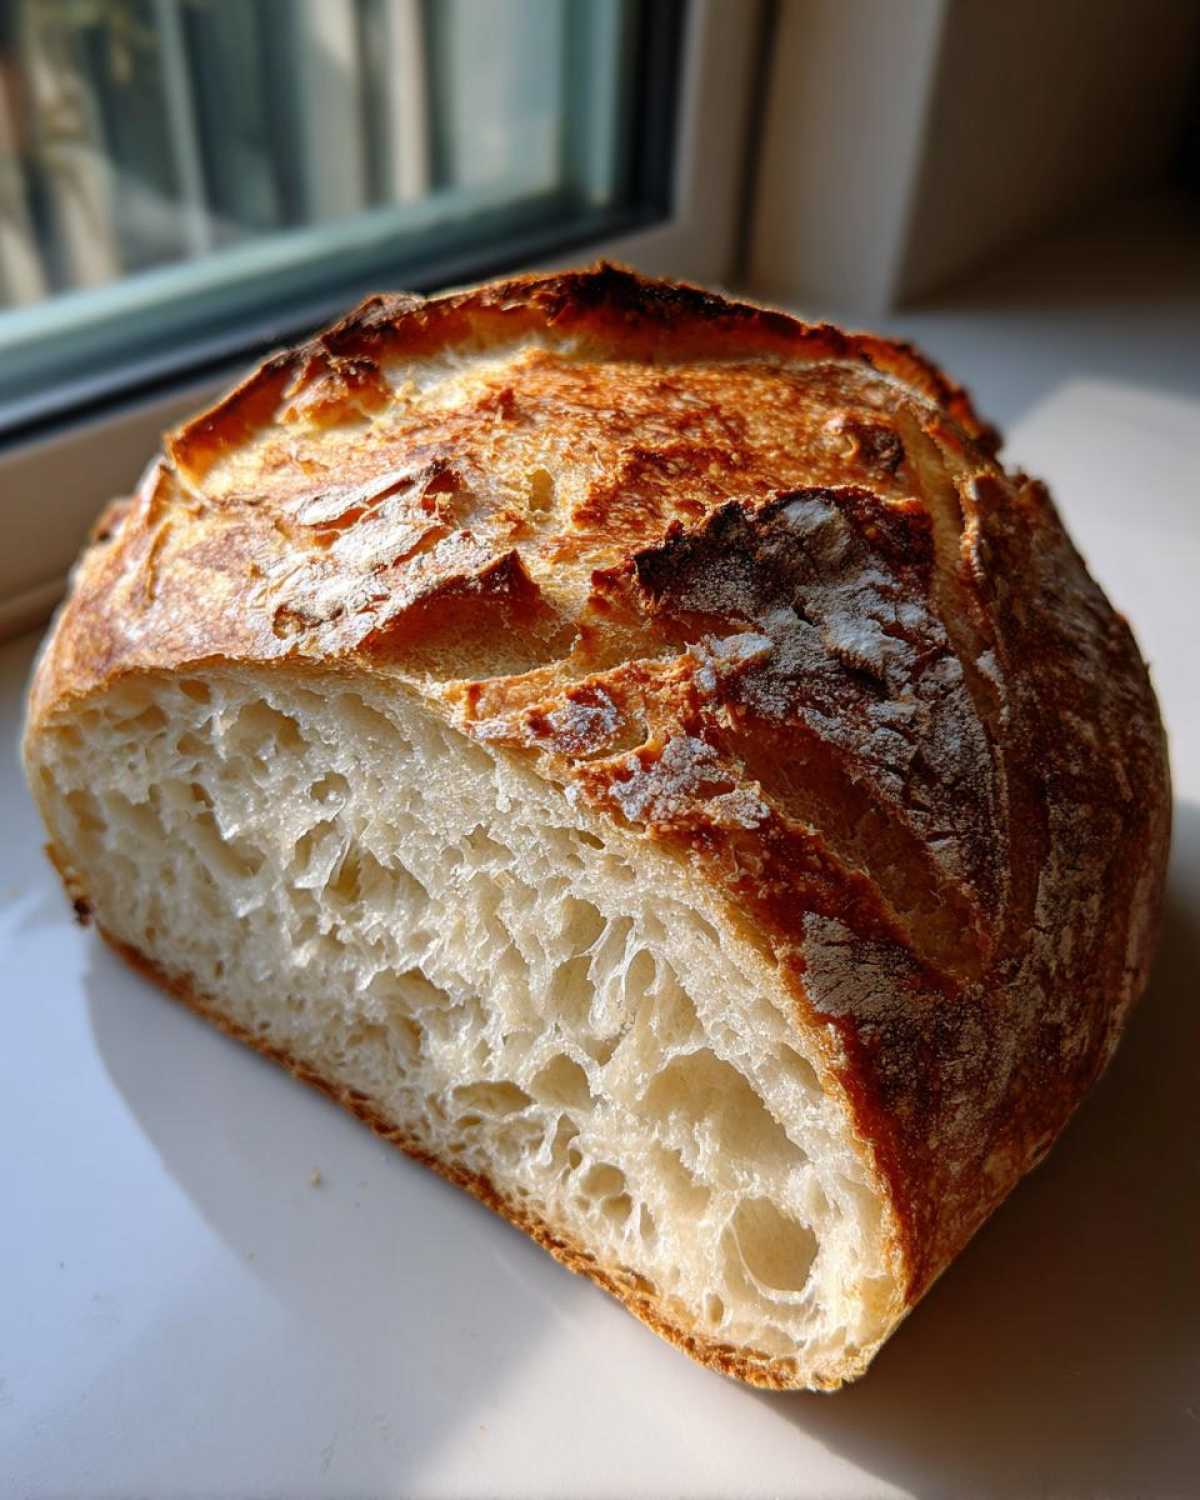
This is how you move from a basic **yeast bread recipe easy** enough for beginners to a truly show-stopping **artisan bread** loaf without ever having to knead!
Storing Your Homemade Loaf Bread
The hardest part about making this perfect **artisan bread** is waiting for it to cool so you can slice it! But once you do, you’ve got to treat it right so that amazing crust lasts past lunchtime. My biggest piece of advice for any **crusty homemade bread** is this: never, ever put it in the refrigerator. Seriously, resist the urge!
The fridge is the absolute enemy of a crisp crust. It pulls all the moisture out of the crust and makes it go soft and leathery within hours. We worked so hard to trap that steam and create that beautiful crackle in the Dutch oven, so we need an air-friendly storage method instead.
For the first day, the absolute best way to store this **no knead crusty loaf** is totally exposed on a wire rack. Yes, the crust might soften a little by the next morning, but that’s normal. It keeps the bottom from getting soggy, which is crucial when you’re dealing with a moist loaf like this one.
If you need to store it longer than 24 hours (which, honestly, shouldn’t happen with a loaf this good!), slice off what you need for the day and put the rest into a plastic bag—only after it has completely cooled, though! Pop the cut side of the loaf against the plastic to seal it, leaving the crust exposed to the air as much as possible. This way, the interior stays soft enough, and you save a bit of that exterior texture.
And here’s a great reheating trick if it *does* get a little soft: toss a slice directly onto a hot griddle for about 30 seconds per side, or wrap a whole loaf loosely in foil and pop it back into a 350-degree oven for about ten minutes. It crisps right back up! That’s how you keep enjoying your **bakery style bread at home** for days!
Frequently Asked Questions About Artisan Bread
I get so many messages asking little things about this recipe, which is wonderful! It’s such a reliable base, but sometimes we need a quick answer to adjust things on the fly. Here are the most common questions I see about getting that perfect **artisan bread** loaf on the table.
What if I don’t have a Dutch oven to bake this in?
Oh, the dreaded lack of cast iron! Don’t panic, you absolutely can still make this **no knead bread** without one. The Dutch oven’s job is trapping steam, right? So, you need to mimic that. Place a very hot, oven-safe baking stone or an upside-down heavy baking sheet on the bottom rack while you preheat the oven. You then bake the **yeast bread recipe easy** dough right on a preheated pizza stone or a regular baking sheet lined with parchment paper. Put a metal pan underneath, just like the steaming trick, and pour water in it right when you put the dough in the oven. It won’t get quite the same massive rise as the Dutch oven version, but it will still be a delicious **crusty homemade bread**!
Is this truly a beginner bread recipe? I’m nervous about yeast!
Yes, yes, and a thousand times yes! This is actually one of the *best* beginner bread recipes out there precisely *because* you don’t have to knead. Most beginner frustration comes from improperly developed gluten when kneading, but here, time does the work for you. If you can whisk four ingredients together and put a bowl on your counter for a day, you can master this **simple bread recipe**. It’s the most forgiving **artisan bread recipe** in my collection!
Can I use active dry yeast instead of instant yeast?
This is a big one! While you can technically substitute it, I strongly recommend sticking to instant yeast, especially when you are first learning this method. The beauty of **no knead bread** is that the yeast works slowly over many hours, and instant yeast is designed to integrate right into the dry ingredients without needing to blossom first. If you *must* use active dry yeast, you should proof it first in about 1/2 cup of the recipe’s water (warmed slightly, maybe to 105°F) with a pinch of sugar. Let it foam for 10 minutes. Then, use that foamy mixture plus the remaining cool water specified in the recipe. It takes extra steps and adds complexity, so for your first time making this **homemade loaf bread**, stick to instant!
Why does my dough look so wet and sticky after the long rest?
That sticky dough is a good sign! It means the **artisan bread** is properly hydrated. Remember, this is a very wet dough, which is what produces that open, airy interior we love in **bakery style bread at home**. Don’t be tempted to add more flour unless you’re actively shaping it on a heavily floured surface. If you add flour during the initial mix, you’ll end up with a heavy, dense loaf instead of the glorious, soft crumb bread texture we are aiming for. Want to see some photos of what my sticky dough looks like before I fold it? I break down the stages of hydration over on my guide to easy yeast bread!
Estimating the Nutrition for This Artisan Bread Recipe
Now, I know some of you are like me—you want that amazing bakery style bread at home, but you’re also keeping half an eye on what’s in it. Since this **artisan bread** recipe is so simple, the nutritional profile is wonderfully clean. You are basically getting flour, water, salt, and a tiny bit of yeast! That’s the beauty of making your own **rustic bread recipe**.
I ran the numbers for a standard slice (assuming you get about 12 slices from the whole loaf). Just remember, this isn’t coming from a lab, so these figures are estimates based on standard all-purpose flour measurements. If you use whole wheat flour instead of white, you’ll see the fiber jump up!
Here is a general breakdown so you can see what you’re working with:
- Serving Size: 1 slice
- Calories: Roughly 200
- Carbohydrates: Around 42g
- Protein: About 7g
- Fat: Very low, around 0.5g (since there’s no added oil or butter!)
- Fiber: About 1.5g
- Sodium: About 350mg (mostly from the salt we added)
- Sugar: Almost zero, maybe 0.5g naturally occurring
See? It’s wonderfully straightforward! When you make your own **no knead crusty loaf**, you control everything. You could easily cut the salt down if you wanted, or bump up the protein by swapping out some of the all-purpose flour for bread flour next time you try this **easy artisan baking** method. Enjoy that guilt-free slice of amazing **crusty homemade bread**!
Share Your Rustic Bread Recipe Success
Wow! If you made it this far, then you are officially ready to join the ranks of **artisan bread** bakers! I’m so excited for you to pull that first gorgeous, crackling **homemade loaf bread** out of your Dutch oven.
I really want to see how yours turned out! Did you get that perfect deep golden color? Did the crust sing when you scored it? Take a picture of your beautiful **rustic bread recipe** creation—I love seeing those airy interiors! You can absolutely share your results with me and say hello over on the contact page right here: Drop Me A Line.
Once you’ve sliced into that wonderful crumb, come back and let me know what you thought! Did this **no knead bread** finally solve your home baking woes? Leave a rating below so other folks just starting out know that this is truly the best way to get **bakery style bread at home**!
PrintNo Knead Dutch Oven Artisan Bread
Make a crusty, bakery-style artisan bread loaf at home using this simple no-knead method in a Dutch oven.
- Prep Time: 10 min
- Cook Time: 50 min
- Total Time: 13 hours 0 min
- Yield: 1 loaf
- Category: Baking
- Method: Baking
- Cuisine: American
- Diet: Vegetarian
Ingredients
- 3 cups all-purpose flour
- 1 1/2 teaspoons salt
- 1/4 teaspoon instant yeast
- 1 1/2 cups cool water
Instructions
- In a large bowl, whisk together the flour, salt, and yeast.
- Pour in the cool water and mix with a wooden spoon until just combined into a shaggy dough. Do not overmix.
- Cover the bowl tightly with plastic wrap. Let the dough rest at room temperature for 12 to 18 hours.
- After resting, lightly flour a work surface. Scrape the dough out onto the surface. Gently fold the dough over itself a few times to form a rough ball.
- Place the dough ball on a piece of parchment paper. Cover loosely with plastic wrap or a clean kitchen towel. Let it rest for 30 minutes.
- About 20 minutes before the second rest ends, place your empty Dutch oven (with the lid on) into your oven. Preheat the oven to 450 degrees Fahrenheit (232 degrees Celsius).
- Carefully remove the hot Dutch oven from the oven using oven mitts. Remove the lid.
- Using the parchment paper as a sling, gently lower the dough into the hot Dutch oven.
- Cover the Dutch oven with the lid and place it back into the oven. Bake for 30 minutes.
- Remove the lid and continue baking for another 15 to 20 minutes, or until the crust is deep golden brown.
- Carefully remove the bread from the Dutch oven and place it on a wire rack to cool completely before slicing.
Notes
- For a crispier crust, you can place a metal pan on the bottom rack during preheating and pour 1 cup of hot water into it immediately after placing the bread in the oven to create steam.
- If you prefer a softer crust, remove the bread from the Dutch oven for the last 15 minutes of baking.
- This recipe works best with cool tap water, not warm water.
Nutrition
- Serving Size: 1 slice
- Calories: 200
- Sugar: 0.5
- Sodium: 350
- Fat: 0.5
- Saturated Fat: 0.1
- Unsaturated Fat: 0.4
- Trans Fat: 0
- Carbohydrates: 42
- Fiber: 1.5
- Protein: 7
- Cholesterol: 0