

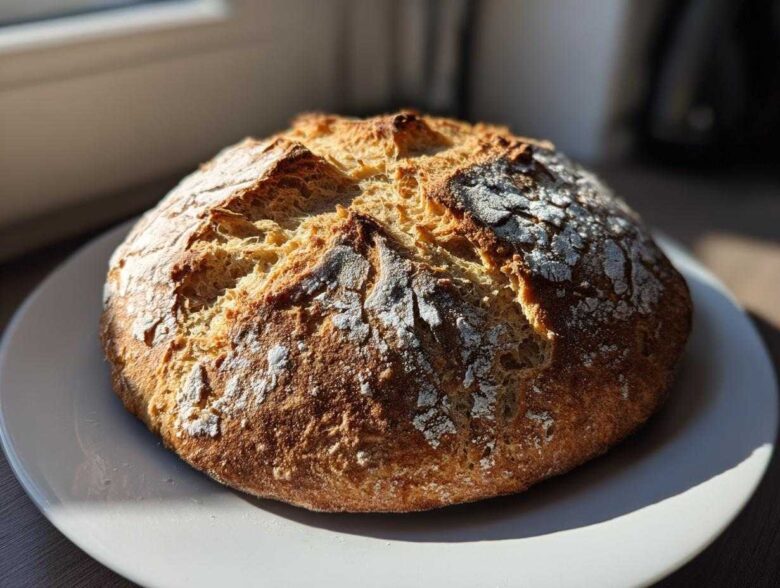
If you think baking is a whole-day project involving complicated starter feeds and hours of rising time, I’m here to change your mind! I first learned to make real, honest-to-goodness soda bread when I visited Ireland years ago, and I was shocked at how easy it was. Seriously, it’s just flour, salt, baking soda, and buttermilk. That’s it! This recipe is my go-to when I need a beautiful, rustic loaf on the table in under an hour, yeast shame-free. You don’t need any fancy equipment, either. Trust me, this simple version delivers that incredible, slightly tangy flavor and a wonderfully tender crumb that pairs perfectly with a slab of good butter. It’s tradition baked fast, and I promise you’ll feel like a baking champion after the first try. Check out my guide here on why we love traditional baking.
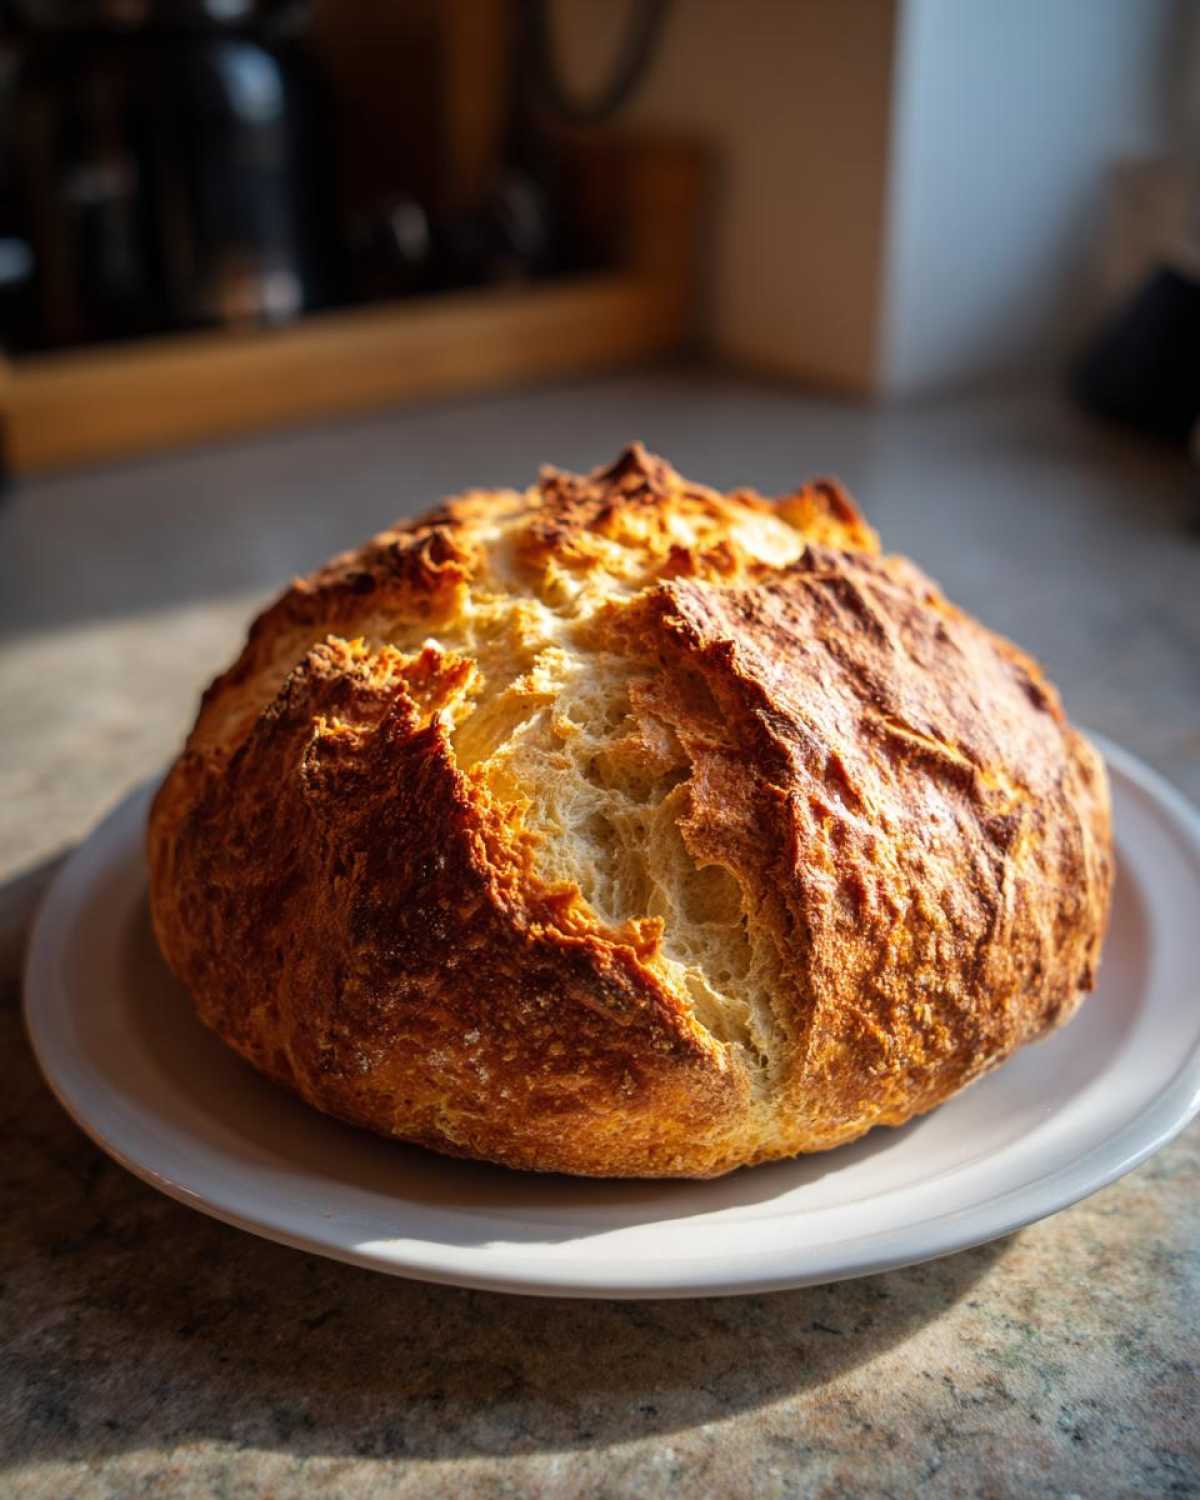
Why This Easy Traditional Irish Soda Bread Recipe Works (Expert Tips)
Forget everything you think you know about bread making. This method for soda bread is quick, powerful, and practically foolproof because we skip the yeast drama altogether. It’s perfect for beginners, and honestly, it’s usually faster than waiting for the oven to preheat!
- No rising time needed! We rely on the chemical reaction between the baking soda and the buttermilk, not yeast, to give this loaf its lift.
- Speed is your friend here. We mix this dough for seconds, not minutes. Why? Because overmixing develops gluten, and gluten makes quick breads tough. Nobody wants tough bread!
- The short bake time means you get that authentic, rustic crust without drying out the interior.
The Science Behind Perfect Soda Bread Crumb
The magic relies on chemistry, which is way cooler than waiting around for dough to double. When the acidic buttermilk hits the baking soda—that’s sodium bicarbonate—it immediately releases carbon dioxide gas. These tiny gas bubbles get trapped in the flour matrix as you mix it gently.
That trapped gas expands rapidly in the heat of the oven, giving your loaf that characteristic rise and tender, cake-like crumb. If you let the wet and dry ingredients sit around too long mixing, all that lovely fizz just escapes. That’s why speed matters so much with this type of quick bread!
Gathering Your Ingredients for Authentic Soda Bread
The beauty of this recipe is how short the ingredient list is! It feels almost impossible that four simple things can create such a wonderful, rustic loaf. When you are gathering your items, make sure they are measured correctly, because with so few players on the field, every single one matters.
For this base recipe, you just need four things:
- 4 cups all-purpose flour – Make sure it’s fresh, not the dusty stuff hiding in the back of the pantry!
- 1 teaspoon baking soda – This is your lift, so it needs to be active.
- 1 teaspoon salt – Just standard table salt works perfectly for seasoning.
- 1 3/4 cups buttermilk – This is non-negotiable unless you’re using my little trick (which I’ll tell you about right after the instructions!).
Now, for my favorite subtle depth upgrade—and this is a secret I only share with folks who appreciate the effort! If you want a richer flavor reminiscent of darker loaves, you can swap out about 1/4 cup of that buttermilk for molasses. It adds a beautiful, dark hue and a whisper of earthiness that complements the slight tang of the milk. Don’t do it if you want the absolute purest Irish taste, but wow, it’s good for chilly evenings!
Step-by-Step Instructions: How to Make Soda Bread Quickly
Okay, let’s get this beautiful loaf into the oven! Since there is no yeast involved, the timing here is all about heat preparation. Make sure your oven is fully preheated to 400°F (200°C) first, and have your baking sheet ready—I usually dust mine lightly with flour, but if you wanna be extra safe, use parchment paper.
Here is the order of operations. Remember, we move fast once the wet hits the dry!
- Get your oven hot, like I just mentioned! And prep that baking surface.
- In a big bowl, quickly whisk your flour, baking soda, and salt together. This is your dry team, and they must be perfectly acquainted before the next step.
- Make a nice little crater, or a well, right in the center of those dry ingredients. Now, pour in ALL of that buttermilk at once. Don’t drip it in slowly!
- Here comes the quick part for your soda bread: Mix it with a wooden spoon or just your hand until everything is barely coming together. It will look shaggy and sticky. Stop stirring the instant you don’t see any dry flour streaks left.
Next, we move to the counter for shaping. We just need a light dusting of flour because we want this dough sticky, not dense!
Mixing the Dough: The Key to Tender Soda Bread
I cannot stress this enough: Do not fuss with the dough! If you start kneading it like yeasted bread, you are going to develop gluten. Gluten means chewiness, and for traditional soda bread, chewiness is the enemy. We want tender, almost biscuit-like softness.
What does “just combined” look like? It looks messy! You should have a soft, slightly sticky mass. If you see pockets of dry flour at the bottom of the bowl, gently fold the dough over itself until those pockets disappear. Seriously, stop mixing the second the dry flour is gone. A few sticky spots are fine; they bake out!
Shaping and Scoring Your Rustic Loaf Recipe
Tip that sticky dough onto your lightly floured workspace. Very gently, using floured hands, pat and coax the dough into a round shape. Don’t squeeze it or punch it down hard! We’re aiming for about an inch and a half thick. Think rustic, not perfect.
Once it’s on the baking sheet, you need to score it. Take a sharp knife and cut a deep cross right through the top. This isn’t just for looks, although it looks fantastic! Cutting the cross traditionally lets the heat penetrate the dense center of your rustic loaf recipe, ensuring the middle cooks all the way through without the edges burning to a crisp.
Bake this beauty for 30 to 40 minutes. You’ll know it’s done when the crust is a deep, handsome brown and if you tap the bottom, it sounds totally hollow. Let it cool on a wire rack; that prevents the bottom from getting sweaty!
If you want to see how I use this base dough to make my favorite cheesy version, check out my latest post over here on my recipe blog!
Tips for Achieving the Best Crust on Your Soda Bread
Listen, I love the soft interior of this bread, but you need that exterior crunch, right? That crust has to snap when you pull it apart! A lot of folks just use a cold baking sheet, but that won’t cut it if you want a truly professional finish on your soda bread.
My absolute favorite trick for maximizing that gorgeous exterior texture is preheating the surface you bake it on. You want the initial blast of heat hitting the base of the dough. I use a heavy cast-iron skillet, which I place in the oven while it preheats.
When the dough is ready, I carefully slide it right onto that scorching hot skillet. The shock of the heat instantly sets the base and gives you that desirable crispy, sturdy bottom. If you don’t have cast iron, a pizza stone works wonderfully too, as long as it’s getting piping hot in the oven before the bread goes in. This one little step elevates your quick bread from good to absolutely fantastic!
Ingredient Substitutions for Your Buttermilk Bread Recipe
Okay, let’s address the elephant in the kitchen: what happens when the recipe calls for buttermilk, and your fridge is sadly empty? Don’t panic, seriously! You absolutely do not need to run to the store, because making a substitute is faster than calling a neighbor.
This recipe relies on buttermilk’s acidity to activate that baking soda, so we just have to mimic that effect with regular milk. This is a lifesaver when you’re trying to make this buttermilk bread recipe up on a whim.
Here is my go-to method for making a fast ’sour milk’ standby. It takes about five minutes, but you have to let it sit, so you can mix your dry ingredients while you wait for the magic to happen!
Grab 1 3/4 cups of regular whole milk—or 2% if that’s all you have. To that milk, add exactly one tablespoon of white vinegar, or if you prefer using citrus, one tablespoon of fresh lemon juice works a treat.
Give that just a quick stir and then leave it alone on the counter undisturbed for about five minutes. Don’t touch it! When you go back, you’ll see it has curdled just slightly. It won’t look exactly like thick store-bought buttermilk, but it will have just enough acidity to do the job.
Once it looks slightly thickened and a little chunky, it’s ready to use exactly as the recipe calls for, poured right into the dry ingredients. See? No stress! This simple trick ensures you can whip up this dough whenever the craving hits, no matter what’s in your dairy drawer.
Serving Suggestions for This Quick Dinner Side Bread
Look, sometimes you don’t want bread that takes hours; you just want something delicious and hearty ready at the same time as dinner. That’s where this soda bread shines brightest! Because it’s slightly dense and unbelievably satisfying, it’s the perfect foil for anything wet or savory happening on your plate.
My absolute favorite, the classic way, is just to slice a warm piece—and I mean really warm, straight from the cooling rack if you’re brave—and slather it with really good, cold salted butter. The butter melts right into those nooks and crannies. You can’t beat that simple combination!
But if you’re having soup or stew, you need a serious dunker. This bread holds up wonderfully. It soaks up every last drop of beef stew broth or creamy tomato soup without immediately turning to mush. It’s sturdy! Try serving big chunks alongside my creamy chicken Caesar pasta salad if you need a savory counterpoint to a lighter meal, too. It’s versatile, which I love in a weeknight side!
Storing Your Homemade Soda Bread for Freshness
I know most of this bread gets eaten the day it comes out of the oven—and honestly, I don’t blame anyone! It’s hard to stop slicing into that warm, rustic crust. However, if you happen to show restraint and have leftovers, storage is important because, well, it’s a quick bread without preservatives.
The main thing to remember is that this bread likes to be kept at room temperature. Don’t even think about sticking it in the fridge! Refrigerating breads like this actually makes them go stale faster because the cold messes with the starch structure. Yuck.
My personal rule is to wrap it snugly in plastic wrap once it has cooled completely. If you have a lot left, you can use a reusable bread bag, but make sure the seal is tight. Stored this way, it should stay perfectly fresh and tender for about two to three days. It really depends on how humid your kitchen is, but usually, it holds up like a charm.
Now, how do you bring it back to life? Because we don’t want sad, room-temperature bread when we get around to the last piece. Reheating is key, and it’s so easy!
If you want that “fresh out of the oven” snap back, you can pop the slice right into a toaster oven for just a minute or two. See how the crust gets crisp again? Fantastic!
If you have a bigger chunk you want to revive, wrap that piece loosely in aluminum foil—don’t seal it tight—and place it in a 300-degree oven for about 8 to 10 minutes. The foil traps just enough moisture to steam the interior soft while the heat crisps the exterior back up. When you pull it out, slice it open immediately and add your butter. It tastes almost exactly like it did when it first came out of the loaf pan. Easy peasy preservation!
Frequently Asked Questions About Making Soda Bread
I know after trying a new staple recipe like this, a few questions always pop up. That’s totally normal! I’ve put together the most common ones I get, especially since this is such a stellar example of no yeast bread baking, which can feel a little different than standard loaves.
Can I add cheese and herbs to this traditional soda bread?
Oh, absolutely! While this base recipe is pure, traditional Irish goodness, this dough is just begging for savory additions. If you want to make a beautiful Cheddar herb bread, I suggest you add about 1 cup of sharp shredded cheese and a tablespoon of fresh chopped rosemary or thyme right at the very end of your mixing process. Since the cheese adds saltiness, I usually cut the required salt from the main recipe down to just 1/2 teaspoon. Just fold them in quickly with your hands until they are evenly distributed, remembering not to overwork it!
How long does it take to bake the soda bread?
That’s the best part about using chemical leaveners instead of yeast! This is a quick turnaround loaf. You need to bake your Irish Soda Bread recipe at a hot 400 degrees Fahrenheit. Generally, it takes about 30 to 40 minutes total. If you’re worried about the inside, remember the hollow-thump test—that’s the real indicator your quick bread is done and ready to enjoy!
If you have any other questions after you try it, please feel free to reach out to me on my contact page. Happy baking!
Nutritional Estimates for Your Rustic Loaf Recipe
I always get asked about the nutrition when people realize how simple this bread is. It’s comforting to know you aren’t loading up on fats or sugars just to get a decent loaf on the table! I’ve done some rough calculations based on the four core ingredients—flour, baking soda, salt, and buttermilk—for a standard slice.
Please keep in mind these figures are just close estimates! Since you aren’t using any added sugar or tons of butter like in, say, a heavy pound cake, the numbers are quite modest. These are purely based on the recipe as written, without any molasses or cheese additions.
Here’s what you can generally expect per serving (one slice):
- Serving Size: 1 slice
- Calories: 220
- Sugar: 2 grams (That’s natural milk sugar, not added junk!)
- Sodium: 350 mg
- Fat: 1 gram (Mostly trace amounts from the buttermilk)
- Protein: 7 grams
- Carbohydrates: 47 grams
See? It’s honestly one of the easiest and cleanest breads you can bake. It’s naturally vegetarian, too! If you’re ever curious about how I calculate these numbers for my other recipes, you can check out my transparency notes over on the disclaimer page. It’s all about sharing good, honest food!
Share Your Simple Baking for Beginners Success
And there you have it! You’ve just mastered the art of making genuine, rustic Irish Soda Bread right in your own kitchen. Didn’t that feel amazing? I truly hope you enjoyed how straightforward this recipe was. For me, seeing comments and photos from people who thought they couldn’t bake bread but nailed this recipe is the absolute best part of running this site!
So please, if you tried this, don’t be shy! Head down below and leave a star rating. Every rating helps other folks who are looking for a dependable, simple baking for beginners recipe feel more confident trying it out. Did yours turn out crumbly and light? Did you use cream instead of buttermilk? I want to hear all the details!
And if you snapped a picture of your golden, cross-scored loaf sitting next to a steaming bowl of stew, I would love, love, love to see it! Tag me on social media or just drop a line in the comments. Showing off your success is totally encouraged around here.
Before you rush off to slice into that fresh loaf, please take a moment to look over my site terms if you are planning on sharing any variations you develop. Happy baking, friends. I already can’t wait to hear how much butter you used on that first slice!
PrintEasy Traditional Irish Soda Bread Recipe

Make a simple, rustic loaf of Irish soda bread using just four main ingredients. This quick bread requires no yeast and is perfect for beginners.
- Prep Time: 10 min
- Cook Time: 35 min
- Total Time: 45 min
- Yield: 1 loaf (about 8 servings)
- Category: Bread
- Method: Baking
- Cuisine: Irish
- Diet: Vegetarian
Ingredients
- 4 cups all-purpose flour
- 1 teaspoon baking soda
- 1 teaspoon salt
- 1 3/4 cups buttermilk
Instructions
- Preheat your oven to 400 degrees Fahrenheit (200 degrees Celsius). Lightly flour a baking sheet.
- In a large bowl, whisk together the flour, baking soda, and salt.
- Make a well in the center of the dry ingredients. Pour in the buttermilk all at once.
- Mix the ingredients quickly with a wooden spoon or your hands until just combined into a soft, slightly sticky dough. Do not overmix.
- Turn the dough out onto a lightly floured surface. Gently shape it into a round loaf, about 1 1/2 inches thick.
- Place the loaf on the prepared baking sheet. Cut a deep cross into the top of the loaf, cutting almost to the bottom.
- Bake for 30 to 40 minutes, or until the crust is deep golden brown and the loaf sounds hollow when tapped on the bottom.
- Transfer the bread to a wire rack to cool completely before slicing.
Notes
- For a richer flavor, substitute 1/4 cup of the buttermilk with molasses.
- If you do not have buttermilk, mix 1 3/4 cups of regular milk with 1 tablespoon of white vinegar or lemon juice and let it sit for 5 minutes before using.
- A crispier crust results from baking on a preheated baking stone or cast-iron skillet.
Nutrition
- Serving Size: 1 slice
- Calories: 220
- Sugar: 2
- Sodium: 350
- Fat: 1
- Saturated Fat: 0.5
- Unsaturated Fat: 0.5
- Trans Fat: 0
- Carbohydrates: 47
- Fiber: 2
- Protein: 7
- Cholesterol: 5