

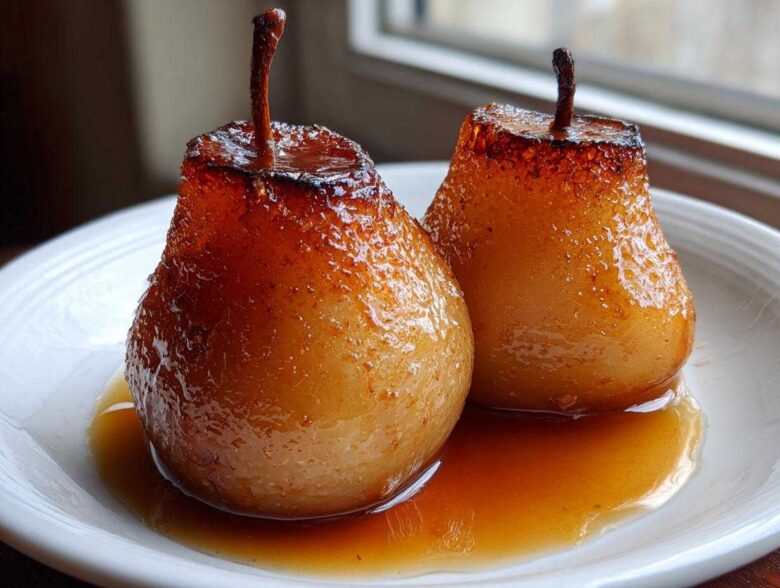
When I want to really impress guests without spending all day tethered to the stove, I reach for my favorite trick: poached pears. Honestly, they look like something plucked from a fancy French pastry shop, but trust me, they are ridiculously easy to make! I remember serving these Vanilla Bourbon Pears at a small dinner party last fall—everyone asked if I bought them. The aroma of vanilla and warm bourbon filling the kitchen felt so cozy and sophisticated all at once. This recipe is truly the gold standard for a simple yet stunning fruit dessert. It’s all about tender fruit swimming in a homemade sweet syrup, and it proves that elegant doesn’t mean complicated! If you love fuss-free elegance, you absolutely have to check out my recipe for strawberry shortcake too, but right now, let’s focus on these lovely pears.
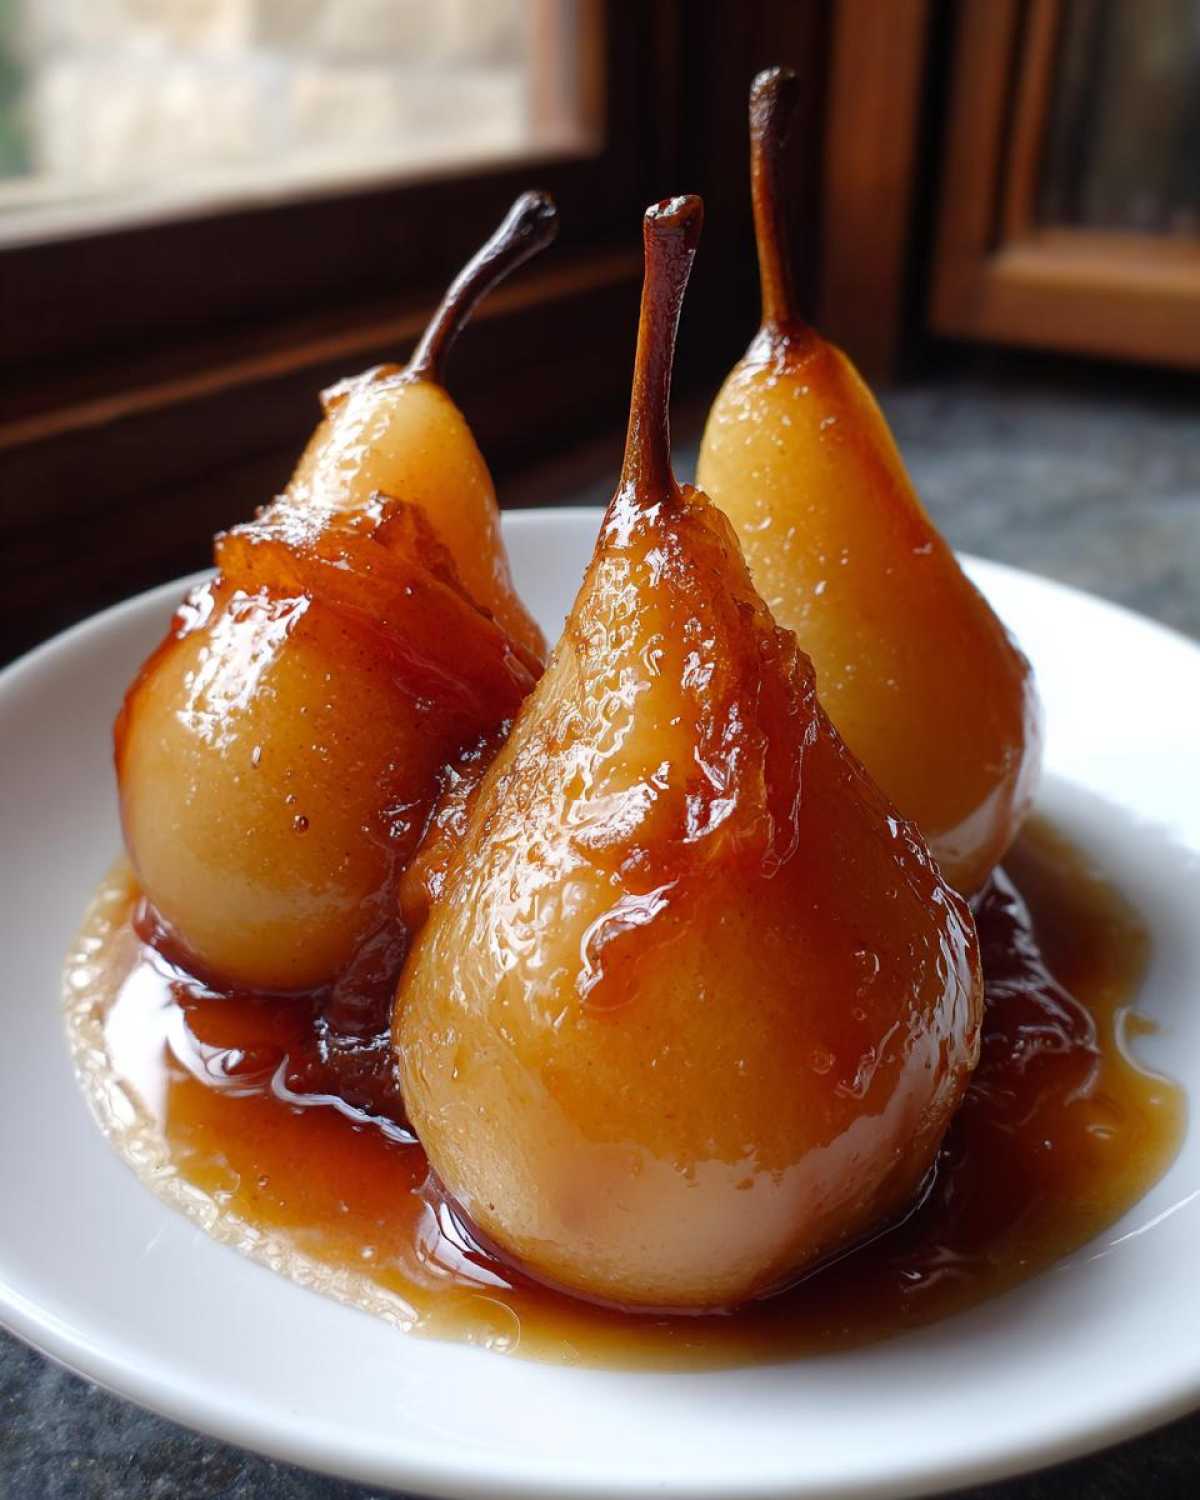
Why You Will Love This Easy Poached Pears Recipe
I know you’re busy, so I wanted to lay out exactly why I think this particular Poached Pears Recipe should become your new go-to dessert for dinner parties. It ticks all the boxes without requiring any fussy pastry skills!
- Unbelievably Tender Texture: When done right, the pears just melt in your mouth. We aren’t left with crunchy, half-cooked fruit; we get pure, buttery softness, thanks to that gentle simmer.
- Complex, Grown-Up Flavor: The bourbon really elevates things, deepening the sweetness of the sugar and pairing beautifully with that scraped vanilla bean. It smells incredible while it’s simmering!
- It Whispers Elegance: Seriously, who needs a complex layered cake when you can serve one of these beauties glistening under its own syrup? It’s instant “Gourmet Dessert Idea” status, but you did the work yourself.
- Perfect Make Ahead Dessert: This is my favorite part! You can totally make these on Tuesday and serve them all weekend. They taste even better the next day. Check out my guide to make ahead desserts for more tips on prepping in advance.
- Adjustable Sweetness: Since you control the sugar in the poaching liquid, you can easily dial it down if you plan on serving it with super sweet toppings like thick caramel sauce.
Essential Ingredients for Perfect Poached Pears
When we talk about making a really stunning dish like this, you absolutely have to start with the right foundation. For my Vanilla Bourbon Pears, the integrity of the pear itself is everything. You can’t use those soft pears you’d grab for a quick snack; they’ll turn to mush on the stovetop! We need something firm that can stand up to the gentle simmering process.
Here’s what you need to gather. Don’t skimp on the vanilla bean—it makes such a huge difference compared to just using extract for these poached pears.
- 4 firm pears (Bosc or Anjou recommended)
- 4 cups water
- 1 cup granulated sugar
- 1 vanilla bean, split and scraped
- 1/2 cup bourbon
- 1 lemon, halved
If you are looking for other great fall flavors to pair with fruit, you might want to check out my recipe for apple cider caramels; that spice combination is next level!
Ingredient Notes and Substitution Tips for Poached Pears
Let’s talk pear choices because this is where people sometimes go wrong. You want Bosc or Anjou pears; they hold their shape beautifully. If you use something like Bartlett too early, they’ll just dissolve into your beautiful poaching liquid, and nobody wants just sugar soup!
The lemon halves are non-negotiable, too. They don’t really flavor the syrup much, but the acidity keeps your pale pears from oxidizing and turning dull brown while they cook. We want them to stay gorgeous! Now, I love the kick the bourbon gives—it evaporates nicely, leaving behind just warmth and depth. But if you are cooking for kids or just don’t want the alcohol, you can easily substitute that 1/2 cup of bourbon with equal parts dry white wine or even some good quality apple juice for a milder flavor.
How to Prepare Tender Poached Pears Step-by-Step
Okay, time to get cooking! This is the easiest part, but you need to treat those pears gently. We are aiming for tender poached pears, not pear mush that tastes like sweet water, so pay attention to how low you keep that heat. I always grab my sharpest paring knife for the first step here. If you want to see this entire process broken down again, I have written a whole guide on how to poach pears, but let’s do this version now!
- First things first: Peel those pears all the way down, but leave those lovely little stems attached if you can! Then, flip them over and use a melon baller or a very small spoon to gently scoop out the core from the bottom. Don’t slice them in half; we want them whole for presentation.
- Grab your biggest, most attractive saucepan—the one that fits the pears standing upright snugly. Dump in the water, sugar, the scraped vanilla bean seeds and the pod itself, and of course, that glorious bourbon. Heat this over medium heat, stirring until you can’t feel any grit anymore and the sugar dissolves completely.
- Once that liquid is shimmering, carefully nestle your prepared pears right in there. If you are worried about them losing their color, toss in those lemon halves we talked about; they act like a little color guard!
- Now, this is the most important bit for texture! You need to reduce the heat way, way down until it is just barely simmering—we shouldn’t see raging bubbles. If you have parchment paper, cut a circle just slightly smaller than your pot lid and place it directly on top of the liquid. This is called a cartouche, and it keeps the pear tops submerged so they poach evenly.
- Let them simmer quietly for about 20 to 35 minutes. They take longer if they were super firm when you started. You test them by poking the thickest part with a thin skewer. If it slides in with barely any fight, you’re golden.
- Gently pull the pears out and set them aside someplace warm (maybe loosely covered with foil).
- Next up is the syrup! Turn the heat up under the pot and boil that leftover liquid down hard for about 10 or 15 minutes until it thickens up a bit. Then, fish out the lemon and the vanilla pod.
- Finally, place your pears on serving dishes and spoon that intensely flavored, wonderful syrup right over the top. Serve them warm or pop them in the fridge to chill out.
Tips for Achieving Perfectly Poached Pears Texture
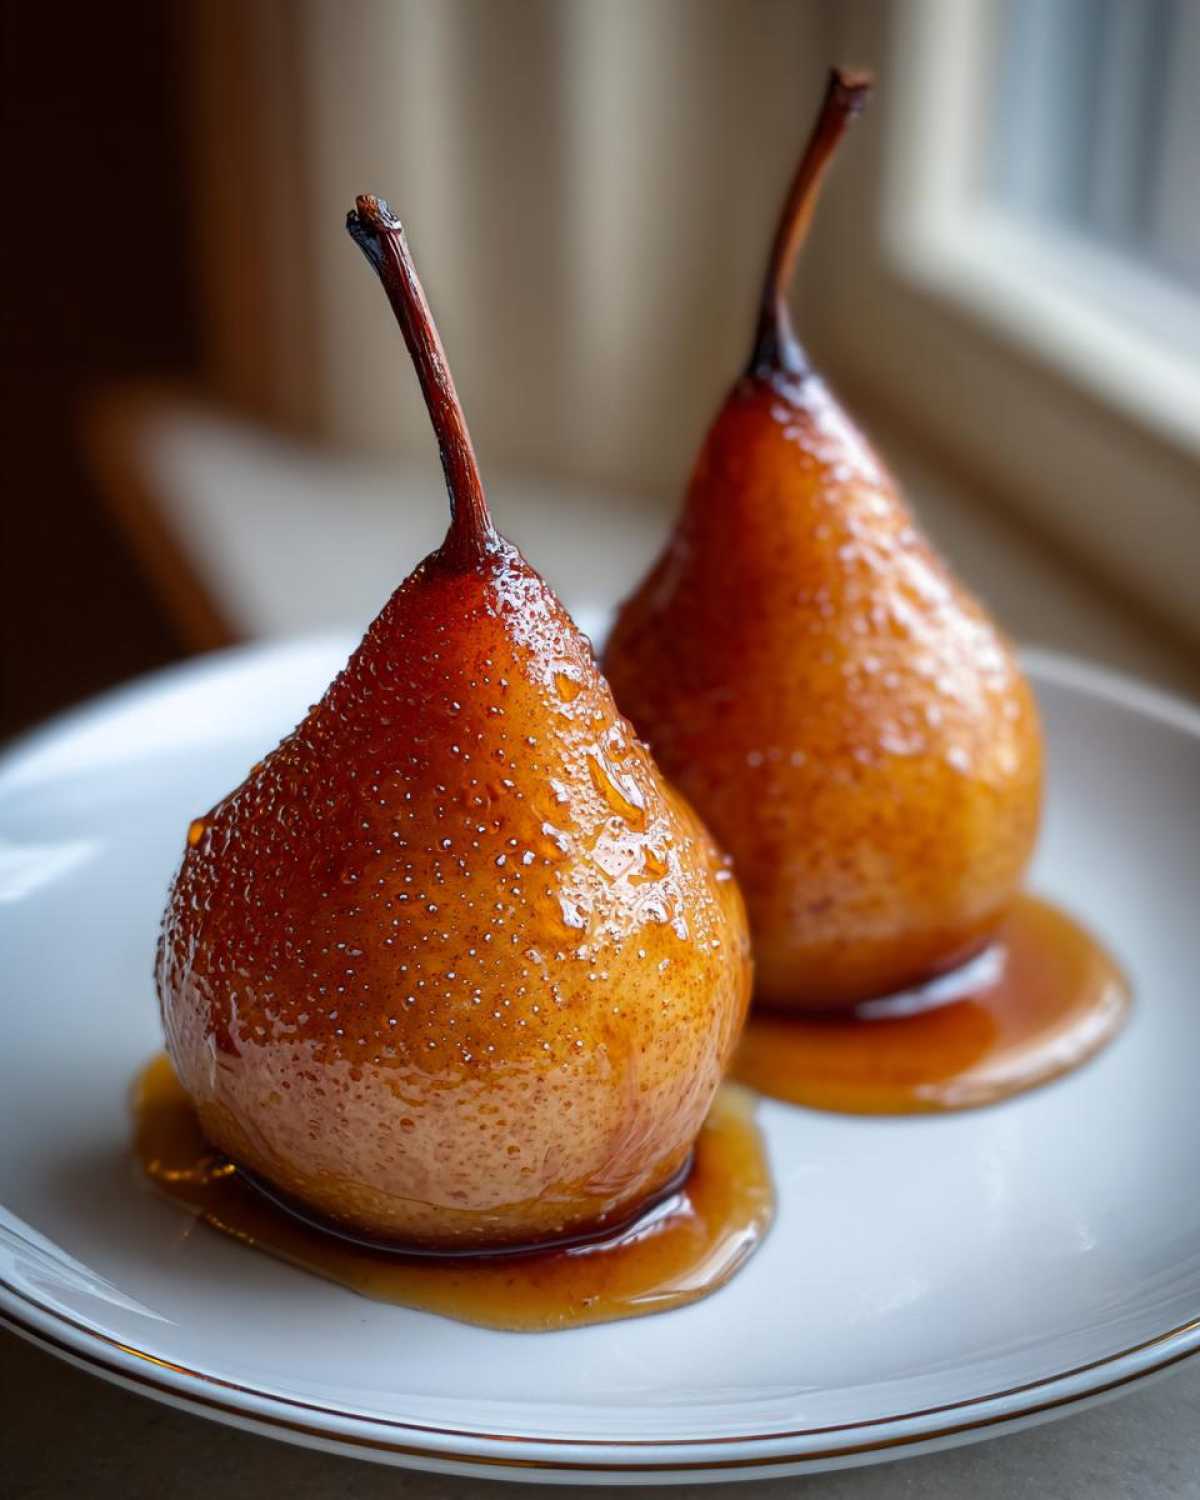
We already talked about avoiding the boil, which is vital because a strong boil will tear up the skin of the pear and make the flesh fall apart. If you see big enthusiastic bubbles, turn the heat down immediately! We are looking for gentle movement, like water barely rippling on a calm lake.
Your main check for doneness is that thin skewer test. It should go in relatively easily. If you feel true resistance in the very middle, that means the part near the core is still hard. But if the skewer goes in and then feels floppy or mushy when you hold it, you’ve gone too far! You want ‘moist crumb’ texture, remember? For these poached pears, you want that sweet spot where the skewer meets only a little resistance, meaning the inside is soft and infused, but the pear structure is completely intact.
Reducing the Poaching Liquid for a Gourmet Dessert Syrup Recipes
Okay, you’ve successfully nursed your gorgeous pears until they are perfectly tender, and now they are resting—don’t you dare throw away that beautiful liquid! That soaking bath is now infused with vanilla, sugar, and that lovely bit of bourbon; it is liquid gold! Failing to reduce this liquid is like making a fantastic pasta sauce only to serve it without seasoning it first—it’s incomplete!
This step is what takes us from just ‘cooked fruit’ to ‘Elegant Fruit Dessert.’ We need to transform that thin, watery liquid into a luscious, sticky syrup that clings perfectly to the fruit when you serve it. This process ensures you have a beautiful Dessert Syrup Recipes component ready to go.
Remember step seven from our main instructions? Take that pot, remove the actual pears, the lemon halves, and the vanilla pod (it’s done its job!). Turn the heat back up to medium-high. We need a full, enthusiastic boil so that water evaporates quickly.
How Long to Simmer the Syrup
You’re looking for the volume to reduce by about a third, maybe even nearly half. Watch for it to start coating the back of a spoon. If you have a candy thermometer, you’re aiming for around 220°F, but honestly, I just eyeball it. If you dip a spoon in and tilt it, the syrup should slowly drip off rather than rushing away like water.
Be careful not to let it go too far, or you’ll end up with hard candy instead of a drizzle! If you’re worried about burning? Take it off the heat, stir it constantly for a minute, and try again. If you want something just as satisfying that you can make ahead, you’ll want to look at how I make my buttery topping for cobbler!
Once it looks beautifully syrupy, take it off the heat immediately. As it cools, it will thicken even more, which is exactly what we want for drizzling over those chilly or gently warmed poached pears when it’s time to serve.
Serving Suggestions for Your Poached Pears with Topping
This is the grand finale, the moment where your hard work pays off! These Vanilla Bourbon Pears are fantastic all on their own, especially when they are slightly warm and that rich syrup pools beautifully on the plate. But if you want to turn this into a truly show-stopping event—a real “Impressive Dinner Ending”—you just need a simple scoop or dollop next to it.
The sweet tartness of the poaching liquid pairs like a dream with creamy, cool things. My absolute favorite pairing, hands down, is a big spoonful of fresh mascarpone cheese. It’s rich, slightly sweet, and cuts through the bourbon warmth perfectly. If you’re serving these in the winter, a scoop of high-quality vanilla bean ice cream is mandatory; watch that syrup melt into the ice cream—it’s heaven!
Presentation is Key for an Elegant Fruit Dessert
You took the time to peel them so nicely, so make sure they look as good as they taste! When plating, make sure the pear is sitting upright if you can manage it. Then, take your spoon and drizzle that reduced syrup over the top in a lovely, artistic swirl around the base of the fruit, letting the vanilla specks catch the light.
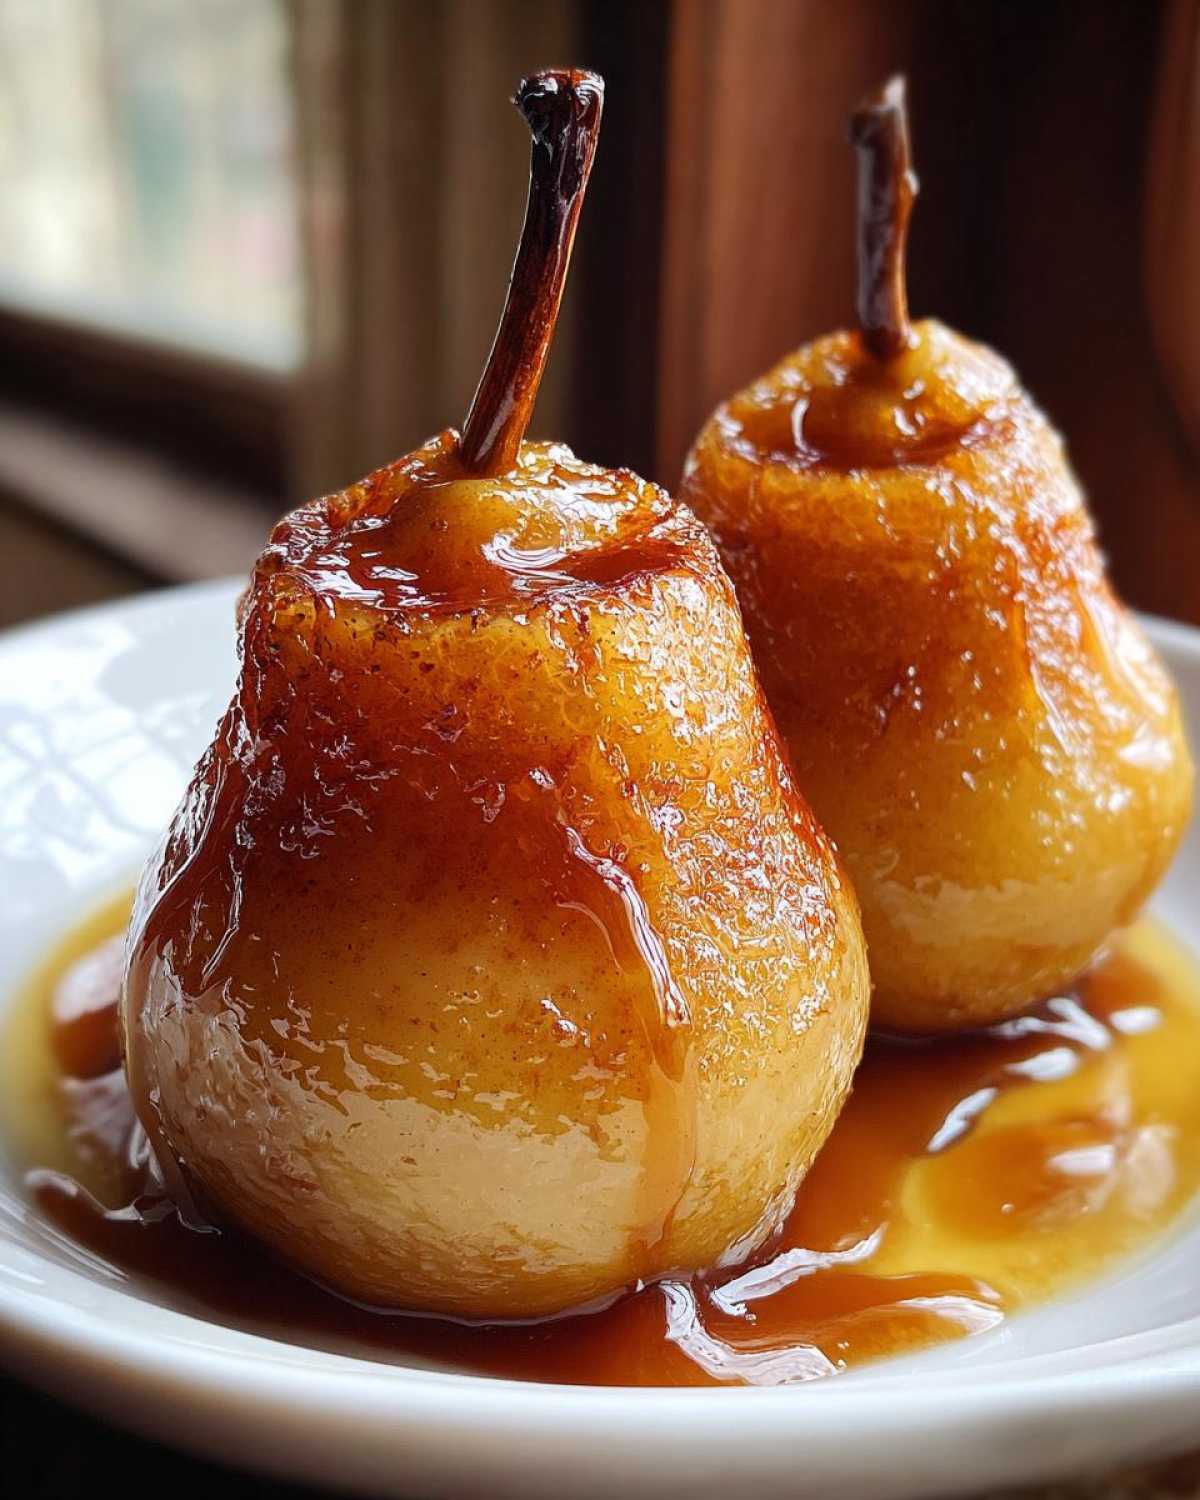
If you want an extra layer of texture that looks gourmet, try adding a sprinkle of toasted nuts! Pecans or slivered almonds work incredibly well and give a nice crunch against the soft fruit. For a color pop, a tiny mint leaf tucked near the stem really wakes up the plate.
Alternatively, if you’re feeling ambitious (and I hope you are!), you can serve these pears over something neutral like panna cotta or even a slice of plain pound cake. If you’re looking for an amazing savory side dish to balance out all this sweetness later in the week, you have to try my recipe for creamy mashed potatoes—sometimes you just need comfort food after all that fancy stuff!
Make Ahead Desserts: Storing Your Poached Pears
You know I love any recipe that lets me get ahead of the game, and these poached pears are absolute champions in the “Make Ahead Desserts” category. It’s such a lifesaver when you’re hosting a big holiday meal or just want something elegant ready for a Tuesday night treat without touching the stove!
The best part? They actually get *better* as they sit! When you make these days ahead, the pears have more time to soak up all that gorgeous vanilla and bourbon flavor from the syrup. It’s the ultimate flavor infusion process.
The rule is simple, but you have to follow it: keep them submerged! You need to store the pears completely covered in the cooled poaching liquid, and an airtight container is your best friend here. I usually let the pears cool down to room temperature first, then pour the cooled syrup over them before sealing everything up tight.
You can safely keep these stored in the refrigerator for up to three whole days. Three days! That means you can focus on the appetizer or setting the table while these beauties are marinating perfectly in the fridge. For a full guide on other desserts that give you a head start, definitely check out my latest post on make ahead desserts!
When it’s time to serve, you can pull them out about 30 minutes before plating to let them come up slightly from fridge temperature, or you can gently warm them—just don’t boil them again! A quick warm-up in a small amount of the reserved syrup on the stove is all you need before drizzling and serving with that dollop of mascarpone we talked about.
Variations on Spiced Poached Fruit
While I absolutely adore the warmth of vanilla and bourbon in my primary recipe—I mean, who doesn’t love a good pumpkin spice and bourbon combination somewhere in the house?—that’s just the beginning of what you can do with poached pears! This method is so versatile; you can change the entire mood of the dessert just by swapping out the liquid.
Trying to lean into a more traditional, deep, autumnal vibe? Let’s swap that bourbon out for something rich and fruity. This is where we get into making those gorgeous, jewel-toned Red Wine Poached Pears that look spectacular on any holiday table, especially for Thanksgiving!
The Red Wine Poached Pears Route
To make the red wine version, you’re going to replace the 4 cups of water and the 1/2 cup of bourbon with about 5 cups of a dry, fruity red wine—something like a Merlot or a Cabernet works perfectly. You’ll still use the sugar, the lemon, and maybe bump up the spice profile here. Instead of just vanilla, throw in a cinnamon stick and maybe two or three whole star anise pods. The color that wine imparts is amazing, staining the pears a beautiful deep ruby red. Just make sure you keep that simmer gentle, just like we discussed before, or you’ll end up boiling off all that lovely flavor!
Bright Citrus and Ginger Infusion
If you want something a little brighter, maybe for a post-Christmas cool-down dessert, try focusing on citrus and ginger. In this version, you can stick to water or use light-colored apple juice instead of red wine. You’ll want to skip the bourbon entirely.
Use the vanilla bean still, but add the zest of two oranges and a large knob of fresh ginger, thinly sliced. This makes for some incredibly Spiced Poached Fruit that feels really refreshing. When you reduce the syrup, it becomes this bright, zingy glaze. You won’t believe the difference it makes!
Simple Honey and Cinnamon Spiced Pears
For those times when you just need something simple and subtly sweet, honey is your friend. This variation leans heavily into that classic “Fall Fruit Recipes” aesthetic. Replace the white sugar with an equal amount of good quality honey—it might take a little longer to dissolve, so keep stirring!
For the spice, just stick to whole cinnamon sticks and maybe a few cloves. Skip the alcohol. Keep the water ratio similar. This creates a slightly stickier, milder syrup that is just perfect for a quiet evening treat. It’s proof that even the most basic ingredients can deliver an exceptional result when you’re making poached pears!
Frequently Asked Questions About Poached Pears
I get so many great questions about these poached pears after I post them online, mostly about pear firmness and how to handle the liquid. It makes total sense; you want to make sure you get that tender texture every single time! Here are the most common things people ask me.
Which pears are best for poaching?
This is the #1 question! My short answer is: pick firm pears that are slightly underripe. They need to be hard enough to handle being peeled and simmered without collapsing into a heap. I always recommend Bosc or Anjou pears. They have that nice structure that holds up beautifully. Avoid soft Bartlett pears unless you are going for a more rustic, mushy fruit spread rather than whole, intact Elegant Fruit Desserts.
Can I make this without alcohol?
Absolutely! You want those vanilla notes, but the bourbon is optional flavor layering, not a structural necessity. To make simple, delicious Easy Poached Pears without alcohol, just replace the 1/2 cup of bourbon with 1/2 cup of water, or better yet, use apple juice or white grape juice for a little extra sweetness and flavor complexity. The final syrup will just be slightly less deep, but the pears will be just as tender!
How long do the poached pears last?
If you follow my advice and store them fully submerged in their cooled syrup inside a sealed container, they will last quite nicely for three to four days in the refrigerator. They actually deepen in flavor during days two and three! They are one of the best Make Ahead Desserts you can prepare for a party. Just pull them out an hour before serving so they aren’t ice-cold.
Can I use honey instead of sugar for poaching?
Yes, you sure can! If you want to make Cinnamon Spiced Pears using honey, you can substitute it 1:1 for the granulated sugar. Just know that honey tends to scorch a little easier than refined sugar, so keep your simmer even gentler than usual when you start heating the liquid. Also, the final syrup will be stickier, which is kind of lovely if you serve it over yogurt or ice cream!
If you’re interested in checking out more tried-and-true slow-simmer recipes that bring out amazing natural flavors, I think you’d really enjoy my guide on making a great cozy lentil soup!
Estimated Nutritional Data for Vanilla Bourbon Pears
I always get asked about the nutrition facts for my sweet treats, and while I’m definitely more focused on flavor than counting calories (hello, flavor is the most important thing!), I wanted to give you a general idea of what’s in these gorgeous poached pears. Remember, these numbers are estimates!
Since we are boiling down the syrup, that concentrated liquid is where most of the sugar ends up. If you use less of the syrup when serving, your actual sugar intake will be lower, so you have control here! If you want to check out my official disclaimer page regarding all food measurements, you can find it here: here.
Here is the breakdown based on one pear served with the reduced syrup, as per the core recipe measurements:
- Serving Size: 1 pear with syrup
- Calories: 350
- Sugar: 75g (Yes, it’s a dessert, friend!)
- Fat: 0g
- Protein: 1g
- Carbohydrates: 90g
- Fiber: 7g (Thanks, pear skin!)
Since we aren’t using any butter or oil in the poaching liquid itself, the fat content stays practically zero, which is a nice bonus for an Elegant Fruit Dessert. These are a wonderful way to get some fruit in, even when covered in bourbon syrup!
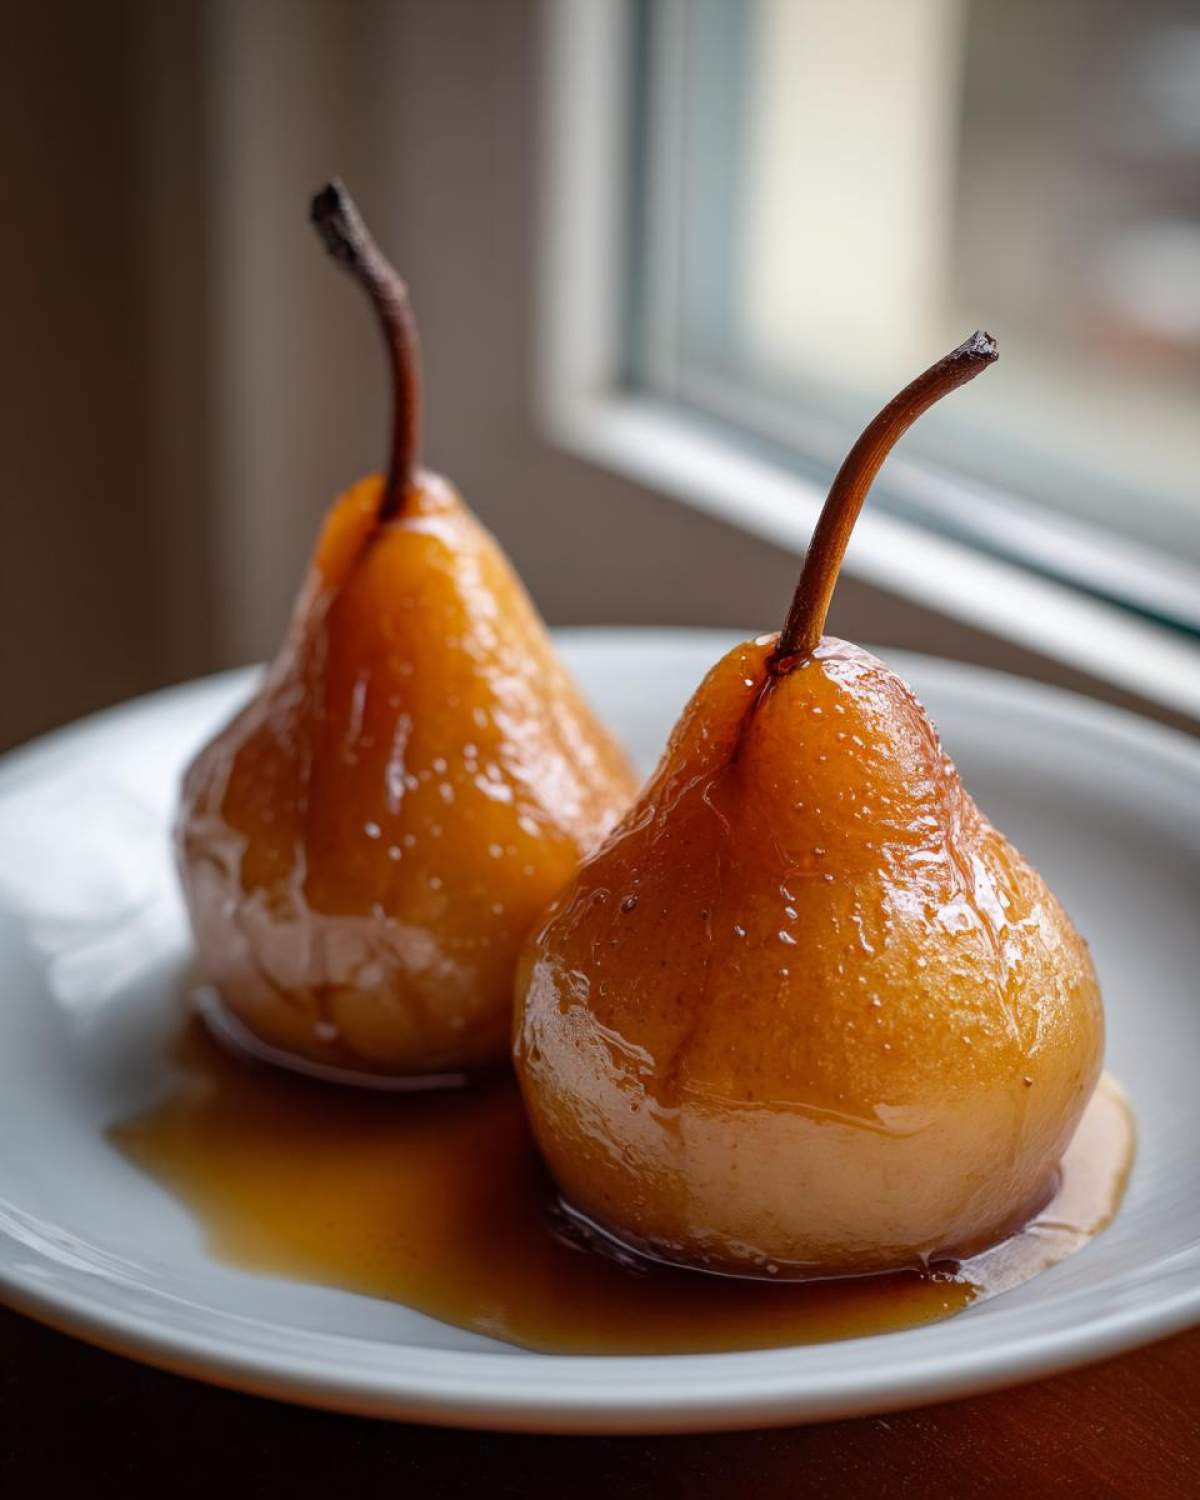
Vanilla Bourbon Poached Pears
Make elegant, tender poached pears infused with vanilla and bourbon. This simple recipe yields a flavorful syrup perfect for drizzling over the fruit.
- Prep Time: 15 min
- Cook Time: 45 min
- Total Time: 60 min
- Yield: 4 servings
- Category: Dessert
- Method: Stovetop Simmering
- Cuisine: American
- Diet: Vegetarian
Ingredients
- 4 firm pears (Bosc or Anjou recommended)
- 4 cups water
- 1 cup granulated sugar
- 1 vanilla bean, split and scraped
- 1/2 cup bourbon
- 1 lemon, halved
Instructions
- Peel the pears, leaving the stems intact. Use a melon baller or small spoon to carefully remove the core from the bottom of each pear.
- In a saucepan large enough to hold the pears standing upright, combine the water, sugar, vanilla bean seeds and pod, and bourbon. Bring the mixture to a simmer over medium heat, stirring until the sugar dissolves completely.
- Gently place the prepared pears into the simmering liquid. Add the lemon halves to the pot to help maintain the pear color.
- Reduce the heat to low so the liquid maintains a gentle simmer, not a rolling boil. Cover the pot partially with a circle of parchment paper (a cartouche) to keep the pears submerged.
- Poach for 20 to 35 minutes, depending on the ripeness and size of your pears. Check for doneness by inserting a thin skewer into the thickest part; it should meet little resistance.
- Remove the pears carefully and set them aside.
- Increase the heat and boil the remaining poaching liquid rapidly for 10 to 15 minutes, or until the syrup reduces and thickens slightly. Discard the vanilla pod and lemon.
- Pour the reduced syrup over the cooled pears. Serve warm or chilled.
Notes
- For a richer color, substitute 1 cup of water with 1 cup of dry white wine or apple juice.
- Serve these poached pears with a dollop of mascarpone cheese or a scoop of vanilla ice cream.
- You can make this dessert up to three days ahead; store the pears submerged in the syrup in the refrigerator.
Nutrition
- Serving Size: 1 pear with syrup
- Calories: 350
- Sugar: 75g
- Sodium: 2mg
- Fat: 0g
- Saturated Fat: 0g
- Unsaturated Fat: 0g
- Trans Fat: 0g
- Carbohydrates: 90g
- Fiber: 7g
- Protein: 1g
- Cholesterol: 0mg