

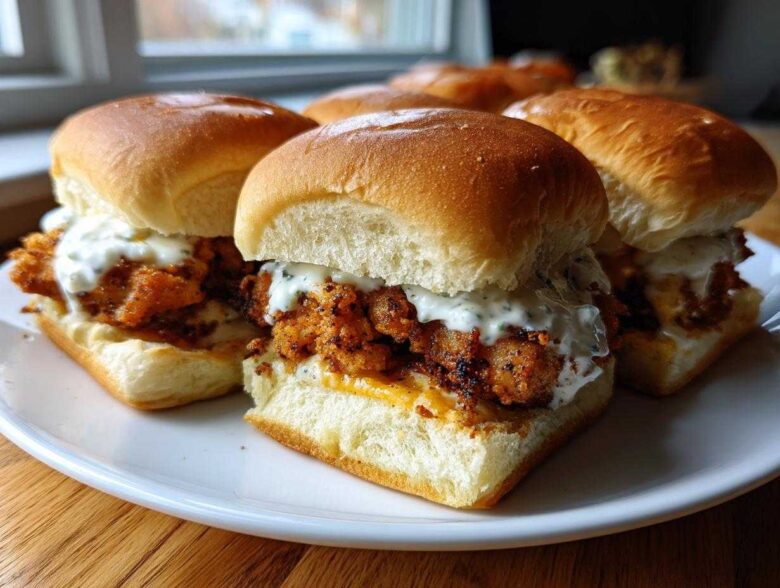
Oh man, are you ever craving that perfect bite? You know, the one that brings together unbelievable crunch, juicy tender meat, and a sauce so garlicky it makes your eyes water in the best way possible? Forget boring sandwiches; we’re diving headfirst into handheld heaven! That’s what making the ultimate Crispy Chicken Sliders with Garlic Sauce is all about. I spent way too many afternoons trying to figure out how to make that crust stick perfectly. Trust me, once you master the double-dredge—that’s my secret weapon—you’ll never go back to store-bought frozen tenders.
These sliders are tiny powerhouses of flavor, perfect for a crazy dinner or when you have friends over and need something fast that tastes like you spent all day on it. We’re coating these petite pieces of chicken until they scream crunch, pairing them with homemade garlic sauce that really pops, and putting it all on soft little buns. It’s fantastic.
If you want to see all my deep dives into making amazing sandwiches, you can check out my main recipe archive here, but for now, let’s get down to the crunch!
Why You Need These Crispy Chicken Sliders with Garlic Sauce
Honestly, what’s not to love? This isn’t just another chicken sandwich recipe; it’s tailored for maximum fun and minimum fuss. I promise these will be your new go-to for everything from Tuesday night dinners to big game days. Here’s why you absolutely need to make a batch right now:
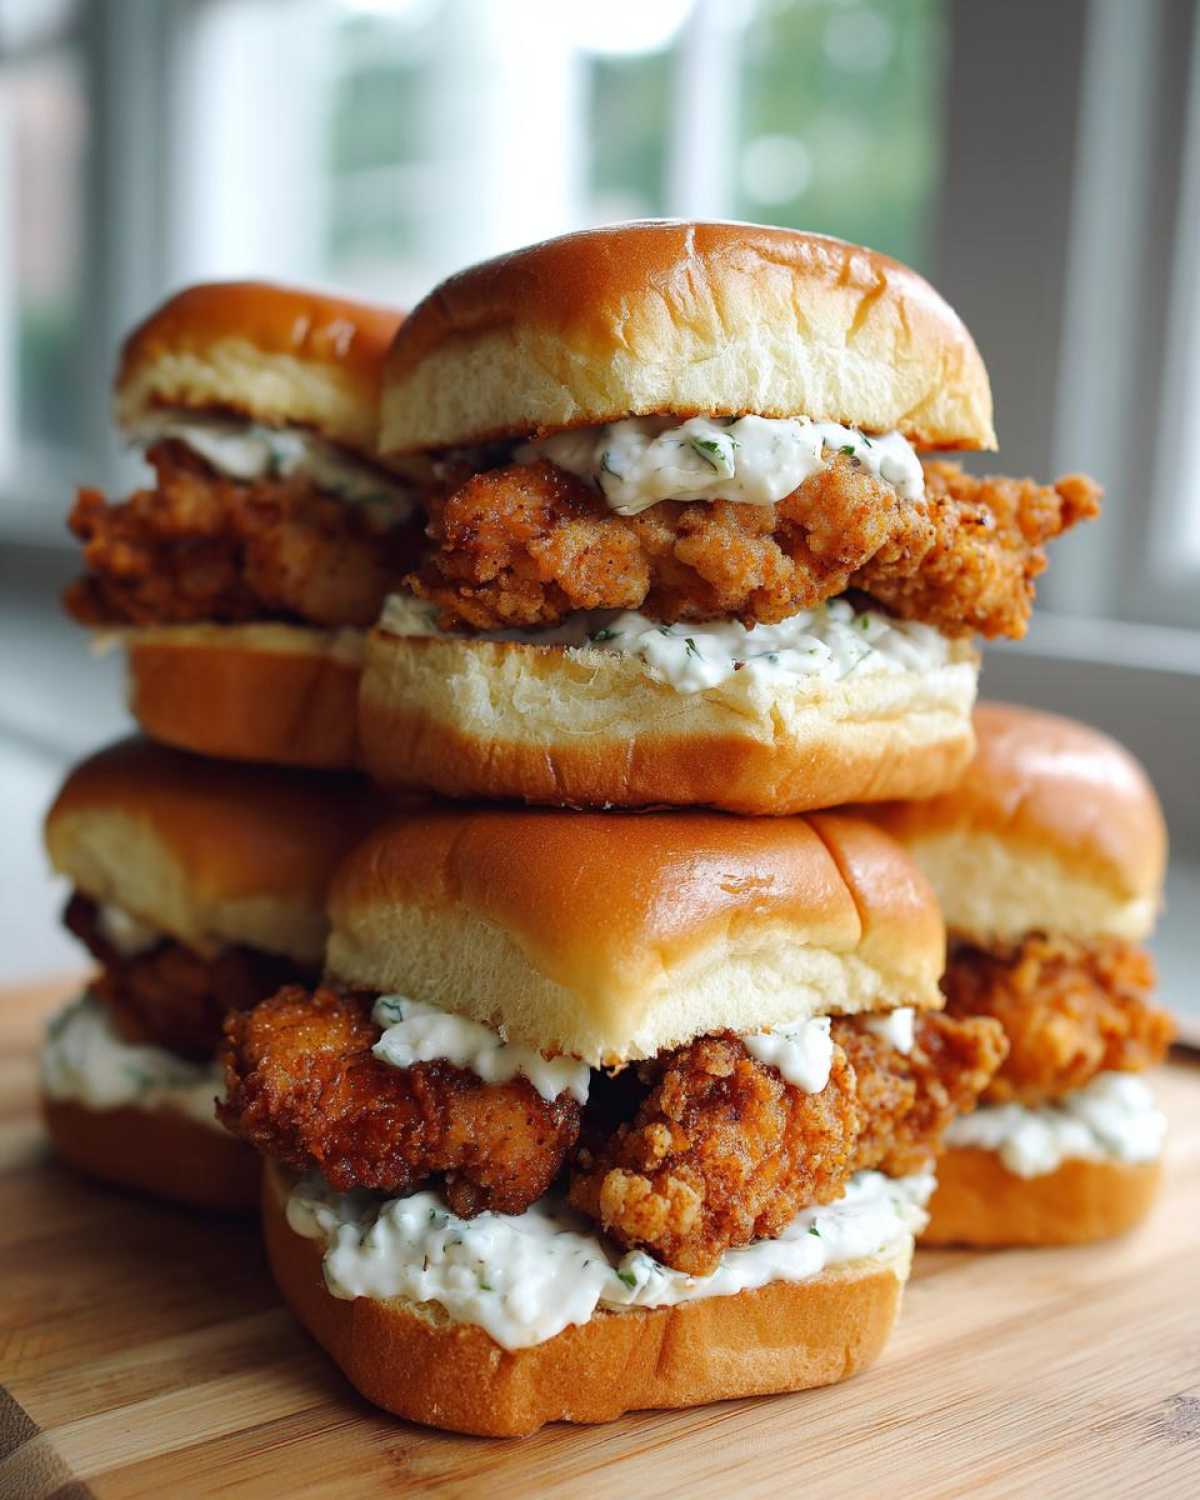
- The Crunch Factor is Real: Thanks to that buttermilk soak and the cornstarch in the dredge, the chicken skin shatters when you bite into it. It’s seriously satisfying, the kind of crunch you usually only get at a dedicated fried chicken place.
- Garlic Sauce Obsession: This sauce, it’s everything! It’s bright from the lemon but deeply savory from the fresh garlic. It cuts through the richness of the fried chicken perfectly. You’ll want to drizzle extra over everything.
- Slider Perfection: Because they are small, you can sneak in a pickle slice or a little bit of shredded slaw without feeling guilty. They’re easy for kids, great for appetizer platters, and way more fun than giant sandwiches.
- Incredibly Fast Flavor: Ready in about 35 minutes total? Yes, please! The prep is quick, the frying is fast, and you get restaurant-quality flavor in less time than ordering takeout. Talk about an easy dinner idea!
- Perfect Party Food: If you’re hosting, these are guaranteed winners. They look gourmet but are assembled so easily. If you need more small-sandwich inspiration, I have some great party slider ideas over on the blog that would pair well with these!
Essential Ingredients for Perfect Crispy Chicken Sliders with Garlic Sauce
Okay, buckle up, because having the right setup is half the battle, especially when you’re mixing up frying spices and making homemade sauces. I’ve broken down everything you need right here. If you want that unbelievably juicy chicken that stays moist under that thick, crunchy crust, make sure you have all these bits and bobs ready to roll!
For the secrets to making sure your chicken base is as flavorful as possible before it even hits the oil, check out my guide on the ultimate all-purpose chicken marinade—it helps immensely with flavor penetration!
For the Crispy Chicken Coating and Frying
This is what gives us that glorious, shatteringly crisp exterior. Don’t skimp on the cornstarch; that’s the secret weapon for true crispiness!
- 1.5 lbs boneless, skinless chicken breasts, cut into 1-inch thick pieces
- 1 cup all-purpose flour
- 1/2 cup cornstarch
- 1 teaspoon salt
- 1/2 teaspoon black pepper
- 1 teaspoon paprika
- 1/2 teaspoon garlic powder
- 2 large eggs, beaten, which you’ll mix with the buttermilk
- 1 cup buttermilk
- Vegetable oil, for frying (you’ll want about 2 inches deep in your pot!)
For the Homemade Garlic Sauce
This sauce is non-negotiable. It’s creamy, it’s punchy, and it just ties the whole slider together. I always use the freshest garlic I can find here because that raw bite is essential.
- 1/2 cup mayonnaise (use your favorite brand!)
- 2 cloves garlic, minced super fine—seriously, mince it well!
- 1 tablespoon lemon juice, for that necessary zing
- 1 teaspoon Dijon mustard
- Pinch of salt and pepper
For Assembly
The final stage! You need a good soft bun that can handle being toasted and holding all that crispy goodness.
- 12 slider buns
- Butter, softened, for toasting the cut sides
Ingredient Notes and Achieving Maximum Crispiness
When you’re making something called ‘Crispy Chicken Sliders,’ the ingredients aren’t just suggestions; they’re a holy covenant! I learned the hard way that swapping out one thing can turn a perfect crunch into a sad, soggy mess. So pay attention, because this next part is crucial for that amazing texture we’re aiming for.
The secret sauce, literally and figuratively, is in the dry dredge. We use both flour and cornstarch: the flour gives us the body and flavor, but the cornstarch is what locks in that professional-level crispiness. If you skip the cornstarch, you’re missing half the crunch journey. Don’t do that to yourself!
Also, the buttermilk is key to juicy chicken. It tenderizes the meat just a touch before it hits the heat. If you don’t have buttermilk on hand—oops!—you can whip up a substitute. Just take one cup of regular milk and mix in a tablespoon of white vinegar or lemon juice. Let it sit on the counter for five minutes until it curdles slightly. That’s your liquid gold right there.
Now, here is the absolute most important thing I do for unparalleled crispiness: I let the dredged chicken rest. After you’ve done that perfect double dredge (flour-wet-flour), lay those babies out on a wire rack for about ten minutes before they go into the oil. It sounds counterintuitive, but letting that coating set up helps it adhere and toughen up a bit. When it hits the hot fat, that coating doesn’t dissolve; it instantly fries into that hard, crunchy shell.
If deep frying just isn’t your style for weeknight slider dinners, don’t panic! You can totally air fry these, and they come out brilliantly crunchy. I’ve got the full run-down on timing in my air fryer wings post, but generally, you’ll set that machine to 400°F (200°C) and cook them for about 12 to 15 minutes, flipping halfway through. Either way, enjoy the crunch!
Step-by-Step: How to Make Crispy Chicken Sliders with Garlic Sauce
Okay, now that we have our ingredients lined up and our chicken resting after its big coat bath, it’s time for the fun part: cooking! This whole process moves really quickly once the oil is hot, so get your wire rack ready to catch the golden nuggets. We’re aiming for that perfect internal temperature to make sure everything is safe and juicy.
If you want to see how I make similar flavor boosters, check out this garlic butter chicken bites recipe for inspiration!
Preparing the Chicken Coating and Buttermilk Soak
First things first, we set up our assembly line for the breading. You need two shallow dishes. In the first one, whisk together your dry ingredients: that’s the 1 cup of flour, the 1/2 cup of cornstarch, salt, pepper, paprika, and garlic powder. Get that mixed really well! In your second dish, just beat those two large eggs and give them a good whisk with the 1 cup of buttermilk until it’s all happy and combined.
The Double Dredge Technique for Crispy Chicken
This is the technique that earns our sliders their name! Take one piece of your prepared chicken and first dredge it gently in the flour mixture, shaking off any loose excess flour. Don’t be shy, but you don’t want huge clumps. Next, dip it completely into the egg/buttermilk mixture. Let the excess drip off for just a second. Finally, press that piece firmly back into the flour mixture again. You want a good, thick coating—that’s your armor against sogginess!
Frying the Chicken to Golden Perfection
Now, get your oil ready. You need about two inches of vegetable oil brought up to about 350°F (or 175°C) in a deep skillet. Carefully drop your dredged chicken pieces into the hot oil. Don’t crowd the pan; let them have space to breathe! Fry them for about 4 to 6 minutes total, turning them over gently so they cook evenly on all sides. We are looking for that beautiful golden brown color and an internal temperature of 165°F (74°C). Once they’re done, pull them out immediately and set them on a wire rack lined with paper towels so they can drain off all that extra oil.
Mixing the Flavorful Garlic Sauce
While the chicken is resting and draining—and trust me, letting that hot oil drip off is essential—whisk up your amazingly fragrant sauce. In a small bowl, combine the 1/2 cup of mayonnaise, the 2 minced cloves of garlic, the lemon juice, Dijon mustard, and a pinch of salt and pepper. Whisk it until it’s perfectly smooth. If you want it thinner, add a tiny splash of water or milk, but I like mine thick enough to really cling to the chicken!
Toasting Buns and Assembling Your Crispy Chicken Sliders with Garlic Sauce
Almost ready for the payoff! Take your slider buns and lightly spread butter on the cut sides only. Toast them either in a dry, clean skillet over medium heat or quickly under the broiler until they are just lightly golden brown and warmed through. That toasting step adds body! Now, assemble: place one glorious piece of crispy chicken on the bottom bun, then slather on a generous amount of that garlic sauce, and pop that top bun on. Don’t wait—serve these bad boys immediately while they’re still piping hot!
Tips for Success with Your Crispy Chicken Sliders with Garlic Sauce
You’ve mastered the frying and the sauce—you’re basically a professional chef now! But these little details are what separate a good batch of sliders from a legendary batch. Trust me, these tricks are the small things that make a huge difference in the final texture and flavor profile of your homemade chicken sliders.
First, I want to bring up that rest time again because I feel like people always skip it. If you can manage it, let those dredged chicken pieces sit on the rack for a full 10 minutes before they see hot oil. This is one of the absolute biggest secrets to getting that crunchy exterior that doesn’t flake off the second you pick it up. It lets the buttermilk mixture really soak into that flour coating, creating a stable crust.
As I mentioned before, if deep frying just isn’t your style for weeknight slider dinners, don’t panic! You can totally air fry these, and they come out brilliantly crunchy. I’ve got the full run-down on timing in my air fryer wings post; the principle is the same for these little chicken pieces at about 400°F (200°C) for 12 to 15 minutes, flipping halfway through. Either way, enjoy the crunch!
Now for my favorite addition when I’m building these for myself: acid! Fried food *loves* acid; it just cuts right through the richness. So, when you’re building that slider, don’t forget a thin, sharp slice of dill pickle right under the chicken. It balances everything out beautifully. Pickles are easily one of the best fried chicken sandwich toppings you can add, especially on a smaller slider!
Finally, make your garlic sauce ahead of time! I usually whip up a double batch because I end up dipping fries in it later. It keeps beautifully in a sealed container in the fridge for up to five days. This makes assembly lightning-fast when it comes time to serve your crunchy chicken appetizers. If you ever want to try baking chicken instead of frying, check out my crispy baked chicken wings recipe for coating inspiration!
Serving Suggestions for Gourmet Slider Ideas
So, you’ve got your basket of these incredible Crispy Chicken Sliders with Garlic Sauce piled high. Amazing! Now, what else is going on the table? Because these are rich, crunchy, and intensely flavorful, you need sides that either balance that richness out or lean right into the decadent fun. It depends on the vibe of the day, really!
If I’m making these for a big gathering, like when we’re watching the game, I go for things that are easy to eat standing up. But if it’s a casual weeknight dinner, I might opt for something a little fresher. Here are a few pairings that I always pull out of the pantry for my game day food inspiration selection.
First up: something sharp and acidic. A really simple coleslaw—just shredded cabbage, carrots, vinegar, and a tiny bit of sugar—is my top pick. It acts like a cleansing palate between those spicy, garlicky bites of the slider. You need that vinegar to cut through the mayo in the garlic sauce!
For those nights where you just need satisfying comfort food, forget the salad and go straight for the potatoes. But don’t just make boring French fries! I highly recommend whipping up a batch of my crispy breakfast potatoes, but skip the egg topping and just toss them with a little smoked paprika and salt. They are amazing for dipping directly into any leftover garlic sauce—I always make extra sauce just for this purpose!
Now, if you want to keep things slightly lighter but still crave that amazing crunch, try a simple side salad, but load it up with something textured. Think mixed greens, thinly sliced radishes, and maybe some chopped celery, all tossed in a light lemon vinaigrette. It’s refreshing, it gives you that snap, and it doesn’t leave you feeling weighed down after you devour three sliders!
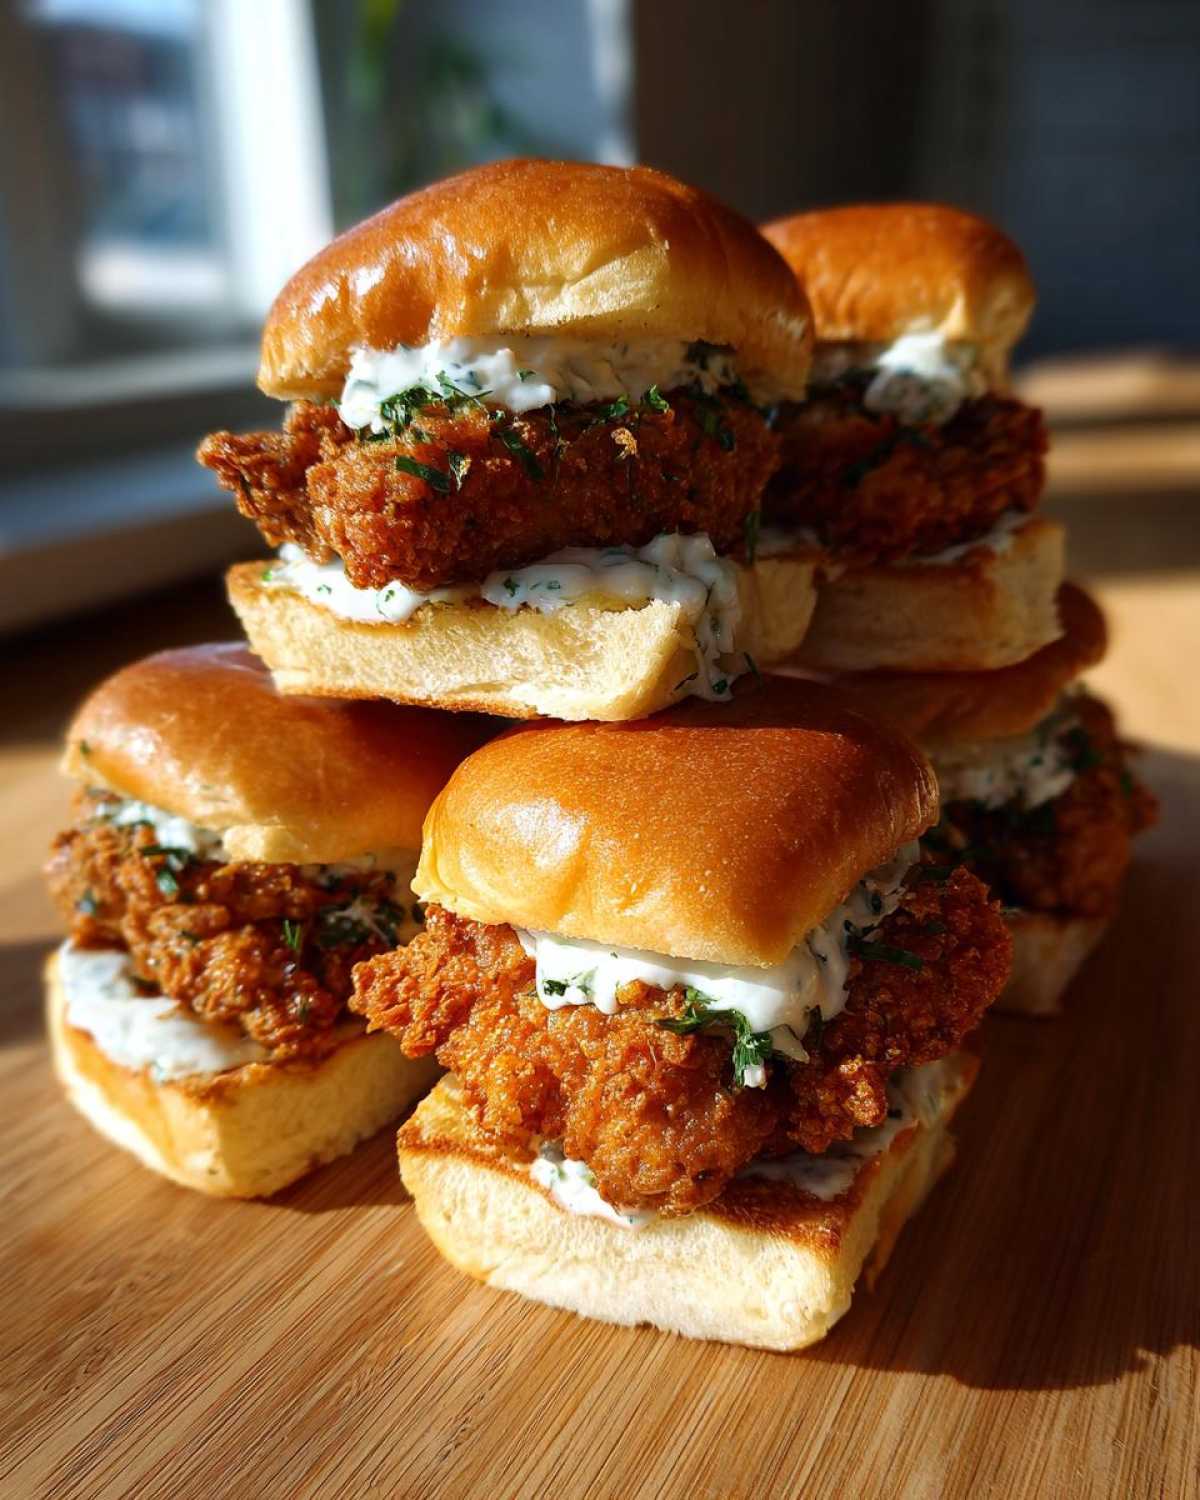
The beauty of the slider format is that it invites sharing, so make sure you have a few smaller bowls of sides scattered around the table. Everyone can grab a chicken slider and then two or three different sides to mix and match. It turns a simple meal into a real spread!
Storage and Reheating Instructions
Look, let’s be real here: these Crispy Chicken Sliders with Garlic Sauce are absolutely, unequivocally, 99.9% best eaten the second they come out of the skillet. That incredible crunch and the warm, melted flavor of the sauce? That window is short! If you manage to have leftovers—which, good job hiding them from the rest of the family!—you need to be strategic about storing and reheating them.
The biggest enemy of leftover fried chicken is condensation, right? So, you can’t just toss them straight into an airtight plastic container when they are warm. That steam gets trapped and turns that beautiful crispy coating into something soft and sad quicker than you can say ‘Aioli.’
If you have sauce leftover, that’s easy: put the Garlic Sauce Recipes for Chicken scraps into a little sealed jar and keep it in the fridge. It lasts for days! For the chicken itself, here’s my rule:
- Let the cooked chicken cool completely on a clean wire rack at room temperature. Don’t cover it!
- Once fully cool, wrap the chicken pieces loosely in a paper towel, then place them in a loosely sealed plastic bag or container. This lets the last bit of moisture escape while keeping it from drying out too much.
Now, reheating is where you bring the magic back. Microwaving is a total no-go; it just steams everything. If you want to bring back any semblance of that original crunch, you *have* to use dry heat. I swear by popping them in a toaster oven or a regular oven set to about 375°F (190°C) for about 8 to 10 minutes. Keep an eye on them, and they should crisp up nicely again for a tasty second lunch.
If you’re prepping ahead for a party, skip the full assembly and just store the fully cooled chicken and the sauce separately. Assemble right before serving so everyone gets that perfect hot-and-crispy bite. For other great ways to use leftover chicken or even how to make a completely different meal, you can check out my tips on remixing chicken dishes!
Frequently Asked Questions About Crispy Chicken Sliders with Garlic Sauce
I know you might have a few lingering thoughts after going through this whole process. Making sure the chicken is crispy and the sauce is spot-on can feel a little intimidating, but honestly, this recipe is pretty foolproof! Here are some common things folks ask when they are gearing up to make these amazing little handheld wonders.
If you’re interested in dipping sauces beyond this incredible garlic version, I actually have a whole post dedicated to awesome garlic sauce recipes for chicken that you might want to bookmark!
Can I make the garlic sauce ahead of time?
Oh yes, please do! Making the garlic sauce ahead of time is one of my top tips for fast assembly, especially if you’re serving these as party slider recipes. I usually mix it up the day before. Just keep it covered tightly in the fridge. Since it has fresh garlic, it’s best used within about five days. When you bring it out, let it sit on the counter for 15 minutes so it warms up slightly; that really helps the flavors bloom when it hits the hot chicken!
What bun works best for these mini chicken sandwiches?
This is so important because the bun has to be soft enough to yield to that giant crunch underneath, but strong enough not to fall apart when you pick it up. I absolutely swear by potato slider rolls—the ones that usually come in packs of 12 or 15. They have a little sweetness and they toast beautifully because of the added potato starch. If you can’t find those, simple sweet Hawaiian rolls are my second choice for these gourmet slider ideas. Just remember to butter that cut side before toasting!
How do I keep a big batch warm if I’m hosting?
That’s a common concern when making party slider recipes! You can’t leave them sitting on a platter at room temperature, and you definitely can’t let them sit in foil. The best method is to keep the chicken warm *separately* from the buns and sauce. Once the chicken is fried, put it on a wire rack set over a baking sheet. Pop that whole setup into an oven set to its absolute lowest temperature, around 170°F (75°C), for about 20 minutes max. This keeps them warm without steaming them. Assemble right before serving!
Can I use the chicken breast chunks for a full-sized sandwich instead?
Absolutely! You are not restricted to slider buns, no matter what I call it! If you want a full-sized, hearty, crunchy meal, just use larger cuts of chicken breast—maybe even use a whole flattened breast instead of 1-inch pieces. You’ll need to adjust your frying time, as those larger pieces will take closer to 7 or 8 minutes per side, but the coating mixture works perfectly. It just becomes an amazing, fully loaded crispy chicken sandwich recipe!
Estimated Nutritional Information
Okay, so these Crispy Chicken Sliders with Garlic Sauce are definitely an indulgence—I’m not going to lie to you! They taste like happiness, and sometimes happiness comes with a little bit of guilt, but look, we’ve got to talk numbers so you can plan accordingly!
I ran the numbers based on the ingredients listed, assuming this recipe yields 12 sliders, meaning this data reflects just one perfect, garlicky, crunchy slider. Keep in mind that the type of oil you use, the brand of mayonnaise for the garlic aioli, and even the type of bun you choose can shift these numbers slightly. It’s all an estimate, right? For all the legal and specific details on how I calculate this stuff, you can check out my site’s nutrition disclaimer page.
But here’s the general breakdown for one slider—and honestly, for something fried and loaded with homemade sauce, I think these numbers are pretty respectable for a real treat!
- Serving Size: 1 slider
- Calories: 350
- Fat: 18g (This includes the delicious frying oil, folks!)
- Saturated Fat: 3g
- Trans Fat: 0g (Phew!)
- Cholesterol: 75mg
- Carbohydrates: 28g
- Sugar: 4g (Mostly from the bun and maybe a tiny bit in the buttermilk!)
- Sodium: 550mg (Remember to go easy on salting the chicken if you want to keep this lower!)
- Protein: 20g (That’s a solid serving of chicken in there!)
- Fiber: 1g
So yeah, they pack a punch because they are loaded with flavor, but that protein count is fantastic! Enjoy them responsibly—or don’t, it’s your dinner party!
Share Your Homemade Chicken Sliders
Now that you’ve got the recipe, the secret dredge technique, and a big giant bowl of that amazing garlic sauce, I absolutely need to see what you created! Seriously, nothing makes me happier than knowing someone else has crunched into these Crispy Chicken Sliders with Garlic Sauce and had a moment of pure, glorious satisfaction.
Did you stick strictly to the recipe, or did you add your own spin? Maybe you tried a spicy buttermilk soak for an extra kick, or perhaps you went wild with the toppings, piling on things like fried onion straws or quick-pickled jalapenos. Whatever you did, I want to hear about it!
Please, please leave a comment below right now and tell me how it went. Did the double dredge technique work like magic for you? How many did you eat in one sitting? No judgment here—I’ve definitely housed five or six myself!
If you snapped a picture of your beautiful, crunchy masterpieces, I’d love to see them! Tag me over on social media so I can cheer you on. It really makes my day to see your creations come to life in your kitchens. I’m always looking for inspiration for my next batch, and reading your feedback helps me make sure all my recipes are as clear and delicious as possible. If you have any questions as you were cooking, this is also the best place to drop them, and I’ll swing by to answer when I can! You can also use my contact form if you prefer to send a private message.
PrintCrispy Chicken Sliders with Garlic Sauce
Make crunchy, flavorful crispy chicken sliders served on small buns with a simple homemade garlic sauce.
- Prep Time: 20 min
- Cook Time: 15 min
- Total Time: 35 min
- Yield: 12 sliders
- Category: Appetizer
- Method: Frying
- Cuisine: American
- Diet: Low Lactose
Ingredients
- 1.5 lbs boneless, skinless chicken breasts, cut into 1-inch thick pieces
- 1 cup all-purpose flour
- 1/2 cup cornstarch
- 1 teaspoon salt
- 1/2 teaspoon black pepper
- 1 teaspoon paprika
- 1/2 teaspoon garlic powder
- 2 large eggs, beaten
- 1 cup buttermilk
- Vegetable oil, for frying
- 12 slider buns
- Butter, softened, for toasting
- For the Garlic Sauce:
- 1/2 cup mayonnaise
- 2 cloves garlic, minced
- 1 tablespoon lemon juice
- 1 teaspoon Dijon mustard
- Pinch of salt and pepper
Instructions
- Prepare the chicken coating: In one shallow dish, mix the flour, cornstarch, salt, pepper, paprika, and garlic powder. In a second dish, place the beaten eggs mixed with the buttermilk.
- Dredge the chicken pieces first in the flour mixture, shaking off excess. Dip completely into the egg/buttermilk mixture. Finally, press firmly back into the flour mixture to coat thoroughly.
- Heat about 2 inches of vegetable oil in a deep skillet to 350°F (175°C).
- Carefully place the coated chicken pieces into the hot oil, ensuring not to overcrowd the pan. Fry for 4 to 6 minutes, turning occasionally, until golden brown and cooked through (internal temperature of 165°F or 74°C).
- Remove the chicken from the oil and place it on a wire rack lined with paper towels to drain excess oil.
- Prepare the garlic sauce: In a small bowl, whisk together the mayonnaise, minced garlic, lemon juice, Dijon mustard, salt, and pepper until smooth.
- Lightly butter the cut sides of the slider buns. Toast them in a dry skillet or under the broiler until lightly golden.
- Assemble the sliders: Place one piece of crispy chicken on the bottom half of each bun. Top generously with the prepared garlic sauce. Place the top bun on the chicken.
- Serve immediately.
Notes
- For extra crispiness, let the dredged chicken rest on a rack for 10 minutes before frying.
- You can air fry the chicken at 400°F (200°C) for 12-15 minutes, flipping halfway, instead of deep frying.
- Add a thin slice of pickle or a small leaf of lettuce to the slider before serving for texture contrast.
Nutrition
- Serving Size: 1 slider
- Calories: 350
- Sugar: 4
- Sodium: 550
- Fat: 18
- Saturated Fat: 3
- Unsaturated Fat: 15
- Trans Fat: 0
- Carbohydrates: 28
- Fiber: 1
- Protein: 20
- Cholesterol: 75