

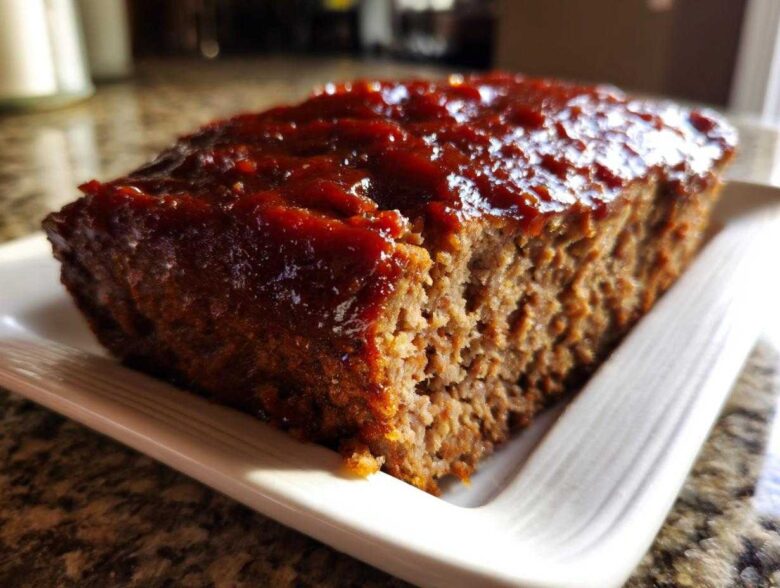
Listen, when you need true comfort food, nothing beats a home-baked loaf of beef. Forget those sad, dry things you might have had growing up! I spent years trying every trick in the book—seriously, years—to nail down the absolute best, super-moist meatloaf recipe that always, always makes my family happy. That is why I am so excited to share this one with you. This isn’t just *a* recipe; this is my definitive, tried-and-true method for the juiciest loaf topped with my simple, tangy homemade glaze. If you’re looking for reliable dinner ideas that taste like home, look no further!
Why This Is the Best Meatloaf Recipe Ever
I know everyone claims theirs is the best, but trust me on this one. This recipe delivers comfort on a platter every single time. If you’ve ever sworn off meatloaf because it turned out dry or bland, you need to try my method. It’s foolproof, and that’s what matters most when you’re counting on an easy weeknight success.
- It is genuinely juicy—no more scrubbing the pan afterwards trying to remove a rock-hard brick!
- The flavor is savory and perfectly balanced, exactly what a traditional loaf should taste like.
- The glaze takes two minutes, but it tastes like you slow-cooked it for hours.
- It’s been heavily vetted by my picky in-laws, which is the highest approval I can give!
Achieving the Perfect Juicy Meatloaf Texture
The main secret to a genuinely juicy meatloaf is ensuring the meat doesn’t dry out, period. That’s why I insist on 80/20 ground beef—that little bit of fat renders down and keeps everything tender. Then, we use the milk-soaked breadcrumbs. That mixture acts like a sponge, locking moisture into every bite, guaranteeing a tender result, not a tough one.
The Secret to Our Signature Meatloaf with Glaze
Let’s talk topping because that’s where the magic happens. My signature meatloaf with glaze isn’t fussy; it’s a quick blend of ketchup, brown sugar, and vinegar. That sweet-and-sour punch cuts through the richness of the beef perfectly. It sets up beautifully as it bakes, giving you that classic, slightly sticky, shiny top that just screams ‘classic comfort food.’
Essential Ingredients for Classic Meatloaf
Okay, before we even think about mixing, we need to talk about what goes *into* the loaf. Getting this right is key to a spectacular classic meatloaf recipe. I’ve made adjustments over the years, believe me, but these core components have remained untouched because, well, they just work! You won’t find any fillers here, just solid, straightforward flavor builders. Don’t forget to check out my latest cooking discoveries for more foundational tips.
Ingredient Specifications and Preparation Notes
This is where you earn your ‘Expert’ badge, friend. For beef, you absolutely must use 80/20 ground beef; anything leaner turns into dry sawdust, and we are aiming for moist meatloaf here! The onions need to be very finely chopped—like, almost minced—so they melt into the loaf while baking rather than leaving huge crunchy chunks. Pay close attention to the ketchup; we use some inside the mix for binding and moisture, and the rest is strictly reserved for that perfect glaze later on. Also, take the time to measure that brown sugar for the topping precisely; it’s crucial for the sticky, sweet crust we are after!
Step-by-Step Instructions for Moist Meatloaf
Alright, let’s get down to business and turn these ingredients into the perfect, savory dish we’ve been dreaming about. Follow these steps closely, and I promise you’ll have the most flavorful, moist meatloaf you’ve ever made. Remember, preheat that oven to 350°F first! I usually prep my loaf pan right away, lining it with parchment paper if I’m feeling extra cautious, but greasing it up works just fine.
First, that breadcrumb and milk step is non-negotiable; let them soak up that liquid for a full five minutes. Then, gently incorporate everything else! You’ll want to visit my post on quick dinner fixes later, but now is the time for gentle hands!
Mixing and Shaping Your Savory Meatloaf
This is the most important part for a tender meatloaf. You have to mix gently! Seriously, I mean it when I say you mix with your hands until everything is *just* incorporated. If you knead this mixture like dough, you’ll activate the proteins and end up with something tough enough to heel your boots. When you can still see faint streaks of dry crumb mixed throughout, that’s your stopping point. Shape it into a nice mound—I usually just plop it onto the sheet pan—so it holds its shape while baking.
Applying the Meatloaf with Glaze in Stages
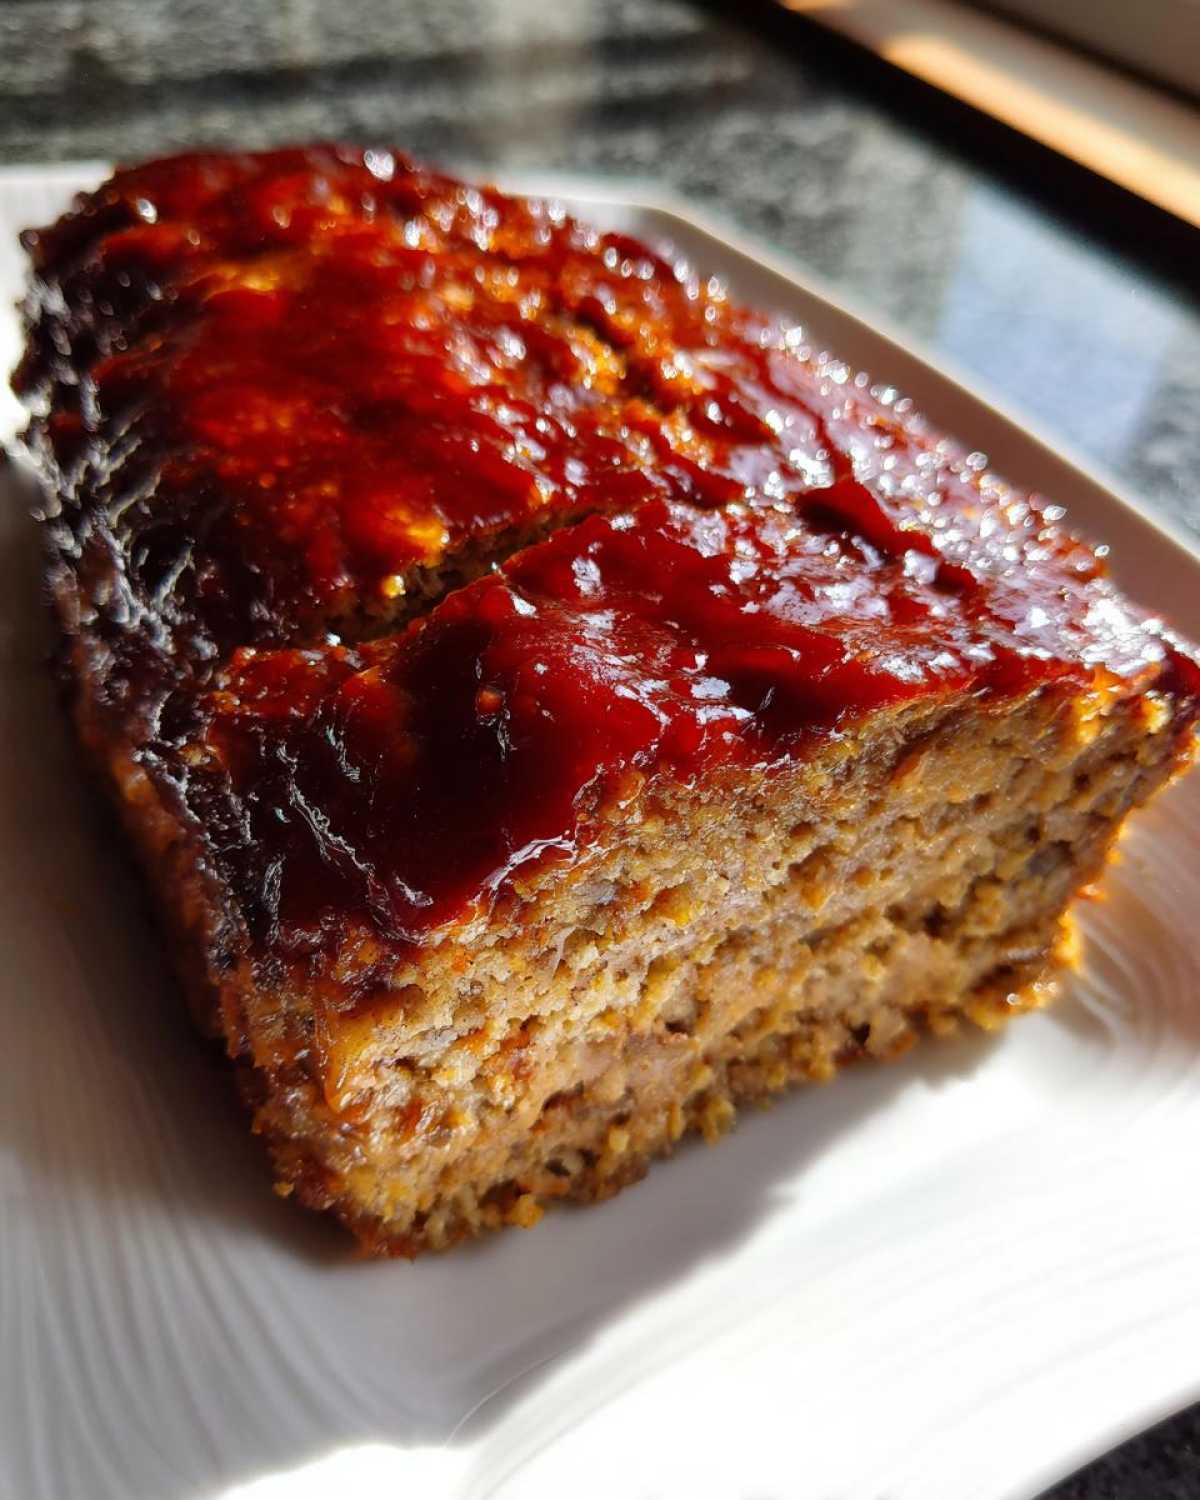
The glaze application is what separates the amateurs from the pros! Spread half of that amazing tangy glaze evenly over your shaped loaf right before it goes into the oven for the first 45 minutes. Then—and this detail matters—pull it out, spread the *remaining* glaze over the top. This two-stage process locks in flavor and prevents the sugar from burning early. Pop it back in until that thermometer hits 160°F. Do NOT skip the 10-minute rest period after it comes out; that lets the juices settle back in, ensuring a truly incredible final slice of meatloaf with glaze.
Expert Tips for the Ultimate Meatloaf Baking Instructions
So, you’ve mixed it gently and glazed it in stages—awesome! But there are a few other secrets I picked up over the years that guarantee success every time you follow my meatloaf baking instructions. A great loaf is all about managing the environment inside that oven, you know? My biggest realization was about the pan choice.
If you use a loaf pan, it traps all those rich juices inside, making it intensely moist, which is great if you want that classic, slightly steamy texture. However, if you bake it free-form right on a parchment-lined baking sheet, the heat circulates around the sides better, giving you a slightly crispier crust all the way around, closer to what you’d expect from a fantastic roast. Both are delicious, but sometimes you want that crust!
And please, please, please let it rest after you pull that beautiful thing out of the oven! Ten minutes is mandatory. If you slice it immediately, all those lovely developed juices run right out onto your cutting board instead of staying put in the meat. Trust me, that brief wait makes all the difference between a good slice and a spectacular slice. You can check out my recipe for sloppy joe sliders while you wait, but only after the meatloaf has rested!
Variations on the Traditional Beef Loaf
While this recipe is perfection as is, I love encouraging cooks to make it their own! After all, an essential part of a great traditional beef loaf is making it fit your family’s taste. You don’t need a whole new recipe to switch things up; just tweak the binders or the herbs.
If you want a richer, even more tender loaf, the absolute best thing you can do is substitute half your ground beef with ground pork or even ground veal. It adds incredible texture and flavor depth. Don’t be afraid to experiment with herbs, either. A teaspoon of dried thyme or a little fresh parsley mixed right into the beef mixture gives it a completely different, but equally delicious, profile.
Serving Suggestions for Your Easy Meatloaf Dinner
You’ve nailed the main event—the most flavorful, juicy meatloaf around! But what’s a perfect easy meatloaf dinner without the right supporting cast? You need sides that are just as comforting and easy to pull off while the loaf is resting. I always keep things classic because this dish doesn’t need anything fancy standing next to it.
Here are my top three must-have pairings—these are the ultimate meatloaf must have sides in my house:
- Creamy Mashed Potatoes: You need something fluffy to soak up those last bits of glaze and beef juice. Don’t overthink them; just keep them buttery!
- Simple Steamed Green Beans: A little crispness and color is necessary to balance all that savory richness. A tiny splash of lemon brightens them up.
- Roasted Root Vegetables: If you have an extra 20 minutes, toss some carrots and potatoes in oil and roast them while the meatloaf bakes.
For a full flavor experience that your family will request again and again, check out my recipe for creamy Caesar pasta salad if you’re looking for something cold to counteract the warm loaf!
Storing and Reheating Your Family Favorite Meatloaf
Even the very best family favorite meatloaf is sometimes too big for one night, right? Don’t worry, leftovers are fantastic! You can keep this safely refrigerated, tightly covered, for up to three or four days. When you’re ready for round two, forget just microwaving a dry slice. That’s a crime against flavor!
For the best result, try reheating individual slices in a skillet over medium heat with just a tiny splash of beef broth or water underneath. Cover the skillet for a minute to steam it gently. This brings back all that wonderful moisture, making it taste almost as juicy as the first time you made it!
Frequently Asked Questions About Making Meatloaf
I get so many wonderful messages about this recipe, and honestly, most questions boil down to texture and timing. I totally get it; when you’re looking for reliable comfort food dinners, you don’t want surprises! Here are the things I hear most often regarding this classic meatloaf recipe.
Can I make this meatloaf ahead of time?
Absolutely, yes! I love making the meat mixture the day before, especially on busy weekends. Just mix everything together gently, shape it into the loaf, cover it tightly with plastic wrap, and pop it right into the fridge. Then, the next day, you just add the first layer of glaze and bake according to the instructions. It’s a fantastic trick for pulling off a quick meatloaf recipe when you get home from work!
What is the best temperature for baking meatloaf?
We stick right to 350°F (175°C) for this recipe! That temperature is the sweet spot for cooking the center thoroughly without hardening the outside too quickly before the glaze has a chance to set. It allows the fat to render nicely and helps achieve that perfect internal temperature of 160°F without drying out the meat fibers. If you’re visiting the site again soon, check out my About Us page to see why I trust these specific cooking temps!
Why do I need to let the meatloaf rest?
Oh, this is critical for keeping your loaf moist! That 10-minute rest period after it leaves the oven is when all the delicious juices, which have been forced to the center by the heat, redistribute throughout the loaf. If you skip stepping away for those ten minutes and slice right into it, all that moisture escapes onto your cutting board. A little patience ensures you get that satisfyingly tender meatloaf slice every time!
Estimated Nutritional Data for This Meatloaf
Now, I know what you’re thinking—is this amazing, super satisfying meatloaf really going to destroy my diet? When you make something this delicious and comforting, you deserve to know what you are eating! This information is based on the recipe yielding 6 servings, which is a generous slice loaded with flavor.
Keep in mind that these are just estimates based on standard 80/20 ground beef and store-bought condiments. If you use higher-quality, grass-fed beef or substitute pork, those numbers will shift slightly. But compared to grabbing something from the freezer aisle, this homemade dish keeps things surprisingly reasonable!
- Calories: Approximately 380 per slice
- Protein: A solid 28 grams! Great for keeping you full.
- Fat: Around 22 grams, which is where all that juicy flavor comes from!
- Carbohydrates: About 18 grams, mostly coming from the breadcrumbs and that gorgeous glaze.
For the full details on ingredients and preparation secrets, you can always refer back to the main recipe instructions. For full transparency on how we calculate these figures across the site, please review our Nutritional Disclaimer. Enjoy your perfect dinner tonight!
PrintClassic Juicy Meatloaf with Best Homemade Glaze
This recipe delivers a moist, flavorful classic meatloaf topped with a simple, tangy homemade glaze. It is a family favorite comfort food perfect for weeknight dinners.
- Prep Time: 15 min
- Cook Time: 65 min
- Total Time: 80 min
- Yield: 6 servings
- Category: Dinner
- Method: Baking
- Cuisine: American
- Diet: Low Calorie
Ingredients
- 2 lbs ground beef (80/20 recommended)
- 1 cup plain breadcrumbs
- 1/2 cup milk
- 1 large egg, lightly beaten
- 1/2 cup finely chopped onion
- 1/4 cup ketchup (for the mix)
- 1 teaspoon salt
- 1/2 teaspoon black pepper
- 1/4 teaspoon garlic powder
- 1/4 cup ketchup (for the glaze)
- 1/4 cup packed brown sugar (for the glaze)
- 2 tablespoons apple cider vinegar (for the glaze)
- 1 teaspoon Worcestershire sauce (for the glaze)
Instructions
- Preheat your oven to 350°F (175°C). Lightly grease a loaf pan or line a baking sheet with parchment paper.
- In a large bowl, combine the breadcrumbs and milk. Let stand for 5 minutes to soften the breadcrumbs.
- Add the ground beef, chopped onion, 1/4 cup ketchup, egg, salt, pepper, and garlic powder to the breadcrumb mixture.
- Mix all ingredients gently with your hands until just combined. Do not overmix, as this can make the meatloaf tough.
- Shape the mixture into a loaf shape and place it in the prepared pan or on the baking sheet.
- In a small bowl, whisk together the glaze ingredients: 1/4 cup ketchup, brown sugar, apple cider vinegar, and Worcestershire sauce.
- Spread half of the glaze evenly over the top of the meatloaf.
- Bake for 45 minutes.
- Remove the meatloaf from the oven and spread the remaining glaze over the top.
- Return to the oven and bake for another 15 to 20 minutes, or until the internal temperature reaches 160°F (71°C).
- Let the meatloaf rest for 10 minutes before slicing and serving.
Notes
- For an extra moist meatloaf, substitute half the ground beef with ground pork or veal.
- If you prefer a crispier exterior, bake the meatloaf directly on a baking sheet instead of in a loaf pan.
- You can prepare the meatloaf mixture the day before and store it covered in the refrigerator.
Nutrition
- Serving Size: 1 slice
- Calories: 380
- Sugar: 15
- Sodium: 550
- Fat: 22
- Saturated Fat: 9
- Unsaturated Fat: 13
- Trans Fat: 0.5
- Carbohydrates: 18
- Fiber: 1
- Protein: 28
- Cholesterol: 95