

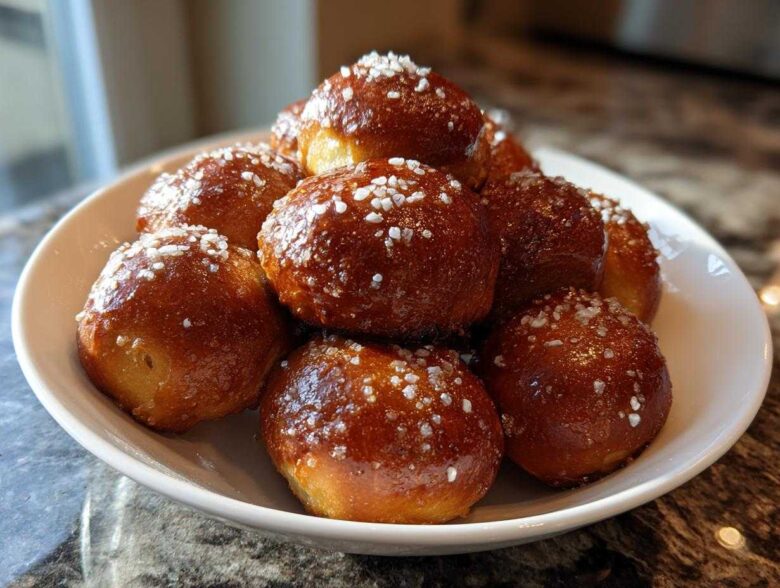
Oh my gosh, if there is one smell that just brings me instantly back to life, it’s that warm, slightly malty, deeply satisfying aroma of something fresh out of the oven that should taste like a boardwalk treat. Forget those dry, sad little store-bought snacks, friends. We are talking about the real deal today: the absolute Best Pretzel Bites Recipe you will ever try. I spent way too many Sundays perfecting these, usually attempting to keep them away from my husband until kickoff! The magic trick here, the thing that makes these *my* favorite homemade pretzel bites, is nailing that quick dip in the baking soda bath. Trust me, you need that step if you want that perfectly soft and chewy texture. When these come out golden brown, brushed with butter, and sprinkled with salt—wow. You need these for your next party!
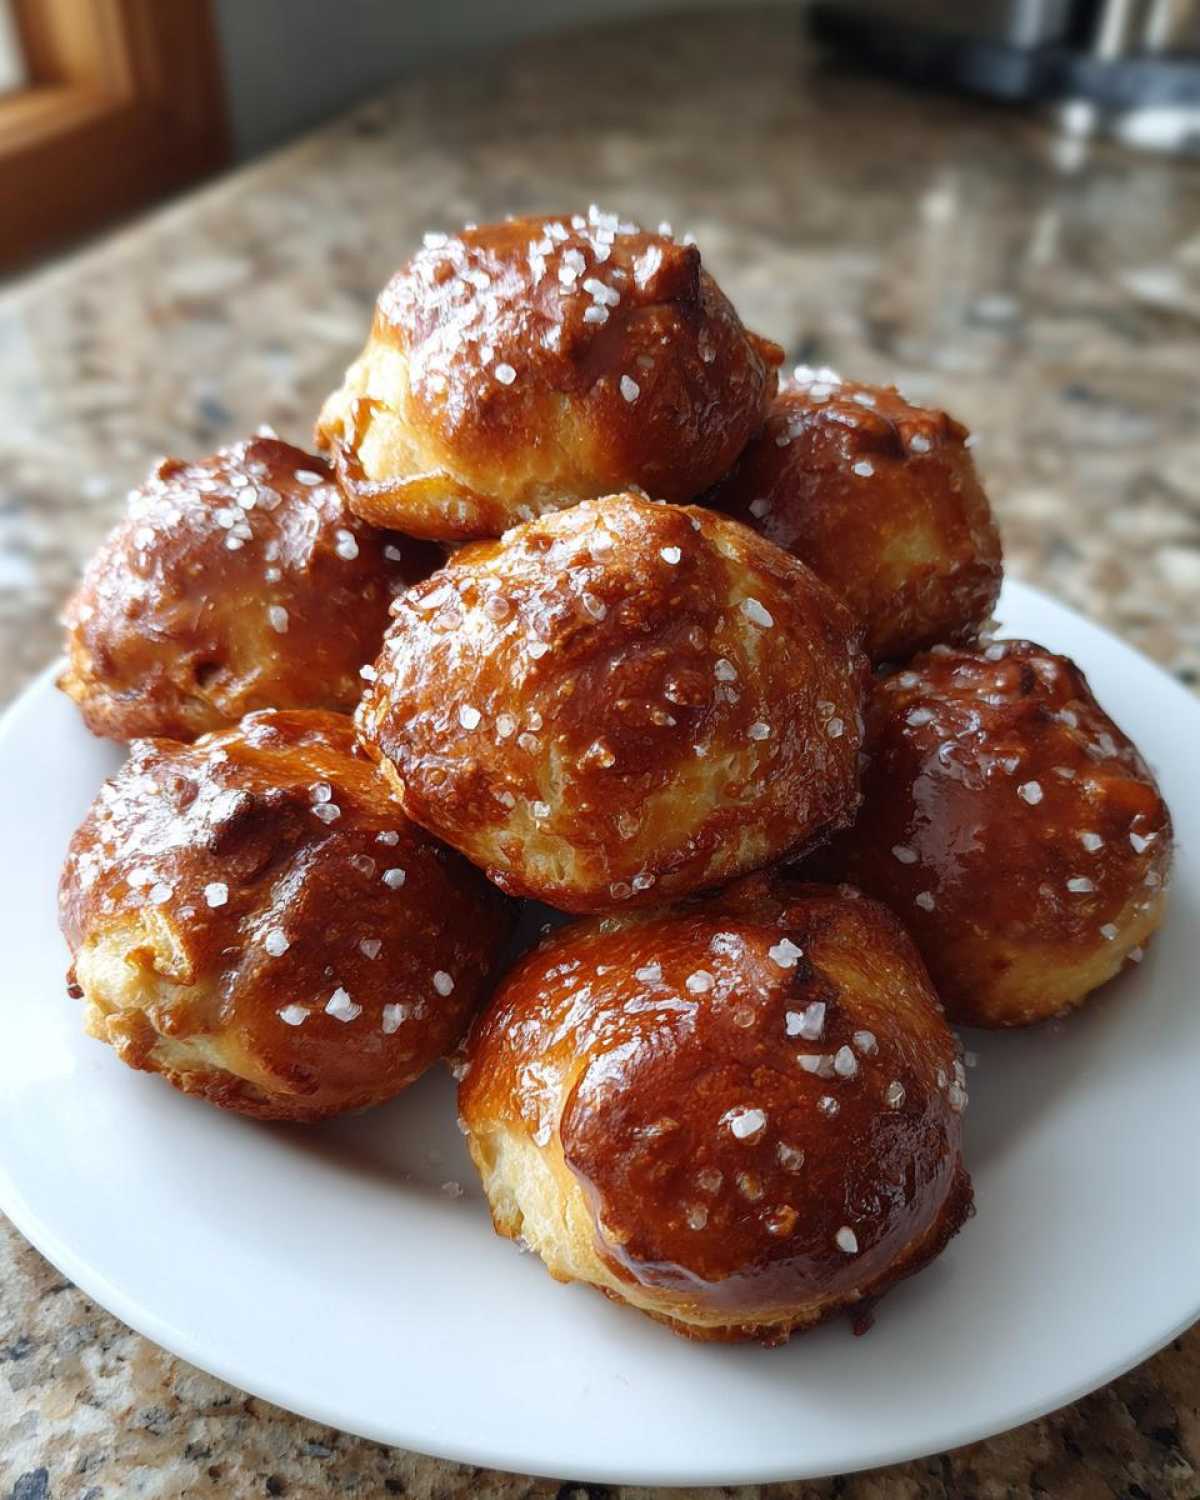
You can find a million quick snacks out there, but if you want to impress everyone, you need to check out all my best baking tips over in the main snacks section right here. We always serve these right alongside a bowl of warm nacho cheese!
Why You Will Make These Buttery Pretzel Bites Again and Again
Honestly, once you taste these fresh from the oven, there’s no going back. These are the ultimate crowd pleaser because they nail the texture every time. Seriously, they rock!
- They have that perfect, slightly tough exterior that instantly gives way to a super soft and chewy center.
- They come together faster than you think, even with the rise time!
- They are hands-down the best game day appetizers that disappear instantly.
- This recipe for pretzel bites makes enough to share, but you’ll want to hoard them all for yourself.
Gathering Ingredients for Your Homemade Pretzel Bites
Okay, so baking is all about precision, especially when we start talking about turning simple dough into something authentically pretzel-like. I’ve broken down everything you need below. Make sure your warm water isn’t too hot; we don’t want to kill that lovely yeast! Also, pay close attention to the two different sets of water measurements—one for the dough, which is small, and one massive pot for the actual boiling later.
The absolute non-negotiable here, the stuff that separates these from just being fancy little dinner rolls, is the baking soda. You need that whopping half-cup for the water bath to create the alkaline environment that gives pretzels their signature color and crust. Don’t skimp there, it’s pure science!
Before you jump into mixing, take a peek at our About Us page to see why we obsess over kitchen details like this. It’s all about passion!
Here’s what you need to pull together your main batch of Buttery Soft Pretzel Bites:
- 1 1/2 cups warm water (remember, around 110°F!)
- 1 packet active dry yeast (that’s 2 1/4 teaspoons, if you’re weighing it out)
- 1 teaspoon granulated sugar (just enough to wake up the yeast)
- 3 3/4 cups all-purpose flour
- 1 1/2 teaspoons salt (for the dough itself)
- 2 tablespoons melted unsalted butter (for mixing into the dough)
- 1/2 cup baking soda (our secret weapon!)
- 8 cups water (for that critical boil!)
- 4 tablespoons melted unsalted butter (reserved specifically for brushing after they bake)
- Coarse salt, for topping (don’t use fine table salt here, it burns too fast!)
Mastering the Soft Pretzel Bites Dough Process
Alright, buckle up, because this is where we build structure! Once the ingredients are measured, we move to the mixing bowl, and this is where we start building flavor and texture for those incredible homemade pretzel bites. Don’t just dump everything in; we need a little patience here to ensure we get that perfect elasticity needed for chewy pretzel bites.
If you’re looking for other amazing bread recipes that are quick on the table, check out my favorites for easy bread snacks. But for now, focus on this dough!
Proofing the Yeast and Mixing the Dough
First things first: we need happy yeast! Dissolve the sugar right into the warm water, then sprinkle that yeast on top. Take five minutes, walk away, look out the window, whatever, but don’t touch it. If it gets all foamy and smells slightly sweet and yeasty, great news—your yeast is alive and kicking! That’s your visual cue that you’re good to go.
Now, mix in the flour and the dough salt until it looks messy and shaggy. Don’t worry about it yet. Next, drizzle in those initial 2 tablespoons of melted butter. That little bit of fat helps keep the dough tender even before the boiling step.
Kneading and Resting for Chewy Pretzel Bites
This is where we build the gluten, which gives us that fantastic chew! Turn that shaggy mass out onto a lightly floured counter and start kneading. You need to work it for a solid 5 to 7 minutes. You’ll know it’s ready when it feels smooth under your hands and springs back slightly when you poke it. Elasticity is key!
Toss that beautiful dough into an oiled bowl, cover it tightly with plastic wrap (I use a damp towel if I’m feeling rustic), and find it a warm spot. It needs a full hour to rest and double in size. Resist the urge to poke it too early; let time do the work!
The Secret to Authentic Texture: The Baking Soda Bath Pretzels Technique
Okay, people, this is the step where most people panic, but honestly, this is the single most important part of making *great* pretzel bites. We’re doing the Baking Soda Bath Pretzels technique, and there’s a genuine reason why professional bakers do this! When you boil the dough in that super-alkaline solution—that is, the water mixed with the half-cup of baking soda—it gelatinizes the starch on the outside of the dough.
Why does that matter? It sets the crust instantly. When you bake it, that set crust is what gives you that beautiful, deep mahogany color and that wonderful, slightly tangy chew. If you skip this part and just bake the dough, you end up with a very slightly flavored soft roll, not a pretzel. Don’t let the boiling scare you; it’s quick and totally safe if you follow my lead!
First things first before we start boiling anything, go ahead and preheat your oven to 450°F (232°C). We want that heat ready to go the second these bites come out of the water. Line two baking sheets with parchment paper now so you’re ready to catch them!
Preparing the Dough Ropes and Cutting the Pretzel Bites
Now that your dough has rested and doubled, punch it gently—we don’t want to knock out *all* the air, just enough to deflate it a bit. I like to divide the dough in half right on the counter, which makes rolling way less messy. Take one half and start rolling it out into a long rope. You want this rope to be about an inch thick—think of a slightly thick garden hose, not a flimsy spaghetti noodle.
Once your rope is rolled, grab a bench scraper or a sharp knife. You need to cut it into small, bite-sized pieces—about 1 inch each. Try to keep them uniform! If some bites are tiny and some are giant, the tiny ones will be dry before the giant ones are cooked through. We are aiming for perfect consistency here for our Soft Pretzel Bites.
Boiling the Bites for Perfect Soft Pretzel Bites
Time for the main event! Get your biggest soup pot and bring those 8 cups of water up to a fierce, rolling boil. Carefully whisk in your 1/2 cup of baking soda. It might foam up a little aggressively, but don’t worry, that’s normal! You want a strong, steady simmer—not a wild, splashing boil where you can’t control the dough, but definitely rolling.
Working in batches—and I mean small batches, maybe 6 to 8 bites at a time—gently drop the raw dough pieces into the water. Don’t overcrowd the pot; we need the water temperature to stay high! You only leave them in for exactly 30 seconds. Seriously, use a timer! Scoop them out using a slotted spoon or a spider strainer, letting the water drain completely before placing them on your prepared baking sheets. They will look pale and slightly puffy when they come out. That’s perfect!
Baking and Finishing Your Buttery Pretzel Bites
We’ve done the heavy lifting with the dough and conquered the boiling bath—now comes the really fun part where the magic happens and they start smelling like heaven! Remember how we preheated everything? Good! Because these delicate bites need high heat to puff up beautifully and get that glorious, deep brown crust. They are surprisingly quick in the oven, so don’t wander off to scroll your phone!
Once your baking sheets are loaded up with those little boiled guys, grab your remaining melted butter. This is the second time butter gets involved, and it’s totally worth it! Brush the tops generously. This liquid butter helps the salt stick, and it also keeps the surface tender as it bakes. Then, liberally sprinkle them with that coarse salt. You want a nice, visible crust of salt on top of those Buttery Soft Pretzel Bites.
Slide them onto the middle rack and set your timer for 10 to 12 minutes. I always err on the side of less time, maybe checking at 10:30, because overbaking is the enemy of a chewy pretzel bite. You’re looking for a deep, rich golden brown—not pale yellow, but definitely not burnt black. That deep color is flavor, kids!
The absolute final, crucial step happens the second they come out of the oven! They are going to look a little dry right out of the heat, so you must brush them immediately with that last bit of melted butter that you kept warm. That final brush locks in moisture, gives them an irresistible sheen, and makes them taste like they just came from a concession stand. Seriously, don’t skip that post-bake butter bath. That’s what seals the deal for the best homemade pretzel bites!
Creative Variations for Your Pretzel Bites
Look, I love that classic salty bite, I really do. But sometimes you need a little curveball, right? Especially if you’re bringing snacks for a mixed crowd! The great thing about having this Basic Buttery Pretzel Bites recipe mastered is that you can pivot easily based on what you’re craving or what you’re watching on TV. We can go sweet, we can go savory—it’s all based on very minor tweaks after they come out of the oven. These still qualify as quick homemade snacks, they just get a little costume change!
If you are really into savory wings as a party starter, make sure you check out my killer recipe for Garlic Parmesan Wings; they use a similar technique of tossing things in savory toppings after cooking, which is always a winner!
Making Sweet Cinnamon Sugar Pretzel Bites
Okay, switch gears! If you’re having a movie night or maybe serving these earlier in the day, we can skip the rough salt entirely and turn these into dessert bites. You don’t need to change the dough at all! As soon as those pretzel bites roll out of the oven—while they are still piping hot, mind you—you need to toss them right into your sugar bowl.
The trick here is that final coating of melted butter! Before you drop them into the sugar, ensure they have that warm, melted butter brushing from the previous step. That butter acts as the glue. You want a generous mix of granulated sugar and ground cinnamon. Shake those bites around in a Ziploc baggie like you’re shaking a cocktail until they are completely coated and glowing! They smell incredible this way. If you like baked oatmeal for breakfast, you’ll appreciate the flavor profile in these sweet pretzel bites, similar to my Cinnamon Apple Baked Oatmeal.
If you want to go full savory, try whisking some garlic powder and dried Italian herbs into the melted butter you brush on before baking, and then toss them with grated Parmesan cheese right when they come out of the oven! Boom. Done. A perfect savory bite-sized appetizer!
Serving Suggestions for These Game Day Appetizers
Honestly, you could serve these pretzel bites plain, and they’d still be devoured instantly. That soft, buttery crust is enough on its own! But why stop there when you can turn this into an epic spread? Since these things disappear the second I put them out, I always make sure to prep two or three different dipping sauces. They are seriously the ultimate crowd pleaser snacks.
The obvious champion pairing is almost always a creamy cheese dip, of course. Nothing beats dunking those warm, salty bites into something gooey and rich. If you’ve got time, I highly recommend making my homemade cheese dip—it’s way less fussy than you think! If cheese isn’t your thing, honey mustard is another huge hit. The sweet tang cuts through the saltiness of the pretzel perfectly.
For a slightly lighter but still delicious option that goes great alongside these game day appetizers, you should try my Pesto Hummus recipe here. It’s bright, flavorful, and gives your spread a nice color contrast!
Storing and Reheating Your Homemade Pretzel Bites
I know what you’re thinking: these pretzel bites are so good, why would there be any leftovers? Ha! That’s what I always say, and yet, somehow, there are usually four or five lingering around the edges of the platter the next morning. Don’t panic; we can revive them! The goal here is to keep them soft and chewy, not turn them back into little rocks.
For short-term storage, which is usually just overnight for me since they vanish fast, you just need an airtight container. Forget the plastic wrap alone; it doesn’t seal well enough and leads to stale bites. Get a solid container, seal it tight, and keep it on the counter. They are just bread, so they don’t need the fridge, which actually dries them out faster!
If you need to keep them longer—say, for a party spread over two days—you can freeze them! This is a great tip for batch cooking. Let them cool completely first. Then, arrange them in a single layer on a baking sheet and flash freeze them until solid. Once they are rock hard, transfer them to a heavy-duty freezer bag. They keep great for about a month this way.
Reheating is super easy, but you must use gentle heat to bring back that wonderful softness. If you microwave them, they get warm fast, but sometimes they can feel a little spongy afterward. I find the oven works best for restoring that original texture, especially if you have a freezer batch you are reviving.
- **Oven Method (Best for restoring true chewiness):** Preheat your oven to a lower temperature, around 300°F (150°C). Spread the bites in a single layer on a baking sheet and warm them for just 5 to 7 minutes. They come out warm, soft, and ready for a fresh butter brush!
- **Microwave Quick Fix:** If you’re absolutely starving and need one or two fast, just zap 3 or 4 bites on a paper towel for about 15 to 20 seconds on medium power. That should warm them through without making them tough. If they feel a bit dry, a tiny spritz of water before microwaving can help create some steam!
No matter how you store them, these savory snack recipes are best enjoyed the day they are made, but these methods ensure you won’t waste a single one!
Frequently Asked Questions About Pretzel Bites
I know you’re probably already planning your next batch because these are seriously addictive. When people ask me about perfecting pretzel bites, usually the questions come down to timing and texture since that’s the tricky bit! I’ve answered the ones I get asked the most down below because I want to make sure your Homemade Dough Bites turn out perfect every single time.
If you have other burning questions after trying the recipe, feel free to reach out on the contact page—I love hearing from fellow bakers!
Can I make the dough for these Easy Pretzel Bites ahead of time?
Absolutely! That’s one of the best parts about this recipe for homemade pretzel bites. You can complete the entire process right up to Step 6 (or even Step 8 if you’ve already cut them). You can chill the un-boiled dough, tightly wrapped, for up to 24 hours. Just make sure you let it sit on the counter for about 20-30 minutes to warm up slightly before you cut and boil them. If you plan to freeze the cut bites, make sure they’re completely frozen solid before bagging them up, as mentioned before!
What is the best dip for these Soft Pretzel Bites?
Oh, this is easy! For the classic savory experience, you simply cannot beat a homemade, slightly spicy cheese sauce. It’s non-negotiable game day snack material! If you aren’t feeling cheese, honey mustard is my next favorite because that sweet and sharp flavor is just brilliant against the salty dough. While I don’t have a dedicated cheese dip recipe linked right here, usually a good store-bought queso warmed up works in a pinch when you’re in a rush!
How do I ensure my pretzel bites are chewy and not hard?
This is the make-or-break question, isn’t it? Two things matter most for getting those perfectly chewy pretzel bites. First, you MUST nail the baking soda bath. Don’t boil them for 15 seconds, and definitely don’t go over 45 seconds. Thirty seconds is the sweet spot for getting that authentic crust set. Second, watch your oven time! These little guys bake fast because they are small. As soon as they hit that deep golden brown—and I mean *deep*—pull them out. If they look pale, they will be flavorless and likely a little tough. That deep color means you’ve created the ideal texture for these soft baked snacks!
PrintButtery Soft Pretzel Bites

Make soft and chewy homemade pretzel bites using a simple baking soda bath for an authentic texture. These are perfect for game day or parties.
- Prep Time: 25 min
- Cook Time: 12 min
- Total Time: 1 hour 37 min
- Yield: About 4 dozen
- Category: Appetizer
- Method: Baking
- Cuisine: American
- Diet: Vegetarian
Ingredients
- 1 1/2 cups warm water (about 110°F)
- 1 packet active dry yeast (2 1/4 teaspoons)
- 1 teaspoon granulated sugar
- 3 3/4 cups all-purpose flour
- 1 1/2 teaspoons salt
- 2 tablespoons melted unsalted butter
- 1/2 cup baking soda
- 8 cups water (for boiling)
- 4 tablespoons melted unsalted butter (for brushing)
- Coarse salt, for topping
Instructions
- In a large bowl, dissolve the yeast and sugar in the warm water. Let it sit for 5 minutes until foamy.
- Stir in the flour and 1 1/2 teaspoons of salt into the yeast mixture. Mix until a shaggy dough forms.
- Add the 2 tablespoons of melted butter. Knead the dough on a lightly floured surface for 5 to 7 minutes until smooth and elastic.
- Place the dough in a lightly oiled bowl, cover it, and let it rise in a warm place for 1 hour, or until doubled in size.
- Preheat your oven to 450°F (232°C). Line two baking sheets with parchment paper.
- In a large pot, bring 8 cups of water and the 1/2 cup of baking soda to a rolling boil.
- Punch down the risen dough. Divide the dough into two pieces. Roll each piece into a long rope, about 1 inch thick.
- Cut the ropes into 1-inch pieces to form the bites.
- Working in batches, carefully drop the dough pieces into the boiling baking soda water for 30 seconds. Do not overcrowd the pot.
- Use a slotted spoon to remove the bites and place them on the prepared baking sheets.
- Brush the tops of the bites with melted butter and sprinkle generously with coarse salt.
- Bake for 10 to 12 minutes, or until deep golden brown.
- Brush immediately with the remaining melted butter after removing them from the oven.
Notes
- For a sweet variation, skip the coarse salt and toss the warm bites in a mixture of cinnamon and sugar.
- Serve these pretzel bites warm with your favorite cheese dip or honey mustard sauce.
- If you want smaller bites, roll the dough ropes thinner before cutting.
Nutrition
- Serving Size: 4 bites
- Calories: 150
- Sugar: 1
- Sodium: 350
- Fat: 4
- Saturated Fat: 2
- Unsaturated Fat: 2
- Trans Fat: 0
- Carbohydrates: 26
- Fiber: 1
- Protein: 4
- Cholesterol: 8