

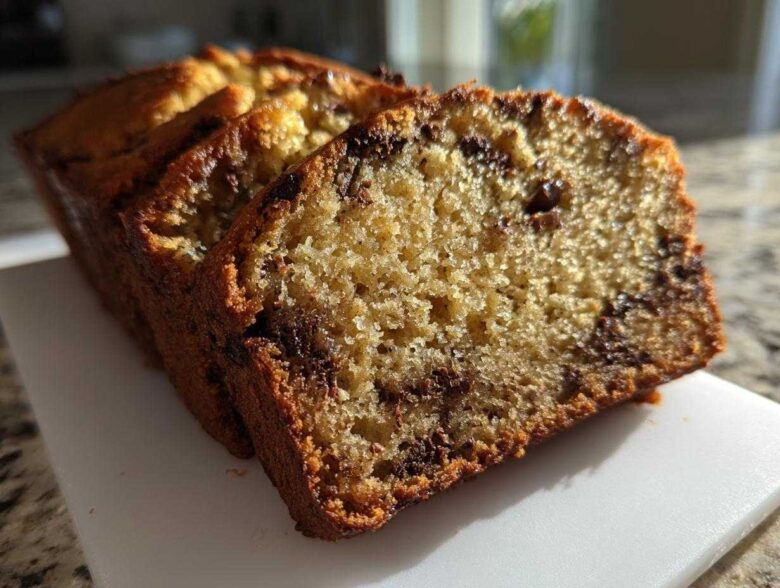
Oh my goodness, listen to your nose! That warm, sweet, comforting smell floating out of the oven? That’s the sound of success, and it can only mean one thing: the best moist banana bread recipe is resting on my counter. I’ve spent years tweaking proportions because, truthfully, dry banana bread is a tragedy we simply can’t allow in our kitchens. This isn’t just any sweet bread; it’s my go-to method for rescuing those bananas that have gone completely black on the counter. I promise you, this banana bread is incredibly easy. It’s honestly foolproof, which is why I’m so confident sharing it with you today. I learned so much about reliable comfort baking while developing this, and you can read a little bit more about our standards over at our baking philosophy. After countless tries, I finally nailed the perfect tender crumb.
Why This Is The Best Moist Banana Bread Recipe
Why should you trust my recipe over the dozens you’ve already tried? Simple: this batch guarantees unbelievable moisture and it takes almost no brain power. We’re talking about turning those sad, overripe bananas into the ultimate comfort baking payoff. Baking this banana bread is genuinely stress-free.
- It’s unbelievably moist—seriously, it stays soft for days.
- The cleanup is minimal because it’s a one-bowl recipe.
- It perfectly uses up those mushy, spotty bananas that look ready for the compost pile.
Key Attributes of Our Easy Homemade Banana Bread
The texture here is the star; we are talking about a soft, tender crumb that melts in your mouth. Forget dry, crumbly loaves! Because we use a super straightforward mixing process, this qualifies as a fantastic quick bread recipe. It’s so easy, anyone can manage it, making it ideal for a fast breakfast treat or a simple sweet snack.
Gathering Ingredients for Classic Banana Bread
Let’s talk about what you need to pull off this amazing loaf of banana bread. The beauty of this recipe is that it uses basic supplies you probably already have in your pantry, which feels so traditional and cozy when you’re baking. Don’t go thinking you need a dozen exotic items; we’re sticking to the essentials for that classic comfort flavor.
Here is the exact list of what you should gather up:
- 3 large very ripe bananas, mashed
- 1/3 cup melted unsalted butter
- 3/4 cup granulated sugar
- 1 large egg, lightly beaten
- 1 teaspoon vanilla extract
- 1 teaspoon baking soda
- 1/4 teaspoon salt
- 1 1/2 cups all-purpose flour
- Optional: 1/2 cup chocolate chips
Ingredient Notes and Substitutions for Soft Tender Banana Bread
Okay, the bananas are non-negotiable. They absolutely must be deeply spotted—I mean almost black—for that deep sweetness this banana bread needs. If they are only slightly yellow, you won’t get the right moisture level. Also, while the recipe calls for granulated sugar, I have sometimes swapped half of it for light brown sugar, and wow, it adds a lovely depth of caramel flavor! Just make sure you stick to the 1/3 cup of melted butter; using oil instead changes the texture too much for my taste.
Essential Equipment for Your Banana Bread
To help you keep this whole process super easy, let’s make sure your kitchen gadgets are ready for action. You don’t need specialty gear, but having the right tools makes the mixing go much smoother!
First off, you absolutely need a good, sturdy large mixing bowl. Since we mix everything in one place, pick one that’s deep enough so when you start stirring, you don’t end up wearing half the batter! You’ll also need a rubber spatula, which is way better than a wooden spoon for folding the flour in gently later on.
For measuring, standard cups and spoons work perfectly, naturally. But the most important piece of equipment is your loaf pan. You’ll want a standard 9×5 inch loaf pan. Make sure you grease and flour it well, or maybe grab some parchment paper if you’re worried about sticking—though either way, get it prepped before you even start mashing those bananas!
Step-by-Step Instructions for Foolproof Banana Bread
Alright, let’s dive into the actual magic! Making this banana bread is so intuitive once you follow the order. First thing, always, always, preheat that oven to 350°F (175°C). While it warms up, take a moment to properly grease and flour your 9×5 inch loaf pan. That little bit of effort now saves you a mountain of heartbreak later when you try to get the loaf out!
We start by mashing those super soft bananas right in your big bowl—I like mine mostly smooth, but leaving a few small lumps is totally fine for texture!
Mixing the Batter and Adding Mix-ins to the Banana Bread
The process follows the wet-then-dry rule so perfectly. After mashing the bananas, stir in the melted butter first. Then come the sugar, the egg, and the vanilla. Just swipe it around until it looks combined. Now, here is where patience comes in! Whisk your flour, baking soda, and salt in a separate little bowl, and then gently fold that dry mix into the wet ingredients using your spatula. You stop mixing the second you see no more white streaks of flour. Seriously, stop! Overmixing ruins the tenderness.
Baking Times and Checking Doneness for Your Quick Bread Recipe
Pour that beautiful batter into your prepared pan and pop it into the oven for about 50 to 60 minutes. Keep an eye on it, though, because every oven is moody. If you notice the top getting too dark before the middle is done, just loosely tent it with some aluminum foil—that’s a little trick I picked up years ago! Start testing around the 50-minute mark by inserting a toothpick right in the center. If it comes out clean, you’re golden. If you don’t have a toothpick handy, a light press on the top center should make it spring back gently.
You can find some other great hands-on baking tips for achieving perfect moisture right here, but honestly, following these steps on the banana bread ensures you can’t go wrong!
Tips for Achieving the Ultimate Moist Banana Bread Recipe
Now that you know the basic steps for this easy banana bread, let’s talk about the secrets to making it truly unforgettable—we are chasing that cloud-like tenderness!
First off, don’t rush the bananas. I know I keep saying it, but trust me, it bears repeating. The browner the banana peel, the sweeter and more moist your final loaf will be. That black-on-black stage is where the magic sugars are hiding.
Another little trick I use is the resting time. After you mix everything—and I mean *everything*—let the batter sit on the counter for about ten minutes before you pour it into the pan. This lets the flour fully hydrate, which means it absorbs liquid better during baking, preventing that dry, cardboard texture. It’s a small pause, but it makes a huge difference in the final outcome of your banana bread.
Also, make sure your baking soda is fresh! If your leavening agents are old, your bread won’t rise properly, leading to a dense, gummy result instead of the beautiful, light crumb we are aiming for. A quick test: drop a tiny bit into a splash of hot water; if it fizzes vigorously, you’re good to go for this recipe!
Variations on Classic Banana Bread
While this recipe stands proudly as a wonderful classic, sometimes you just need to mix things up a little bit, right? Once you master the base loaf, which is so simple, you can have endless fun with additions!
My favorite thing to sneak in, especially when I’m making a batch for a weekend brunch, is nuts. Walnuts are the traditional choice, and they add such a satisfying little crunch against the soft loaf. I always roughly chop about a cup of them, kind of like how Grandma liked her raisins—just enough to surprise you in different bites!
If you’re feeling more decadent, you absolutely must try baking it with chocolate chips. I mentioned them as optional above, but honestly, a half-cup of semi-sweet chips melted slightly into that warm batter creates pockets of pure joy once it cools down. That combination is just unbeatable for a sweet treat.
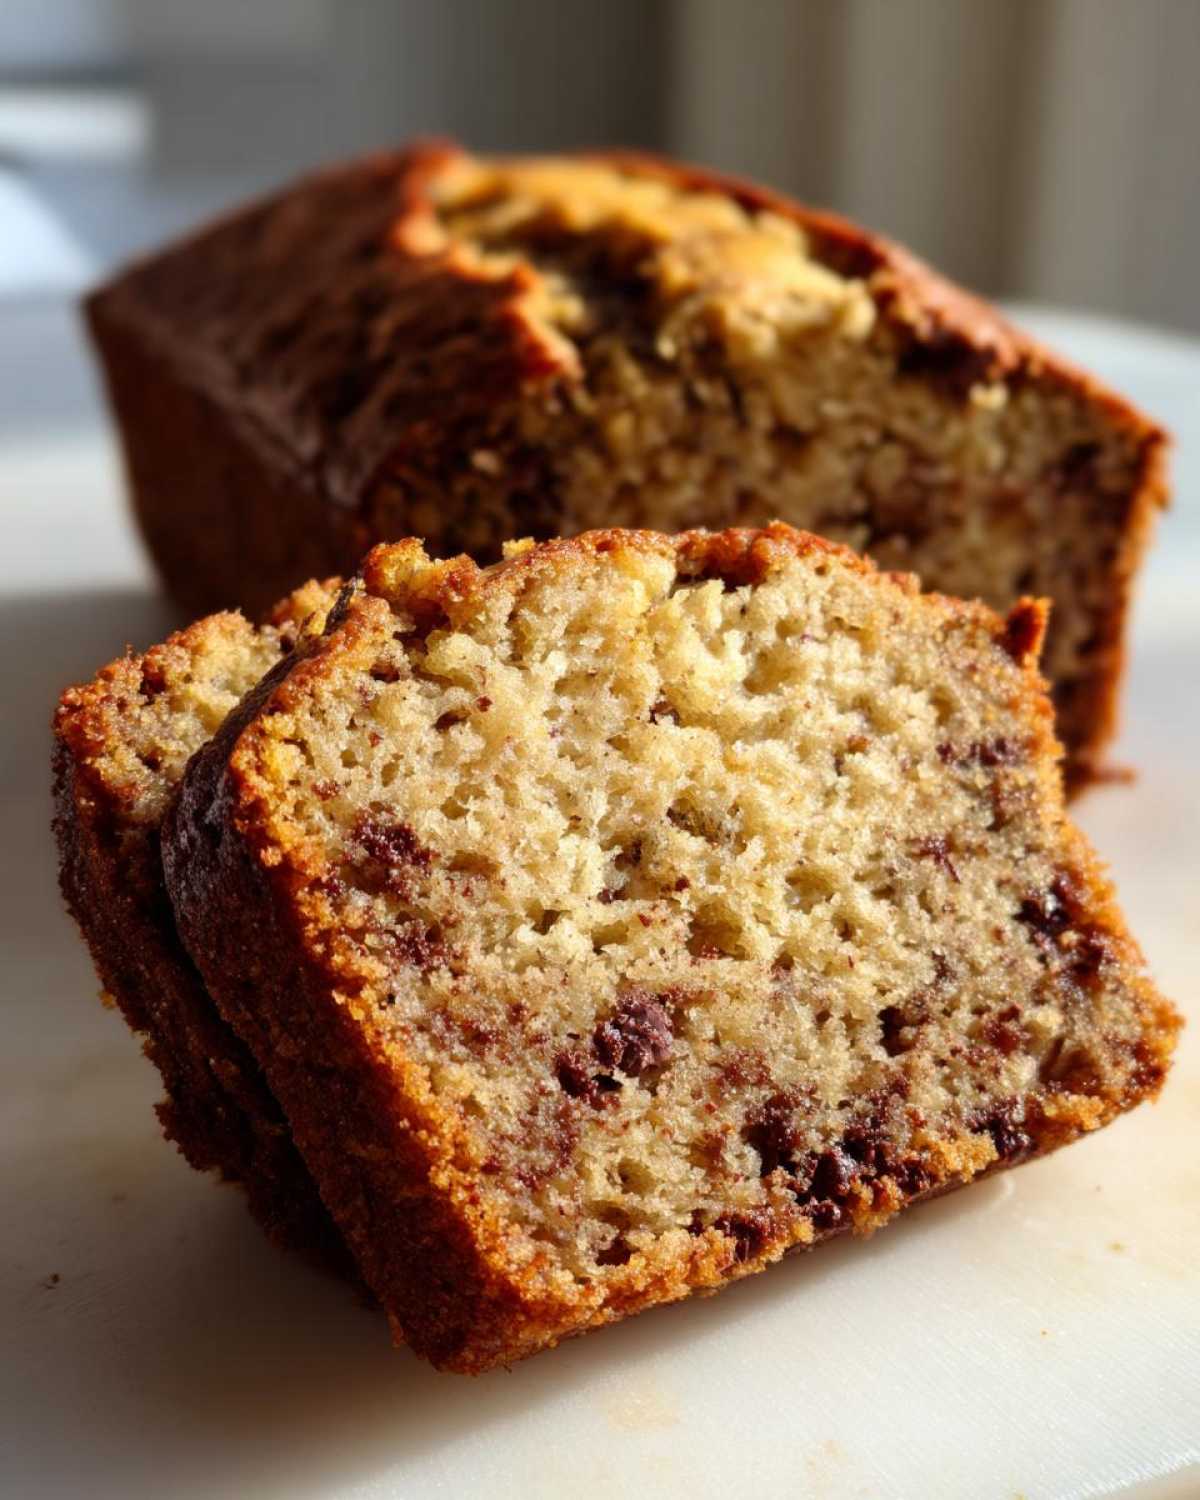
For something that feels a little more holiday-esque, try swirling in some spice! Before pouring the batter into the pan, mix about two tablespoons of brown sugar with a heavy teaspoon of cinnamon. Sprinkle that mixture over the top of the batter, and then use a knife to gently swirl it down through the top layer a few times. It gives you a lovely ribbon of spice running through your homemade sweet loaves.
If spice is your thing, you can also check out another amazing sweet bread recipe we tried out recently, which uses similar base techniques, over at our zucchini bread adventures. You can swap out the zucchini for banana if you’re feeling extra experimental!
Storing and Reheating Your Homemade Banana Bread
You made a whole loaf of perfect banana bread, wow! Now you need to keep it magnificent for later. If you plan to eat the whole thing within three days, just keep it covered tightly at room temperature. A simple wrap in plastic wrap or placing it in an airtight container works wonders.
If you need it to last longer though, you can absolutely freeze it! Wrap individual slices really well, or the whole cooled loaf, in plastic wrap first, then foil. That double layer keeps freezer burn away. When you’re ready for a snack, just pop a slice on a microwave-safe plate and nuke it for about 15 to 20 seconds. It comes out tasting like it just came out of the oven—perfectly soft!
Frequently Asked Questions About Making Banana Bread
I know you’re probably going to have a few little questions swirling around after reading the whole recipe. That’s totally normal! We’ve tried to answer everything here to make sure your first loaf of banana bread is a huge success. If you have an issue, it’s usually a quick fix!
Can I use yellow bananas instead of totally ripe ones?
Oh, you really shouldn’t, honey. If your bananas are still yellow or just starting to show brown spots, they haven’t developed enough sugar yet. That sugar is what keeps the final product so unbelievably moist! Using yellow bananas will result in a much blander flavor and a denser, drier texture. For the best banana bread recipe, wait until those spots look like dark freckles all over the skin. That’s when they are ready to give you that soft, tender result!
Why is my banana bread dense and heavy?
That usually means one of two things, and it’s almost always user error during the mixing phase! The number one cause for a heavy loaf is overmixing the batter after you add the flour. Once you start combining the dry and wet ingredients, you are developing gluten, and too much gluten means tough bread. Stop stirring the second the flour vanishes. Another reason could be that your baking soda isn’t fresh, so it didn’t give the bread the lift it needed for a wonderful quick bread recipe moment.
Can I make chocolate chip banana bread by doubling the chips?
You can certainly add more than the half-cup listed if you adore chocolate chips! However, remember that the chips add extra weight to the batter. If you pack in too many, they can actually weigh down the loaf and prevent it from baking evenly in the center, which leads back to that density problem. I’d suggest keeping the mix-ins around the one-cup total mark, whether that’s all chocolate chips or a mix of chips and nuts. It’s better to have a perfectly baked banana bread than a collapsing one, right?
How long should I let the bread cool before slicing?
This is torture, I know! But you must let it cool for at least 15 minutes in the pan. If you slice it when it’s piping hot, the steam rushes out, taking all that precious moisture with it! I usually wait a full 15 minutes, turn it out onto the rack, and then wait another 30 minutes before cutting into the first slice. Plus, cutting it too soon can cause those soft crumbs to tear, making it look messy. This ensures you get beautiful, neat slices suitable for your morning snack!
Estimated Nutrition for This Simple Banana Loaf
It’s always good to have an idea of what’s in your sweet bread, even though we are mostly focused on taste and comfort here! Since this recipe is made with standard pantry items, these numbers are pretty close to what you can expect per slice. Just remember that if you decide to add a huge handful of chocolate chips or use fancier sugars, the nutritional breakdown might shift a little bit.
Here is a breakdown for one generous slice of this simple banana loaf:
- Serving Size: 1 slice
- Calories: 230
- Sugar: 14g
- Sodium: 150mg
- Fat: 10g
- Saturated Fat: 6g
- Unsaturated Fat: 4g
- Trans Fat: 0g
- Carbohydrates: 36g
- Fiber: 2g
- Protein: 3g
- Cholesterol: 35mg
Please know that these figures are just estimates based on the ingredient measurements provided. They don’t account for variations in brand or specific ingredient choices during your baking adventure. But honestly, the health factor here is secondary to the sheer joy of eating this amazing bread!
PrintThe Best Moist and Easy Banana Bread Recipe
Make a wonderfully moist and tender banana bread loaf using your overripe bananas. This simple recipe requires one bowl and delivers classic comfort flavor.
- Prep Time: 10 min
- Cook Time: 55 min
- Total Time: 65 min
- Yield: 1 loaf (about 8 servings)
- Category: Baking
- Method: Baking
- Cuisine: American
- Diet: Vegetarian
Ingredients
- 3 large very ripe bananas, mashed
- 1/3 cup melted unsalted butter
- 3/4 cup granulated sugar
- 1 large egg, lightly beaten
- 1 teaspoon vanilla extract
- 1 teaspoon baking soda
- 1/4 teaspoon salt
- 1 1/2 cups all-purpose flour
- Optional: 1/2 cup chocolate chips
Instructions
- Preheat your oven to 350°F (175°C). Grease and flour a 9×5 inch loaf pan.
- In a large bowl, mash the ripe bananas until mostly smooth.
- Stir the melted butter into the mashed bananas.
- Add the sugar, egg, and vanilla extract. Mix until just combined.
- In a separate small bowl, whisk together the baking soda and salt with the flour.
- Add the dry ingredients to the wet ingredients. Mix with a spatula until just combined. Do not overmix.
- If using, fold in the chocolate chips.
- Pour the batter into the prepared loaf pan.
- Bake for 50 to 60 minutes, or until a toothpick inserted into the center comes out clean.
- Let the bread cool in the pan for 10 minutes before turning it out onto a wire rack to cool completely.
Notes
- For the moistest bread, use bananas that are heavily spotted or almost black.
- If your oven tends to brown the top too quickly, loosely tent the loaf with aluminum foil halfway through baking.
- To check for doneness without a toothpick, gently press the top center; it should spring back slightly.
Nutrition
- Serving Size: 1 slice
- Calories: 230
- Sugar: 14g
- Sodium: 150mg
- Fat: 10g
- Saturated Fat: 6g
- Unsaturated Fat: 4g
- Trans Fat: 0g
- Carbohydrates: 36g
- Fiber: 2g
- Protein: 3g
- Cholesterol: 35mg