

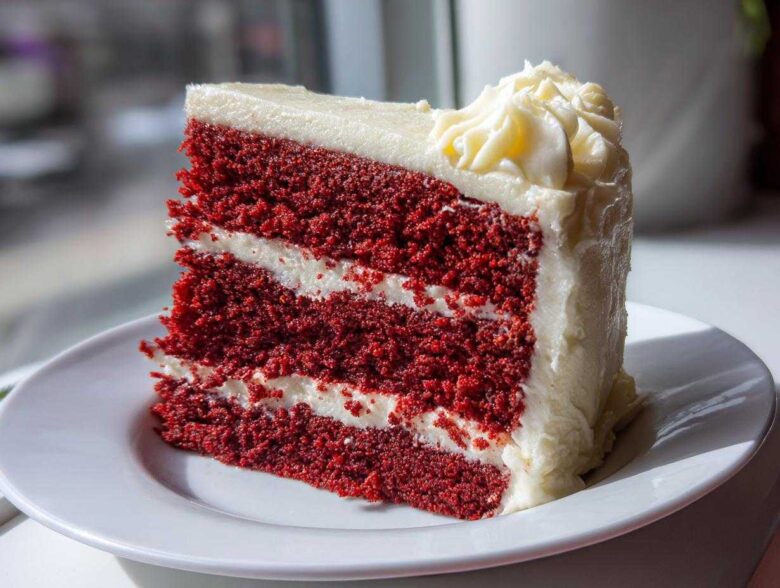
Oh, friends, stop whatever you’re doing! If you thought baking a showstopper dessert was complicated, Leo and I are here to prove you wrong. After decades of curating stories and symphonies, we’re applying that same dedication to the kitchen, and today’s headline is a big one: Leo’s Best Southern Style Moist Red Velvet Cake From Scratch with Classic Cream Cheese Frosting! This isn’t just some chocolate cake dyed red; this is the real deal, capturing the essence of an red velvet cake that melts in your mouth. We took the dedication we used in our teaching days, like when I managed worlds bound in paper, and bottled it into one unbelievably soft and fluffy recipe that you can absolutely master. You can read more about our transition from the library and music room to the kitchen over on our About Us page! Get ready for some applause!
Why This is the Best Moist Red Velvet Cake Recipe
This isn’t just a recipe, it’s a declaration of flavor! If you’ve ever been disappointed by dry, crumbly results, you can breathe easy. Leo spent weeks perfecting this cake so it delivers on every promise: moist, fluffy, and unbelievably soft. This is the definitive red velvet cake you’ve been searching for, hands down.
- It features that gorgeous crimson hue without being artificially dark.
- The crumb is incredibly tender—it practically floats off the fork.
- It maintains moisture for days; seriously, leftovers are heavenly!
We love that it comes together fast; you can check out my favorite quick lentil soup recipe, but this cake is just as fast in its own way!
Achieving that Authentic Southern Red Velvet Flavor
True Southern style isn’t just about the color; it’s about the subtle tang! We use just a whisper of cocoa powder—not enough to make it taste like standard chocolate cake—but just enough to pair perfectly with that necessary splash of vinegar and the buttermilk. That little bit of acid reacts with the soda to give you the lightest, softest cake structure you’ve ever had in your life. It’s magic brewed right in the bowl!
Gathering Ingredients for Your Red Velvet Cake from Scratch
Before Leo starts his symphony in the mixer, we need our mise en place ready! Getting these exact measurements and temperatures right is the key to a moist red velvet cake recipe that truly sings. I always lay everything out on the counter—it saves me from panicking halfway through the process. Don’t try to rush the temperature of the dairy, though; room temperature is non-negotiable for that beautiful emulsion!
Ingredients for the Fluffy Red Velvet Cake Layers
Leo insists that room temperature are the magical words here. Make sure your eggs and that gorgeous buttermilk have had at least thirty minutes on the counter before you start beating anything. This helps everything combine smoothly into that perfect batter!
- 2 1/2 cups all-purpose flour
- 1 teaspoon baking soda
- 1 teaspoon salt
- 1 tablespoon unsweetened cocoa powder
- 1 cup unsalted butter, softened (not melted, mind you!)
- 1 1/2 cups granulated sugar
- 2 large eggs (room temperature, please!)
- 1 teaspoon vanilla extract
- 1 cup buttermilk, room temperature
- 1 teaspoon white vinegar
- 1/2 teaspoon red liquid food coloring (I usually grab a little more for that deep color!)
Ingredients for the Best Cream Cheese Frosting Recipe
This frosting needs to be utterly smooth so it spreads like silk over the cake. My biggest tip? Sift your powdered sugar! It stops those tiny, sandy lumps that ruin an otherwise perfect **best cream cheese frosting recipe**. You’ll find ideas for other pairings, like our buttermilk scones, that also require precision!
- 8 ounces cream cheese, softened
- 1/2 cup unsalted butter, softened
- 4 cups powdered sugar, sifted
- 1 teaspoon vanilla extract
- 1 tablespoon milk or heavy cream (only if you need a little loosening up!)
Step-by-Step Instructions for the Easy Red Velvet Cake
Alright, time to make some beautiful music! This is where Leo shines. He gets so excited when we move onto the mixing stage for this red velvet cake. Don’t panic about the steps—we’re just taking things slow and steady. When you follow this sequence, you’re guaranteeing yourself that soft homemade cake everyone dreams about.
Preparing the Dry Mix and Wet Base
First things first: get that oven humming at 350°F (175°C). Prep those 9-inch pans by greasing, flouring, and cutting parchment circles for the bottom. Now, in a medium bowl, whisk together your flour, cocoa, soda, and salt. Keep that ready!
Next, grab your stand mixer or a big bowl and start creaming that room-temperature butter and sugar. Leo always sets a timer—you need three full minutes here until it looks genuinely light and fluffy, like pale yellow whipped cream. Beat in those eggs one at a time, then add the vanilla hiding in the corner. This initial step builds the structure so you get that magnificent, fluffy result.
Combining Batter for a Soft Homemade Cake
This is the most crucial part, so listen up! We’re going to alternate additions now. Start by adding one-third of your dry mixture to the creamed butter base. Mix it just until it disappears, no more! Then, pour in half of your colored buttermilk mixture and mix until barely combined.
Repeat this: another third of the dry, then the rest of the buttermilk. Always finish with the remaining dry ingredients. The final instruction is the hardest one: mix ONLY until no streaks of flour remain. Trust me, overmixing turns this gorgeous batter into something heavy. We want tender, not tough!
Baking and Cooling the Red Velvet Layer Cake
Divide that lovely red batter evenly between your prepared pans. Slide them gently into the oven. They usually bake in about 25 to 30 minutes. You know they’re done when a wooden pick comes out clean. Don’t fight the urge to check early, but be patient!
Once they look perfect, let them just sit in the pans for about 10 minutes. This lets them firm up enough so they don’t tear when you flip them out onto the wire rack to cool completely. You must wait until they are absolutely cold before frosting, otherwise, that beautiful frosting melts right off! This recipe is one of my favorite easy baking recipes because the mixing is so straightforward.
Mastering the Best Cream Cheese Frosting Recipe
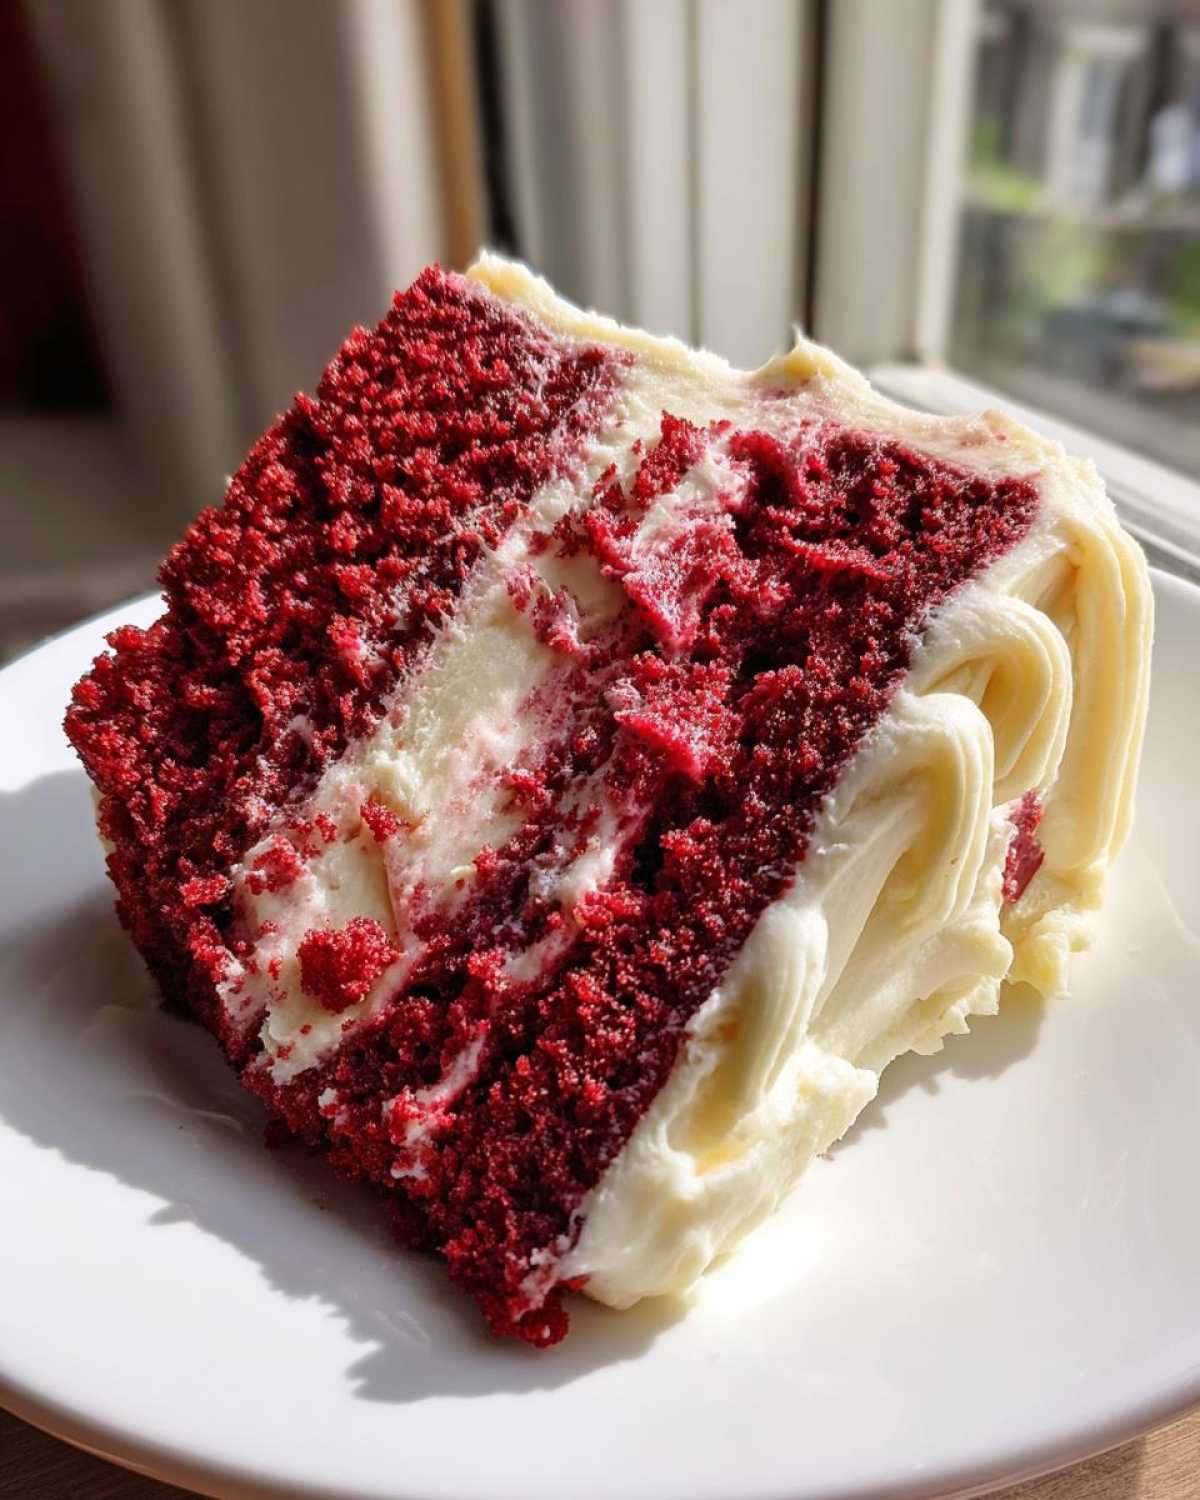
Now, we arrive at the crowning jewel! You can’t have an exquisite cake without truly magnificent cream cheese frosting. Forget those runny, overly sweet store-bought tubs; we’re making the real deal here. The secret to making this the best cream cheese frosting recipe isn’t just about the ingredients; it’s about the order and the temperature.
Get your cream cheese and butter out early, just like you did for the cake. They need to be softened—I mean truly soft—but not greasy or melted. If they aren’t soft enough, you’ll end up with lumps, and lumps are the enemy of smooth spreading!
In a large bowl, I have Leo beat the cream cheese and butter together until it’s looking like a single, perfectly smooth cloud. It needs to look uniform before you even think about adding the powdered sugar. I mean, you can check out our New York Cheesecake recipe, and you’ll see the same principle applies: smooth base first!
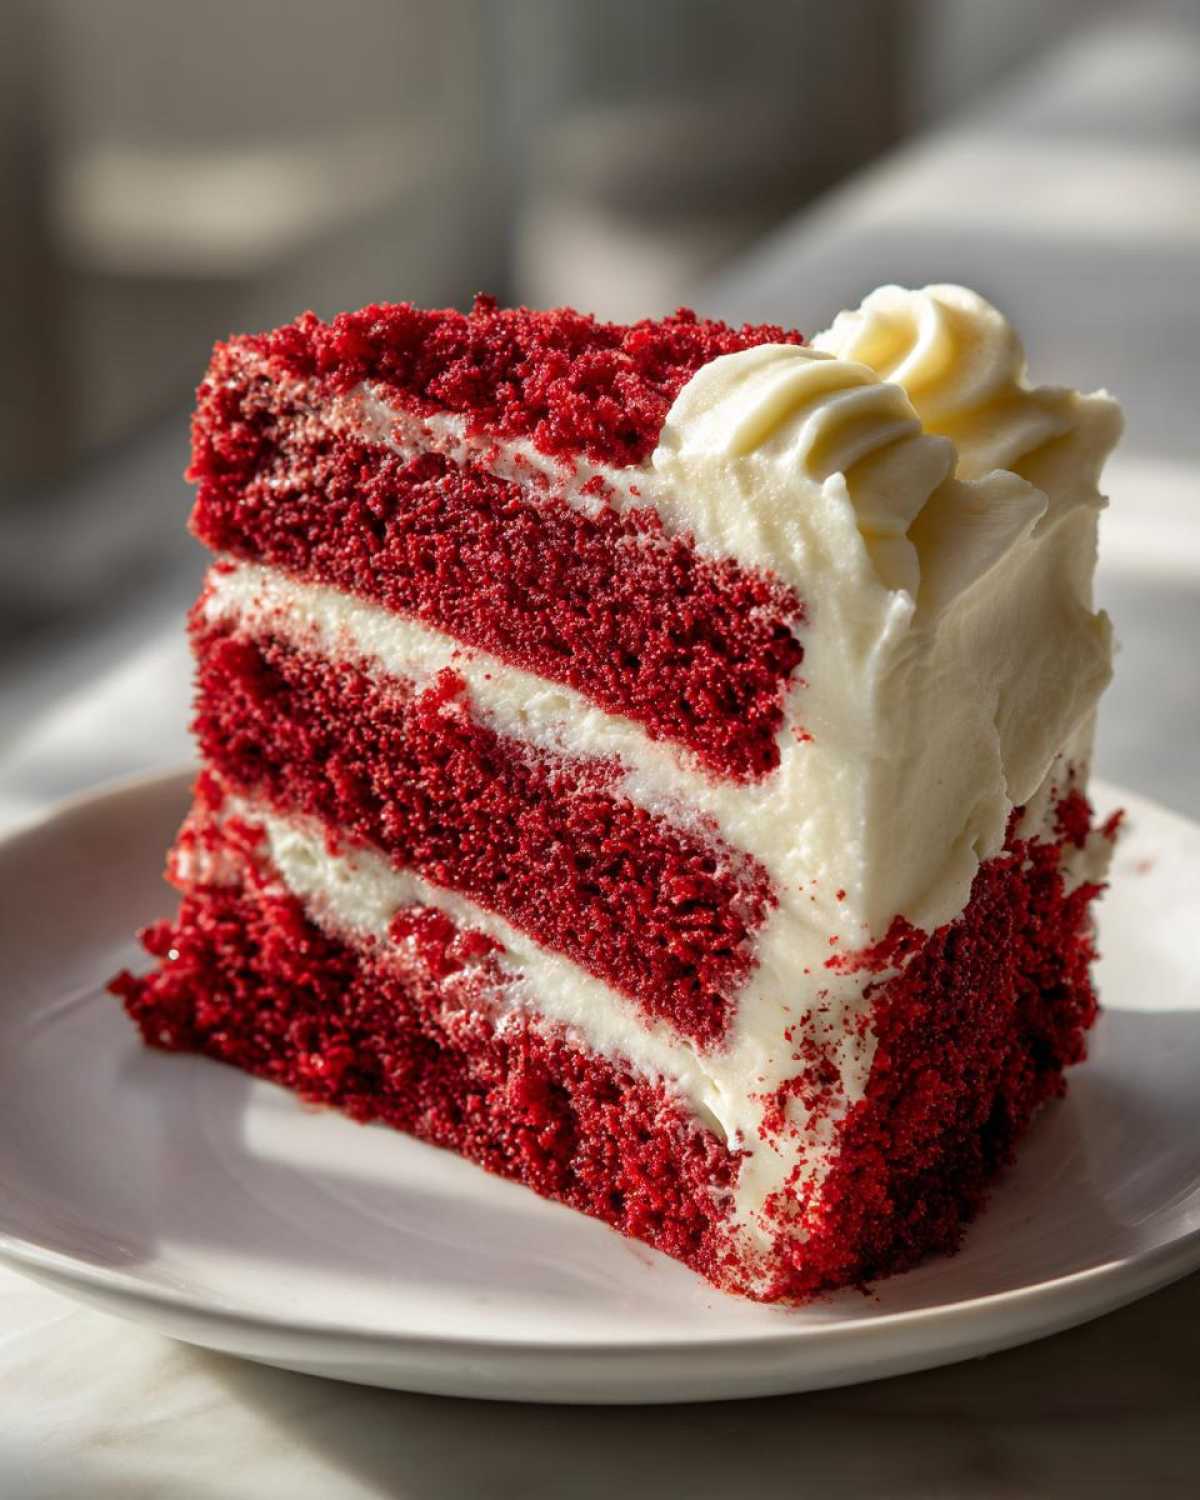
Once that base is flawless, start adding the sifted powdered sugar slowly, mixing on low speed so you don’t create a powdered sugar explosion across my kitchen! Once it’s all incorporated, add your vanilla. If, and only if, the mixture seems too stiff to flow nicely when you spread it, add that tablespoon of milk or cream one teaspoon at a time. You want it spreadable, not slathered on like spackle. A few minutes of patient mixing, and you’ll have frosting so good you might want to eat it with a spoon before it even sees the cake!
Tips for a Vibrant Red Velvet Cake Tutorial
Okay, let’s talk curb appeal! Nobody wants a spooky brown cake when they are going for that iconic, vibrant look. Leo has a non-negotiable rule for achieving the deepest, most gorgeous color in this red velvet cake.
Forget the standard grocery store liquid food coloring! I’m telling you, it takes a whole bottle, and it often waters down the flavor just slightly. Leo insists on using a high-quality gel food coloring, even though it costs a little more. You use way less, and those tiny drops pack a powerful punch of color. We mix the gel right into our buttermilk mixture with the vinegar and cocoa powder.
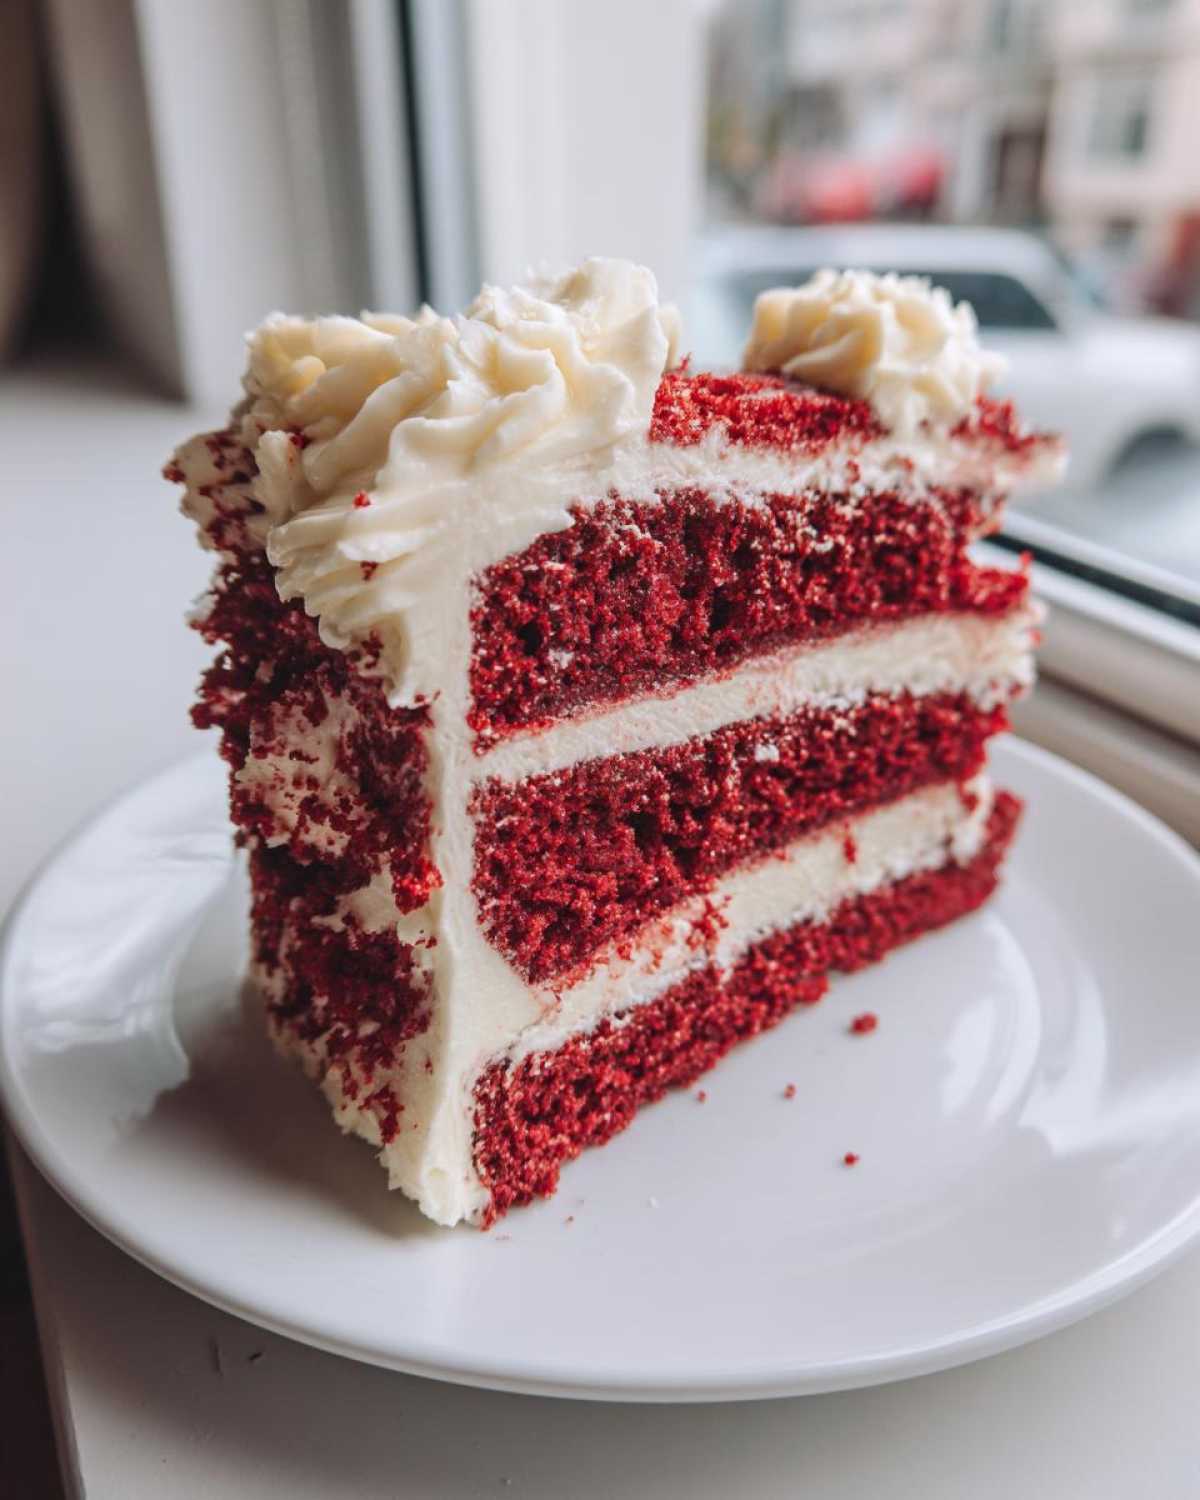
That beautiful color makes this cake a guaranteed hit for any celebration. It’s one of my favorite **birthday cake ideas** because it looks so dramatic with that bright white cream cheese frosting against the deep red crumb. It just screams ‘special occasion’!
Another tip for keeping things bright and moist? Don’t overbake! Seriously, check it right at 25 minutes. You want that perfect crumb that you can see in our vanilla cupcake recipe posts—tender, not dry!
Ingredient Notes and Substitutions for Red Velvet Cake
Okay, let’s talk about what happens when you’re staring into your fridge and realize you’re short on one critical item. It happens to everyone, even Leo when he’s deep in a baking improvisation! Since this cake relies on very specific chemical reactions to get that signature soft texture, we need to be smart about substitutions.
We are making a proper Southern cake here, so we rely on that slight acidity to do the heavy lifting alongside our baking soda. That’s why using real, actual buttermilk is top priority when you’re aiming for that incredible soft homemade cake texture.
But just in case, if you find yourself empty-handed, don’t despair! You can create a quick substitute. Just take one cup of regular milk—whole milk works best—and stir in one tablespoon of either white vinegar or lemon juice. Let that stand on the counter for about five minutes until it starts to curdle slightly. That’s your fresh buttermilk ready to go! You can see how precise we get when we talk about baking, much like when we bake lemon scones.
Buttermilk Cake Recipes: Why It Matters
This is where the science gets fun! The buttermilk (or your quick substitute) is acidic, right? Well, baking soda is a base. When acid meets base in our batter, they freak out a little bit, and that reaction creates carbon dioxide bubbles. Those bubbles are what puff up your cake layers and keep them airy and light, even with the cocoa powder in there.
Using baking powder alone just won’t give you that same lift and tender crumb because it’s already balanced. If you skip the acid, your cake might turn out dense, or worse, a little grey instead of that beautiful subtle red hue we’re looking for. This reaction is the whole reason an authentic southern red velvet recipe tastes so different from a standard chocolate cake!
Serving Suggestions for Your Showstopping Red Velvet Cake
Now that you have this magnificent, towering layer cake sitting on your counter—frosted and gleaming—the question becomes: how do we serve this masterpiece? Because this cake is so rich and visually stunning, it pairs beautifully with simple, complementary flavors. It really is the perfect centerpiece for any celebration, whether it’s a big birthday bash or just because it’s Tuesday!
For a truly gorgeous presentation, especially if you’re making this for a special occasion like Valentine’s Day desserts, keep the sides clean. We love topping the cake with just a few perfectly piped rosettes of frosting, and maybe some finely chopped toasted pecans sprinkled around the base. That little bit of crunch against the soft crumb is just divine.
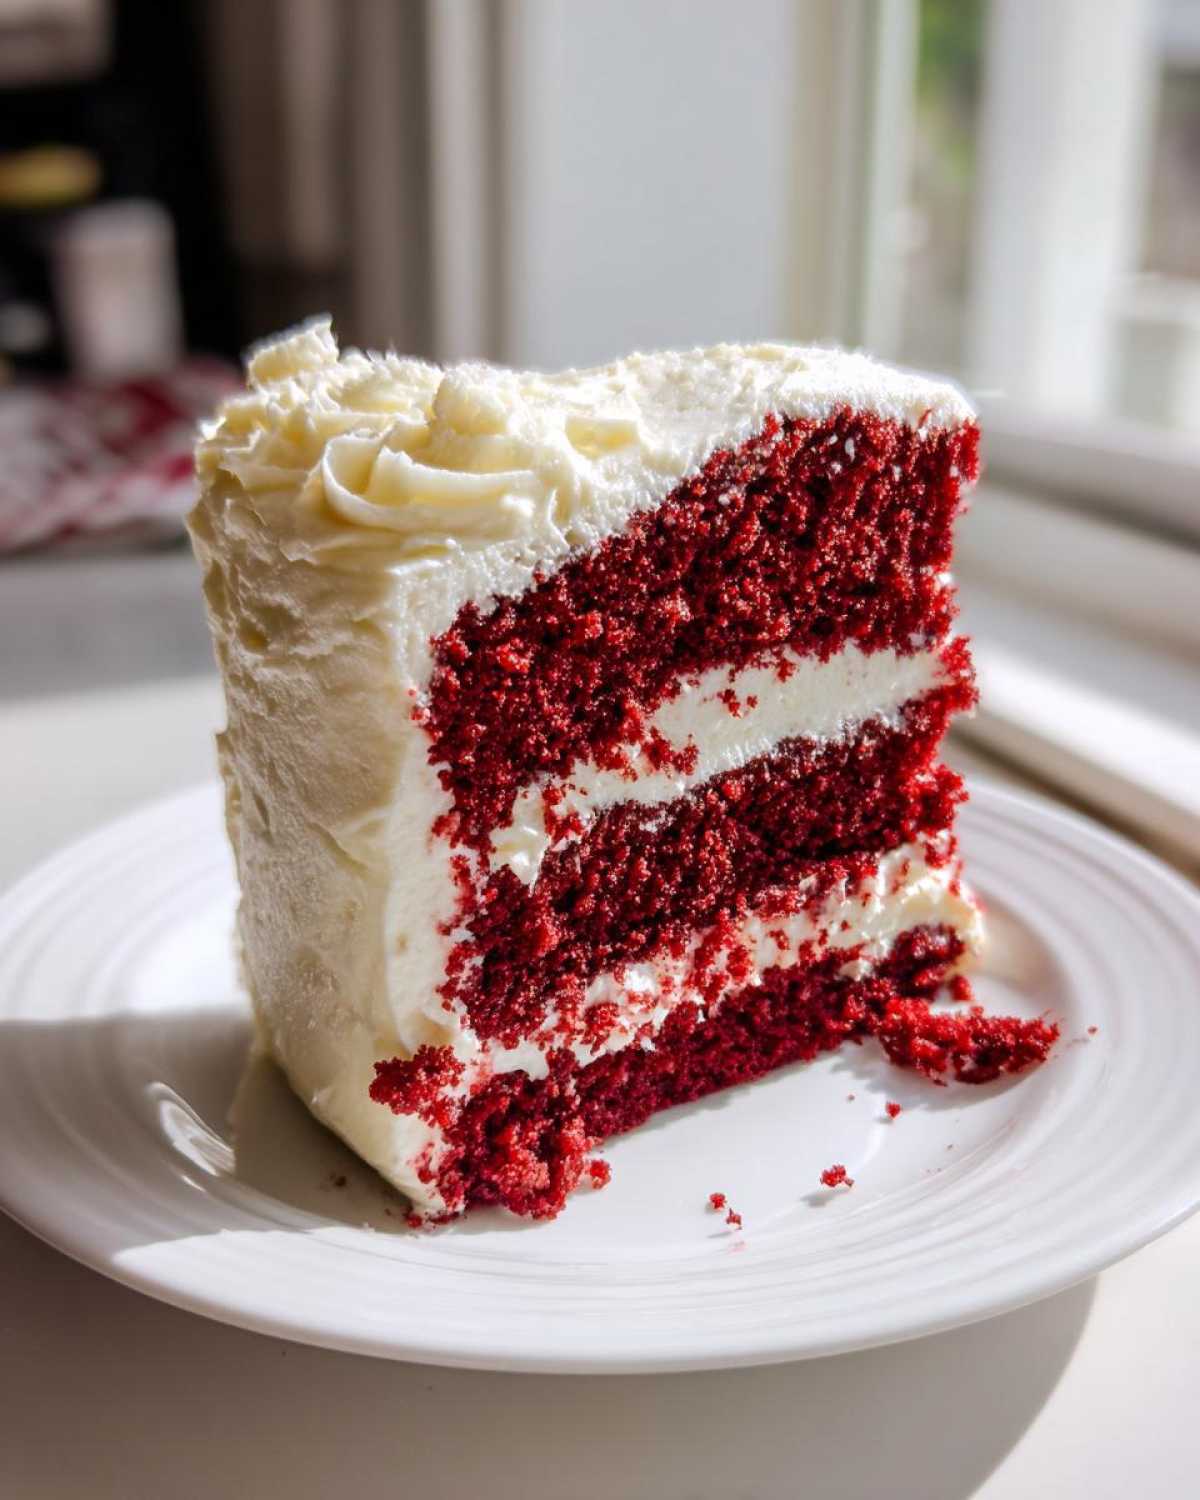
If you’re leaning toward serving this during the winter holidays, consider adding a tiny dusting of edible gold glitter over the finished frosting. It catches the light beautifully! Or, serve individual slices alongside a small dollop of raspberry coulis. The slight tartness of the berries cuts through the richness of the cream cheese frosting perfectly. Honestly, though, this cake is so good, sometimes Leo just cuts a slice and eats it standing up at the counter, and I don’t even judge him for it!
Storage and Reheating Instructions for Leftover Red Velvet Cake
Oh, the eternal question: how do we keep this glorious, moist confection perfect until the next day? If you are lucky enough to have leftovers of this red velvet cake—and I mean *lucky*, because it usually disappears fast—storage is everything for maintaining that soft homemade cake texture.
The biggest enemy of any frosted cake is the air! Once you cut into that beautiful layer cake, the exposed cake layers start to dry out immediately. My first rule: if you only have a few slices left, cover the cut edges of the remaining cake tightly with plastic wrap before putting it in the fridge. Think of it like giving your cake a little hug to keep the moisture in!
If you plan to eat the cake within 2 to 3 days, storing it tightly covered in the refrigerator is the best bet, especially because of that beautiful cream cheese frosting. The fridge might seem cold, but it keeps the dairy settled and safe. Just remember to take the slices out about 30 to 45 minutes before you plan to eat them! That chilling time tends to stiffen the cake, and we need it back to that soft, room-temperature tenderness.
If you need to keep it longer, up to a month, you can slice the unfrosted layers, wrap each layer *super* tightly in plastic wrap, and then tuck them into a freezer-safe container or Ziploc bag. When you’re ready to enjoy them again, let them thaw slowly in the fridge overnight, then bring them to room temperature, and frost as usual. Leo always says that freezing locks in the freshness, just like when we freeze our leftover gooey cinnamon rolls.
As for reheating? Well, I generally advise against microwaving frosted cake—it just gets rubbery! But if you have a single slice and just want a tiny warm-up moment, zap it for about 10 seconds on a low setting to just soften the crumb slightly. Enjoy every last, velvety bite!
Frequently Asked Questions About Making Red Velvet Cake
I know you’re going to have a few questions once you dive into this recipe. After all, baking is a science, but it’s also art! Leo and I wanted to preemptively answer the things folks always ask us when they try a new version of this classic dessert. We want you to feel confident tackling this **red velvet cake** right from your own kitchen!
Is this truly an easy red velvet cake to make from scratch?
Absolutely! If you can cream butter and sugar, you can master this. The steps are very clear, and since we are alternating the wet and dry ingredients, the mixing process prevents you from ending up with a dense result. This is one of the most approachable **beginner cake recipes** we offer without sacrificing that rich, authentic Southern flavor. You’ll be amazed at the results from such a quick prep!
Why is my cake brown instead of vibrant red?
This is almost always about the coloring, honey! If you are using standard liquid food coloring, you might need a lot of it, which can change the batter texture. For that iconic color that makes this a perfect **holiday cake recipe**, ditch the liquid drops and use a high-quality red gel food coloring. Mix it right into your buttermilk/vinegar mixture—a little goes a very long way. Also, don’t forget that tiny bit of cocoa powder is supposed to be there; it adds flavor, but the coloring does the heavy lifting visually.
Can I substitute buttermilk with something else for this buttermilk cake recipe?
You definitely can, but you *must* replace the acid! Since the buttermilk is essential for getting that **fluffy red velvet cake** crumb, you need an acidic swap. The quick trick Leo taught me is stirring one tablespoon of white vinegar or lemon juice into one cup of regular milk. Let it sit for five minutes until it sours slightly. Use that in place of fresh buttermilk. It works perfectly every time for our cake endeavors!
Do I have to use cocoa powder if I want a vibrant red velvet cake?
Yes, you do, and trust me, you *want* to! While we’re focusing on color, you can’t skip the small amount of cocoa powder listed in the ingredients. That tiny bit provides the signature hint of chocolate that separates true red velvet from a standard vanilla butter cake. It balances the slight tang from the buttermilk beautifully. If you skip it, you just have a very red vanilla cake; you miss out on the complexity!
If you have any more questions while you’re baking, feel free to check out the whole library of helpful posts on our blog!
Nutritional Estimate for This Classic Dessert
Now, I know what you’re thinking! Leo and I aren’t dieticians, bless our hearts, so don’t take these numbers as gospel! We spent our lives focusing on the composition of music and literature, not macronutrients, but we want you to have a rough idea of what you’re indulging in when you make this stunning creation. Think of this estimate as a fun little footnote to the overall joy of baking!
These figures are based on dividing the entire recipe (two layers plus all the cream cheese frosting) into 12 generous slices, using standard measurements for all ingredients listed. These values are estimates based on standard ingredient usage, and your results might vary slightly depending on your specific brands of butter or sugar.
- Serving Size: 1 slice
- Calories: approximately 450
- Fat: around 24g (It’s butter and cream cheese, so we expected that!)
- Carbohydrates: 58g
- Protein: 4g
- Total Sugar: about 55g
- Sodium: 350mg
There you have it! It’s a rich dessert, perfect for those birthdays and holidays we talked about. Enjoy it responsibly, or you know, just cut yourself a second slice and forget the numbers altogether. That’s what I usually do!
Share Your Tasty Tribune Baking News
Well, we made it to the end of Leo’s masterpiece! Now the baton passes to you, my lovely baker. Seeing your creations always brings a burst of joy to our previously quiet house. We poured so much love and careful measurement into this recipe, and I genuinely want to know how it turned out for you. Did it achieve that fluffy texture? Did Leo’s mixing suggestions save your batter from disaster?
Please, please, please rate this recipe below! Five stars means you’re ready to bake it again next week, and anything less lets us know where we might need to clarify things in Leo’s next big composition. Leave us a comment telling us what occasion you baked this for—was it a special birthday, or just a Tuesday calling for a bit of scarlet splendor?
And don’t forget to snap a picture! We absolutely *love* seeing the final, frosted look of your cakes. You can tag us on social media or send us a message through our Contact page. We’re always adding new dishes to our rotation, so if you loved how easy this was, make sure to stick around and explore some of our other incredibly easy baking recipes. There is always a new headline coming out of our kitchen!
Thank you so much for joining us at the Tasty Tribune today. Happy baking, everyone!
PrintLeo’s Best Southern Style Moist Red Velvet Cake From Scratch
You deserve a show-stopping dessert! This recipe delivers a perfectly moist, soft, and fluffy red velvet layer cake with that classic vibrant red color, paired with rich homemade cream cheese frosting. It is easy to make from scratch.
- Prep Time: 25 min
- Cook Time: 30 min
- Total Time: 55 min
- Yield: 12 servings
- Category: Dessert
- Method: Baking
- Cuisine: American
- Diet: Vegetarian
Ingredients
- 2 1/2 cups all-purpose flour
- 1 teaspoon baking soda
- 1 teaspoon salt
- 1 tablespoon unsweetened cocoa powder
- 1 cup unsalted butter, softened
- 1 1/2 cups granulated sugar
- 2 large eggs
- 1 teaspoon vanilla extract
- 1 cup buttermilk, room temperature
- 1 teaspoon white vinegar
- 1/2 teaspoon red liquid food coloring (or more for vibrant color)
- 1 cup Cream Cheese Frosting (recipe below)
- **For the Cream Cheese Frosting:**
- 8 ounces cream cheese, softened
- 1/2 cup unsalted butter, softened
- 4 cups powdered sugar, sifted
- 1 teaspoon vanilla extract
- 1 tablespoon milk or heavy cream (if needed)
Instructions
- Preheat your oven to 350°F (175°C). Grease and flour two 9-inch round cake pans. Line the bottoms with parchment paper.
- In a medium bowl, whisk together the flour, baking soda, salt, and cocoa powder. Set this dry mixture aside.
- In a large bowl, use an electric mixer to beat the softened butter and granulated sugar together until the mixture is light and fluffy, about 3 minutes.
- Beat in the eggs one at a time, mixing well after each addition. Stir in the vanilla extract.
- In a separate small bowl, whisk together the buttermilk, white vinegar, and red food coloring until combined.
- With the mixer on low speed, add the dry ingredients to the wet ingredients in three additions, alternating with the buttermilk mixture in two additions, beginning and ending with the dry ingredients. Mix only until just combined; do not overmix.
- Divide the batter evenly between the prepared cake pans.
- Bake for 25 to 30 minutes, or until a wooden pick inserted into the center comes out clean.
- Let the cakes cool in the pans for 10 minutes before inverting them onto a wire rack to cool completely.
- **Make the Frosting:** In a large bowl, beat the softened cream cheese and butter together until smooth. Gradually add the sifted powdered sugar, beating until combined. Mix in the vanilla extract. If the frosting is too thick, add milk or cream one teaspoon at a time until you reach a smooth, spreadable consistency.
- Once the cakes are completely cool, place one layer on a serving plate. Spread about one-third of the cream cheese frosting over the top. Place the second layer on top and frost the top and sides of the entire cake.
Notes
- For the most vibrant red velvet cake color, use a high-quality gel food coloring instead of standard liquid coloring.
- The reaction between the buttermilk and vinegar creates the soft crumb structure, so do not skip them!
- This cake is perfect for Valentine’s Day or any special birthday celebration.
Nutrition
- Serving Size: 1 slice
- Calories: 450
- Sugar: 55g
- Sodium: 350mg
- Fat: 24g
- Saturated Fat: 14g
- Unsaturated Fat: 10g
- Trans Fat: 0.5g
- Carbohydrates: 58g
- Fiber: 1g
- Protein: 4g
- Cholesterol: 75mg