

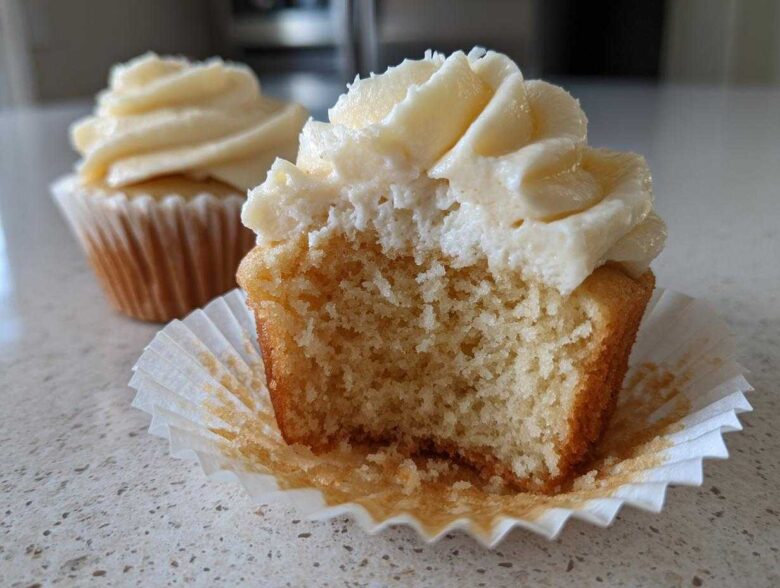
There is just something magical about a perfectly executed, classic dessert, isn’t there? Forget complicated flavors or trendy gimmicks; when you nail the basics, you have a winner ready for any celebration. That’s why I’ve spent years chasing the single greatest version—the one that vanishes the second it hits the table. I’m thrilled to share what I truly believe is the blueprint for the Ultimate Soft & Fluffy Vanilla Cupcakes. After making this specific *vanilla cupcakes* recipe hundreds of times for birthdays, school events, and random Tuesday cravings, I can tell you it never fails. Get ready for tender, moist, and genuinely light results every single time you bake!
You can read more about my baking philosophy over on my About page, but trust me, these are the sweet vanilla treats you’ll want to keep hidden away!
Why This is the Best Homemade Vanilla Cupcakes Recipe
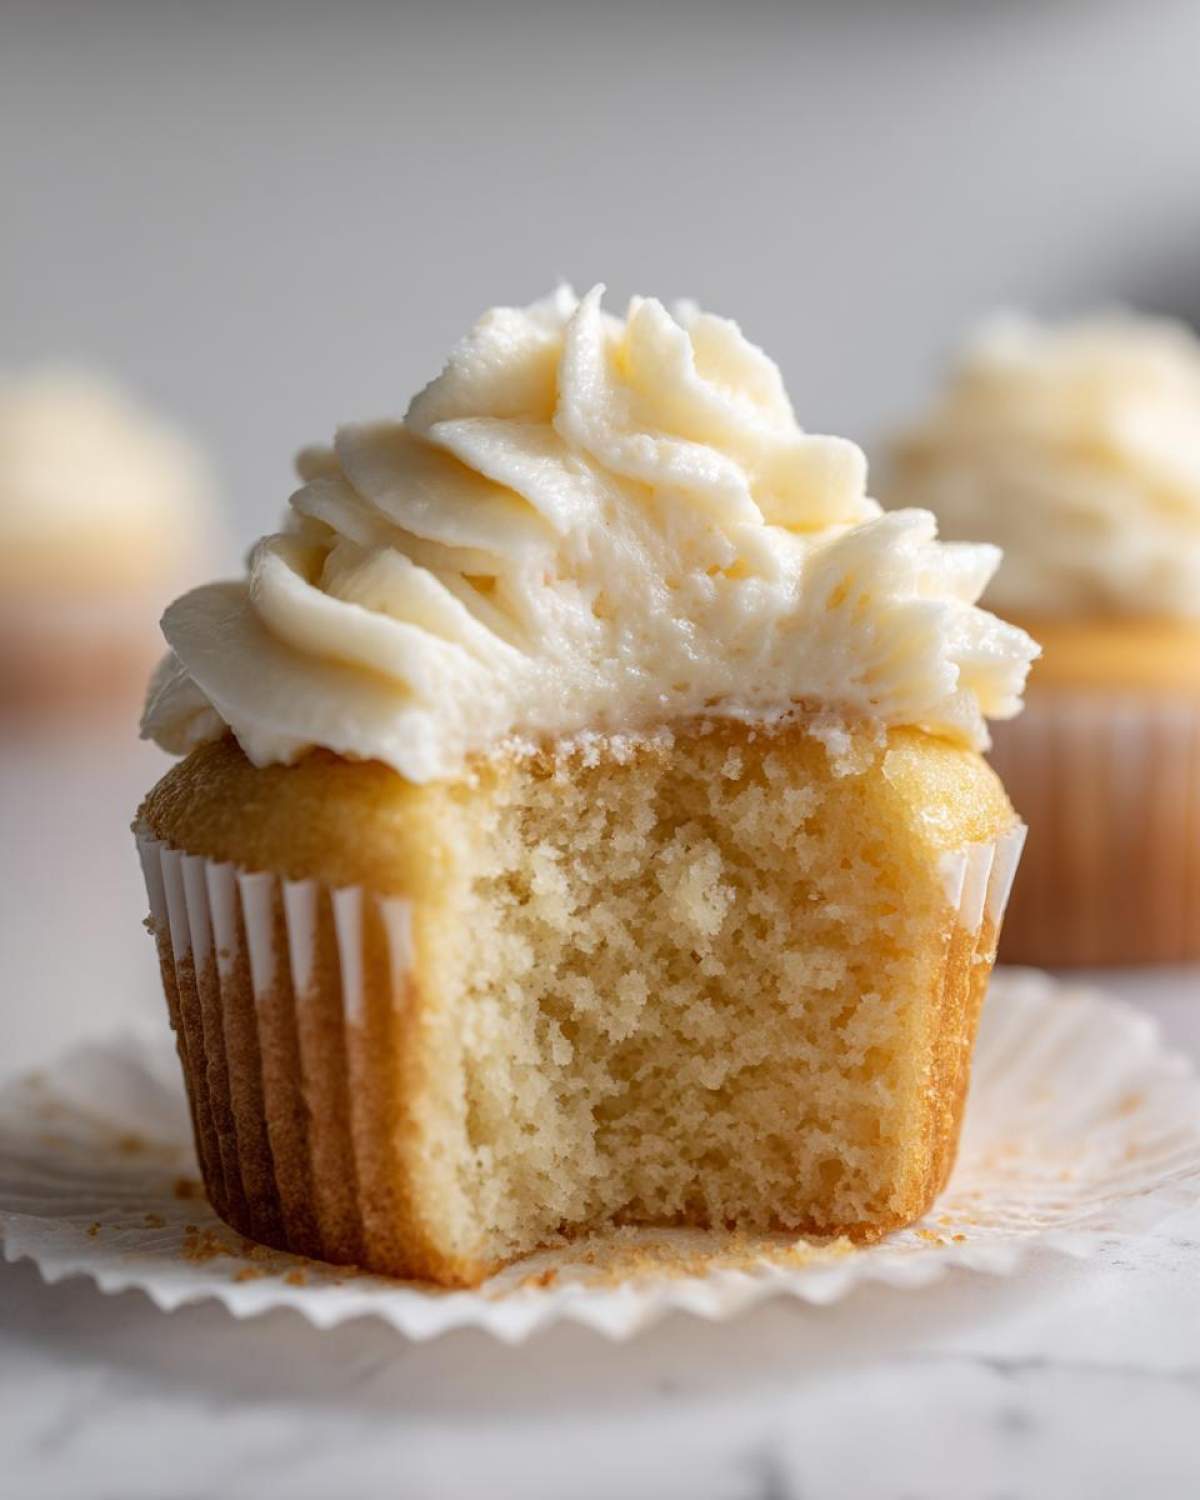
I’ve tried every variation out there, but this one stands head and shoulders above the rest when you want truly fantastic *vanilla cupcakes*. What makes them superior? It all boils down to texture and that pure, sweet vanilla flavor. These are genuinely the moist fluffy vanilla cupcakes you dream about—not dense, not crumbly, but perfectly light. If you’ve been searching for that elusive bakery style vanilla cupcakes result at home, you’ve found your new go-to. I promise, you’ll stop buying box mixes after trying this from scratch version!
You can check out some of my other baking adventures on the blog if you’re interested!
Achieving Light and Airy Cupcakes Texture
The texture is everything! We achieve that amazing lightness by focusing on technique, not just ingredients. The absolute key is the creaming step. You have to beat that softened butter and sugar together until it looks pale and almost doubles in volume. Seriously, give it three full minutes with the mixer!
My expert tip here is this: once the flour goes in, you stop mixing the second you see no more dry streaks. Overmixing develops gluten, and gluten means tough, chewy cupcakes. We want tender perfection. That’s the secret to those light and airy cupcakes!
Gathering Ingredients for Perfect Vanilla Cupcakes
Before we even think about turning on the oven, let’s talk about preparation. For any moist fluffy vanilla cupcakes recipe to shine, your ingredients need to cooperate. That means everything needs to be at room temperature! Seriously, your butter, eggs, and milk must be sitting out, feeling nice and soft, before you start mixing. This helps create that beautiful emulsion we need for the best homemade vanilla cupcakes.
We’re separating the components for the cake and the frosting, much like tackling any great baking project. Having everything measured out beforehand makes the actual assembly so quick; you’ll see how this becomes a genuine quick vanilla cupcake recipe!
Cake Ingredients for Moist Fluffy Vanilla Cupcakes
For the cakes themselves, you’ll need your dry components ready mixed: that’s the all-purpose flour, the baking powder for lift, and a touch of salt to balance the sweetness. Then, for your wet ingredients, grab your softened butter and sugar—this is where the magic starts! Don’t forget your two large eggs, the pure vanilla extract which gives us that signature flavor, and the whole milk to add richness and moisture.
Ingredients for Perfect Vanilla Buttercream Frosting
For that creamy topping we all crave, you’ll need some more softened butter, but this time mixed with powdered sugar. And listen—you absolutely must sift that powdered sugar! No one wants grainy frosting, right? Make sure it’s super fine before you start. Finish it off with a generous splash of pure vanilla extract and a couple of tablespoons of heavy cream or milk to get that gorgeous, pipeable texture for your perfect vanilla buttercream frosting.
How to Make Vanilla Cupcakes From Scratch Step-by-Step
Alright, now that we have our room-temperature ingredients ready to rock and roll, it’s assembly time! This is where the science of baking really comes into play, but don’t panic—it’s super straightforward. We’re making vanilla cupcakes here, people, not rocket fuel! First things first: get that oven glowing at 350°F (that’s 175°C, for my international friends). Make sure you’ve lined your muffin tin because nobody wants to scrub baked batter later. Once that’s done, we dive into the mixing!
Check out these steps if you’re looking for other easy baking desserts inspiration!
Mixing the Vanilla Cupcake Batter
Remember that creaming part we talked about? Start there! Beat the butter and sugar until it’s super pale and fluffy—I mean three full minutes of strong mixing. Then, you add those eggs, one at a time, scraping down the bowl between each one. Next comes the crucial alternating part. You slowly add your dry mixture (flour, leavening, salt) and the milk, making sure you start and finish with the dry ingredients. Why alternate? It keeps the batter perfectly emulsified! If you dump all the milk in at once, it can make your butter separate. If you dump all the flour in, you risk overmixing instantly. Mix gently until *just* combined. I can’t stress this enough: stop mixing when you still see tiny streaks of flour—they’ll disappear when you scoop!
Baking and Cooling Your Vanilla Cupcakes
Spoon the batter into those paper liners, filling them about two-thirds full. This is the sweet spot for perfect cupcake height. Pop them into your preheated oven for about 18 to 20 minutes. You’re looking for that toothpick test to come out clean, maybe with a few moist little crumbs clinging to it—that means they are perfectly done.
Here’s a pro tip for handling delicate vanilla cupcakes: Leave them in the hot pan for exactly five minutes after they come out of the oven. This lets them firm up just enough so that when you transfer them to the wire rack to cool completely, they don’t stick, break, or collapse. Patience pays off here!
Crafting the Ultimate Perfect Vanilla Buttercream Frosting
Okay, once those *vanilla cupcakes* are totally cool—and I mean stone cold, otherwise you’ll have a vanilla soup catastrophe—it’s time for the best part: the frosting! This is where we create that gorgeous, light, fluffy topping that makes these classic vanilla birthday cupcakes look like they came straight from a professional bakery case.
The secret to this perfect vanilla buttercream frosting is treating the butter right. You need your half-cup of butter softened, but not melty! Pop that softened butter into your mixer bowl and beat it by itself until it’s perfectly smooth and creamy. This initial step gets rid of any lumps before the sugar enters the picture.
Once the butter is smooth, start adding your sifted powdered sugar slowly. If you dump it all in at once, you’re going to have a sugar cloud explosion in your kitchen, and trust me, I learned that the hard way many moons ago! Slowly incorporate it all until it looks thick and sandy.
Now for the air! Add your vanilla extract and your heavy cream or milk. This is when you crank the mixer up to high speed. You need to let it whip for a solid three to five minutes. I always watch it transform. It goes from dense and heavy to pale yellow, voluminous, and incredibly fluffy. That whipping time incorporates all that air we need for a truly light and airy feel.
If you find your frosting is just a touch too stiff after that whipping session—maybe your kitchen was chillier than usual—don’t worry! Just add more cream, just one teaspoon at a time, until you reach a consistency that pipes beautifully but still holds its shape on a spoon. That beautiful, creamy frosting is the crowning jewel on our sweet vanilla treats!
Tips for Success When Making Your Vanilla Cupcakes
Even the best recipe needs a little technique behind it, and since we’re aiming for those legendary results, let me give you my non-negotiable rules for perfect *vanilla cupcakes*. First, and I can’t say this enough: room temperature eggs, milk, and butter! If the eggs are cold, they shock the creamed butter and deflate all that lovely air we just beat in. That’s a recipe killer right there.
Remember what I said about overmixing after the flour goes in? Don’t do it! Seriously, stop mixing as soon as you can’t see the white flour streaks anymore. I made that mistake once when I was trying to get these done fast before a party, and the tops looked fine, but the texture was horribly chewy. It taught me a lesson about patience!
Also, if you want that beautiful, tall, bakery-style dome, skip the spoons! I always use a large ice cream scoop to portion the batter evenly. It makes the baking time consistent across the entire batch. You can read more about my specific vanilla cupcake techniques right here. Follow these tips, and your moist fluffy vanilla cupcakes are guaranteed!
Serving Suggestions for Classic Vanilla Birthday Cupcakes
Honestly, these beautiful classic vanilla birthday cupcakes are perfect just as they are, topped with that tall swirl of buttercream. But if you’re making them for a big event or just feeling a little extra, adding some flair is easy! If you’re using a piping bag, try a star tip—the Wilton 1M is my favorite for those gorgeous, professional-looking ridges. It makes such a difference!
For decoration, you can’t go wrong with rainbow sprinkles, but I love using edible glitter or maybe some finely chopped toasted nuts for texture. They pair wonderfully with a strong, hot cup of coffee—the slight bitterness cuts through the sweet frosting perfectly. Or, serve them alongside fresh raspberries or sliced strawberries; the slight tartness makes the vanilla *pop*. These are such reliable party dessert recipes; everyone always asks for the recipe!
If you’re looking for other crowd-pleasing recipes, you should really check out my recipe for those bakery-style apple turnovers too!
Storage and Reheating Instructions for Vanilla Cupcakes
One thing I love about these vanilla cupcakes is that they actually keep well, unlike some delicate cakes! If you have leftovers—though I doubt you will—storage is super important. For unfrosted cupcakes, just keep them in an airtight container on the counter for up to three days. They stay beautifully soft that way. Frosting changes things slightly.
Once they are frosted with that yummy buttercream, you might think the fridge is the best spot, but I actually prefer them at room temperature unless your kitchen is baking hot. The cold makes the butter in the frosting hard, which we absolutely don’t want! Keep the frosted ones airtight at room temperature for maybe two days.
If, heaven forbid, they seem a tiny bit dry after a couple of days—which shouldn’t happen with this moist cake recipe, but just in case—here’s a trick for those simple dessert ideas: pop one in the microwave for about 8 to 10 seconds. It warms the butter slightly and brings back the incredible moisture instantly. They taste freshly baked again!
Frequently Asked Questions About Easy Vanilla Cupcake Recipe
I know you might still have a few little questions buzzing around, especially when tackling a recipe from scratch for the first time! It’s totally normal. I’ve gathered up the questions I get asked most often about making these easy vanilla cupcake recipes so you can feel confident before you even start mixing. Baking is supposed to be fun, not stressful!
If you’re a beginner, I’ve got a whole guide dedicated just to beginner baking recipes for cupcakes that might help too!
Can I substitute the whole milk in these vanilla cupcakes?
Oh, absolutely, you can swap out the milk! I used whole milk because it adds the best richness, making them that much more moist fluffy vanilla cupcakes. But if you only have low-fat milk, it will work fine. If you want to try something different, buttermilk is amazing—it adds a tiny, pleasant tang that makes the vanilla flavor sing! If you use buttermilk, you might want to cut back the baking powder by just a tiny pinch since buttermilk is slightly acidic.
How do I get the bakery style vanilla cupcakes look?
This is my favorite part of the finishing process! To get that professional, tall swirl that looks like it costs five dollars each, you need the right tip and patience. Make sure your vanilla cupcakes are absolutely, completely cool to the touch—wait longer than you think you need to! Then, use a large, open star tip, like a Wilton 1M. Fill your piping bag halfway, hold the bag straight up and down over the center of the cool cupcake, and squeeze steadily while moving the tip in slow, continuous circles outwards and then back inwards. Easy peasy!
What makes this a quick vanilla cupcake recipe?
While I insist on the three-minute creaming step—and you shouldn’t rush that!—the hands-on time is surprisingly short. Once you’ve creamed the butter and sugar, adding the rest of the ingredients takes maybe five minutes. Then they are in the oven! Even with baking and cooling time factored in, you can have these sweet vanilla treats ready to frost in under an hour total. That makes them a fantastic choice when you need quick party desserts!
Nutritional Estimates for Sweet Vanilla Treats
Now, I know what you’re thinking. We just want to enjoy these glorious, fluffy miracles, but sometimes folks ask about the numbers! Since these are genuinely homemade sweet treats and we all have slightly different ways we measure things (and what brand of butter we use!), please take these figures as a good guideline. They are estimates based on the recipe yielding 12 servings.
I always try to be as transparent as possible, so you can see what you’re working with for your simple dessert ideas. You can always check out a more detailed breakdown on my disclaimer page, but here are the ballpark figures for one of these incredible sweet vanilla treats:
- Calories: About 350
- Sugar: Roughlly 40g
- Total Fat: Around 18g
- Carbohydrates: Nearly 45g
- Protein: About 4g
Remember, that fat content is mostly from that lovely butter we used to make the frosting so creamy! If you skip the frosting, the numbers drop significantly, though I personally can’t recommend skipping the best part of the vanilla cupcakes!
Share Your Homemade Sweet Treats
Well, that’s it! You’ve officially mastered the blueprint for what I consider the absolute best homemade vanilla cupcakes. I feel like we’ve been baking buddies in the kitchen this whole time squeezing that final bit of vanilla out of the bottle!
Now comes my favorite part—seeing what you create! If you give this easy vanilla cupcake recipe a try, please, please come back here and let me know how it turned out for you. Did you crush the frosting technique? Did you sneak a taste before they cooled down? Let me know in the comments!
I’d be so grateful if you could take a moment to give this recipe a solid five stars if you loved it. That really helps other bakers find this amazing recipe for cupcakes for celebrations. And don’t forget to snap a picture and tag me on social media! I always love seeing your beautiful creations. Happy baking, and I hope these vanilla cupcakes bring a bit of sunshine to your day!
PrintThe Ultimate Soft & Fluffy Vanilla Cupcakes: Easy Homemade Recipe for Perfect Results
Follow this simple recipe to make moist, fluffy vanilla cupcakes from scratch, topped with creamy vanilla buttercream frosting. This recipe yields perfect results for any celebration.
- Prep Time: 20 min
- Cook Time: 20 min
- Total Time: 40 min
- Yield: 12 cupcakes
- Category: Dessert
- Method: Baking
- Cuisine: American
- Diet: Vegetarian
Ingredients
- 1 1/2 cups all-purpose flour
- 1 1/2 teaspoons baking powder
- 1/4 teaspoon salt
- 1/2 cup unsalted butter, softened
- 1 cup granulated sugar
- 2 large eggs
- 1 teaspoon pure vanilla extract
- 1/2 cup whole milk
- 1/2 cup unsalted butter, softened (for frosting)
- 3 cups powdered sugar, sifted (for frosting)
- 1 teaspoon pure vanilla extract (for frosting)
- 2 tablespoons heavy cream or milk (for frosting)
Instructions
- Preheat your oven to 350°F (175°C). Line a standard 12-cup muffin tin with paper liners.
- In a medium bowl, whisk together the flour, baking powder, and salt. Set aside.
- In a large bowl, beat the softened butter and granulated sugar with an electric mixer until light and fluffy, about 3 minutes.
- Add the eggs one at a time, beating well after each addition. Mix in 1 teaspoon of vanilla extract.
- Gradually add the dry ingredients to the wet ingredients, alternating with the milk, beginning and ending with the dry mixture. Mix only until just combined; do not overmix.
- Spoon the batter evenly into the prepared cupcake liners, filling each about two-thirds full.
- Bake for 18 to 20 minutes, or until a toothpick inserted into the center comes out clean.
- Let the cupcakes cool in the pan for 5 minutes before transferring them to a wire rack to cool completely.
- To make the frosting, beat the 1/2 cup softened butter until smooth. Gradually add the sifted powdered sugar, beating until combined.
- Add 1 teaspoon of vanilla extract and 2 tablespoons of heavy cream. Beat on high speed until the frosting is light and fluffy, about 3 to 5 minutes. Add more cream, one teaspoon at a time, if the frosting is too stiff.
- Once the cupcakes are completely cool, pipe or spread the vanilla buttercream frosting onto each cupcake.
Notes
- For the moistest cupcakes, use room temperature eggs and milk.
- Do not overmix the batter after adding the flour; this develops gluten and makes the cupcakes tough.
- To achieve bakery-style height, use a large ice cream scoop to portion the batter.
Nutrition
- Serving Size: 1 cupcake
- Calories: 350
- Sugar: 40g
- Sodium: 150mg
- Fat: 18g
- Saturated Fat: 11g
- Unsaturated Fat: 7g
- Trans Fat: 0.5g
- Carbohydrates: 45g
- Fiber: 0.5g
- Protein: 4g
- Cholesterol: 60mg