

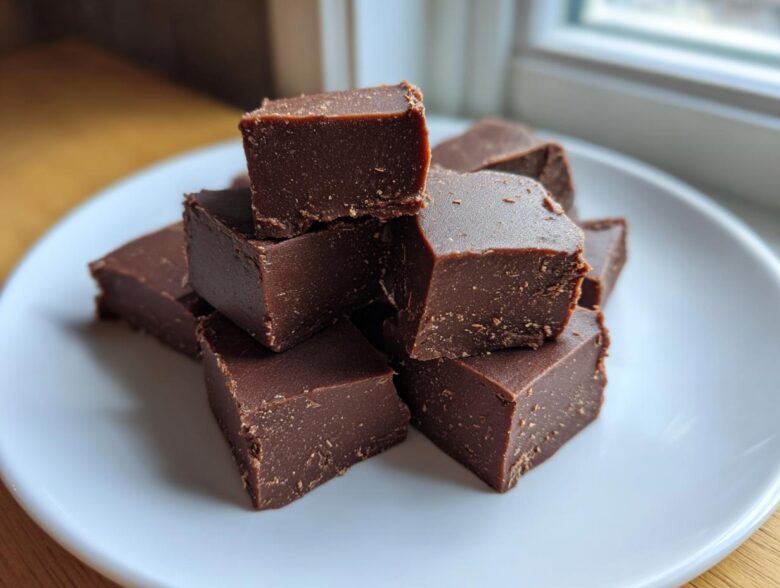
Oh, that sudden, desperate craving hits you, right? When you just need that deep, dark, melt-in-your-mouth chocolate, and you need it five minutes ago! Forget the complicated sugar stages and the scary candy thermometers. I’m here to tell you that the absolute best, most reliable homemade fudge you will ever make requires just three things. Seriously! I was once scrambling for a last-minute holiday platter contribution, panic setting in, when I remembered this magic trick. Twenty minutes later, I had the creamiest, most decadent batch of chocolate squares ever, and nobody believed how easy it was. This easy fudge recipe is my secret weapon, and now it’s yours too. If you are looking for other quick and easy desserts, check out my recipe for no-bake peach cheesecake jars, but trust me, this fudge always wins.
Why This Classic 3-Ingredient Chocolate Fudge is the Best Fudge Recipe
Why mess with tradition when perfection is this simple? The magic ingredient here isn’t secret; it’s sweetened condensed milk! That’s what makes this a truly foolproof fudge recipe that never lets you down. We skip all the messy boiling and temperature checks required for old fashioned fudge. Seriously, no candy thermometer needed, ever. That milk does all the heavy lifting, ensuring we get that amazing, incredibly creamy fudge texture every single time we mix it up. It’s the ultimate no bake fudge solution when you need something truly decadent fast. For more quick inspiration on desserts, I’ve got everything you need over on my general blog page!
Quick Dessert Idea: Prep and Cook Times for Your Fudge
Transparency is everything when you’re relying on a recipe, so here are the times you can absolutely count on. The hands-on work time is basically nothing! Prep time is just about 5 minutes, and the actual cooking—or melting—takes about 5 minutes too, max. So, why does the total time look so high? Well, the reality is that about two hours are dedicated to the fudge chilling in the fridge so it sets up perfectly. That’s 130 minutes total, but you’re free to run errands or clean the kitchen during that time. It’s the perfect quick dessert idea because the oven stays off and your active time is minimal.
Gathering Ingredients for Your Easy Fudge Recipe
Okay, let’s get down to brass tacks—the ingredients. Because this is three-ingredient fudge, every single item needs to be exactly what I say it is, or you risk your mixture seizing up on you! If you’re looking for other easy recipes while you’re here, I just posted some amazing sloppy joe sliders that are surprisingly quick too.
- 1 (14 ounce) can sweetened condensed milk – See, I’m specific! Don’t grab evaporated milk; that’s a totally different animal that will give you a disaster.
- 1 (12 ounce) package semi-sweet chocolate chips – Yes, chips! They melt beautifully.
- 1 teaspoon vanilla extract – Pure extract, please. It makes such a difference in the final flavor.
Ingredient Substitutions for Homemade Fudge
I always preach using exactly what’s written for the absolute best result, but I know sometimes you have to improvise when making homemade fudge. If you want an even deeper, more decadent flavor, go right ahead and swap the semi-sweet chips for dark chocolate chips. Wow, that’s rich!
Now, the condensed milk is trickier. If you are truly desperate—and I mean *truly* desperate—you can try using evaporated milk, but you absolutely *must* add about half a cup of granulated sugar to it and stir it thoroughly before microwaving. I’ve done it in a pinch, but I have to warn you: the final texture will be slightly less smooth and maybe a little more grainy than the perfect, velvety texture you get with the real condensed milk. It’s just not the same! Always try to stick to the list for the best homemade fudge experience.
Step-by-Step Instructions for Perfect Microwave Fudge
Alright, this is where the magic happens! Since we are using the microwave—the hallmark of a great easy fudge recipe—this process is lightning fast, but you need to pay attention, especially when that chocolate starts getting melty. Before you even touch the microwave, we have to prep our container. Get your trusty 8×8 inch baking pan and line it completely with parchment paper. Make sure you leave a good overhang on two sides. This acts like little handles so you can lift the whole block of set fudge out later—trust me, slicing it while it’s still sticky is not the way to go!
Next, grab your medium microwave-safe bowl. Toss in the sweetened condensed milk and all those beautiful chocolate chips. Into the microwave they go for a blast of 60 seconds high power. When the minute is up, take it out, but don’t panic if it doesn’t look totally melted yet! It should look sad and chunky. Stir it really, really well. If you see melted rivers starting to form, stir harder! If it still looks mostly solid, back into the microwave you go. We are going in short bursts now—30 seconds at a time—stirring thoroughly after every single round until everything is completely smooth. You don’t want any hiding chocolate pockets in there!
Once you’ve stirred until it looks like glossy silk, quickly add in that teaspoon of vanilla extract and give it one final, loving stir to combine everything perfectly. Then, pour that gorgeous mixture right into your prepared pan and use a spatula to smooth the top. It spreads so easily! Now, we wait. Pop it into the fridge for at least two hours until it’s rock solid. Don’t rush this part! Once it’s firm, peel up those parchment handles and slice it up. I sometimes look at my other recipes, like my TikTok ramen, and I think, wow, this is way easier!
Expert Tips for Achieving Creamy Fudge Texture
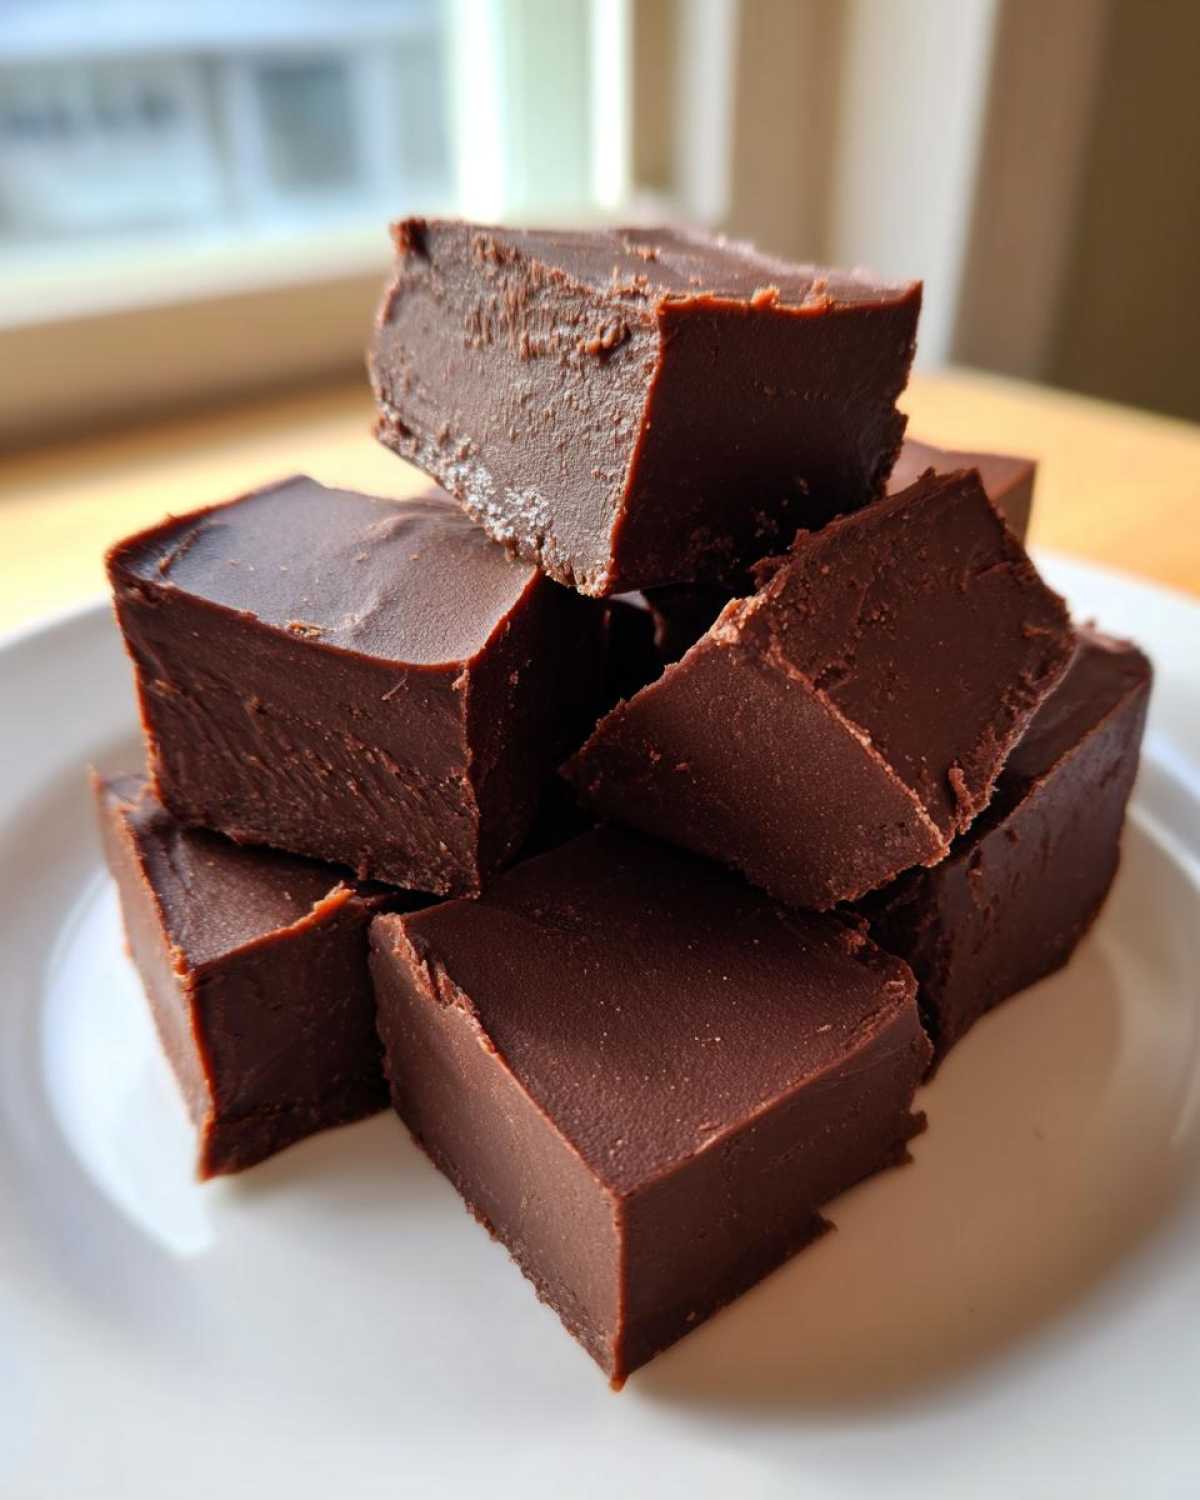
The single biggest crime you can commit against fudge is overheating the chocolate! If you let it get too hot during that melting stage, the cocoa solids seize up, and suddenly you’ve got hard, grainy chocolate instead of smooth dessert. That’s why we microwaved in those short increments and stirred like mad between each one—it gently coaxes the chips to melt using residual heat, not brute force.
Related to that, really stir vigorously when you check it after each 30-second round. You need to manually incorporate the melted edges into the unmelted center. This vigorous mixing helps keep the emulsion stable and guarantees that impossibly smooth, creamy fudge finish we are after. You’ll know it’s ready when it pulls away from the sides of your bowl slightly almost like a thick batter when you stop stirring.
Making Old Fashioned Fudge Without Stovetop Cooking
You know, when people talk about old fashioned fudge, they usually picture me in an apron, stirring a giant copper pot over a low gas flame for forty-five minutes straight. That’s nice and cinematic, but let’s be real—who has time for that kind of commitment most days?
The beautiful thing about this recipe is that we capture every single comforting, rich note of that classic flavor profile without ever having to turn on the burner. This is pure, glorious no bake fudge magic! We get away with it because the sweetened condensed milk is already cooked down and stabilized. When we melt the chocolate into it gently using the microwave, we are essentially mimicking the final stage of the traditional candy-making process, just much, much faster.
If you’re making this for a rustic holiday platter, the subtle difference in texture between stovetop and microwave is barely noticeable, especially when it’s cut into small squares! Plus, think about keeping your kitchen cool in the summer—no hot stove required! If you’d rather bake something warm, you should totally check out my recipe for cinnamon apple baked oatmeal; it’s coziness in a pan.
This method delivers that deep, satisfying chocolate hit we all crave from old fashioned fudge, but it does it in under ten active minutes. That’s a win-win in my book for any busy day or when you’re just dipping your toes into making homemade candy for the first time. Don’t let the lack of stirring stop you from enjoying truly delicious no bake fudge.
Storing and Serving Your Decadent Desserts Fudge
The hardest part of making this amazing fudge is waiting for it to chill! Once it is finally firm and ready to eat, we need to talk about keeping it perfect. Since this is such a rich, simple sweet treat, it holds up really well. The recipe notes say straight up that you can store leftovers in an airtight container at room temperature for up to one week. Isn’t that the best news? Unlike things like fresh pastries, you don’t need to worry about keeping this in the fridge, unless your kitchen is super hot and humid, of course.
If you do chill it—which helps it set faster—just pull it out about 30 minutes before serving so it softens up just a tiny bit. That perfect, velvety texture comes out when it isn’t ice cold. Now, let’s talk about cutting. After it’s chilled for those two hours, use the parchment paper handles to lift the whole slab out of the pan onto a cutting board. For the cleanest edges possible on your fudge, use a really sharp knife and dip it into a glass of hot water before each cut. Wipe the knife dry between cuts, too! This prevents tearing and gives you those beautiful, professional-looking squares.
Remember, this recipe yields about 36 small squares. That means if you are bringing this to a party alongside a lovely chicken Caesar pasta salad, you might want to cut them even smaller if you want to stretch the batch! Honestly, these little squares pack a huge punch, so don’t feel like you need giant wedges. Keep the rest stored, and enjoy your successful batch of homemade fudge all week long!
Frequently Asked Questions About This Simple Sweet Treat Fudge
I get so many great questions whenever I post this fudge recipe, and honestly, they are usually the exact questions I had when I first started making this simple sweet treat! Let’s clear up anything that’s still lingering so you can dive into making the best chocolate fudge of your life.
Can I use milk chocolate chips instead of semi-sweet?
Yes, you totally can, but you have to be prepared for things to get sweeter! Milk chocolate has a higher sugar content than semi-sweet, so the final product will be noticeably sweeter and perhaps a bit softer in texture. If you use milk chocolate, I seriously recommend adding an extra teaspoon—maybe even two teaspoons—of vanilla extract to help balance out that sweetness. If you’re pairing this with something savory like my teriyaki beef stir fry later in the week, you might want that darker chocolate contrast!
How do I prevent the fudge from becoming grainy?
Graininess is the enemy of creamy fudge, and usually, it happens one of two ways when you’re making a standard recipe: either you cook the sugar too long, or you don’t melt the ingredients completely together. Since this specific easy fudge recipe is nearly foolproof because of the condensed milk, the main way it goes grainy is through overheating! If you let the chocolate get scorching hot in the microwave—especially if you skip stirring between bursts—the sugar crystals start separating again, and voilà, grittiness. Keep the heat moderate, stir until it’s perfectly glossy, and you’ll have velvety perfection.
Can I add nuts or mix-ins to this easy fudge recipe?
Absolutely! This is a fantastic base for mixing things in. If you want to add walnuts, pecans, or even mini marshmallows, wait until right after you stir in the vanilla. Gently fold in about half a cup of your chosen mix-ins. Make sure your nuts are lightly toasted first! Toasting brings out their flavor and helps them stay crisp instead of getting soggy inside your soft homemade fudge. Just remember that adding very large or heavy things might slightly affect how smoothly it sets up, but it’s always worth it for that extra crunch!
Why is my fudge so sticky and won’t set up?
This is frustrating, but it almost always means you didn’t chill it long enough, or the ratio of ingredients was slightly off. If you rush the chilling time, it will definitely be sticky to the touch. It needs that solid two hours minimum in the fridge to firm up properly. If you’ve waited the full two hours and it’s still gooey, check if you accidentally grabbed evaporated milk instead of condensed milk, or if you used low-fat chips which sometimes don’t set as firmly. Patience is key for a successful no bake fudge!
Estimated Nutritional Data for One Square of Fudge
Since this is such a rich and simple dessert, I know some of you like to see the numbers, even if we try not to think about them too much when enjoying chocolate! Please remember that these values are an estimate based on using standard semi-sweet chips and condensed milk, yielding 36 small squares as noted in the recipe. If you swap ingredients, these values will change, of course, but this gives you a good baseline for our classic fudge.
- Serving Size: 1 square
- Calories: 110
- Fat: 5g
- Carbohydrates: 16g
- Protein: 2g
It’s amazing how few calories are in just one little square of this delicious bakery-style apple turnover alternative, so grab one and enjoy it!
Ideas for Gifting Your Homemade Candy Recipes
Honestly, this is one of my absolute favorite homemade candy recipes to give away, especially around the holidays! Since this fudge is so stable at room temperature, it travels beautifully. It makes a wonderful addition to any Christmas fudge box you put together.
Here is my trick for packaging: once it’s fully set and cut into those lovely little squares, wrap each piece individually in a small square of wax paper or even little squares of colorful tissue paper. Tie it with some baker’s twine for a rustic look. Layer the wrapped pieces neatly inside a nice tin or a small gift box. It looks incredibly thoughtful, and nobody will ever believe you pulled this incredible holiday candy together in less than ten minutes of actual work!
What to Do Next With Your Easy Dessert Recipes
Well, you successfully made the easiest, creamiest fudge known to humankind! Now I need to hear all about it! If you followed along and made a batch, please head down to the comments section below and leave a rating—the stars help other bakers find this reliable recipe, and I love reading your success stories.
If you were thrilled with how simple this was, I’d be so grateful if you shared this page with a friend who always says they are “bad at candy making.” They need to know this classic fudge exists!
And if you have any questions at all, or want to tell me what you mixed into your batch, please visit my contact page! Happy treating!
Estimated Nutritional Data for One Square of Fudge
Since this is such a rich and simple dessert, I know some of you like to see the numbers, even if we try not to think about them too much when enjoying chocolate! Please remember that these values are an estimate based on using standard semi-sweet chips and condensed milk, yielding 36 small squares as noted in the recipe. If you swap ingredients, these values will change, of course, but this gives you a good baseline for our classic fudge.
- Serving Size: 1 square
- Calories: 110
- Fat: 5g
- Carbohydrates: 16g
- Protein: 2g
It’s amazing how few calories are in just one little square of this delicious bakery-style apple turnover alternative, so grab one and enjoy it!
Ideas for Gifting Your Homemade Candy Recipes
Honestly, this is one of my absolute favorite homemade candy recipes to give away, especially around the holidays! Since this fudge is so stable at room temperature, it travels beautifully. It makes a wonderful addition to any Christmas fudge box you put together.
Here is my trick for packaging: once it’s fully set and cut into those lovely little squares, wrap each piece individually in a small square of wax paper or even little squares of colorful tissue paper. Tie it with some baker’s twine for a rustic look. Layer the wrapped pieces neatly inside a nice tin or a small gift box. It looks incredibly thoughtful, and nobody will ever believe you pulled this incredible holiday candy together in less than ten minutes of actual work!
If you want to get fancy, try dusting the tops with a tiny bit of edible gold glitter right before you wrap them up—it adds such a sophisticated sparkle! Or, for a real wow factor, drizzle a little white chocolate over the top after it sets, sprinkle with sea salt, and then cut. That contrast of salty and sweet chocolate fudge is always a massive hit. They make perfect little neighbor gifts or easy teacher thank-yous. Speaking of easy, if you need another quick, healthy dip for a party tray, you have to try my pesto hummus!
What to Do Next With Your Easy Dessert Recipes
Well, you successfully made the easiest, creamiest fudge known to humankind! Now I need to hear all about it! If you followed along and made a batch, please head down to the comments section below and leave a rating—the stars help other bakers find this reliable recipe, and I love reading your success stories.
If you were thrilled with how simple this was, I’d be so grateful if you shared this page with a friend who always says they are “bad at candy making.” They need to know this classic fudge exists!
And if you have any questions at all, or want to tell me what you mixed into your batch, please visit my contact page! Happy treating!
PrintClassic 3-Ingredient Chocolate Fudge
Make rich, creamy chocolate fudge using only three simple ingredients. This recipe is quick and foolproof.
- Prep Time: 5 min
- Cook Time: 5 min
- Total Time: 130 min
- Yield: 36 small squares
- Category: Dessert
- Method: Microwave
- Cuisine: American
- Diet: Vegetarian
Ingredients
- 1 (14 ounce) can sweetened condensed milk
- 1 (12 ounce) package semi-sweet chocolate chips
- 1 teaspoon vanilla extract
Instructions
- Line an 8×8 inch baking pan with parchment paper, leaving an overhang for easy removal.
- In a medium microwave-safe bowl, combine the sweetened condensed milk and chocolate chips.
- Microwave on high for 60 seconds. Stir well.
- Continue microwaving in 30-second intervals, stirring after each, until the mixture is smooth and completely melted. This usually takes 1 to 2 minutes total after the first minute.
- Stir in the vanilla extract until fully combined.
- Pour the fudge mixture into the prepared pan and spread evenly.
- Refrigerate for at least 2 hours, or until firm.
- Lift the fudge out using the parchment paper overhang and cut into small squares.
Notes
- For a richer flavor, use dark chocolate chips instead of semi-sweet.
- If you prefer a stovetop method, heat the milk and chocolate gently over low heat, stirring constantly until smooth.
- Store leftovers in an airtight container at room temperature for up to one week.
Nutrition
- Serving Size: 1 square
- Calories: 110
- Sugar: 15
- Sodium: 25
- Fat: 5
- Saturated Fat: 3
- Unsaturated Fat: 2
- Trans Fat: 0
- Carbohydrates: 16
- Fiber: 0
- Protein: 2
- Cholesterol: 10