

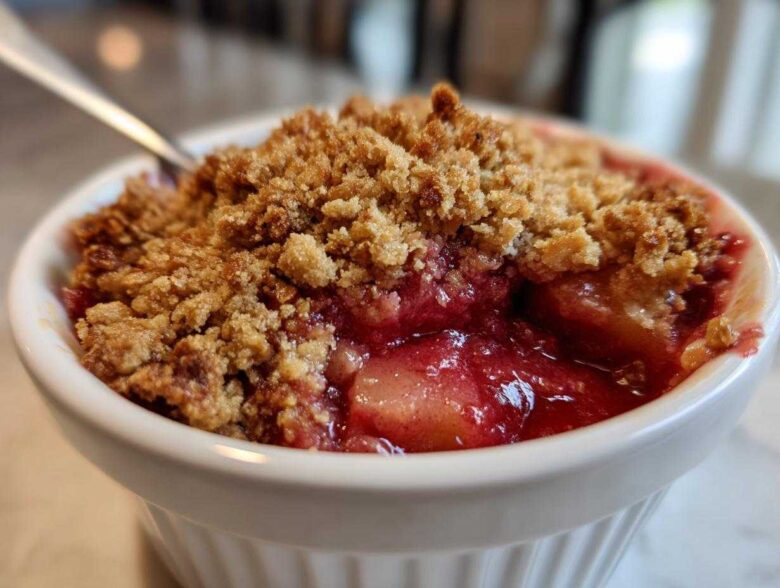
Oh my gosh, is there anything better than the first real sign of spring produce? For me, that’s rhubarb! It’s so tart and bright, and while it shows up in so many baked goods, honestly, nothing beats a classic, rustic, piping hot **rhubarb crisp**. Forget fussiness; this recipe is my gold standard for a reason. It’s unbelievably easy, and I’ve tested batches and batches until I landed on the absolute most reliably crunchy oat topping you’ll ever make.
The real trick, I found out after a few puckery failures back in the day, is nailing that sweet and tart balance in the filling. It takes a little intuition, but trust me, once you follow my simple guide here, you’ll have the best spring dessert on your table without breaking a sweat. Grab your stalks; we’re making magic!
I cover everything you need to know, from ingredient ratios to serving up that perfect scoop of vanilla ice cream. If you want to know more about how we run this kitchen, check out our little corner of the internet!
Why This Is The Best Easy Rhubarb Crisp Recipe (Sweet Tart Dessert)
I know everyone claims their dessert is the best, but you need to try this one, seriously. It cuts through all the fussiness that other fruit desserts sometimes require. This recipe is built on beautiful contrasts, which is why it’s become my go-to Spring Fruit Desserts staple. Plus, it looks great coming out of the oven!
Key Features of Our Classic Rhubarb Crumble
- It’s genuinely quick! You spend maybe 15 minutes prepping this entire thing. It’s the definition of a Quick Rhubarb Crisp.
- The filling achieves that glorious sweet-tart balance—never mushy, always bursting with bright flavor.
- That topping? It’s golden, buttery, and stays crunchy down to the last bite. If you’re looking for an Old Fashioned Rhubarb Crisp, this is it.
- It’s honestly the easiest fruit dessert you’ll ever pull off. Perfect for a weeknight treat or last-minute company.
Ingredients Needed for Your Perfect Rhubarb Crisp
Okay, let’s talk about what you need to grab from the pantry. The beauty of this **rhubarb crisp** is that it uses basic, homey stuff, but the way we use the butter and the oats in the topping is what really makes it sing. I always keep everything measured out before I start tossing the rhubarb, just to make sure I don’t forget that pinch of salt—it makes a huge difference in cutting the sweetness!
For the Tart Rhubarb Filling
- 4 cups fresh rhubarb, chopped into 1-inch pieces (Don’t measure too strictly; just get about 4 cups in there!)
- 1 cup granulated sugar (Keep this handy, but taste your rhubarb first—if it’s super tart, you can always add a touch more later.)
- 2 tablespoons all-purpose flour (This helps the juices thicken up nicely.)
- 1 teaspoon vanilla extract
For the Buttery Oat Topping Dessert
This is where the real crunch comes from, so pay attention to the butter temperature!
- 1/2 cup all-purpose flour (For the topping structure)
- 1/2 cup rolled oats (Make sure these are the old-fashioned kind, not the instant mushy stuff!)
- 1/2 cup packed light brown sugar (This adds that deep, caramel flavor.)
- 1/4 teaspoon ground cinnamon
- 1/4 teaspoon salt (Yes, even in the topping!)
- 1/2 cup (1 stick) cold unsalted butter, cut into small cubes (Say it with me: COLD butter.)
How to Make Rhubarb Crisp: Step-by-Step Instructions
Making this **rhubarb crisp** is honestly so simple once you have your ingredients ready. It’s quick enough for a weeknight treat, which is great because I never want to wait for rhubarb season to end! We’re going to tackle this in three main stages: filling, topping, and baking. Don’t forget to check out my quick ramen cheats while the oven preheats!
Preparing the Filling and Dish
First things first, get your oven yelling hot at 375°F (190°C). Lightly grease whatever 8×8 dish you’re using—you don’t want any sticking later! Now, grab that bowl with your chopped rhubarb. Toss it gently with the granulated sugar, the small amount of flour, and your vanilla extract. You just want everything evenly coated, nothing too aggressive here. Once it looks glossy, pour that lovely mixture right into your baking dish and spread it out so it makes one nice, even layer across the bottom. That’s your base done!
Creating the Crispy Fruit Topping Baking
Time for that beautiful **Buttery Oat Topping Dessert**! In a separate, clean bowl, whisk together the topping flour, those rolled oats, brown sugar, cinnamon, and salt. Now, the crucial part: the butter. You need to cut in those cold, cubed butter pieces. I usually use my fingers to pinch and rub the butter into the dry ingredients. Stop when you have coarse crumbs, and look for a few pea-sized chunks of butter still hanging around. Those chunks create the best pockets of crispness! Sprinkle this heavenly crumb mixture right over the rhubarb. Resist the urge to press it down; just let it sit lightly on top!
Baking and Resting the Rhubarb Crisp
Pop the whole dish into your hot oven. This usually takes between 35 to 45 minutes. How do you know it’s done? Look for the topping to be deeply golden brown, and you should see the rhubarb filling bubbling thick and slow around the edges. This bubbling means the tartness has cooked down perfectly. Once you pull it out, you HAVE to wait! Let your **rhubarb crisp** rest for at least 15 minutes on the counter. This mandatory cooling time lets those juices set up so they don’t run everywhere when you finally dig in.
Tips for Success When Making Your Rhubarb Crisp
Now that you know the basic steps, I want to share a few little “chef secrets” that I picked up over the years. Rhubarb can be tricky sometimes—it’s either the sweetest thing ever or it tastes like pure lemon juice mixed with celery! These tips, especially about keeping things cold, will guarantee you a successful **rhubarb crisp** every time. Speaking of great textures, you absolutely have to see how I manage the topping on my baked oatmeal; it uses similar cold-fat principles!
Handling Frozen Rhubarb for this Simple Rhubarb Baked Dessert
Let’s be real, sometimes we can’t get fresh rhubarb or we just have bags of it in the freezer from last season. If you’re using frozen rhubarb, please, please, please do not thaw it first! Thawing releases all the water, and you end up with a watery base. Just take those frozen chunks and toss them straight into the sugar and flour mixture. Because the rhubarb is colder, it takes longer to heat up in the oven. So, you’re probably looking at cooking an extra 5 to 10 minutes to get that beautiful, thick bubble when it’s done.
Achieving the Perfect Buttery Oat Topping
This is the difference between a soggy fruit bowl and an amazing **Crispy Fruit Topping Baking** experience. Cold butter is your best friend here. If your butter is too soft when you cut it into the flour and oats, it melts instantly into the dry ingredients, creating a paste instead of distinct little crumbly pockets. You want to work quickly when you’re cutting it in—use your fingertips or a pastry blender, and stop as soon as you see those slightly larger, pea-sized bits. Those are the bits that melt, release buttery steam, and turn golden and crunchy while they bake. Don’t overmix, or you’ll lose the texture!
Variations: Strawberry Rhubarb Crisp Variations and More
While my heart belongs to the pure, sharp taste of straight rhubarb, I totally get it—sometimes you want a little more sweetness or color in your bowl! Messing with a great base recipe like this **rhubarb crisp** is half the fun, and it’s so easy to do without breaking the core structure. If you try one variation, make it this one, because it’s absolutely stunning.
We need to nail that sweet spot between the tart rhubarb and the sweet additions, but it works like a dream. If you love the idea of baked fruit but want something different than this crisp, you should check out my recipe for baked apples with the oatmeal filling—it uses a similar crunchy topping idea!
Strawberry Rhubarb Crisp Variations
Everyone goes crazy for the Strawberry Rhubarb Crisp, and honestly, it’s easy to see why. Strawberries add a beautiful sweetness and a gorgeous red hue to the filling that just screams summer picnic. When you want to make this swap, it’s super straightforward. Just take your total fruit measurement (which should be about 4-5 cups total) and substitute exactly half of the rhubarb with sliced fresh strawberries.
Remember, strawberries are softer and sweeter than rhubarb, so they release more juice. You don’t need to change the sugar quantity in the rhubarb filling part of the recipe unless your berries are unusually sour. If you are using slightly under-ripe berries, maybe toss in an extra teaspoon of that granulated sugar just to be safe. Slice them thick so they don’t disappear completely in the oven!
Simple Add-Ins for Extra Texture
If you aren’t doing the strawberry swap, you can still jazz up the filling. Pecans or walnuts are my favorite things to add to the topping mixture. Just toss about half a cup of chopped nuts in with your oats and flour. They toast up beautifully next to that buttery crust!
Another little trick for variety is adding dried fruit to the filling. Dried cranberries pair wonderfully with rhubarb if you want a deeper, slightly chewy texture. Just toss those dried pieces in with the fresh rhubarb and sugar so they can plump up nicely while baking. It really elevates this from a simple dessert to something truly special!
Serving Suggestions: Rhubarb Crisp with Ice Cream
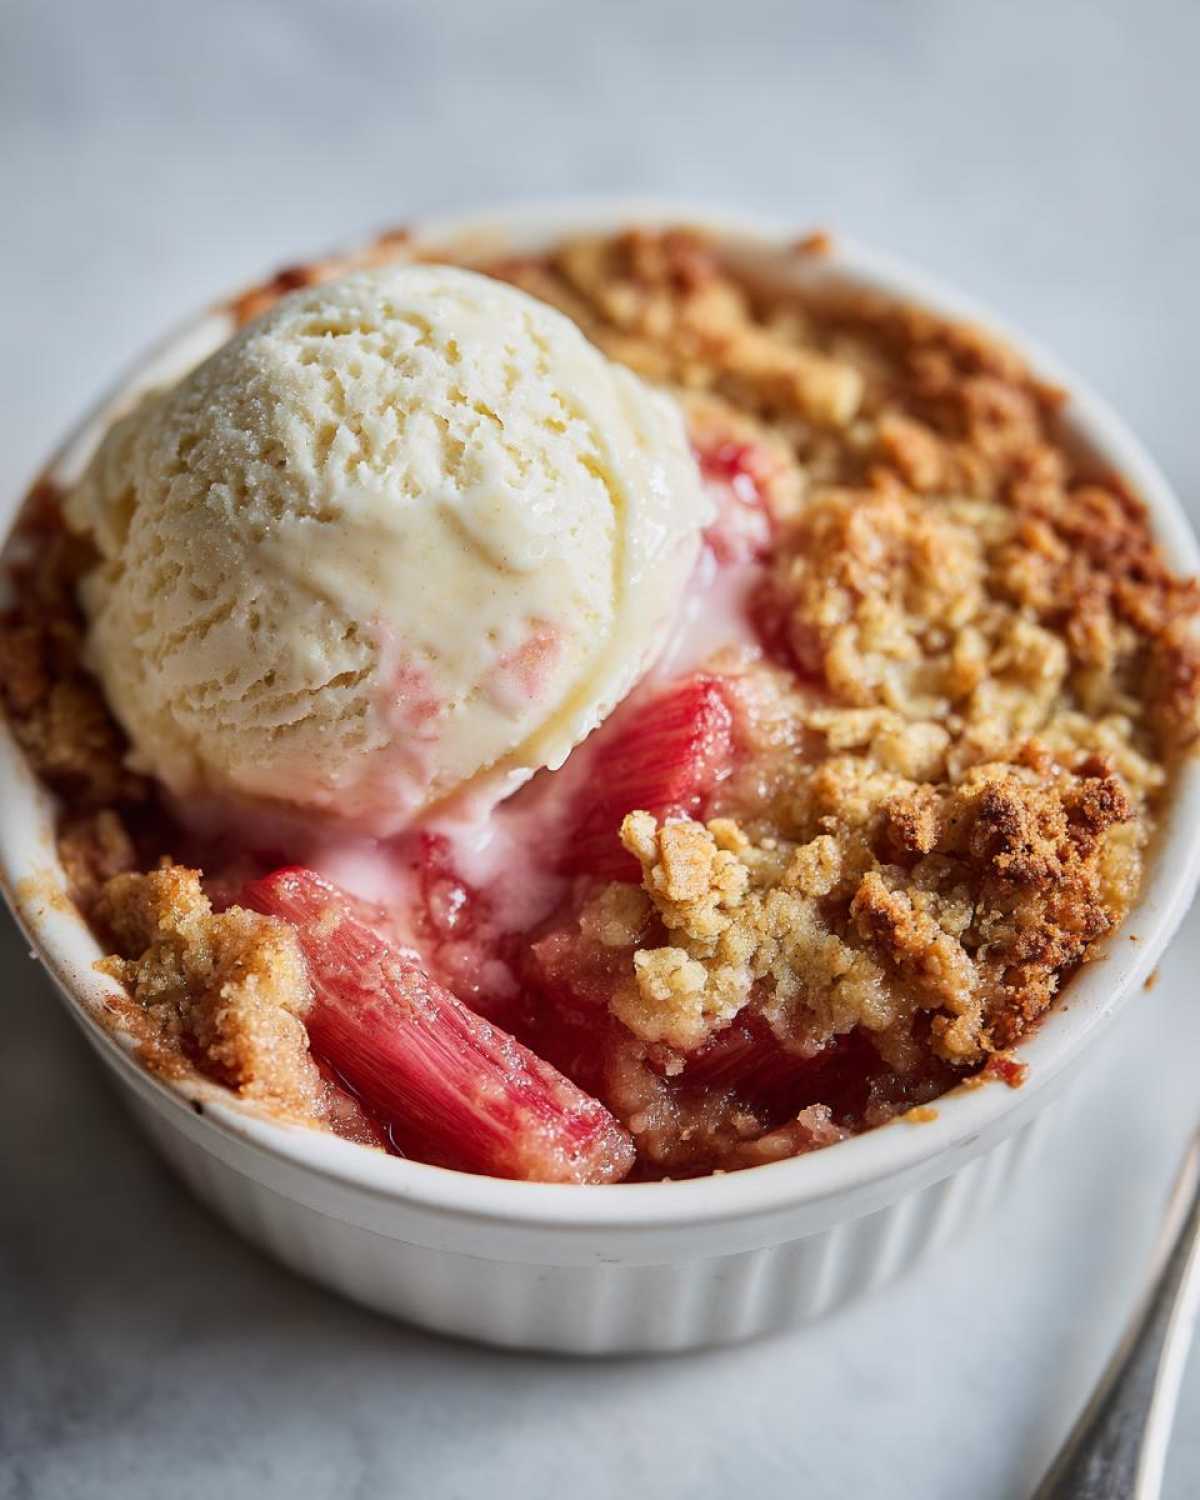
Okay, you pulled the baking dish out of the oven, it cooled for 15 minutes, and now it smells like heaven—it’s time to eat! What we do here is simple but mandatory. You CANNOT serve this **rhubarb crisp** cold. It has to be warm. That glorious contrast between the piping hot, bubbling, tart fruit and something perfectly cold is what makes this dessert legendary.
My absolute number one serving suggestion—the way I serve it every single time—is with a giant scoop of good quality vanilla ice cream on top. It’s the classic pairing for a reason! When that cold cream hits the hot fruit base, it softens just enough, and the vanilla really balances out that sharp rhubarb tang. It’s cozy comfort food dessert perfection.
The Vanilla Ice Cream Rule
If you take away nothing else from this post, remember this: Use real vanilla bean ice cream if you can. We’re making an incredible dessert here, so don’t sabotage it with cheap, icy stuff! The melting vanilla ice cream creates its own thin, sweet cream sauce right on your plate. We love adding a tiny drizzle of fresh caramel sauce over the ice cream sometimes, especially if we baked ours a little longer and got a really deep brown topping.
Other Cozy Companions
If ice cream isn’t your thing, that’s fine! We’ve got other great options for this simple **Simple Rhubarb Baked Dessert**.
- Fresh Whipped Cream: Take heavy cream, a little powdered sugar, and maybe just a tiny splash of almond extract, and whip it until soft peaks form. It’s lighter than ice cream but still provides that lovely cool contrast.
- Crème Fraîche: This is an old-school Dutch favorite. Crème fraîche is tangy, rich, and much thicker than sour cream. It works beautifully because its slight sourness complements the rhubarb’s natural tartness without adding extra sweetness.
- A Simple Dusting: If you prefer simplicity and want the rhubarb flavor to really dominate, just dust a bit of powdered sugar over the warm crisp right before serving. It looks rustic and elegant all at once!
No matter how you serve it, make sure you grab a spoon right away. This is one of those **Dessert Recipes with Fresh Rhubarb** that doesn’t wait for anyone!
Storage & Reheating Instructions
This **rhubarb crisp** is honestly so good the next day, but you have to store it right if you want the topping to hold onto its crunch. Generally, leftovers always taste amazing because the flavors—that sweet filling mixed with the buttery oats—really meld together overnight. However, if you just toss it in plastic wrap, you’re going to wake up to a sad, soggy topping, and nobody wants that!
If you plan on eating it all within 24 hours, you can actually leave it covered tightly on the counter at room temperature. But if you’re saving it for longer, or if your kitchen is humid (which ruins crisp tops faster than anything!), definitely pop it into the fridge. Just make sure it’s covered tightly with plastic wrap or an airtight lid. It keeps well for about four days refrigerated.
Before you tuck it away, let the crisp cool completely to room temperature first. Putting warm food into the fridge traps moisture, which defeats the whole purpose of keeping that lovely crunch intact. And if you’re worried about privacy after eating this much dessert, don’t sweat it; we keep things pretty safe here, as outlined in our privacy policy!
Bringing Back the Crunch
Here’s the absolute key to reheating: Skip the microwave! I know it’s fast, but the microwave turns any oat topping into chewy sadness almost instantly. We want that *crisp* back!
The best way to revive leftovers is in the oven. You can reheat a slice or the whole pan. Cover the dish loosely with aluminum foil (this stops the topping from burning before the middle gets warm) and bake it at about 325°F (160°C) until it’s heated through—that’s usually about 15 minutes for a single slice or 25 minutes for the whole dish.
If you have leftovers that have been in the fridge, give them 5 extra minutes in the oven, or just take the foil off for the last 5 minutes of reheating to bring that golden crunch right back to life. Serve it warm again with a fresh scoop of ice cream, and nobody will ever know it wasn’t made fresh!
Frequently Asked Questions About This Recipe
I get so many questions about this **rhubarb crisp**, especially when people are baking with rhubarb for the first time! It’s totally normal to wonder about substitutions or just how different fruit toppings work. I tried to cover all the common hurdles in the steps above, but here are the things I hear most often. If you have other questions, feel free to reach out—I love hearing from you all! You can always find my contact information here.
Can I make this a Gluten Free Rhubarb Crisp Adaptation?
Absolutely! This recipe is very forgiving for making it Gluten Free Rhubarb Crisp Adaptation friendly. The filling is naturally GF, so you only have to swap out the flour and oats in the topping. Use a good quality 1-to-1 gluten-free all-purpose flour blend instead of regular flour. For the oats, make absolutely certain you purchase oats that are explicitly certified gluten-free, just to avoid any cross-contamination risks! Then, follow the recipe exactly as written, and you’ll get that same crunchy topping.
How do I prevent the rhubarb from being too tart in my Rhubarb Crisp?
This depends entirely on your rhubarb! Some rhubarb stalks are naturally sweeter than others. When I first mix up the filling, I always suggest using the full cup of granulated sugar listed, but I tell folks to taste a tiny nibble of the raw rhubarb mixed with the sugar. If it’s already relatively sweet, cut the sugar back to 3/4 cup. If it makes your face pucker up, stick to the full cup or even add an extra tablespoon or two. It’s easier to add sugar before baking than to try and fix a super sour filling after it comes out of the oven!
What is the difference between a crisp and a crumble?
That’s a great question! For me, the difference is all in the texture of the topping, and it’s all about the oats. A true “crumble” topping usually relies solely on flour, sugar, and butter rubbed together to make a crumbly texture. But when you use oats, you get that satisfying crunch that stays crisp even when served warm, which is why we call this a **rhubarb crisp**!
Our recipe includes those oats for that extra texture, so it stays true to the crisp name. If you left the oats out, you’d technically have a classic **Classic Rhubarb Crumble** topping, but honestly, who would skip the crunch?
Estimated Nutritional Information for This Dessert
We all need to know what we are diving into when we enjoy a big bowl of warm, buttery goodness, right? Look, because this **rhubarb crisp** dessert is made with real fruit and real butter, it’s definitely a treat, not a diet food! I always find the sugar content varies slightly depending on how tart your rhubarb was, but these numbers give you a very good general idea.
Keep in mind these are just estimates for one serving size, based on the quantities I listed. For the official details about how we track this stuff, always refer to our disclaimer page!
- Serving Size: 1 serving
- Calories: Roughly 350
- Fat: Around 18g (Don’t forget that’s mostly that lovely butter!)
- Carbohydrates: About 48g
- Sugar: Approximately 30g (This can fluctuate wildly based on your rhubarb!)
- Protein: 4g
It’s a decadent dessert, plain and simple, but oh my goodness, it’s worth every single bite, especially spooned over that melting ice cream!
Share Your Homemade Rhubarb Crunch Experience
Well, that’s it! You’ve got the recipe, you know the secrets, and you are ready to bake the most fantastic, buttery, crunchy **rhubarb crisp** of your life. Seriously, getting that golden topping right is so satisfying, and the smell filling your house while it bakes is just the best part of spring cooking.
Now, I really, really want to see what you come up with! Did you stick to the classic version, or did you try adding those pecans I mentioned? Did you go heavy on the vanilla bean ice cream?
Don’t keep that delicious **Homemade Rhubarb Crunch** to yourself! Take a picture when it’s bubbling hot, and tag me on social media! I absolutely love seeing all your bakes, and it inspires me to keep trying new things, too. If you followed along and loved how easy this turned out, please do me a huge favor and leave a rating right here on the post!
Happy baking, and don’t forget to check out my main recipe index for more easy fruit desserts!
PrintEasy & Buttery Rhubarb Crisp with Crunchy Oat Topping
Make this classic rhubarb crisp with a simple, tart filling and a rich, buttery oat topping. It is a straightforward dessert perfect for serving warm.
- Prep Time: 15 min
- Cook Time: 40 min
- Total Time: 55 min
- Yield: 6 servings
- Category: Dessert
- Method: Baking
- Cuisine: American
- Diet: Vegetarian
Ingredients
- 4 cups fresh rhubarb, chopped into 1-inch pieces
- 1 cup granulated sugar (adjust to taste based on rhubarb tartness)
- 2 tablespoons all-purpose flour
- 1 teaspoon vanilla extract
- 1/2 cup all-purpose flour (for topping)
- 1/2 cup rolled oats (not instant)
- 1/2 cup packed light brown sugar (for topping)
- 1/4 teaspoon ground cinnamon
- 1/4 teaspoon salt
- 1/2 cup (1 stick) cold unsalted butter, cut into small cubes
Instructions
- Preheat your oven to 375°F (190°C). Lightly grease an 8×8 inch baking dish.
- In a large bowl, combine the chopped rhubarb, granulated sugar, 2 tablespoons of flour, and vanilla extract. Toss gently until the rhubarb is evenly coated.
- Pour the rhubarb mixture into the prepared baking dish and spread it into an even layer.
- In a separate medium bowl, whisk together the 1/2 cup flour, rolled oats, brown sugar, cinnamon, and salt for the topping.
- Cut in the cold butter cubes using a pastry blender or your fingertips until the mixture resembles coarse crumbs with some pea-sized pieces remaining.
- Sprinkle the oat topping evenly over the rhubarb filling. Press lightly, but do not pack it down.
- Bake for 35 to 45 minutes, or until the topping is golden brown and the rhubarb filling is bubbling thickly around the edges.
- Remove from the oven and let it cool for at least 15 minutes before serving.
Notes
- If you use frozen rhubarb, do not thaw it first. Toss it directly with the sugar and flour, and you may need to add 5 to 10 minutes to the baking time.
- For a strawberry rhubarb crisp, substitute 2 cups of rhubarb with 2 cups of sliced strawberries.
- Serve warm with vanilla ice cream or fresh whipped cream for the best flavor.
Nutrition
- Serving Size: 1 serving
- Calories: 350
- Sugar: 30
- Sodium: 150
- Fat: 18
- Saturated Fat: 11
- Unsaturated Fat: 7
- Trans Fat: 0
- Carbohydrates: 48
- Fiber: 4
- Protein: 4
- Cholesterol: 45