

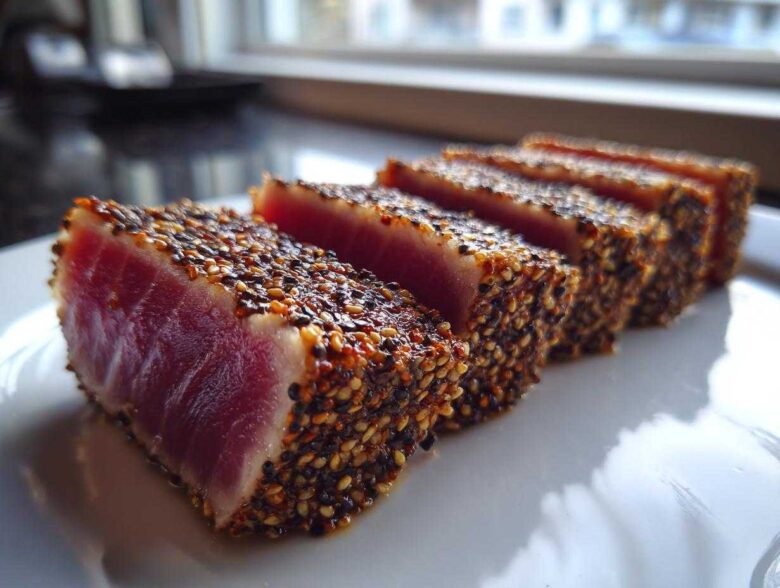
When we first retired, Clara thought our culinary adventures would be limited to perfecting sourdough starters. Boy, was she wrong! Now, the hardest part of cooking feels like finding quiet time because Leo is always cranking up the heat. If you’ve looked at restaurant menus and sighed over the price of perfectly cooked seafood, stop right there! Today, we’re proving you can bring that high-end sushi bar experience right into your own kitchen tonight. This recipe for Seared Ahi Tuna is our absolute favorite quick seafood recipe. It takes less time than ordering takeout, gives you that gorgeous, bright ruby-red center, and proves that simple ingredients, handled correctly, make the best gourmet tuna. Trust me, once you master this sear, you’ll be making this healthy dinner all the time.
Leo discovered the secret to that beautiful crust during a rainy Tuesday afternoon experiment. He was determined to get the outside blackened just right without overcooking the precious sushi grade tuna we bought that morning. He realized the trick wasn’t just the heat—it was what came before and after! It’s fast, it’s easy, and honestly, it feels incredibly luxurious. We think everyone deserves meals this good without needing a reservation.
Why This Seared Ahi Tuna Recipe is Your New Go-To
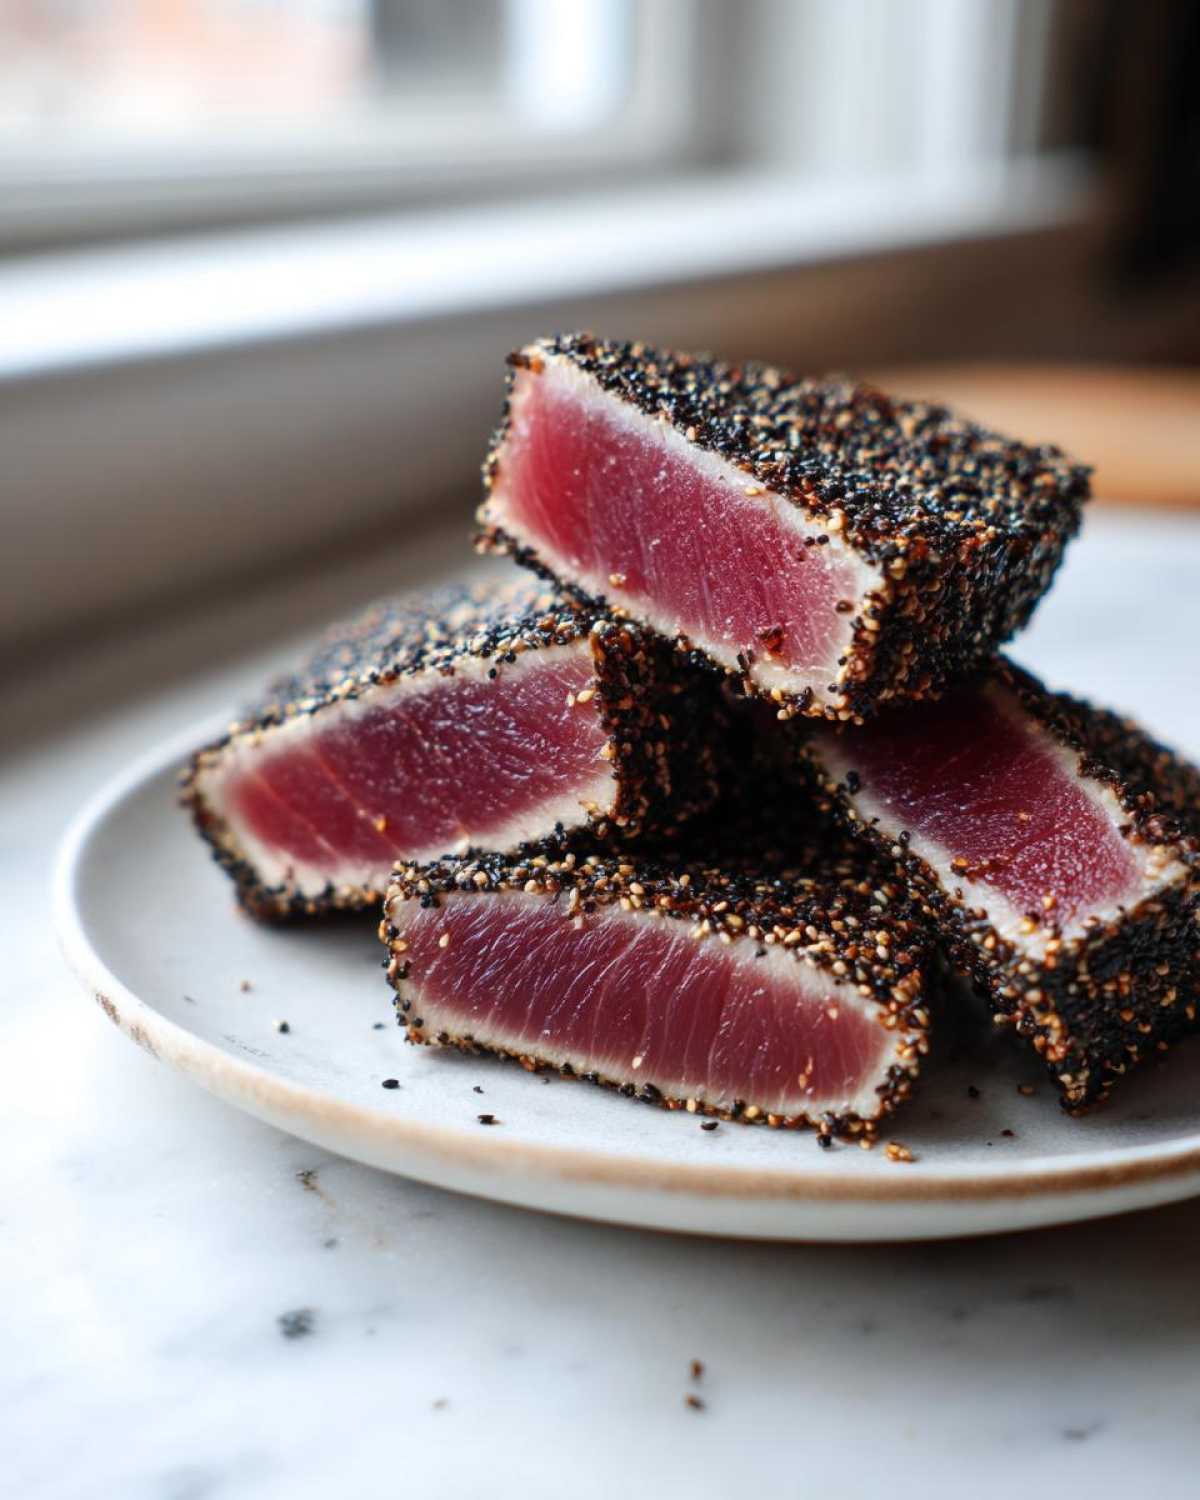
Clara convinced me that we needed a weeknight meal that felt fancy but didn’t require hours of standing over the stove. This quick seafood recipe fits the bill perfectly! When you’re dealing with a beautiful piece of quality yellowfin tuna, you want to honor the ingredient, and that means keeping things simple and moving fast.
Here’s why you’re going to fall in love with this version of seared ahi tuna:
- It’s astonishingly fast! The actual cooking time for searing is under five minutes total.
- You get true gourmet tuna results—a perfect crust meets a cool, rare interior—without breaking a sweat.
- It’s a champion healthy dinner choice; lean protein with minimal fat content.
- The flavor relies on the quality of the sushi grade tuna, which means less fussing with complicated sauces.
Seeing that beautiful sesame crust come together makes me feel like a world-class chef, even though I’m just working with two beautiful steaks!
Ingredients Needed for Perfect Seared Ahi Tuna
You don’t need a long list of exotic items for this restaurant-quality meal. What you need is quality! For this quick seafood recipe, the star is definitely the protein. You absolutely must source the best sushi grade tuna you can find, usually yellowfin or bigeye, about 6 ounces per steak. Don’t try this with regular supermarket tuna; it just won’t work the same way!
Here’s what Clara lays out on the prep station before we even think about turning on the heat:
- Two 6-ounce sushi grade tuna steaks (remember, quality first!).
- Two tablespoons of simple sesame oil for brushing.
- One tablespoon of soy sauce or tamari if we need gluten-free that night.
- One teaspoon of fresh ginger, grated until it’s nearly soup.
- One clove of garlic, minced super fine—Leo hates big chunks!
- Half a teaspoon of black pepper.
- A quarter cup of mixed black and white sesame seeds.
Now, here’s Leo’s golden rule for the searing part: You need a heavy-bottomed skillet—cast iron is my go-to. If your pan isn’t scorching hot, the crust won’t form, and you’ll end up steaming your beautiful gourmet tuna instead of searing it. That pan retention is everything!
Mastering the Marinade for Your Seared Ahi Tuna
This is where many people make a tiny mistake that ruins the gorgeous texture of the yellowfin tuna. We whisk together our little blend of flavor: sesame oil, soy sauce (or tamari for Clara when she’s being strict about gluten), that bright fresh ginger, minced garlic, and a good grind of pepper. It smells absolutely divine, honestly—totally Asian tuna recipe central in our kitchen!
Now, listen closely, because this is key for that melt-in-your-mouth, rare center. You put the tuna steaks in this marinade, coat them quickly, and set the timer for exactly ten minutes. No more! I cannot stress this enough. That salty soy sauce and the acidity in the ginger start to firm up the protein almost immediately. If you leave that beautiful, delicate sushi grade tuna soaking for half an hour, it stops being silky and starts tasting a little cooked before it even hits the pan. We want a sear, not ceviche, right?
Ten minutes is perfect for flavor infusion without changing the texture. It’s enough time for the marinade to sink in but not enough time to turn your gourmet tuna tough. While those steaks are chilling out for their quick soak, I’m usually whipping up a batch of the easy fluffy rice pilaf to go underneath. A quick marinade calls for a quick side!
Ingredient Notes and Substitutions for Seared Ahi Tuna
Because this recipe relies on such few ingredients, every one counts for making your seared ahi tuna perfect. If you are watching sodium or can’t handle soy sauce, tamari is my favorite swap—it gives you that deep umami flavor without the wheat. You can also substitute the sesame oil if necessary, but I really wouldn’t recommend it here. Sesame oil is what ties that classic Asian tuna recipe together.
If you don’t have fresh ginger, powdered ginger is a last resort, but it lacks that bright punch we need to cut through the richness of the tuna. Since we only marinate for 10 minutes, you don’t need to worry about citrus juice burning the outside. Just stick to what’s listed for the best result. It’s all about keeping that delicate wonderful flavor profile intact!
Step-by-Step Instructions for the Best Seared Ahi Tuna
Okay, the ten minutes are up! Now we move fast. This is where Leo takes center stage because he is relentless about heat control. Remember, we are trying to protect the wonderful rare interior of this yellowfin tuna, and that means giving the outside an aggressive blast of heat.
Step 1: The Absolute Dryness Test. Before anything else, take those steaks out of the marinade and pat them down with paper towels until they are super dry. I mean bone-dry! If there’s any moisture clinging to them, steam will happen, and steaming equals a rubbery, gray sear instead of that dark, beautiful crust we want. Don’t skip this, seriously—it’s non-negotiable for perfect seared ahi tuna.
Step 2: The Seed Coat. Once dry, press every surface of the tuna steaks into that plate of mixed sesame seeds. Make sure they stick really well. This crust isn’t just for looks; it’s the shield that keeps the inside raw.
Step 3: Heat the Stage. Put your cast iron pan back on the highest heat your stove allows. We need it smoking hot. This takes a good few minutes, but trust me, waiting for that pan to get roaring hot is the difference between a restaurant-quality product and a sad, lukewarm mess.
Step 4: Sear Time! Carefully place the crusted tuna into that screaming hot, dry skillet. Now, listen close—this is Clara’s favorite part! When it hits the metal, you should hear an immediate, aggressive *sizzle*! If you hear a gentle hiss, your pan wasn’t hot enough, and you need to pull the tuna back out while the pan heats up more.
Step 5: Timing is Everything. For that perfect, cool, rare center, sear for just 60 to 90 seconds on the first side. Don’t touch it! Flip it over and sear the second side for the same short time. If you’re aiming for medium-rare, you can push it to two minutes per side, but that’s pushing it for true ahi!
Step 6: Rest and Slice. Get those beautiful steaks out of the pan immediately and let them rest on a cutting board for about five minutes. This lets the juices settle. Then, slice them against the grain into half-inch pieces. If you want to see how we turn this into an amazing appetizer, check out our recipe for spicy ahi tuna tartare!
Achieving the Perfect Crust on Your Seared Ahi Tuna
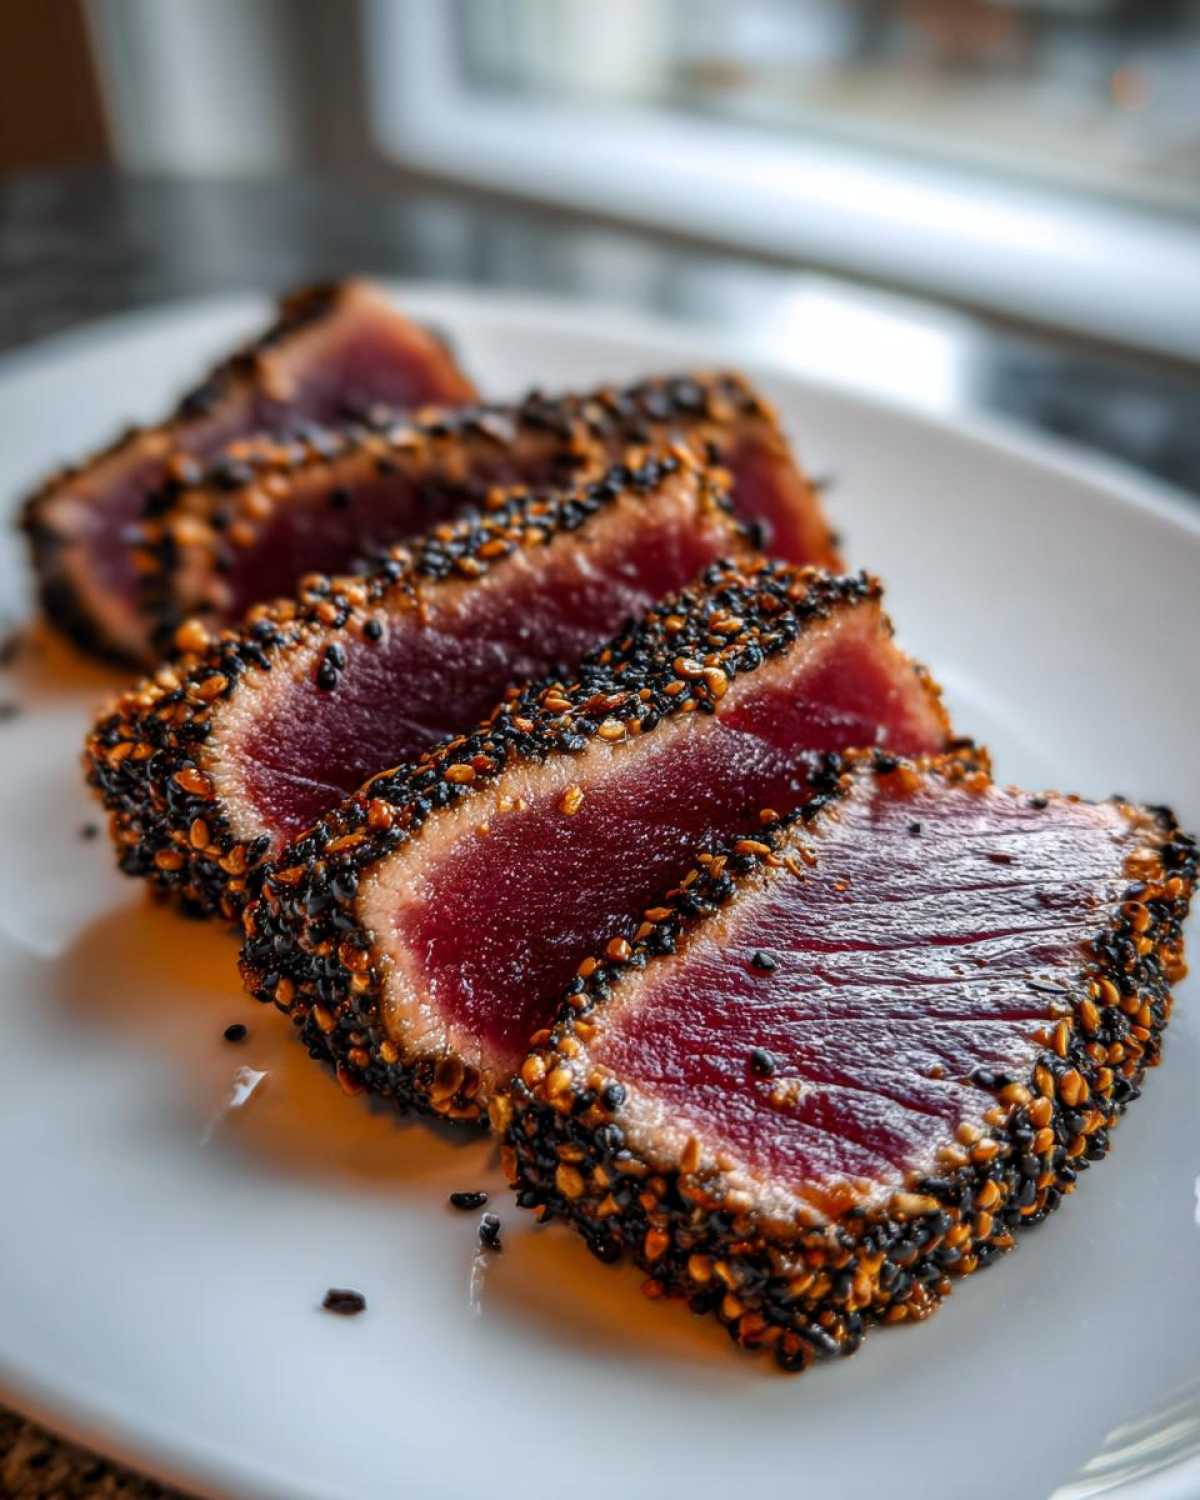
The crust is truly the signature of an amazing seared ahi tuna. It’s a simple concept, but the execution needs conviction! Remember, that combination of sesame oil in the marinade and the dry exterior helps the seeds adhere completely. Then, the searing itself is all about the *contact*.
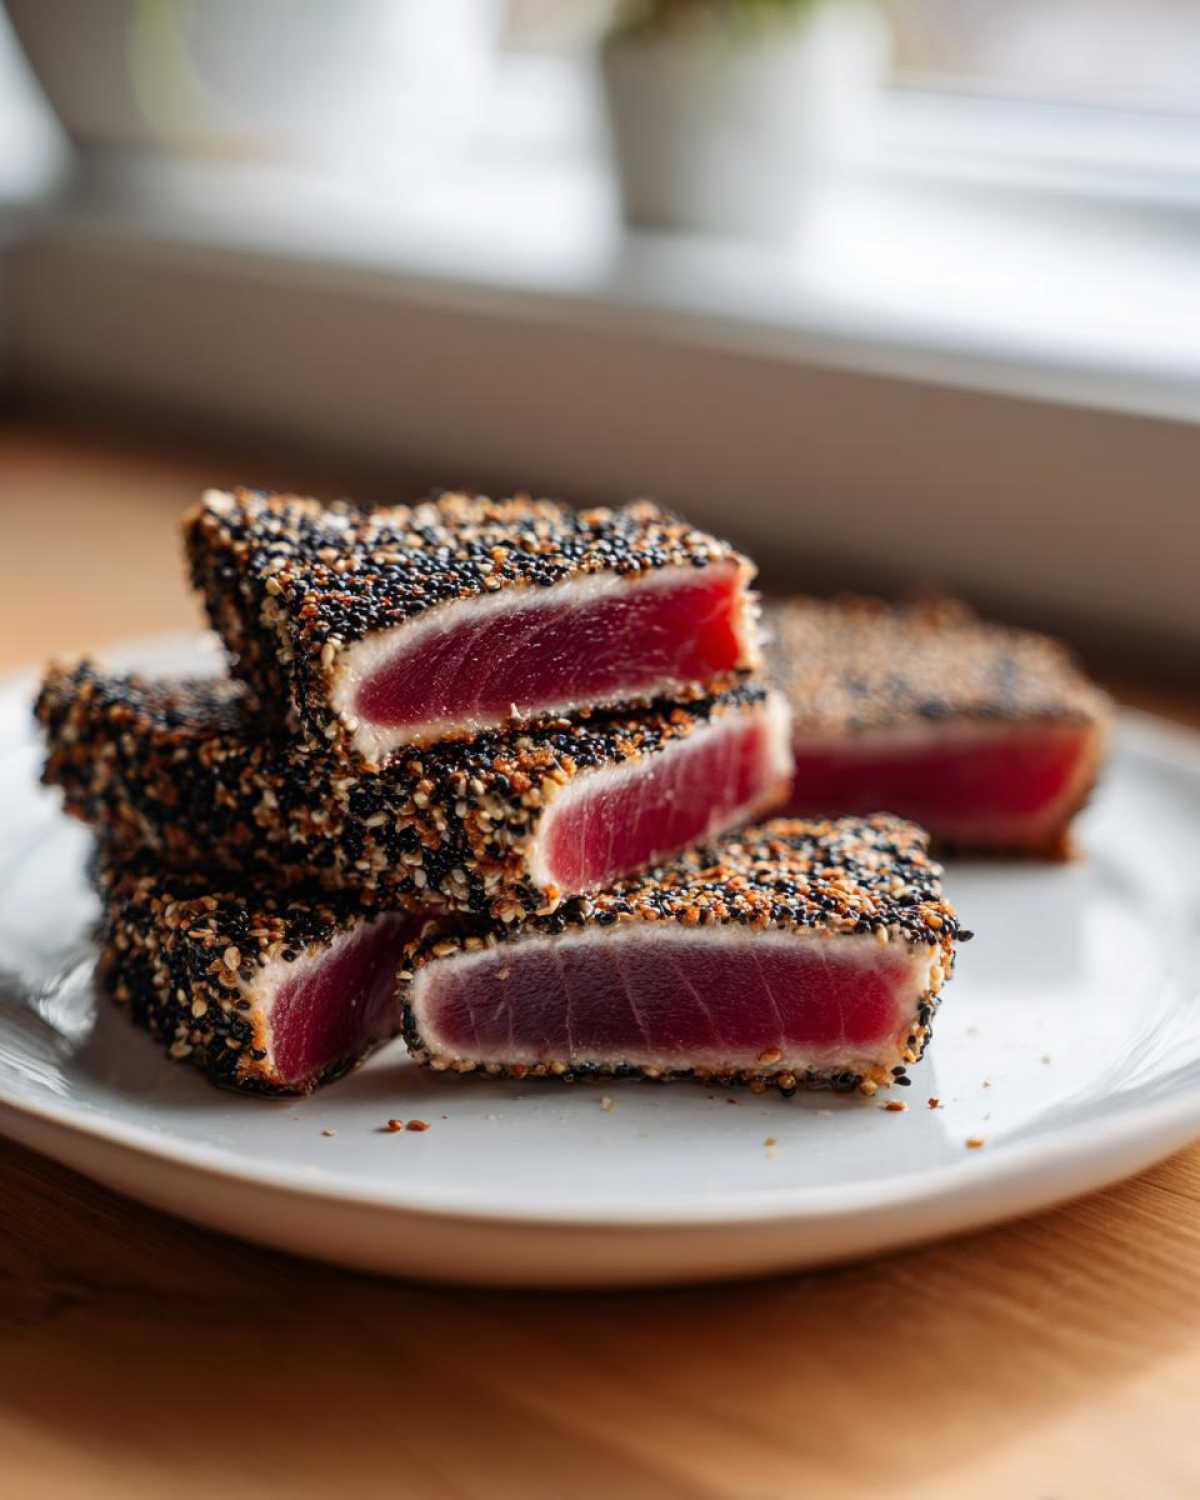
High heat does two amazing things. First, it instantly toasts the sesame seeds, adding this incredible nutty aroma to the whole dish. Second, the incredible heat creates a Maillard reaction—a beautiful browning—on the tiny surface area that touches the metal. This dark, flavorful crust acts like a delicious little blanket, holding all that beautiful, cool, flavorful uncooked yellowfin tuna safe inside. Never crowd the pan, either! We need every inch of that skillet surface to be dedicated to searing, not steaming.
Tips for Success When Making Seared Ahi Tuna
Even though this is a quick seafood recipe, Clara reminds me that the success lies entirely in the prep work afterward. Leo and I have found a few extra little tricks over the years that turn a good sear into a sensational one. These aren’t in the main instructions, but they are exactly what keeps our gourmet tuna consistently perfect.
Here are the three things I insist on every time we make this seared ahi tuna:
- Slice Against the Grain, Always! This is crucial for texture, especially with firm fish like yellowfin tuna. Look closely at the muscle fibers running through the steak before you cut it. You want to slice *perpendicular* to those lines. This shortens the muscle fibers, making every piece tender! Cutting with the grain leaves you with chewy, long fibers, and nobody wants that after all that searing effort.
- The Rest is Not Optional! Just like a good steak, you *must* let the tuna rest for five minutes after it comes off the heat. If you slice it straight away, all those beautiful, flavorful juices that have been concentrating near the edges will just run out onto your cutting board instead of staying in the meat.
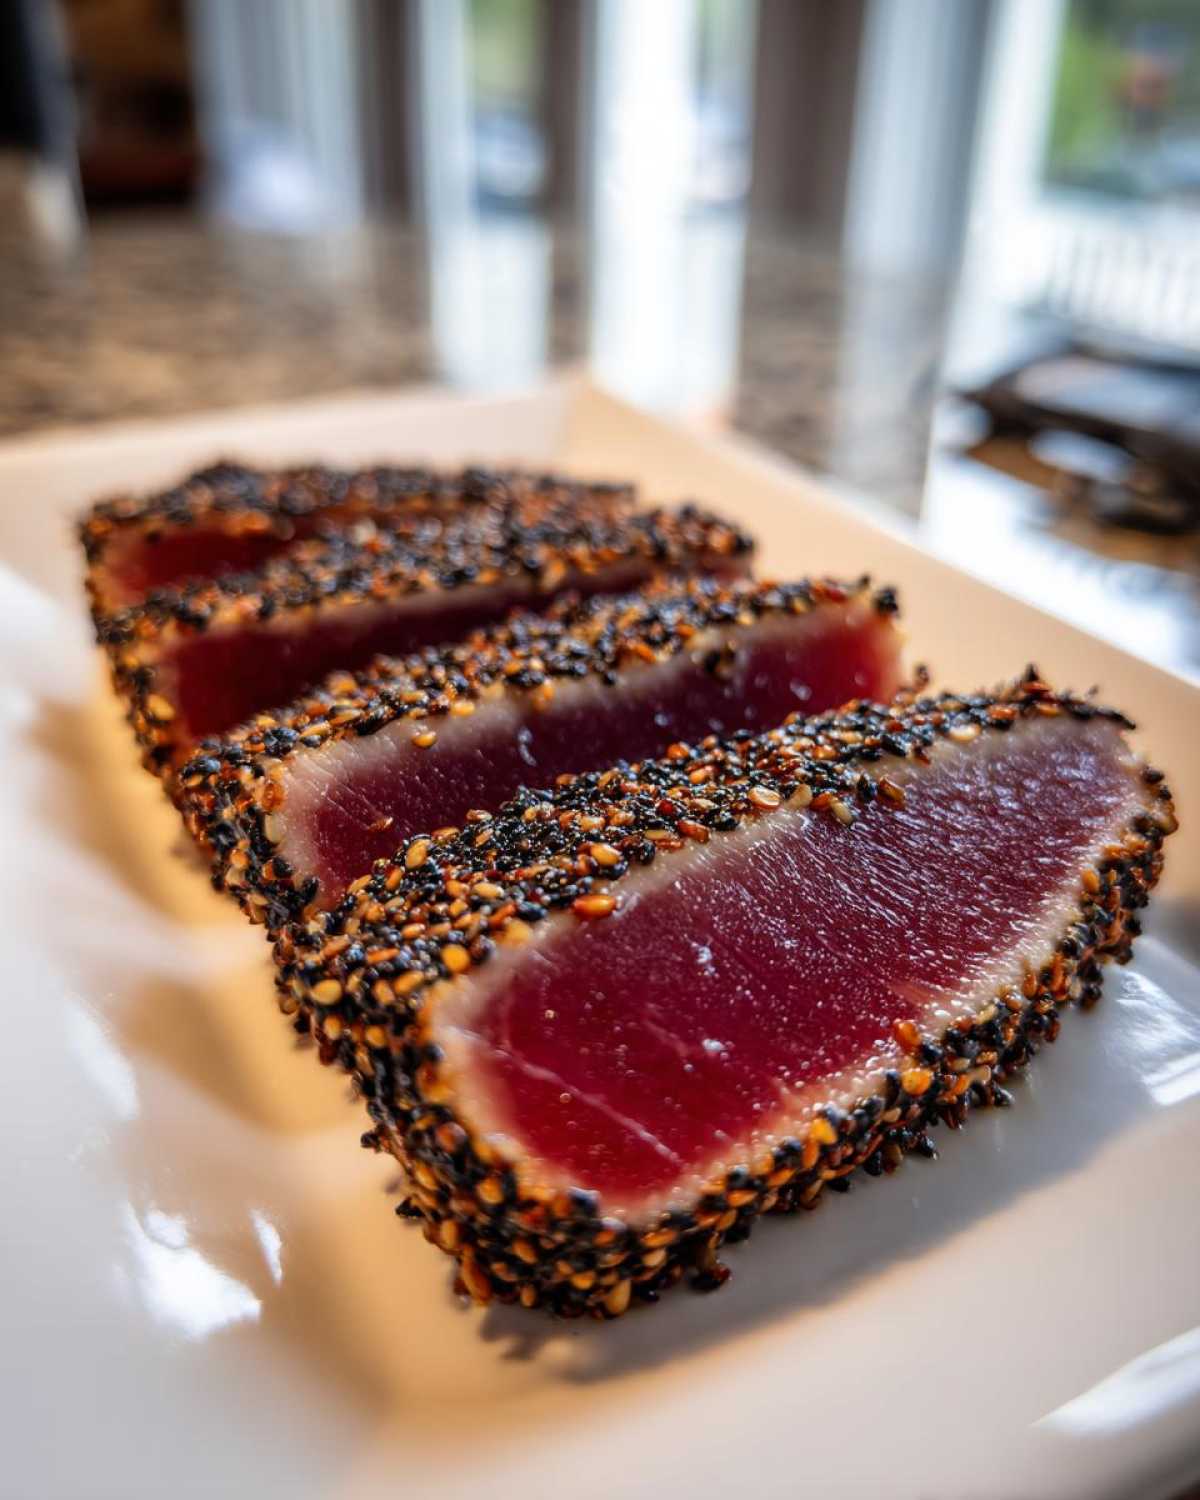
Leo’s Pro Tip for the Nervous Cooks: If you absolutely cannot trust the clock for that 60 to 90 seconds, bring in your secret weapon: your instant-read thermometer! For a perfect rare center—that lovely cool, rosy pink—you are aiming for an internal temperature of exactly 115°F when you pull it from the pan. Pull it at 110°F, because it will continue cooking another five degrees while it rests. This takes the guesswork out of hitting that elusive center. Don’t worry, I won’t tell anyone you used a gadget!
One final thing: make sure your cutting board is spotless before you slice. We want clean presentation for this dish!
Serving Suggestions for Your Asian Tuna Recipe
Now that you’ve created this stunning, perfectly seared ahi tuna that practically screams gourmet tuna, you can’t just leave it naked on a plate! This is an Asian tuna recipe, so we want accompaniments that feel light, bright, and complementary. The star here is the flavor of the fish, so we don’t want heavy sauces competing with that gorgeous sesame crust.
For me, it’s almost always served over a bed of steamed jasmine rice. The rice soaks up any teeny drops of that leftover marinade—absolute perfection! But if you’re looking for something a bit lighter to really emphasize that this is a healthy dinner, I highly recommend pairing it with a crunchy, simple Asian slaw. If you’re serving a crowd, why not make a full meal out of it and pair your tuna with our roasted veggie grain bowl? It uses some of the same bright vinaigrette flavors that play so well with the ginger in the marinade.
Just make sure whatever you choose, you slice that tuna first and arrange it beautifully. That ruby-red center deserves a spotlight!
Storage and Reheating Instructions for Leftover Seared Ahi Tuna
Oh, the eternal question! If you manage to have any leftover seared ahi tuna—which rarely happens in our house, Leo usually manages to eat most of it—you need to know how to treat it gently. This, my friends, is not like a shepherd’s pie that tastes better the next day. This delicate yellowfin tuna is at its absolute peak quality the second it finishes resting.
The best advice I can give you is to plan on eating it fresh. Seriously, time your searing for when everyone is sitting down because that quick seafood recipe is designed for immediate gratification! It’s a quick move from pan to plate.
But, if you must store it (maybe you saved one perfect steak for lunch tomorrow?), here is the protocol. Wrap those beautiful, sliced pieces tightly in plastic wrap or stick them in an airtight container. Keep them chilled in the refrigerator for no more than one day. Any longer and you risk losing that beautiful texture you worked so hard to create.
Now, let’s talk reheating, or rather, *not* reheating. Resist the urge! If you try to microwave or pan-fry that already perfectly seared tuna, it will instantly go gray, tough, and frankly, very sad. Leo says that reheated seared tuna is the dullest tune in the orchestra.
Instead, enjoy it cold or let it sit on the counter for about 15 minutes to come closer to room temperature. I love to take any leftover slices and flake them right over a simple green salad the next day, or tuck them into a chilled wrap. It keeps that wonderful Asian tuna recipe flavor without ruining the texture! It’s still delicious, just in a different, colder presentation.
Frequently Asked Questions About Yellowfin Tuna
After Leo mastered his searing technique, we started getting so many questions from neighbors asking about the specifics of the fish itself! It’s smart to be curious; buying high-quality seafood can sometimes feel like navigating the library stacks—so many sections! Clara and I compiled the most common inquiries we get about this amazing yellowfin tuna so you can shop with confidence.
Can I use frozen tuna for this recipe?
This is the million-dollar question, isn’t it? If you can only find frozen, you *can* use it, but you have to treat it with extreme care. You need to thaw the tuna slowly in the refrigerator overnight. Never rush thawing in warm water, because that ruins the texture instantly! However, for the absolute best seared ahi tuna, fresh is king because you can ensure that perfect dryness needed for the sear. Frozen, even if thawed perfectly, sometimes retains just a touch too much moisture.
What is the difference between Ahi and Yellowfin Tuna?
For our purposes here, the terms are practically interchangeable! Ahi is the Hawaiian word, and it generally refers to both Yellowfin and Bigeye tuna. Since we are looking for that deep red, meaty texture perfect for searing, whenever a recipe mentions Ahi, they mean you should go for Yellowfin or Bigeye. They handle the high heat of searing beautifully, unlike some of the paler fish out there.
Is this a good healthy dinner option?
Absolutely! This is one of my favorite reasons to prepare this quick seafood recipe for ourselves. Tuna, especially when prepared like this without heavy frying, is such a fantastic source of lean protein. As you can see in the nutrition breakdown, it’s naturally low in fat and carbohydrates, making it an excellent choice for a satisfying yet light healthy dinner. It’s truly satisfying without weighing you down.
Can I use a different crust or coating besides sesame seeds?
Of course! Leo loves experimenting with the crust, although the mixed black and white sesame seeds give you the best visual pop for a gourmet tuna presentation. If you want a little more crunch or punch, try using finely crushed black peppercorns mixed with a tiny bit of dried dill. Some folks even use a thin layer of pulverized nori sheets! Just remember the most important rule we learned: whatever you choose, the tuna must be patted totally dry first, or nothing will stick properly to create that crust.
If you’re looking for other ways to enjoy delicious seafood that’s quick and good for you, you should check out Clara’s easy recipe for salmon salad next! It’s great for lunch the next day.
Nutritional Estimates for This Quick Seafood Recipe
Leo sometimes sneaks a peek at the nutritional data after he’s done cooking, mostly just to confirm that the delicious feast he just made fits into our “eat healthy now that we’re retired” plan. Since this quick seafood recipe is made with such clean, simple components—quality protein and healthy oils—it comes out looking fantastic nutritionally speaking! It truly is a wonderful, low-carb option.
Remember, these figures are just our best guess based on the exact amounts of 6-ounce sushi grade tuna steaks, the sesame oil marinade, and the seeds we used. If you use a heavier hand with the oil or decide to pour on extra soy sauce, those numbers will shift a bit. But overall, this is a fantastic, protein-packed main course!
Here is what we are looking at for one serving (one 6-ounce steak):
- Calories: Approximately 250
- Protein: A whopping 32 grams!
- Total Fat: Around 12 grams, mostly the good unsaturated kind.
- Carbohydrates: Very low, only about 4 grams.
- Sugar: Nearly negligible at 1 gram.
- Sodium: About 350mg (This is why I tell Clara to watch her pouring if she’s using regular soy sauce!).
It’s such a wonderful, light meal that leaves you feeling energized rather than sluggish. It’s such a smart way to enjoy a beautiful piece of gourmet tuna!
PrintPerfectly Seared Ahi Tuna Steaks
Learn how to sear sushi grade yellowfin tuna to achieve a beautiful crust and a rare, flavorful center. This quick seafood recipe is a healthy dinner favorite.
- Prep Time: 10 min
- Cook Time: 3 min
- Total Time: 18 min
- Yield: 2 servings
- Category: Dinner
- Method: Searing
- Cuisine: Asian
- Diet: Low Fat
Ingredients
- 2 (6 ounce) sushi grade tuna steaks (yellowfin or bigeye)
- 2 tablespoons sesame oil
- 1 tablespoon soy sauce or tamari
- 1 teaspoon grated fresh ginger
- 1 clove garlic, minced
- 1/2 teaspoon black pepper
- 1/4 cup sesame seeds (mixed black and white for garnish)
Instructions
- Pat the tuna steaks completely dry using paper towels. This step is key for a good sear.
- In a small bowl, whisk together the sesame oil, soy sauce, ginger, garlic, and pepper to create the marinade.
- Place the tuna steaks in a shallow dish and pour the marinade over them. Turn to coat evenly. Let the tuna marinate for 10 minutes at room temperature; do not marinate longer or the texture can change.
- Spread the sesame seeds out on a plate. Remove the tuna from the marinade, letting any excess drip off, and gently press all sides of the steaks into the sesame seeds until coated.
- Heat a heavy-bottomed skillet (cast iron works best) over high heat until it is very hot, almost smoking.
- Carefully place the sesame-crusted tuna steaks into the hot, dry skillet. Sear for 60 to 90 seconds per side for rare, or up to 2 minutes per side for medium-rare. You want a dark crust and a cool, raw center.
- Remove the tuna from the pan immediately. Let the steaks rest on a cutting board for 5 minutes before slicing against the grain into half-inch thick pieces.
Notes
- For the best results, use the highest quality sushi grade tuna you can find.
- If you prefer a different flavor, substitute the soy sauce with coconut aminos for a slightly sweeter taste.
- Serve this gourmet tuna immediately with a side of steamed rice or a simple Asian slaw.
Nutrition
- Serving Size: 1 steak
- Calories: 250
- Sugar: 1
- Sodium: 350
- Fat: 12
- Saturated Fat: 2
- Unsaturated Fat: 10
- Trans Fat: 0
- Carbohydrates: 4
- Fiber: 1
- Protein: 32
- Cholesterol: 75