

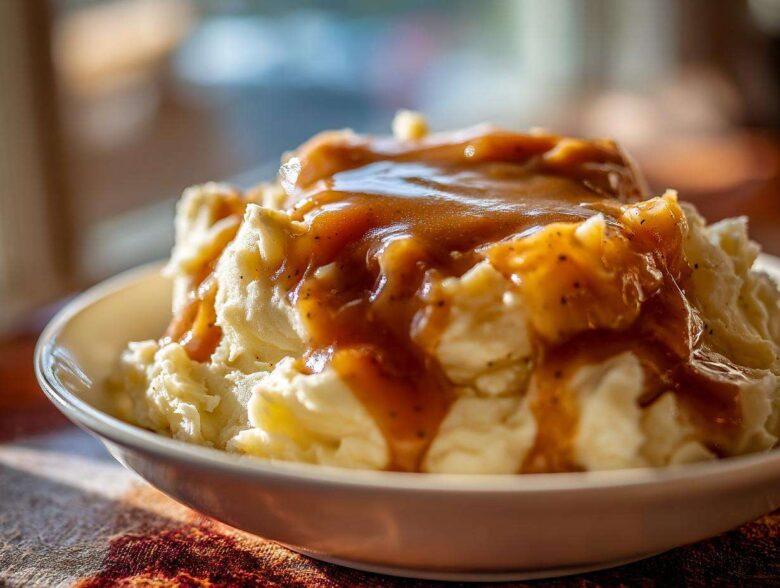
Oh my gosh, let’s talk comfort food because, honestly, what is better than smothering perfectly mashed potatoes in a silky, flavorful sauce? For years, I was terrified of making homemade chicken gravy. I thought it was some complicated, messy thing only my Aunt Carol could handle. Then I finally cracked the code on the roux—the base—and suddenly, I could whip up the best chicken gravy recipe in under 15 minutes. Seriously! Trust me, once you master that swirl of fat and flour, you’ll never look at a packet mix again. This recipe is so forgiving; whether you have those beautiful pan drippings from roasting up a bird or if you’re just starting with butter from the fridge, we’re getting that perfect, savory poultry gravy consistency every single time. It pairs perfectly with everything! Learning the basics behind cooking is what makes life better, which is why I always talk about my journey in my little corner of the internet.
Why This Is the Best Chicken Gravy Recipe
So, why am I so obsessed with this particular easy homemade chicken gravy? Because it checks every single box for a busy weeknight or a rushed holiday prep! You absolutely cannot beat the convenience of having something this rich on the table in barely 15 minutes. Forget that lumpy mess you might be expecting; this is a genuinely quick chicken gravy recipe that guarantees a smooth, velvety finish. Plus, the best part is its flexibility—it works beautifully whether you have leftover drippings or not. It’s foolproof, I promise!
- Ready in under 15 minutes total for super fast serving.
- The texture is always smooth and luxurious, never grainy.
- It works perfectly when you have pan drippings or if you start with simple butter.
- It creates the most delicious base for any comfort food gravy sauce.
Ingredients for Your Quick Chicken Gravy
Making this truly quick chicken gravy recipe is so simple because most of what you need is probably already in your fridge or pantry! The base of any good liquid sauce is the fat, right? You’ll need about two tablespoons of that. If you’ve just roasted some chicken or turkey, scoop out two tablespoons of that beautiful, rendered fat—that’s gold! But if you are just whipping this up on a Tuesday when you haven’t roasted anything, that’s totally fine; just grab two tablespoons of unsalted butter or even some good solid chicken fat you have stored.
For the thickening power, we are going with standard all-purpose flour, just a couple of tablespoons. Then we need our liquids: one cup of chicken broth—and listen, if you can grab the low-sodium kind, please do! It helps us control the saltiness later. And to make this truly creamy and give it that beautiful color, we add about half a cup of milk.
For seasoning, keep it simple: salt, pepper, and if you want to lean into that savory poultry gravy flavor, a tiny dash of dried thyme makes a huge difference, but it’s totally optional!
Ingredient Notes and Substitutions for Chicken Gravy
A few housekeeping notes here! Because chicken broth can sometimes be really salty, I always insist on using low-sodium broth. That way, you start low and add more salt later if you need it. We are aiming for flavor here, not an instant salt lick!
If you want the absolute richest, creamiest sauce possible, feel free to swap that half cup of regular milk for heavy cream. Wow, it makes the texture almost decadent, though it will change the calorie count slightly. Also, if you taste your gravy at the end and it feels a little too thin, don’t panic! You can easily fix that. Just mix one more tablespoon of flour with a tablespoon of cold water (that’s called a slurry) and slowly whisk that into your simmering gravy until it thickens right up.
Step-by-Step Instructions: Making Smooth Chicken Gravy
Okay, this is where the magic really happens. We are moving fast here, so keep your whisk handy! The goal is to have this wonderful gravy for mashed potatoes ready in about 10 minutes of active cooking time. We move from fat to roux to liquid, and the key to success—and to avoiding that awful lumpy texture—is constant motion and controlled temperature.
We are going to walk through the process together so you end up with a perfect, velvety sauce. Remember, if you mess up the roux a little, it’s okay because we have tricks later, but getting this base right sets us up for success!
Creating the Perfect Roux for Your Chicken Gravy
First things first: get your fat melted in your saucepan over medium heat. If you have those glorious drippings, great, use them! If not, just melt the butter until it’s fully liquid. Once it’s shimmering, toss in your flour all at once. Now, don’t stop stirring! You’re making a roux, which is just a fancy French word for fat and flour cooked together. You cook this paste, stirring gently but constantly, for about one to two minutes.
I know it feels like you are standing there forever, but heating that flour is crucial! If you skip this step or don’t cook it long enough, your chicken gravy is going to taste like raw flour, and nobody wants that. You’re looking for the color to change just slightly and for it to start smelling warm and almost nutty, like roasted popcorn. Don’t let it go dark brown; we just want that pale peanut butter shade for this particular recipe. You can check out a few more tricks on developing that base flavor over on my main blog page if you’re curious about making a deeper, richer brown gravy chicken stock vibe!
Thickening the Chicken Gravy Without Lumps
Once your roux is smelling perfect, it’s time to add the liquids, and this is where most people panic and get lumps. You need to add your liquids slowly and whisk like you mean it! Start by pouring in about half of your cold chicken broth while whisking vigorously. The mixture will seize up and look thick and stiff—that is totally normal! Grab your whisk and beat it until that thick phase smooths out again.
Once that’s smooth, add the rest of the broth, and bring the whole thing up to a gentle simmer. You’ll see it thicken up pretty quickly as it heats. After it’s simmering nicely for about three minutes, whisk in your milk, salt, pepper, and thyme. Keep it simmering and whisking for another three to four minutes until it coats the back of your spoon nicely. If it seems a little thin when you test it, just keep simmering; that activation process takes a minute!
Tips for Perfect Skillet Chicken Gravy Every Time
Even though this recipe is super fast, there are definitely a few pro secrets I’ve picked up over the years to take your skillet chicken gravy from good to absolutely show-stopping. These little bits of wisdom are what separate my gravy from the packet stuff, even on those busy days. If you follow these, you’ve basically mastered the art of a fantastic savory poultry gravy!
First, let’s talk color and depth, especially if you are making a batch for the holidays and need that deep, rich brown gravy chicken stock look. Remember that roux we made? If you cook that flour and fat mixture for an extra minute or two—maybe hitting five minutes total—until it gets a nice light peanut butter color before adding the broth, you develop a much deeper, nuttier flavor base. Just be careful not to burn it, or you’ll have to start over!
What about thickness? Gravy is notorious for setting up like cement once it cools down. If you taste it, and it’s perfect, but you know leftovers will be too thick tomorrow, here’s what you do: pull it off the heat just when it seems slightly thinner than you want it. It will continue to thicken as it cools down! If you find that your gravy has stiffened up overnight in the fridge, don’t try to microwave it stiff! Just warm it gently on the stovetop over low heat and whisk in a splash of extra milk or broth until it loosens up back into that beautiful pourable consistency. It comes right back to life!
And finally, for the ultimate silky mouthfeel, especially if you skipped straining the drippings or maybe a bit of flour got away from you, here’s the trick: strain it! Right at the end, after the milk is whisked in and it’s hot, gently pour the entire batch of chicken gravy through a fine-mesh sieve set over a clean bowl. It takes two seconds, and what drips through is the smoothest sauce you’ve ever made. Honestly, once you have these tricks down, you’ll be making this for every dinner, and you might even want to touch base with me sometime to share your favorite ways to use up leftovers; you can always reach out on my contact page!
How to Make Chicken Gravy Without Drippings
Okay, I get this question all the time: what if I baked chicken last week, or maybe I’m just making this gravy as a standalone side sauce for biscuits? Can I still make amazing chicken gravy without drippings? YES, you absolutely can, and I want you to know that this recipe is totally designed for those days!
See, the crucial element in making any good roux for a sauce—whether it’s a dark brown gravy or a white country gravy—is the fat. If you don’t have those golden, savory drippings from roasting a bird, we simply swap them out for butter. Since butter is just fat and milk solids mixed perfectly, it melts down beautifully and works just as well as rendered chicken fat for starting the roux. In fact, when you only use butter, sometimes it makes the final color a little lighter, which I love for a classic look!
Don’t worry about losing flavor at all. We combat that by making sure we cook the flour long enough to get that slightly nutty smell, and then we rely on quality chicken broth and maybe a tiny pinch more black pepper to carry the flavor load. It turns your simple pantry items into a truly satisfying and budget friendly homemade sauce. So, forget the roast, grab the butter, and let’s make some delicious gravy!
Serving Suggestions for Your Savory Poultry Gravy
Now that you have this gorgeous, thick, and flavorful chicken gravy ready to go, the real fun begins: what are you going to drown it in? This creamy sauce isn’t just a side dish; it’s the star of comfort food heaven! My number one, non-negotiable pairing has always been a massive pile of buttery, fluffy mashed potatoes. The way this rich gravy seeps down into all those little valleys in the potatoes? Pure joy!
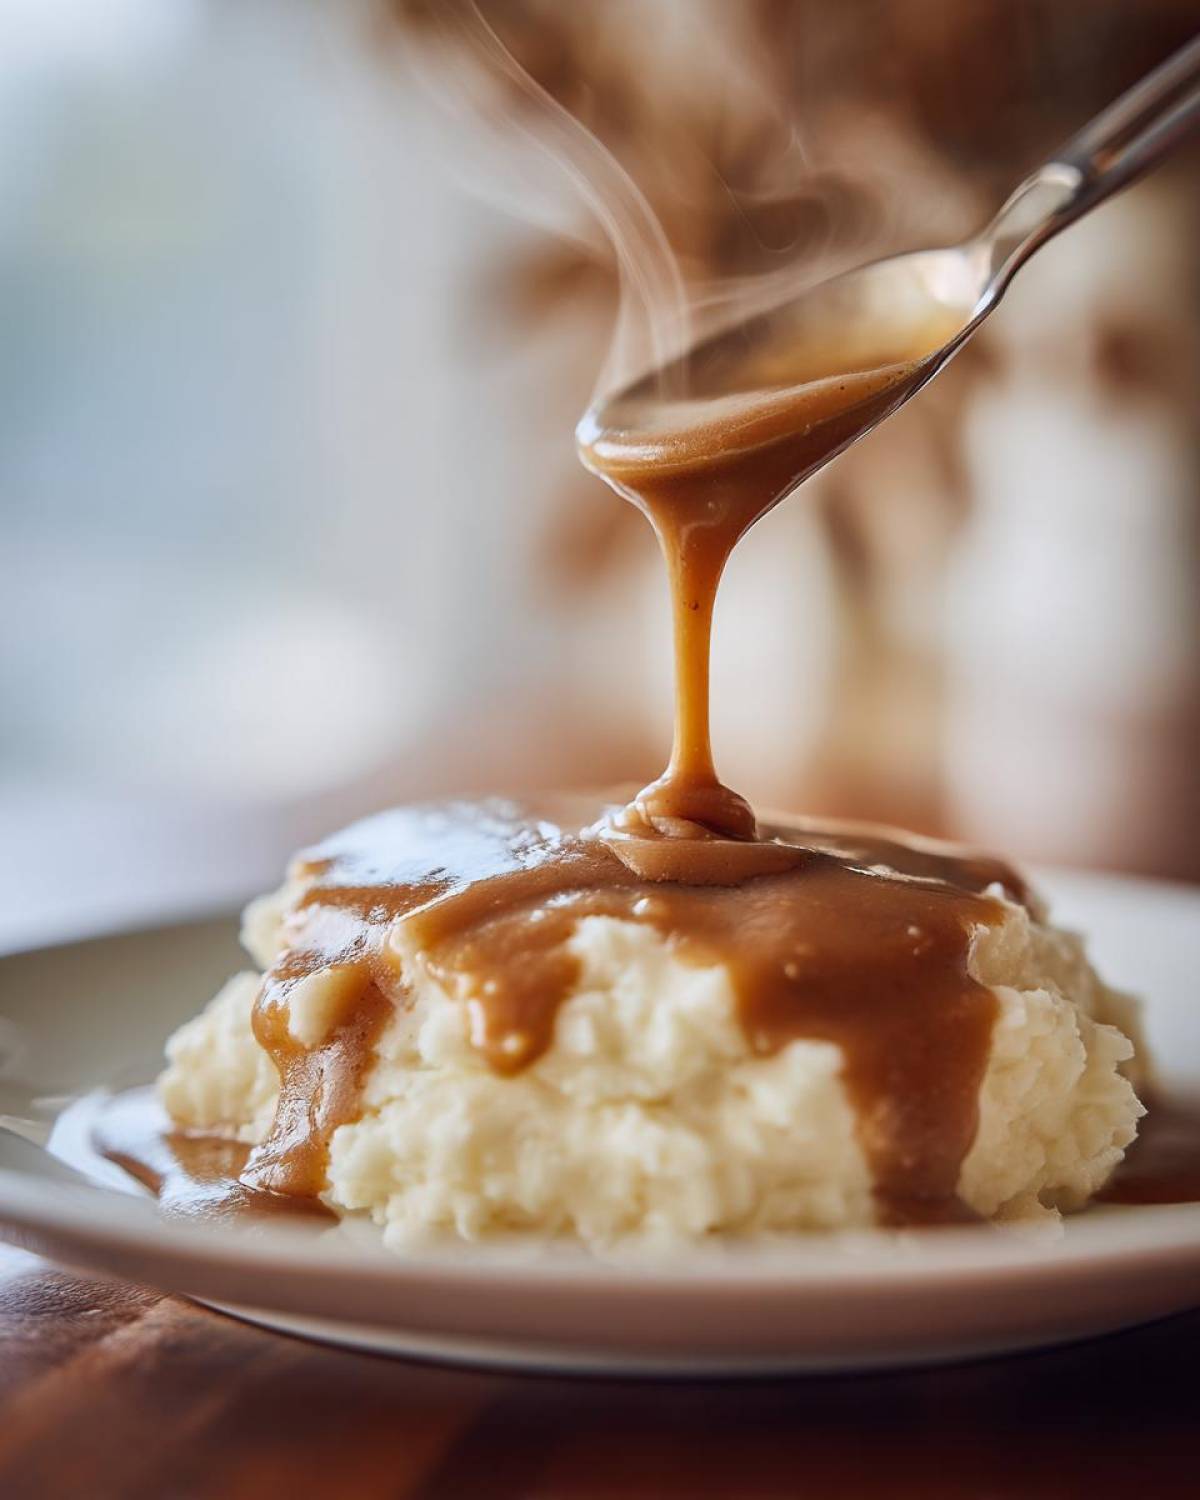
But don’t stop there! This is your go-to comfort food gravy sauce for so many things. If you’re doing breakfast for dinner, you absolutely must pour it straight over warm, fluffy biscuits. I mean, we’re talking about an instant Southern treat right there in your kitchen.
If you happen to be sitting down to a plate of roasted chicken or maybe even turkey leftovers from a holiday, this quick batch of gravy is the perfect way to make that meat magical again. It’s much better than using jarred stuff! Or, if you’re feeling something simple, spooning this over a bed of steamed white rice is hearty, satisfying, and surprisingly elegant for how fast it comes together. It’s just the perfect simple chicken side sauce for whatever main you’re serving up!
If you want to try using these flavors in a totally different way, check out my recipe for Chicken Caesar Pasta Salad—though I promise, this gravy is best enjoyed hot and savory!
Storing and Reheating Your Homemade Chicken Gravy
I hope y’all are planning on having seconds, because leftovers of this luscious chicken gravy are genuinely the best perk of making it fresh! Since we used quality ingredients like butter and real broth—not a bunch of stabilizers—it behaves a little differently when chilled, but it’s super easy to manage.
The main thing to remember is that when it cools down, it’s going to set up firm. Don’t panic when you open the fridge the next day and find something that looks more like a soft, savory jelly than a sauce! That’s normal; the fat and the flour are just holding on tight together.
You can safely keep this delicious sauce in an airtight container in the refrigerator for about three to four days. I usually just use an old mason jar—it seals nicely and lets me see how much is left!
When you are ready to reheat it, this is critical: do NOT heat it on high heat, and definitely don’t just microwave it straight from the fridge; it will break apart unevenly. You want gentle warmth. Place the gravy in a small saucepan over low to medium-low heat. As it warms up, you absolutely must whisk it regularly. While it heats, be prepared to add a little extra liquid to bring it back to that perfect, pourable consistency we love so much. I usually keep a little bit of leftover milk or broth right next to the stove for this purpose!
If you add a splash of milk or broth—maybe just a tablespoon at a time—and keep whisking gently as it warms up, that gravy will loosen right back up and taste as fresh as the batch you made last night. It’s so delicious that sometimes I think the leftovers taste even better because the flavors have all had time to mingle overnight! I try to keep all my important tips handy, which is why I always make sure my policies, like my privacy policy, are easy for you to find here on the site!
Frequently Asked Questions About Chicken Gravy
My chicken gravy is way too thin! How do I fix it?
Oh, don’t worry about that for a second! This is the most common panic moment, but it’s an easy fix for this quick chicken gravy recipe. If your sauce just won’t thicken up even after simmering for a few minutes, we need to make a slurry. Never dump flour directly into hot liquid; that just creates new clumps! Take about one tablespoon of cornstarch or flour and put it in a small bowl. Now, pour two tablespoons of COLD water or cold broth into that bowl and whisk it until it’s perfectly smooth. Then, while your gravy is gently simmering, slowly pour that cold mixture in, whisking constantly. It will thicken up almost instantly! Let it simmer for one more minute to cook out that starchy taste, and voilà, problem solved!
Can I use plain water instead of chicken broth?
You totally *can* use water, especially if you are in a pinch, but I have to give you a heads-up: the flavor just won’t be the same. The broth is key to that rich flavor profile. If you have to use water, make sure you drastically increase the seasoning! Add a little extra salt, pepper, and definitely use that optional dried thyme or maybe even a tiny bit of poultry seasoning. For the best results, I really, really recommend keeping a box of good quality broth on hand because it’s what makes this a truly savory poultry gravy and not just a thickened, seasoned liquid. Remember, this recipe is designed to be a fantastic thanksgiving gravy alternative when the big stock pots are already full, so sticking to broth really helps.
How do I make my chicken gravy darker and richer?
If you look at the instructions, I mentioned cooking the roux for one or two minutes, which gives you a nice standard color. But if you want that deep, almost mahogany look—that perfect dark color reminiscent of a rich brown gravy chicken stock—you need to cook the flour and fat longer! Go ahead and gently cook that roux mixture for four to five minutes instead of two. You are looking for a color like peanut butter or maybe even darker caramel. Keep stirring so it doesn’t burn on the bottom of the pan, but the deeper the color of your roux, the deeper the color of your final easy homemade chicken gravy will be!
Is this considered a good Thanksgiving gravy alternative?
Absolutely, yes! If you’re hosting a big meal and your stovetop is totally dominated by the turkey or you just don’t have the space or time to spend two hours making a traditional pan drippings gravy from scratch, this is your hero. It delivers that incredibly satisfying, silky texture—that perfect smooth chicken sauce recipe—that you want pooling around your turkey slices in just 15 minutes. It’s quick, it’s delicious, and it’s easy to double if you need a little more for everyone’s plate. Just make sure you check out my disclaimer page if you have any specific allergy concerns, but for general use, this is a weeknight hero that steps up for the holidays!
Nutritional Snapshot of This Simple Chicken Side Sauce
I know we’re here for flavor and comfort, not necessarily for reading nutrition labels, but since this simple chicken side sauce comes together so quickly with real ingredients, I wanted to give you a quick look at what’s in a standard serving. Please remember this is an estimate, because our final product can vary slightly based on whether you use butter or drippings and what kind of broth you buy!
This breakdown is based on a serving size of 1/4 cup, which is usually enough to generously spoon over one big scoop of mashed potatoes. It’s honestly pretty straightforward—mostly fat from the roux and some protein from the milk and broth. It’s hard to believe you get this much flavor for only about 85 calories!
- Serving Size (Approx): 1/4 cup
- Calories: 85
- Total Fat: 6g (Saturated Fat: 3g)
- Protein: 3g
- Carbohydrates: 5g
- Sugars: 1g
- Sodium: 280mg (This is why low-sodium broth is our friend!)
This is definitely a rich addition to your meal, but without the heavy flour load of some other thickening agents, it keeps things relatively light. Enjoy that amazing flavor!
PrintQuick Homemade Chicken Gravy (With or Without Drippings)

Make a rich, smooth chicken gravy quickly using pan drippings or simple pantry staples. This recipe is ready in under 15 minutes.
- Prep Time: 5 min
- Cook Time: 10 min
- Total Time: 15 min
- Yield: About 1.5 cups
- Category: Side Dish
- Method: Stovetop
- Cuisine: American
- Diet: Vegetarian
Ingredients
- 2 tablespoons chicken fat or butter
- 2 tablespoons all-purpose flour
- 1 cup chicken broth (low sodium)
- 1/2 cup milk (whole or 2%)
- 1/2 teaspoon salt
- 1/4 teaspoon black pepper
- 1/4 teaspoon dried thyme (optional)
Instructions
- If you roasted chicken or turkey, collect 2 tablespoons of the pan drippings and place them in a small saucepan over medium heat. If you do not have drippings, use 2 tablespoons of butter or solid chicken fat.
- Once the fat is melted, whisk in the flour. Cook this roux, stirring constantly, for 1 to 2 minutes until it forms a smooth paste and smells slightly nutty. Do not let it brown too much.
- Slowly pour in the chicken broth while whisking continuously to prevent lumps. Bring the mixture to a simmer.
- Continue to simmer and whisk for about 3 minutes until the gravy begins to thicken.
- Whisk in the milk, salt, pepper, and dried thyme, if using.
- Continue cooking and stirring until the gravy reaches your desired thickness, usually another 2 to 4 minutes. If it is too thick, add a splash more broth or milk.
- Remove from heat and serve immediately over mashed potatoes, biscuits, or roasted meat.
Notes
- For a darker, richer color, cook the flour and fat (roux) for an extra minute until it turns a light peanut butter color before adding the liquid.
- If you prefer a thicker gravy, use 3 tablespoons of flour instead of 2.
- Strain the finished gravy through a fine-mesh sieve for an extra smooth texture.
Nutrition
- Serving Size: 1/4 cup
- Calories: 85
- Sugar: 1
- Sodium: 280
- Fat: 6
- Saturated Fat: 3
- Unsaturated Fat: 3
- Trans Fat: 0
- Carbohydrates: 5
- Fiber: 0
- Protein: 3
- Cholesterol: 10