

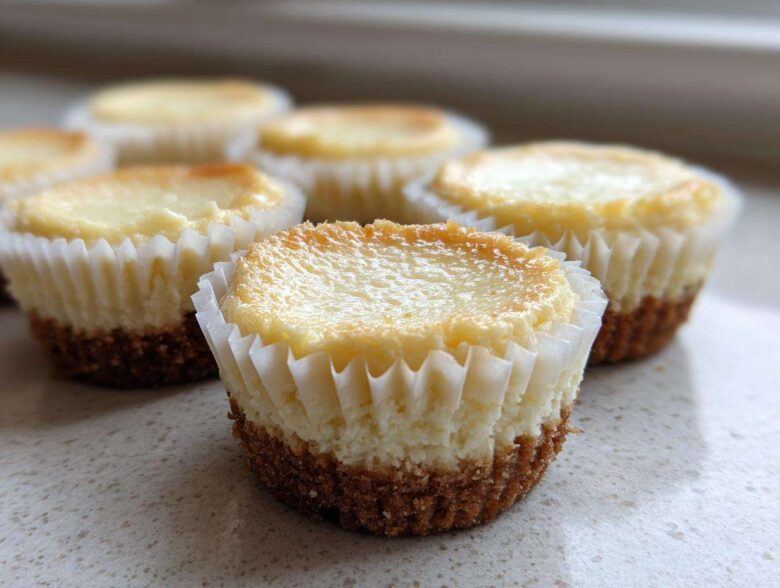
Okay, you know how sometimes you need a spectacular dessert for a party, but the thought of wrestling with a giant springform pan gives you the sweats? I totally get it! That’s why I’m obsessed with these easy mini cheesecake bites. Seriously, they are the definition of portion-controlled desserts perfection. I just brought a batch of these classic mini cheesecakes to my friend Sarah’s potluck last week, and they were gone before I could even grab the recipe card back! They are creamy, they have that perfect little graham cracker crunch, and they look super fancy without requiring any actual fancy effort. Trust me, you’re going to want every single one.
Why This Easy Mini Cheesecake Recipe Works for Everyone
When I say this is the best mini cheesecake recipe, I mean it because it simplifies everything without sacrificing that indulgent flavor. I’ve tried countless versions, and this one always comes out exactly right. It’s quick enough for a Tuesday night craving but pretty enough for a major event. If you need reliable, crowd-pleasing sweets, this is your recipe.
- It’s foolproof! The ingredient list is short and sweet.
- The texture is impeccably smooth—no bumps or weird air pockets, I promise.
- They are naturally portion controlled, which means less mess and more deliciousness at gatherings.
Perfect for Parties: The Appeal of Mini Cheesecake Bites
Seriously, these mini cheesecake bites are made for gatherings. Nobody wants to waste time cutting and serving slices when they could be mingling! Since these are already perfectly sized as party desserts bites, they look fantastic arranged neatly on a platter. They totally satisfy that sweet tooth without being overwhelming. It’s the ultimate grab-and-go treat.
Achieving That Creamy Mini Cheesecake Texture
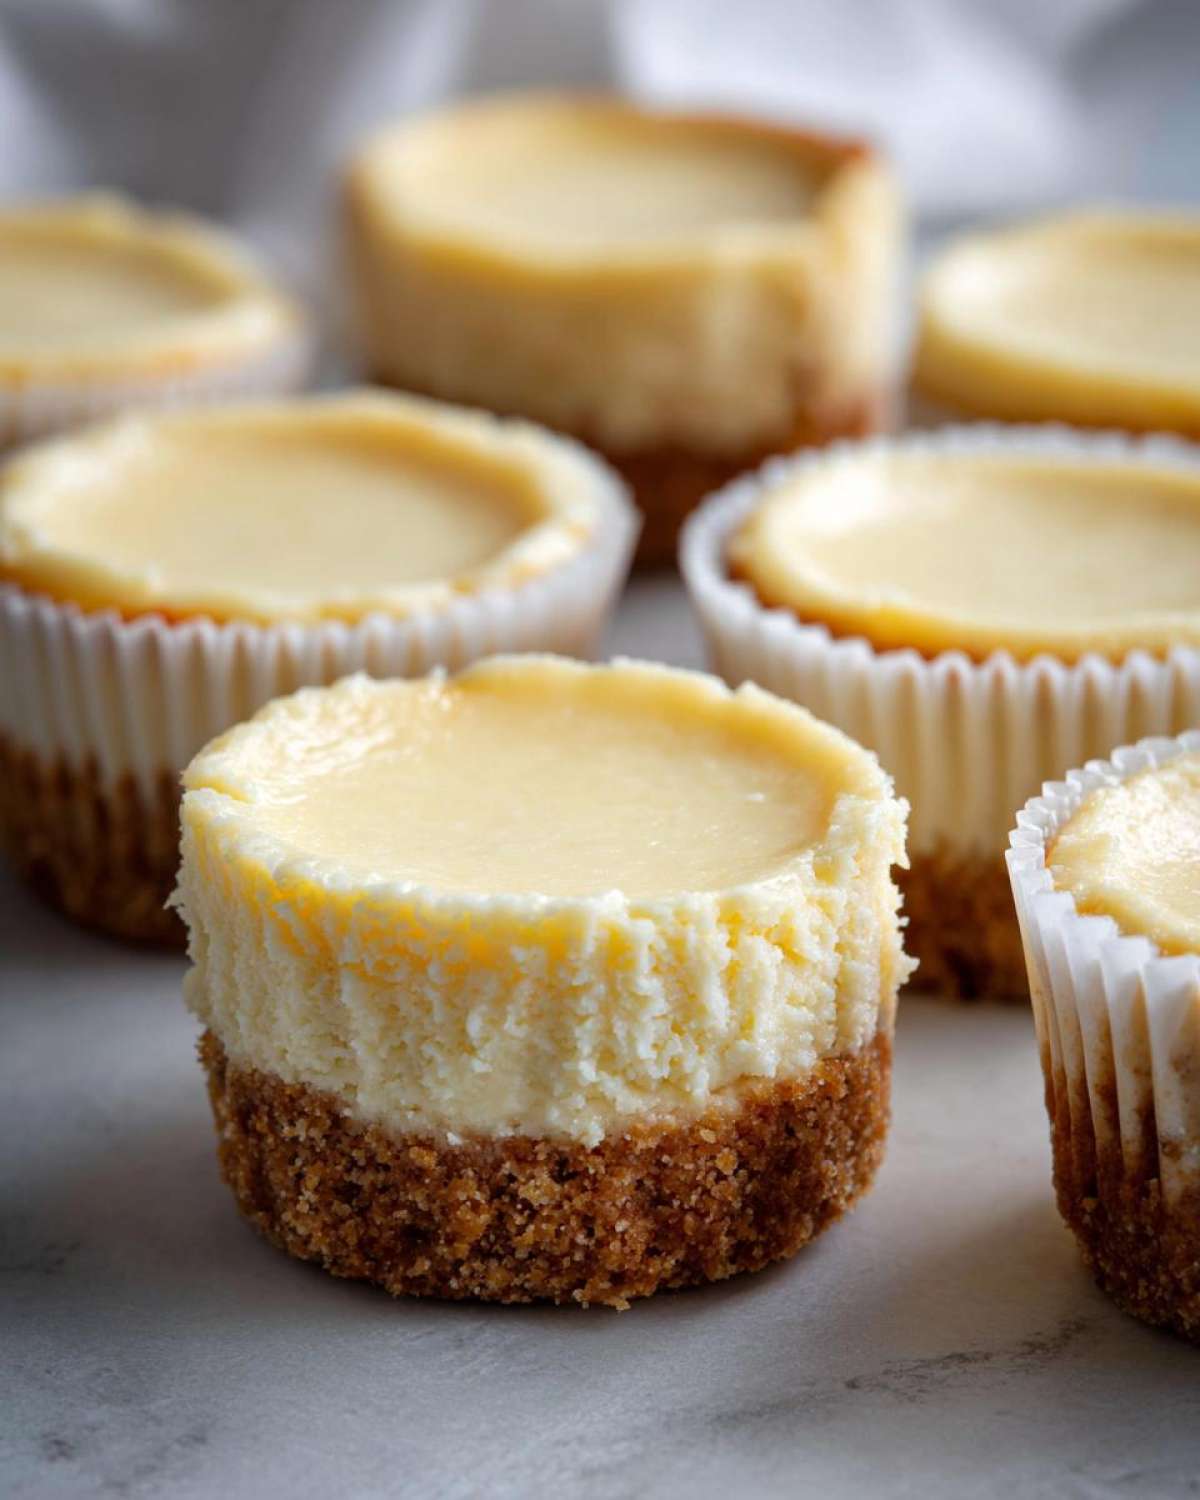
This is where we talk trust points! The secret to that signature creamy mini cheesecake finish isn’t just the cream cheese; it’s the mixing technique. You absolutely must stop beating the batter once those eggs are just incorporated. If you keep mixing after the eggs go in, you whip too much air in there. Too much air creates bubbles, and bubbles lead to cracks when they cool. Resist the urge to turn the mixer up high—low and slow is the way to velvety smooth results!
Gathering Ingredients for Classic Mini Cheesecake
Alright, before we dive into the magic of the oven, let’s talk supplies. Getting the ingredients ready is half the battle won when making any great dessert, especially something as delicate as a mini cheesecake recipe. I always lay everything out on the counter first—it’s my version of professional mise en place, even if I’m just making twelve bites!
The most critical piece of this puzzle, the one you cannot cheat on, is the cream cheese. It has to be completely, utterly softened. I mean room temperature, squishy soft. If it’s cold, you’ll end up with lumps, and nobody wants a lumpy cheesecake filling, even in miniature form. If I forget to take it out early, I cut the blocks into cubes and then microwave them for about 10 seconds, checking every five. Just enough to take the chill off, but *never* warm enough to melt—that would ruin the texture.
Ingredient Notes and Substitutions for Your Mini Cheesecake
Because precise measurements matter for these individual cheesecake desserts, I want to clarify the cream cheese amount. When the recipe calls for 16 ounces, that means you need four standard 4-ounce blocks of cream cheese. Don’t eyeball it! Those four blocks are the backbone of the richness.
For the crust, graham crackers are tradition, but if you run out or just feel like switching things up, vanilla wafers make a fantastic substitution. Just crush them up the same way you would the graham crackers. They blend beautifully with the melted butter and give a slightly different, warmer flavor to your graham cracker crust mini cheesecakes. Also, make sure your butter is measured accurately; it’s what holds those crumbs together under the filling!
Step-by-Step Instructions for Perfect Mini Cheesecake
Okay, we have our lovely ingredients ready to go, so now it’s time for the real fun—mixing and baking! While these are indeed easy mini cheesecakes, a little attention to detail in the bake protects you from sad, cracked tops later. We are aiming for luscious, velvety smooth individual portions here, so follow along closely! The entire actual baking time is quick, which is what makes this recipe so fantastic for last-minute needs.
Building the Graham Cracker Crust Mini Cheesecakes
First things first: get that oven humming at 325°F! We need it to be ready before the crust mixture sits too long. Grab your muffin tin and line it up with those little paper cups—don’t skip the liners, they save your life later! In a bowl, mix your graham cracker crumbs, that first bit of sugar, and the melted butter until it looks like wet sand. Now, this is critical for stability: take about a tablespoon of that crumb mix and press it down firmly into the bottom of each liner. Use the bottom of a clean measuring cup if you need extra leverage. You want a solid base for your beautiful graham cracker crust mini cheesecakes.
Mixing the Creamy Filling for Your Mini Cheesecake
Time for the filling! In a separate bowl, beat that softened cream cheese and the remaining sugar until it’s just smooth—no lumps, please! Then, add your eggs one at a time. Listen, this is my biggest piece of baking wisdom for you: after the first egg is mixed, stop. Scrape down the sides, and then add the second egg. Mix just until you see the yolk disappear. Seriously, stop stirring! Adding too much air here ruins the smooth texture we are chasing for these mini cheesecakes. A quick stir of vanilla, and we are ready to fill the cups!
Baking and Slow Cooling the Mini Cheesecake Bites
Pour that dreamy batter over your crusts, filling them about three-quarters of the way up. Pop them into the oven for about 18 to 20 minutes. You want the edges to look set, but the very center should have a tiny, adorable wiggle when you gently nudge the pan—that means they aren’t overcooked! The real trick to happy, uncracked tops is the cooling process. Once the time is up, turn the oven OFF. Leave the door slightly ajar (I stick a wooden spoon handle in there) and let them chill out in that residual heat for a good 30 minutes. This slow cooling process is the absolute secret weapon that prevents those awful cracks that plague bigger cheesecakes, making these perfect easy mini cheesecakes!
Elevating Your Mini Cheesecake with Topping Ideas
So, you’ve mastered the classic baked mini cheesecake. Congratulations! Honestly, that creamy base is incredible all by itself, especially served chilled. But if you’re planning a spread or just feel like getting fancier, the topping is where you can really show off. I love having a couple of extra bowls of toppings ready to go because people love customizing their little treats. These mini cheesecake topping ideas are all easy wins that take zero extra baking time.
If you want to simulate flavors like apple crisp or chocolate swirls, you don’t need a whole new recipe; you just need a simple drizzle or dollop! Think of the base as a blank canvas waiting for your personality to shine through.
Here are my absolute must-try ideas for dressing up these bite sized cheesecake treats:
- Simple Salted Caramel Drizzle: Warm up some store-bought caramel sauce—don’t even worry if it feels too thick—then drizzle it artistically over the tops. A tiny pinch of flaky sea salt right afterwards makes the sweetness absolutely sing.
- Quick Berry Coulis: This sounds fancy, but it’s just frozen berries simmered with a splash of water and a teaspoon of sugar until they break down. Strain it if you want it super smooth, or leave the seeds in if you like texture. It adds a beautiful bright color against the cream!
- Chocolate Ganache Touch: Melt about half a cup of good quality chocolate chips with two tablespoons of heavy cream. Stir until smooth. Let it cool just until it thickens slightly (about five minutes). You can dip the very top edge of the chilled mini cheesecakes right into the ganache. It sets up beautifully!
- Cinnamon Sugar Dusting: Perfect for an autumn vibe! Mix about two tablespoons of sugar with a teaspoon of cinnamon. Once the cheesecakes are completely cool, dust it over the top using a tiny sifter or a fine-mesh tea strainer. It’s so simple, but it smells divine.
No Bake Mini Cheesecakes Versus Baked Mini Cheesecake
You know, one of the questions I always get after sharing this baked mini cheesecake recipe is, “Can I just skip the oven?” And the answer is definitely yes! Everyone has a different preference, and sometimes you just can’t turn on the oven, or maybe you just want something that feels lighter. That’s where no bake mini cheesecakes come into play.
The main difference is texture, full stop. Our baked version relies on eggs and heat to create that dense, rich, almost melt-in-your-mouth quality. It’s classic New York style mini cheesecakes essence, just shrunk down. They set up firm because of the coagulation happening during baking.
If you switch to a no-bake filling—which usually uses gelatin or relies just on cold cream cheese and whipped cream—you get something much lighter and fluffier. It’s more mousse-like than dense. It’s fantastic, especially for really hot weather when you don’t want a dense dessert.
The process difference is mainly the chilling time. For the baked guys, we cool them slowly and then chill them for a couple of hours, right? With the no-bake option, you skip the baking but you have to commit to serious chilling time. My notes on the recipe point out that a no-bake version generally needs to hang out in the fridge for at least four hours, sometimes longer, to get firm enough to hold its cup shape. It’s a trade-off: less active time upfront, but more waiting time later! Either way you choose to make your mini dessert recipes, you end up with a winner.
Storage and Serving Suggestions for Individual Cheesecake Desserts
One of the best things about making these individual cheesecake desserts is that they actually taste better the next day! They are so wonderfully satisfying served cold, straight from the fridge. Since they are already in their little paper liners, cleanup and serving couldn’t be easier. It makes preparing for guests so simple because you aren’t trying to assemble anything last minute.
When it comes to storage, you want to keep them contained and cool. Once they are completely chilled from their initial refrigeration time (remember, at least two hours after cooling!), pop them into an airtight container. I usually layer them between parchment sheets if I’m stacking them up, just to make sure the tops don’t get smushed or pick up any odd fridge smells. Stored properly in the refrigerator, these bite sized cheesecake treats will hold up beautifully for about three to four days.
If you happen to have leftovers after a party—which, good for you for having restraint!—you can definitely sneak them out of the fridge the next day for an afternoon treat. They keep that creamy mini cheesecake texture perfectly for several days.
For serving, my favorite way to present these little gems is super simple because the crust and filling are already perfect. Pull them out of the fridge about fifteen minutes before you plan to serve them—this just takes the initial hard chill off so the texture softens just a touch. Then, I take one mini cheesecake, peel off the liner just enough so you can hold it easily, and place a tiny, perfectly fresh mint leaf right on top of the filling. That little pop of green just brightens the whole look. It’s elegant, it’s fresh, and it takes literally three seconds!
Frequently Asked Questions About Making Mini Cheesecake
I know that when you start baking something new, especially a classic like cheesecake, you always end up with a few burning questions floating around in your head. Why did it crack? Can I skip chilling? Do I *really* have to use foil on the pan? Help me out with the unknowns! I’ve answered the most common things I hear about these delightful mini dessert recipes right down here so you can bake with total confidence.
Can I make these mini cheesecake bites ahead of time?
Oh, absolutely! In fact, I think they are better the next day once they’ve really had time to firm up and let those flavors meld together. This is why they are my go-to party desserts bites! You can make these mini cheesecake bites completely through the chilling stage, put them in an airtight container, and they will keep wonderfully in the refrigerator for up to three full days. Just try not to let them sit right next to anything smelly, like last night’s garlic dip!
What is the best way to get the best New York style mini cheesecakes?
To capture that rich, dense, and beautifully smooth experience that makes New York style mini cheesecakes famous, we focus purely on the dairy and the mixing. First, use full-fat, block-style cream cheese—none of the whipped tub stuff! That higher fat content is essential for that dense texture. Second, and this is key, remember what I said about beating the eggs? For that true New York style—which is all about texture—you must avoid over-beating the batter once the eggs are added. Keep your mixer on low speed right at the end. That prevents loosening the structure and keeps them tasting incredibly rich and authentic.
Estimated Nutrition for Your Bite Sized Cheesecake Treats
I know some of you count calories or track macros, and even though these are little, they still pack a delightful punch! These numbers are just estimates based on the standard ingredients in this recipe for one bite sized cheesecake treat, but I always recommend adjusting based on what kind of toppings you decide to add.
For one single, glorious mini cheesecake:
- Serving Size: 1 bite
- Calories: 180
- Sugar: 14g
- Fat: 12g (7g Saturated Fat)
- Carbohydrates: 15g
- Protein: 3g
See? Pretty reasonable for something this delicious! They are naturally vegetarian, too, since we aren’t using any gelatin when we bake them!
Share Your Perfect Mini Cheesecake Creations
I honestly can’t wait for you to try these and see how simple it is to produce truly fantastic individual cheesecake desserts. Once you’ve made a batch—whether you stuck to the classic look or got wild with my berry coulis idea—I want to know! Please leave a rating and a comment down below. Your feedback helps other bakers decide if this is the right mini cheesecake recipe for them.
And if you’re sharing photos online, please tag me! Seeing your beautifully lined, perfectly baked mini cheesecakes always makes my whole week. I live for seeing your kitchen creations!
Estimated Nutrition for Your Bite Sized Cheesecake Treats
I know some of you count calories or track macros, and even though these are little, they still pack a delightful punch! These numbers are just estimates based on the standard ingredients in this recipe for one bite sized cheesecake treat, but I always recommend adjusting based on what kind of toppings you decide to add.
For one single, glorious mini cheesecake:
- Serving Size: 1 bite
- Calories: 180
- Sugar: 14g
- Fat: 12g (7g Saturated Fat)
- Carbohydrates: 15g
- Protein: 3g
See? Pretty reasonable for something this delicious! They are naturally vegetarian, too, since we aren’t using any gelatin when we bake them!
Share Your Perfect Mini Cheesecake Creations
I honestly can’t wait for you to try these and see how simple it is to produce truly fantastic individual cheesecake desserts. Once you’ve made a batch—whether you stuck to the classic look or got wild with my berry coulis idea—I want to know! Please leave a rating and a comment down below. Your feedback helps other bakers decide if this is the right mini cheesecake recipe for them.
And if you’re sharing photos online, please tag me! Seeing your beautifully lined, perfectly baked mini cheesecakes always makes my whole week. I live for seeing your kitchen creations! Tell me, which topping are you going to try first?
PrintEasy Classic Mini Cheesecake Bites
Make simple, creamy, portion-controlled mini cheesecakes with a crisp graham cracker crust. This recipe is perfect for parties.
- Prep Time: 15 min
- Cook Time: 20 min
- Total Time: 35 min
- Yield: 12 servings
- Category: Dessert
- Method: Baking
- Cuisine: American
- Diet: Vegetarian
Ingredients
- 1 1/2 cups graham cracker crumbs
- 1/4 cup granulated sugar
- 6 tablespoons unsalted butter, melted
- 16 ounces cream cheese, softened
- 1/2 cup granulated sugar
- 2 large eggs
- 1 teaspoon vanilla extract
Instructions
- Preheat your oven to 325°F (160°C). Line a 12-cup muffin tin with paper liners.
- Combine graham cracker crumbs, 1/4 cup sugar, and melted butter in a bowl. Mix until the crumbs are evenly moistened.
- Press about 1 tablespoon of the crumb mixture firmly into the bottom of each liner to form the crust.
- In a separate bowl, beat the softened cream cheese and 1/2 cup sugar until smooth.
- Beat in the eggs one at a time, mixing just until combined after each addition. Stir in the vanilla extract. Do not overmix.
- Spoon the cream cheese mixture evenly over the crusts, filling each liner about three-quarters full.
- Bake for 18 to 20 minutes, or until the edges are set but the centers still have a slight jiggle.
- Turn off the oven and let the cheesecakes cool in the oven with the door slightly ajar for 30 minutes.
- Remove from the oven and cool completely on a wire rack. Chill in the refrigerator for at least 2 hours before serving.
Notes
- For a richer flavor, use New York style cream cheese.
- To prevent cracking, cool the cheesecakes slowly in the turned-off oven.
- Top with fresh berries, chocolate ganache, or caramel sauce before serving.
- If you prefer no-bake mini cheesecakes, use a no-bake filling recipe and chill for 4 hours.
Nutrition
- Serving Size: 1 bite
- Calories: 180
- Sugar: 14g
- Sodium: 150mg
- Fat: 12g
- Saturated Fat: 7g
- Unsaturated Fat: 5g
- Trans Fat: 0g
- Carbohydrates: 15g
- Fiber: 0g
- Protein: 3g
- Cholesterol: 40mg