

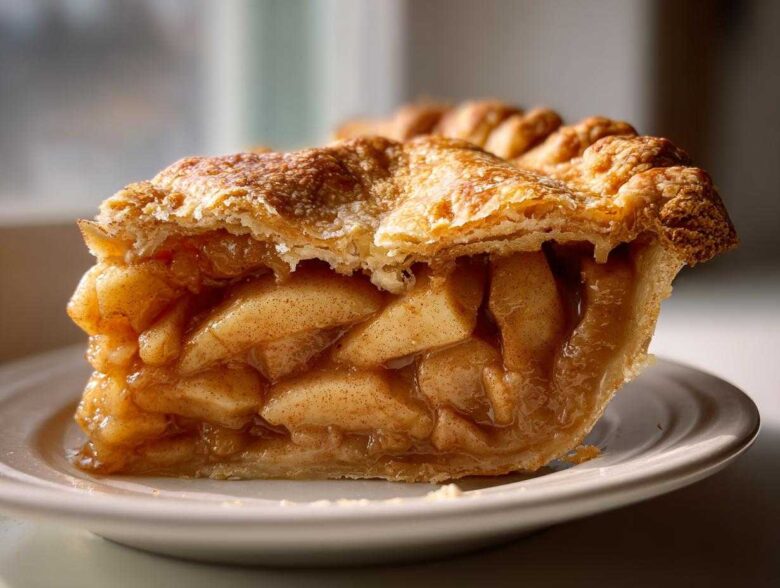
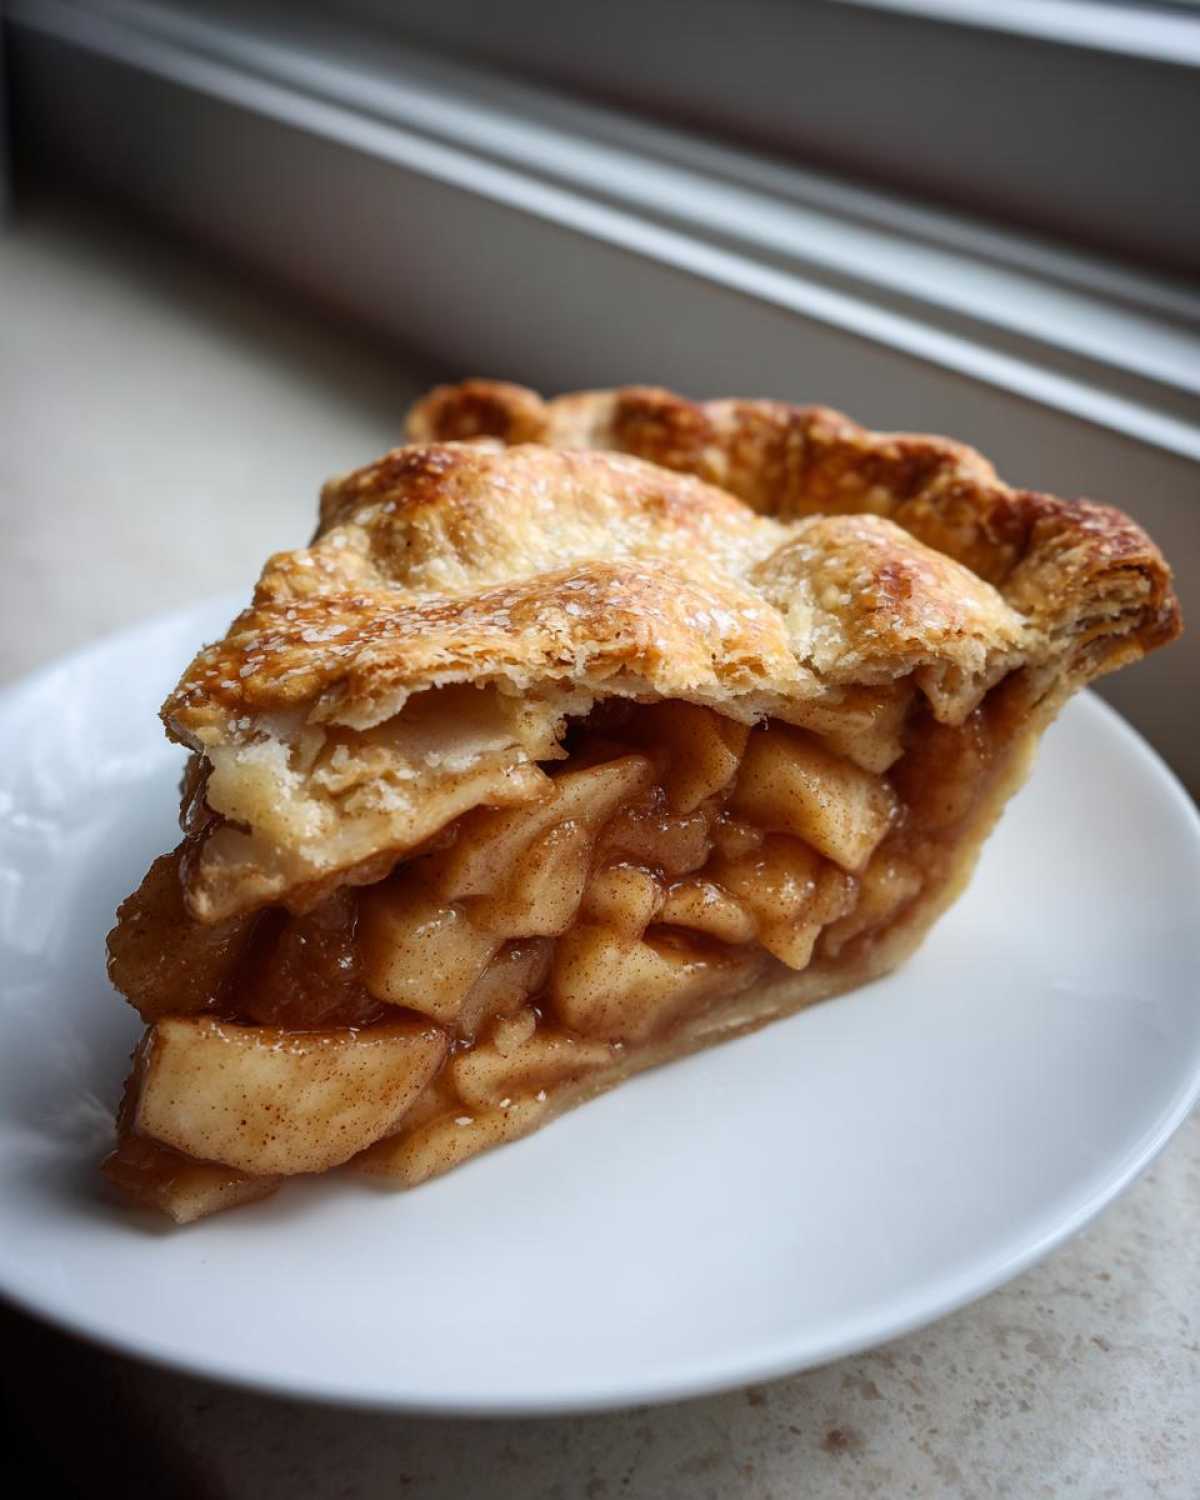
Oh, when that crisp autumn air hits, nothing beats the smell of a truly unbelievable homemade dessert filling your kitchen. Forget those sad, soggy store-bought slices! We’re talking about the absolute peak of comfort food here. This recipe is my go-to, my crowning achievement, because I finally cracked the code for the most gloriously flaky, buttery crust you could ever dream up, holding in a spiced filling that stays perfectly tender.
I spent years battling tough, flavorless dough before I realized my butter wasn’t cold enough! But that single change transformed my entire world of baking. This isn’t just any dessert; this is the definitive, truly the best apple pie you’ll ever make from scratch. I can’t wait for you to try this classic apple pie!
If you want to know a little more about how we roll here and why we take baking so seriously, you can check out our story over at our little corner of the baking world.
Why This Is the Best Apple Pie Ever (Homemade Apple Pie Recipe Secrets)
People always ask me what makes this particular Homemade Apple Pie Recipe so much better than every other kind they’ve tried. Honestly, it comes down to two non-negotiable rules. You absolutely have to treat your pastry right, and you can’t let the apples run wild inside the lattice!
This is how we guarantee a result worthy of the title “Best Apple Pie Ever.” It takes a little more effort than just mixing everything in a bowl, but I promise, the results are worth every minute. It’s all about respecting the process, which is something I learned trying to copy my Aunt Celia’s Thanksgiving masterpiece years ago.
Achieving the Perfect Flaky Pie Crust Recipe
If you want that impossibly crisp, shatter-in-your-mouth texture, you have to keep your butter colder than the Arctic! Remember, we are making a Double Crust Apple Pie, and those lovely layers of flakiness only form when tiny pieces of solid butter melt during baking, creating steam pockets. Never, ever overwork the dough. We need visible chunks of cold butter in there; that’s what gives you that incredible, Buttery Pie Crust you dream about.
The Secret to a Non-Mushy Spiced Apple Filling
My biggest frustration with earlier attempts was the pie sinking into a watery mess after cooling. That’s why I started giving my apples a little head start. By briefly cooking the apple mixture, we coax out some of that excess liquid ahead of time. This pre-cooking tightens up the structure and concentrates the flavor of the cinnamon and nutmeg.
When you bake it later inside the dough, you get that perfect, slightly soft but firm Spiced Apple Filling. No soupiness, just structure and pure fall flavor heating up the house!
If you’re curious about other great fall recipes, maybe check out my notes on baking quick breads while your dough chills!
Gathering Ingredients for Your Classic Apple Pie Recipe
Okay, step two! Now that we know the secrets to fighting mush and achieving flakiness, let’s look at what you absolutely need to have on hand. Listen, when you’re making something this classic—a true, Old Fashioned Apple Pie—the quality of your ingredients really shows. You can’t hide sub-par butter under all that cinnamon, trust me!
For the crust, remember what I said: bring out your unsalted butter a few minutes early, but only just enough so you can cube it, not melt it! Those two sticks have to be absolutely frigid, and that water better be swimming in ice cubes. Seriously, this is where the magic starts happening for that flaky texture.
When it comes to the apples, this is non-negotiable: use Granny Smiths—at least six of them. They hold their shape best during that pre-cook stage. You need to peel them, core them, and slice them exactly a quarter-inch thick. Too thin, and they turn to applesauce; too thick, and you’re hacking through big chunks that haven’t softened. Get those spices measured carefully too; you want warmth, not a mouthful of nutmeg!
Step-by-Step Instructions for Your Apple Pie
Alright, let’s get our hands dirty! Baking is just following directions, but adding a little bit of kitchen intuition, right? I’ve broken down the process into three clear stages so you don’t panic when the oven starts preheating. We’ll handle the dough first, then the mix, and finally, putting her together for that beautiful golden finish. Grab your largest mixing bowl!
Remember, before you even start assembling, you’ll want to get those two dough disks wrapped up tight and tucked into the fridge for at least an hour. That chilling time is sacred; don’t skip it!
Making the Flaky Pie Crust Recipe
First things first: whisk that flour and salt. Now, this is where you get your workout! You need to cut in that super cold, cubed butter. Use a pastry blender if you have one, but honestly, using your fingertips works great if you keep moving fast so the butter doesn’t melt. Stop when you have a mix that looks like uneven sand, meaning you still see those pea-sized bits of butter peppered throughout. That’s the secret sauce!
Add the ice water slowly, just a splash at a time, until the dough barely holds together when squeezed. Don’t knead it! Divide it in two, flatten those hunks into disks, wrap them tightly, and get them chilling for a full hour. Go clean up—it buys you time!
Assembling the Apple Pie Filling
While the dough is getting nice and firm, we mix the guts of the pie. Take all your beautiful, sliced apples and toss them in a big, separate bowl. Add both sugars, your three spices—cinnamon, nutmeg, and allspice—and that two tablespoons of flour to soak up extra liquid. I also add a splash of lemon juice right here to keep the apples looking bright and add a necessary little tang.
Toss everything gently but thoroughly so every single apple slice is coated in that sweet, spiced mixture. You want to see all that dry sugar and flour disappear into the apple moisture.
Building and Baking the Double Crust Apple Pie
Time to roll! Roll out one disk large enough to drape over your 9-inch pie plate, leaving about an inch of overhang. Pour in your luscious filling. Now take the second disk for the top crust. Lay it over, trim the excess so the top and bottom edges match up, and then crimp them together tight—seal that filling in!
You absolutely must cut a few slits in the top crust; or the steam builds up, and you get a pie explosion, which is messy! Brush the top with your egg wash—that’s just one egg beaten with a tiny bit of water—and maybe sprinkle some extra sugar on top for crunch. Bake at 425°F for 15 minutes. Then, lower the temperature to 375°F and bake another 40 to 50 minutes. If the edges look too dark while it’s baking, just tent them with some foil. Remember to check out how I make delicious bakery-style apple turnovers if you have leftover dough!
Tips for Success When Making Apple Pie From Scratch
Even with the best recipe, little things can go wrong, right? I learned these little hacks trying to make sure my pies looked as good as they tasted, especially when making an Easy Apple Pie From Scratch for company. If you follow these, you are setting yourself up for a beautiful, classic slice worthy of any Old Fashioned Apple Pie competition!
The number one issue people face is that dreaded soggy bottom. My fix? Before you even pour in that wonderful spiced filling, brush the bottom crust lightly with a thin layer of beaten egg white. It creates a little waterproof barrier that seals up any tiny gaps in the dough! It sounds crazy, but it works like a charm.
Also, when you pull that beautiful pie out of the oven, you must let it cool completely—I mean seriously cool, for at least three hours. If you cut into it too early while it’s still bubbling hot, all that perfectly set filling will just ooze out onto the plate. Patience pays off when you’re dealing with hot fruit!
If you have a little bit of fruit filling left over and don’t want to waste it, try stirring a spoonful into your next batch of cinnamon apple baked oatmeal. It’ll feel like cheating because it tastes so good!
Variations: Beyond the Classic Apple Pie
Now, I truly believe this double crust version is the gold standard, but who doesn’t love options? If serving this for Thanksgiving, sometimes folks want something a little more rustic, or maybe they just hate making top dough circles—I get it!
The great thing about mastering that rich, buttery crust recipe we just did is that it serves as the perfect base for other fabulous tops. You don’t need a whole new recipe; you just need to swap out the top layer, and suddenly, you have a completely different vibe for your Apple Dessert Recipes collection.
If you find yourself with leftover crust scraps or just want something less fussy than a full top crust, you have two amazing directions to go. These variations still let you use our fantastic, slightly pre-cooked Homemade Apple Pie Filling.
Turning it Into a Dutch Apple Pie Recipe
To make a wonderful Dutch Apple Pie Recipe—which is really just my base pie with a fantastic crumb topping—you skip rolling out that second disk of dough entirely! Seriously. Instead, you mix up a simple streusel topping. I usually use cold butter cut into flour, brown sugar, and a handful of oats or finely chopped pecans if I have them.
You just generously scatter that crumb mixture all over the apple filling and bake like normal. The result is heaven: crisp, crunchy, buttery peaks contrasting with the soft, warm spiced apples underneath. It’s so satisfying, and it makes for a fantastic Comfort Food Desserts centerpiece!
Making an Apple Pie with Crumb Topping
This is almost identical to the Dutch approach, but sometimes people prefer a purely buttery crumble without the oats mixed in. For an Apple Pie with Crumb Topping, just use more flour, more brown sugar, and a bit more butter to make sure you get enough topping to cover every inch of the apples. Don’t be shy—you want a thick layer so it achieves that beautiful, golden-brown crunch while baking.
These variations mean you are always ready for last-minute gatherings or when you just crave that crumbly top texture. If you’re looking for another easy baked apple treat, check out my notes on baked apple and oatmeal filling!
Serving Suggestions for Your Perfect Apple Pie
Now that you’ve pulled that gorgeous, golden creation out of the oven—and managed to wait three long hours for it to cool a touch—the best part is deciding how you’re going to serve it! This pie sits right at the heart of Comfort Food Desserts, and you can really elevate it right there on the plate.
Of course, a big scoop of good quality vanilla bean ice cream melting slowly over a warm slice is non-negotiable in my house. The cold and hot, creaminess and spice—it’s perfection!
But here’s a little trick my dad always insisted on: a thin slice of sharp, tangy cheddar cheese melted right on top of your slice. It sounds strange, I know, but the saltiness cuts through the sweetness beautifully. If you want to skip dessert for breakfast the next day, I actually have a recipe for an apple pie smoothie!
Storing and Reheating Leftover Apple Pie
The best part about baking a whole apple pie is knowing you have leftovers for the next day, or maybe even two! If you have any slices left over from your big gathering, you don’t have to rush to eat them all right away. Because this pie has a nicely cooked filling, it’s pretty sturdy.
You can safely leave the pie on the counter, loosely covered, for about 24 hours if your kitchen isn’t too warm. After that, you’ll definitely want to move it into the fridge where it will keep nicely for another three or four days. If you made this amazing pie to try out from scratch, you know you don’t want to ruin that crust when reheating!
Don’t even think about the microwave for reheating a slice! That’s how you get a soft, chewy bottom crust. Instead, pop that slice directly onto a baking sheet and warm it up in a 350-degree oven for about 10 minutes. It crisps up that crust beautifully, making it taste almost freshly baked again. You’ll be so glad you cooled it down properly before trying to store it!
Frequently Asked Questions About Apple Pie
I know when I first started baking, the whole process felt like chemistry, and I always had a million little questions bouncing around in my head. It’s good that you’re asking! Getting these little details right is what separates an okay bake from the Best Apple Pie Ever. Don’t hesitate to reach out if you have anything you can’t find answers to—you can always send a note over at our contact page!
What apples are best for apple pie?
For a truly sturdy and flavorful Classic Apple Pie Recipe, you really need a mix! I always rely on Granny Smith because they are tart and hold their shape perfectly when cooked. But honestly, mixing in a slightly sweeter variety like Honeycrisp or Fuji gives you depth. Using a blend means you get both the structure and the flavor complexity we love in an Old Fashioned Apple Pie.
Can I use all butter for the crust instead of shortening?
Absolutely, and I highly recommend it for the richest flavor! That is the exact goal of getting that perfect Buttery Pie Crust we talked about. The key, though—and I can’t stress this enough if you aren’t using any shortening—is that the butter must be **ice cold**. The fat content is higher in all-butter crusts, which leads to supreme flakiness, provided you keep everything frozen until the last second.
How do I prevent the bottom crust from getting soggy?
This is the bane of every baker’s existence! Aside from the egg white trick I shared earlier, make sure your filling isn’t too liquidy—that’s why we pre-cook a bit. Also, make sure your oven temperature is correct and your pie plate is preheated slightly—some people even bake the bottom crust blind for 10 minutes before adding the filling. That slight crispness baked in first really helps fight the moisture when you’re making a hearty Homemade Apple Pie Recipe.
Nutritional Estimates for This Apple Pie
Look, this isn’t exactly a light snack, right? It’s butter, sugar, and apples, and that combination is pure joy! But since you asked, I pulled the numbers together for you so you know what you’re working with when you serve up a slice. These estimates are based on the recipe using standard grocery store ingredients for eight servings.
Keep in mind that because we used rich, real butter and both types of sugar in our apple pie, the numbers reflect that decadent taste! For ingredient specifics and variation math, you can always run over to our nutritional disclaimer page.
- Serving Size: 1 slice
- Calories: 450
- Sugar: 35g (Totally worth it!)
- Fat: 25g
- Carbohydrates: 58g
Classic Homemade Apple Pie with Flaky Double Crust
Follow this recipe to make a traditional double crust apple pie featuring a buttery, flaky crust and a perfectly spiced, slightly cooked apple filling.
- Prep Time: 45 min
- Cook Time: 65 min
- Total Time: 110 min
- Yield: 8 servings
- Category: Dessert
- Method: Baking
- Cuisine: American
- Diet: Vegetarian
Ingredients
- 2 1/2 cups all-purpose flour
- 1 teaspoon salt
- 1 cup (2 sticks) unsalted butter, very cold and cubed
- 1/2 cup ice water, plus more if needed
- 6 large Granny Smith apples, peeled, cored, and sliced 1/4 inch thick
- 1/2 cup granulated sugar
- 1/4 cup packed light brown sugar
- 1 teaspoon ground cinnamon
- 1/4 teaspoon ground nutmeg
- 1/8 teaspoon ground allspice
- 2 tablespoons all-purpose flour
- 1 tablespoon lemon juice
- 1 large egg, beaten with 1 teaspoon water (for egg wash)
Instructions
- Prepare the crust: In a large bowl, whisk together the flour and salt. Cut in the cold butter using a pastry blender or your fingers until the mixture resembles coarse crumbs with some pea-sized pieces of butter remaining.
- Gradually add the ice water, one tablespoon at a time, mixing until the dough just comes together. Do not overmix. Divide the dough in half, flatten each half into a disk, wrap in plastic, and chill for at least 1 hour.
- Prepare the filling: In a large bowl, combine the sliced apples, granulated sugar, brown sugar, cinnamon, nutmeg, allspice, 2 tablespoons of flour, and lemon juice. Toss gently to coat the apples evenly.
- Preheat your oven to 425 degrees Fahrenheit (220 degrees Celsius).
- On a lightly floured surface, roll out one disk of dough into a 12-inch circle. Carefully transfer it to a 9-inch pie plate. Trim the edges, leaving a 1-inch overhang.
- Pour the apple filling into the crust. Dot the top of the filling with small pieces of any remaining butter if desired.
- Roll out the second disk of dough for the top crust. Place it over the filling. Trim the top crust overhang to match the bottom. Crimp the edges to seal the top and bottom crusts together. Cut several slits in the top crust to allow steam to escape.
- Brush the top crust evenly with the egg wash. Sprinkle lightly with extra granulated sugar, if desired.
- Bake for 15 minutes at 425 degrees Fahrenheit. Then, reduce the oven temperature to 375 degrees Fahrenheit (190 degrees Celsius) and continue baking for 40 to 50 minutes, or until the crust is golden brown and the filling is bubbling. If the edges brown too quickly, cover them loosely with aluminum foil.
- Cool the pie on a wire rack for at least 3 hours before slicing and serving.
Notes
- For the flakiest crust, keep all ingredients, especially the butter and water, very cold.
- If you prefer a slightly softer filling, you can cook the apple mixture on the stovetop for 5 minutes before placing it in the crust.
- Use a mix of apple varieties for the best flavor and texture balance.
Nutrition
- Serving Size: 1 slice
- Calories: 450
- Sugar: 35g
- Sodium: 300mg
- Fat: 25g
- Saturated Fat: 15g
- Unsaturated Fat: 10g
- Trans Fat: 0g
- Carbohydrates: 58g
- Fiber: 3g
- Protein: 5g
- Cholesterol: 60mg