

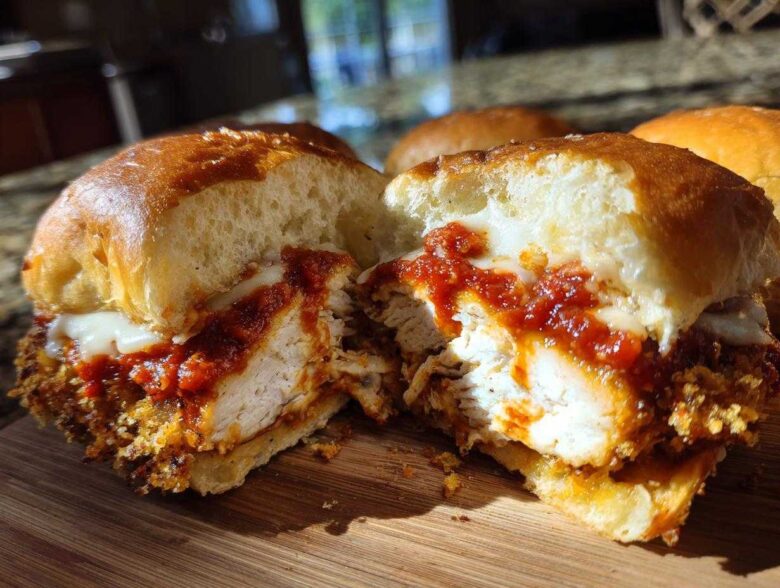
Okay, forget those sad, floppy little sandwiches you sometimes see at parties! If you’re anything like me, when you think of comfort food, you think of layers of gooey cheese and that shatteringly crisp texture. That’s exactly what we’re delivering today with these Crispy Chicken Parmesan Sliders with Cheese. Honestly, making something delicious for a crowd used to stress me out, but these became my absolute go-to snack for game days or movie nights.
The secret isn’t just the marinara or the mozzarella—it’s all about making sure that chicken stays crunchy even after it’s nestled under that beautiful, melty top layer. Trust me, getting the chicken just right is 90% of the battle, and I’m going to walk you through the technique I use every time so you don’t end up with a soggy mess. We use a little trick to maximize the crunch, and once you try these, they’ll be your signature entertaining food, too! For more kitchen inspiration, check out what’s new on the blog!
Why These Crispy Chicken Parmesan Sliders with Cheese Are a Must-Make
I know what you’re thinking: sliders are cute, but are they satisfying? With this recipe, the answer is a resounding YES! You get all the big, bold flavor of a full chicken parm dinner packed into a perfect little bite. No one leaves hungry, I promise you that.
- They offer that incredible texture contrast—super crunchy chicken against soft, sweet rolls.
- This recipe is perfect for parties or game nights because they bake up all together in one dish, which means cleanup is a breeze!
- If you’re looking for the best savory slider recipes out there, stop scrolling.
Achieving Ultimate Crunch with Our Crispy Chicken Slider Breading
This is where we earn the name Crispy Chicken Parmesan Sliders with Cheese. I don’t just trust one layer of breading; that’s just not enough insurance against steam from the sauce and cheese! We use a double breading technique here. You dip it, dredge it in the panko mixture, then dip it *again* in the egg and press it hard back into the crumbs.
This second layer essentially seals the deal, creating a thick, rugged crust that locks in the chicken’s juices while keeping it satisfyingly brittle when you bite in. It’s the key to making sure this slider stands up to all that gooey goodness.
Perfect Assembly for Melty Cheese Chicken Sliders
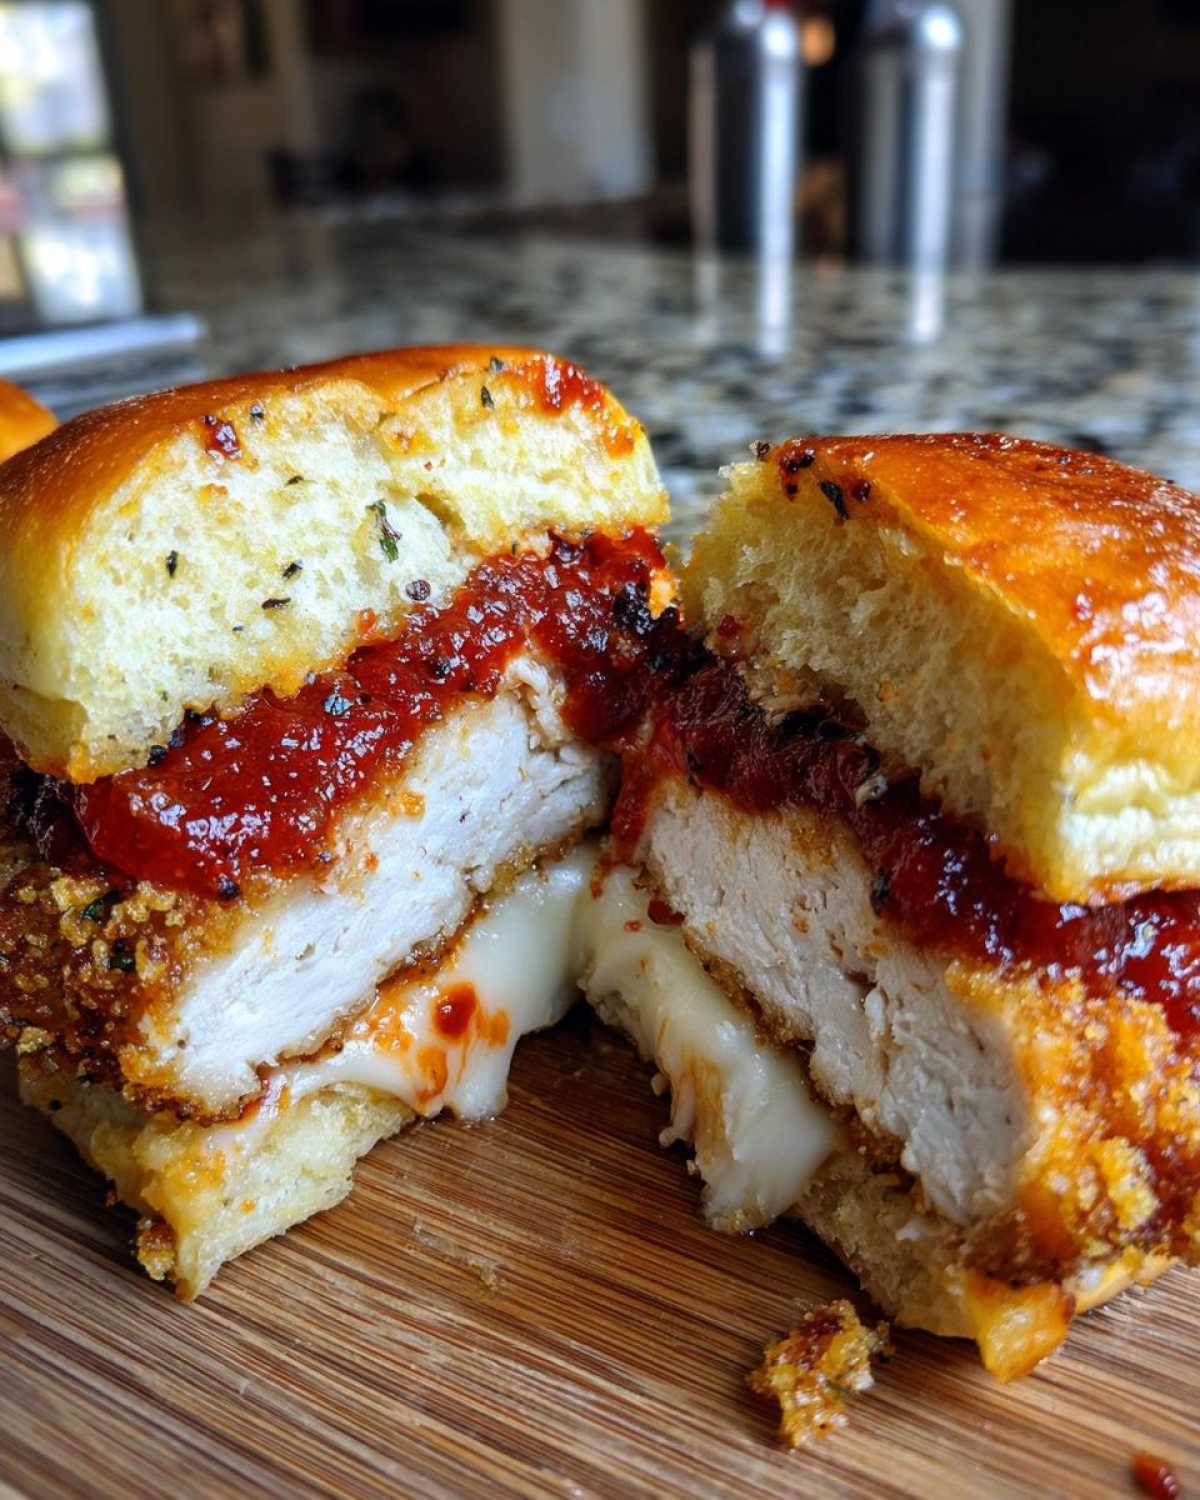
Listen, you absolutely have to use Hawaiian rolls for these. That slight sweetness cuts through the richness of the Parmesan and marinara so beautifully. When assembling these Melty Cheese Chicken Sliders, the layering matters.
We put the chicken down first, then the sauce, and then pile the cheese high. This ensures that when the tops go on and melt down, you get that beautiful cheese pull right down over the chicken edges. It’s messy, but in the best possible way!
Gathering Ingredients for Crispy Chicken Parmesan Sliders with Cheese
Alright, let’s talk about what you need to wrangle for this party masterpiece. I always lay everything out assembly-line style before I start pounding chicken; it just makes a huge difference when you’re moving fast. We need quality basics here, but remember, the spices are what make the breading pop!
For the chicken itself, grab about a pound and a half of those boneless, skinless breasts. Then, you’ve got your wet and dry dredging stations coming up. You’ll need some basic flour and two eggs, obviously.
The secret weapon for crispiness is the crumb mixture! We are mixing panko, which is essential, with some plain breadcrumbs to give it body. Plus, don’t forget the cheese—I use both shredded mozzarella for that stretch and finely grated Parmesan for the salty bite. And of course, you need a dozen slider buns; I’m telling you, grab the Hawaiian rolls! We finish the sandwich off with warmed marinara and a quick brush of melted butter on top before baking.
Step-by-Step Instructions for the Best Crispy Chicken Parmesan Sliders with Cheese
This is the part where we put it all together, but you’ve got to follow the order here! We aren’t just dumping things in a pan; we are constructing a handheld masterpiece. Getting the chicken ready correctly is half the battle for amazing Crispy Chicken Parmesan Sliders with Cheese.
First things first: take those chicken breasts and pound them! Honestly, you want them thin—about a quarter of an inch—so they cook fast in the oil and don’t end up dry. Slice them into pieces that comfortably fit your slider buns. That’s step one done!
Preparing the Chicken Cutlet Preparation for Sandwiches
Now we build that fortress of crunch. You must set up your dredging station right next to your stove. You need three shallow dishes, see? Fill one with flour. Then your beaten eggs go in the second. For the third dish, that’s where the magic happens: we mix the panko breadcrumbs, the regular crumbs, and all those lovely spices like oregano and garlic powder.
Remember what I said about the double dip? Dredge that piece lightly in flour first—shake off the extra! Dip it fully in the egg, make sure it’s coated, and press it hard into the panko mix. Then, give it a quick dip back in the egg and press it *hard* again into the breadcrumbs. That second layer is your guarantee for crunch!
Frying Technique for Perfectly Cooked Chicken Parmesan Sliders
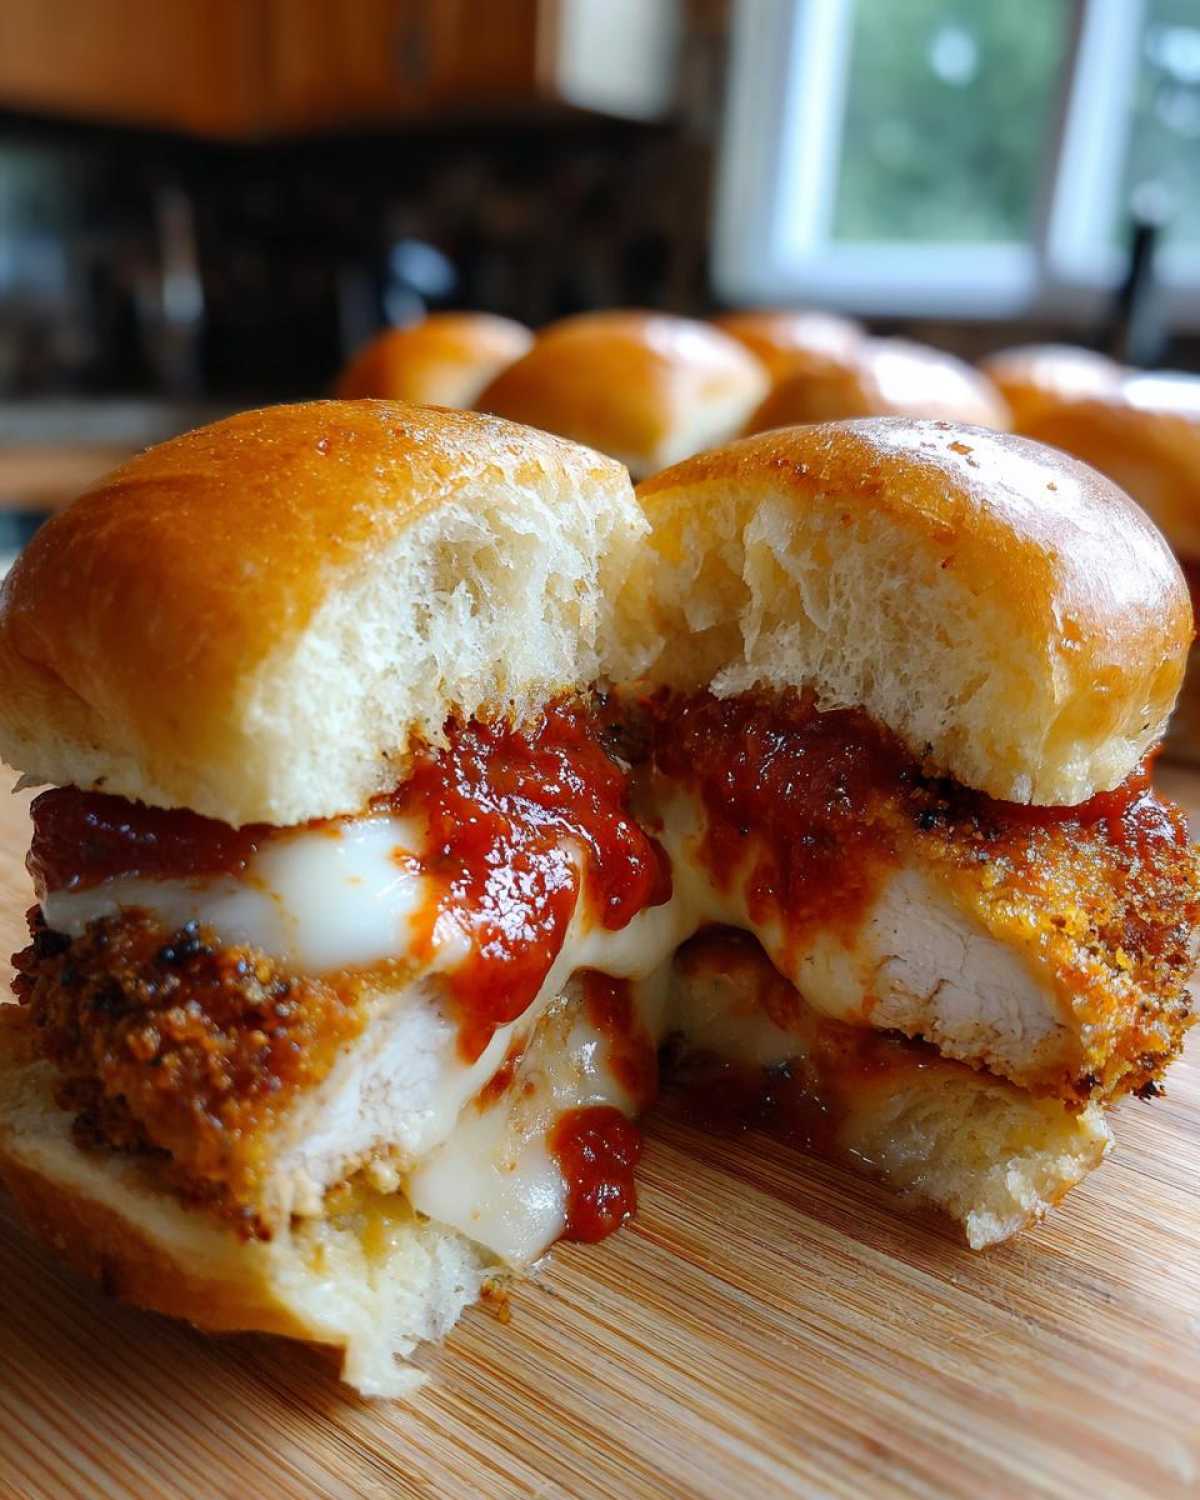
We need oil that’s nicely shimmering, about medium-high heat, which means around 350 degrees Fahrenheit if you have a thermometer. Don’t overcrowd your skillet, or the oil temperature will drop, and your chicken will soak up grease instead of crisping up. Work in small batches!
Each side should only take about three or four minutes until it’s gorgeously golden brown. Once they’re done, pull them straight out. Don’t just leave them on paper towels, though; put them on a wire rack set over paper towels. This lets air circulate underneath so the bottom doesn’t steam. This beautiful chicken is the foundation for your Crispy Chicken Parmesan Sliders with Cheese!
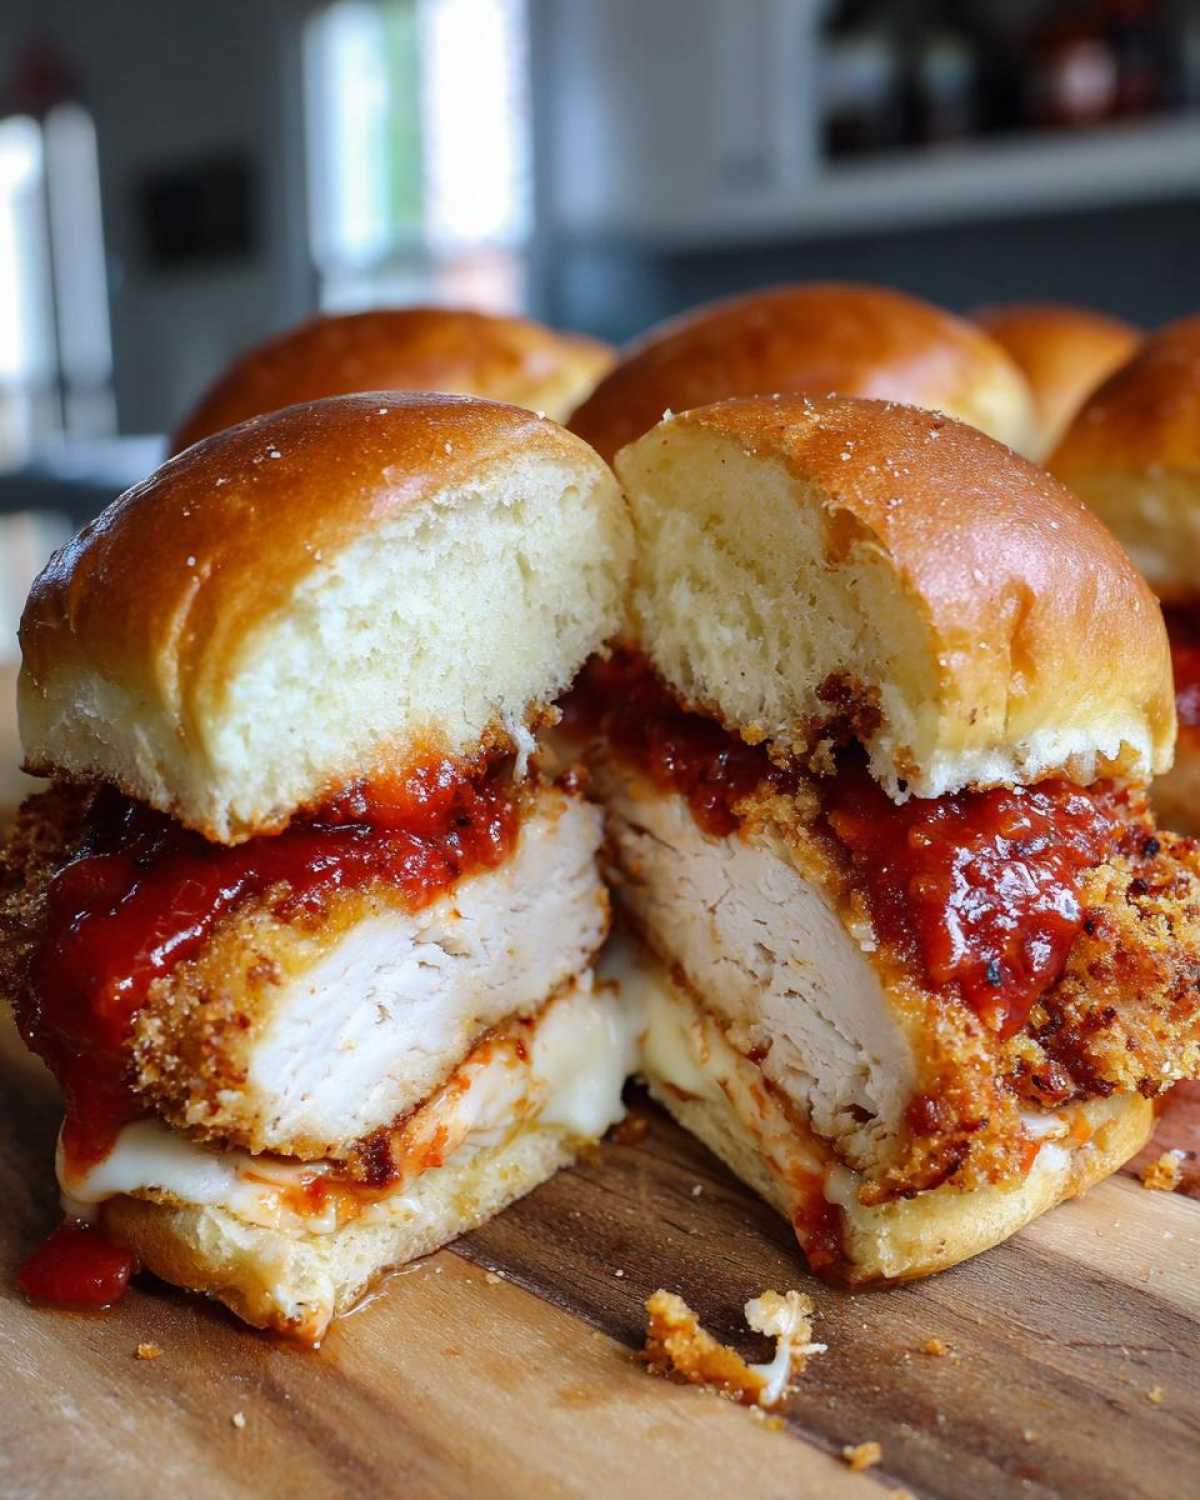
If you want to check out some other amazing techniques for crusting chicken, I have a great guide over here on Parmesan-crusted chicken that might give you other ideas!
Assembling and Baking Your Crispy Chicken Parmesan Sliders with Cheese
The cooking part is done—you have perfect, crunchy chicken cutlets! Now we move to the big finish: assembling these beauties. You’ll want to grab a 9×13 inch baking dish here. Slice those sweet slider buns in half horizontally, keeping them attached if you can; that makes the whole transfer process easier.
Start by placing the bottom buns in the dish. Put your crispy chicken piece right on top of each one. Spoon a nice amount of warm marinara sauce over the chicken—don’t drown it, just enough to cover it gently. Then, pile on that mozzarella and a sprinkle of Parmesan. After capping them with the tops, the final magic trick happens: brush every single bun top generously with melted butter. This is what gets the tops golden brown while the insides steam just enough!
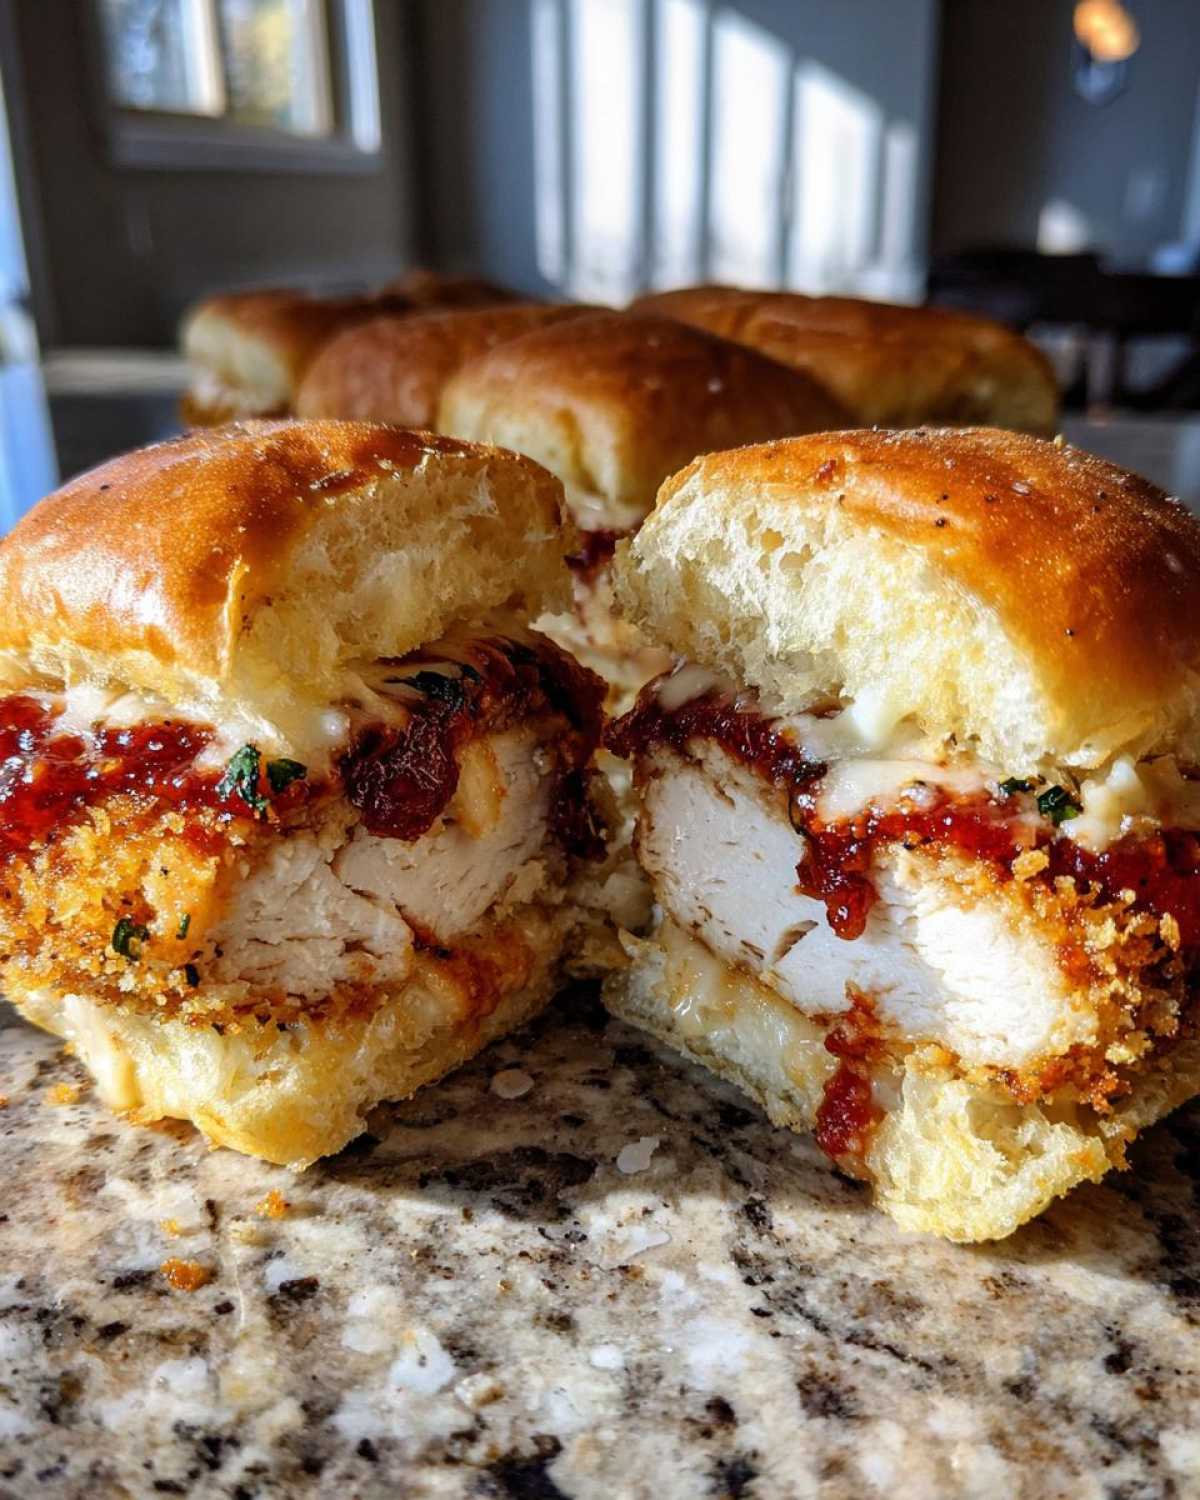
Cover the dish loosely with foil, and bake at 375°F for about 10 minutes. This melts the cheese without burning the tops. Then, pull that foil off and bake for just five more minutes so the cheese bubbles up. Now you have the most perfect Crispy Chicken Parmesan Sliders with Cheese!
If you’re making something else saucy to go alongside, like my easy stovetop chili, get that going while the sliders are in the oven!
Tips for Success with Savory Slider Recipes
Creating these for a party means you might tackle making them a little ahead, so we need a solid plan to keep that crunch alive! The biggest enemy of any baked slider is steam, especially if you have sauce underneath and cheese on top.
If you absolutely must assemble the sliders more than an hour before serving, keep the cooked chicken separate from the buns and sauce. Store the cooled chicken cutlets in an airtight container in the fridge. Assemble everything right before you’re ready for that final 15-minute bake time. That little bit of separation makes all the difference!
Also, remember what I emphasized during the breading: ditch the standard breadcrumbs and rely on panko! Panko acts like tiny, airy sponges that crisp up beautifully when fried, which is crucial here. If you’re short on time and ditching the frying, at least spray those breaded cutlets lightly with cooking spray before you bake them at 400°F. For more easy party ideas that disappear fast, check out my guide to sloppy joe sliders!
Variations on the Ultimate Chicken Parmesan Sliders
While my fried, butter-brushed, baked slider is definitely the king in my book, sometimes you want a quicker cleanup or just a different texture profile, right? If you’re watching oil use, you can totally skip the frying step! I’ve had some success using the baking method described in the notes—just make sure you spray those breaded cutlets really well so they still brown up nicely.
And I know so many of you are diving into air frying these days! For Crispy Chicken Parmesan Sliders with Cheese, the air fryer works like a charm if you cook the chicken first and then assemble.
You can also switch things up with the sauce! Try thinning out some spicy pesto for a fun surprise, or use a Provolone cheese instead of Mozzarella if you like a sharper taste. If you want to see how Parmesan pairs with a different main dish, check out my chicken scampi recipe—it gives you killer flavor ideas!
Serving Suggestions for Party Appetizer Chicken Sliders
Since these sliders pack a punch of flavor and cheese, you want sides that balance them out without competing too much. For Game Day gatherings, I usually pair them with something cool and creamy. A quick vinegar-based coleslaw is fantastic because the tang cuts right through the richness of the fried chicken.
If you’re having a full appetizer spread, you absolutely need a good dip nearby. My favorite spicy accompaniment is my famous jalapeño popper dip—it’s always the first thing to disappear! Otherwise, a simple side of crispy zucchini fries works great too.
Frequently Asked Questions About Crispy Chicken Parmesan Sliders with Cheese
I know you might still have a few lingering questions before you dive into making a whole batch of these. It’s good to ask! Getting the chicken right for a sandwich size is different than making a dinner cutlet, so let’s clear up the main hurdles for these Crispy Chicken Parmesan Sliders with Cheese.
Can I use pre-cooked chicken tenders instead of raw chicken?
You certainly can if you are in a huge rush! But, honestly, you’ll lose that fantastic, thick crust we build with the double breading. If you use frozen tenders, you risk the breading falling off and the inside getting gummy when you bake it later with the sauce. I always recommend pounding raw chicken thin so you can control the texture from start to finish for that perfect slider!
How far ahead of time can I assemble these?
This is the big one! Because we want amazing crunch, I really only recommend assembling them no more than 30 minutes before you plan to bake them. If you need to prep more than that ahead of time, please, please keep the cooked chicken cutlets completely separate. Assemble everything—sauce, cheese, butter topping—right before they go into the oven. That prevents sogginess!
Is frying absolutely necessary for the Best Crispy Chicken Slider Breading?
While frying gives you that absolute textbook crunch you see in the pictures, you have a solid option if frying isn’t your thing. Check out the notes section—baking works if you spray the breaded chicken with cooking spray first, bake at 400°F, and flip them halfway through. It won’t be quite as rugged as the fried version, but it keeps the flavor profile intact for these Crispy Chicken Parmesan Sliders with Cheese.
What’s the best way to reheat leftovers?
If you have any leftovers (which is rare at my house!), never, ever use the microwave. It melts the cheese beautifully but turns the crust instantly soft. Pop any remaining Melty Cheese Chicken Sliders onto a baking sheet in a 350°F oven for about 8 minutes, or until heated through. If you have an air fryer, even better—a few minutes at 350°F brings a lot of that crispness back! For more amazing cheesy ideas, you have to see my pizza dip recipe!
Storage and Reheating Instructions for Leftover Melty Cheese Chicken Sliders
If, by some miracle, you have any of these Melty Cheese Chicken Sliders left over (which I highly doubt!), you need to treat them right for reheating. The microwave is your absolute enemy here; it turns that amazing crispy texture into sad, wet mush instantly.
The best way to save them is to let them cool completely, ideally separating the chicken from the sauced bun assembly if you can manage it later. When you want to eat them, toss them onto a baking sheet. Pop them into a 350°F oven for about 8 minutes. If you have an air fryer, even better—a few minutes at 350°F will wake up that crust! For dipping ideas, my go-to is always my homemade tartar sauce, even though it’s usually for seafood!
PrintCrispy Chicken Parmesan Sliders with Cheese
A recipe for making crispy, flavorful chicken parmesan sliders using a double-breading technique for maximum crunch.
- Prep Time: 25 min
- Cook Time: 25 min
- Total Time: 50 min
- Yield: 12 sliders
- Category: Appetizer
- Method: Frying and Baking
- Cuisine: American
- Diet: Vegetarian
Ingredients
- 1.5 lbs boneless, skinless chicken breasts, thinly sliced or pounded to 1/4 inch thickness
- 1 cup all-purpose flour
- 2 large eggs, beaten
- 1.5 cups panko breadcrumbs
- 0.5 cup plain breadcrumbs
- 1 teaspoon garlic powder
- 1 teaspoon dried oregano
- 0.5 teaspoon salt
- 0.25 teaspoon black pepper
- 1 cup vegetable oil, for frying (or enough for 1/4 inch depth)
- 12 slider buns (Hawaiian rolls recommended)
- 1 cup marinara sauce, warmed
- 1.5 cups shredded mozzarella cheese
- 0.5 cup grated Parmesan cheese
- 4 tablespoons unsalted butter, melted
- 1 teaspoon dried parsley, for garnish
Instructions
- Prepare the chicken: Pound the chicken breasts to an even 1/4-inch thickness. Cut the chicken into pieces that fit your slider buns.
- Set up the breading station: Place flour in one shallow dish. Whisk eggs in a second dish. Combine panko, plain breadcrumbs, garlic powder, oregano, salt, and pepper in a third dish.
- Bread the chicken: Dredge each chicken piece first in flour, shaking off excess. Dip completely in the egg mixture. Press firmly into the breadcrumb mixture, ensuring full coverage. For extra crispiness, dip the breaded chicken back into the egg mixture briefly, then back into the breadcrumbs (double breading).
- Cook the chicken: Heat the oil in a large skillet over medium-high heat until shimmering (about 350°F). Fry the chicken in batches, being careful not to overcrowd the pan. Cook for 3-4 minutes per side until golden brown and cooked through (internal temperature of 165°F). Remove and drain on a wire rack set over paper towels.
- Assemble the sliders: Preheat your oven to 375°F. Slice the slider buns horizontally. Place the bottom halves of the buns in a 9×13 inch baking dish.
- Layer the sliders: Place one piece of crispy chicken on each bottom bun half. Spoon about 1 tablespoon of marinara sauce over each piece of chicken. Top with mozzarella cheese and a sprinkle of Parmesan cheese. Place the top halves of the buns on top.
- Bake: Brush the tops of the assembled sliders evenly with the melted butter. Cover the baking dish loosely with aluminum foil. Bake for 10 minutes.
- Melt the cheese: Remove the foil and bake for an additional 3-5 minutes, or until the cheese is fully melted and bubbly.
- Finish and serve: Sprinkle with dried parsley before serving immediately.
Notes
- To prevent sogginess if assembling ahead, keep the cooked chicken separate and assemble just before the final 15-minute bake time.
- Use panko breadcrumbs exclusively for the best crisp texture.
- If you prefer baking over frying, spray the breaded chicken lightly with cooking spray and bake at 400°F for 15-20 minutes, flipping halfway, until golden.
Nutrition
- Serving Size: 1 slider
- Calories: 350
- Sugar: 8
- Sodium: 550
- Fat: 18
- Saturated Fat: 7
- Unsaturated Fat: 11
- Trans Fat: 0.5
- Carbohydrates: 28
- Fiber: 1
- Protein: 20
- Cholesterol: 65