

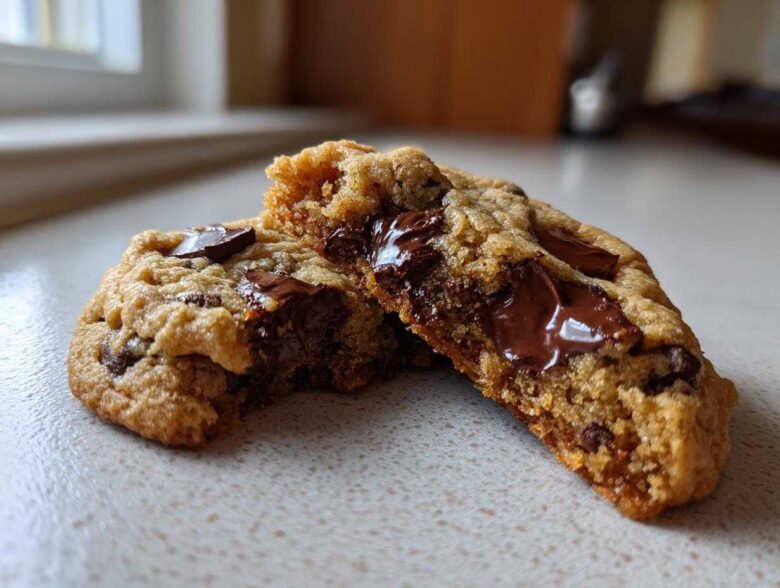
Oh, friends, the quest is over! I’ve spent years chasing that mythical cookie—the one that isn’t cakey, isn’t flat, but is perfectly thick, gooey, and delightfully substantial in your hand. I finally cracked the code for the absolute best chewy chocolate chip cookies you will ever make. Forget those sad, thin versions. This recipe delivers thick, bakery-style results every single time. The real magic? It comes down to a very specific balance of fat and sugar; we rely heavily on melted butter and lots of brown sugar to hydrate the flour just right. Trust me, this technique changes everything about your cookie game, and you can see more about my approach to baking over at our journey here.
The Science Behind Perfectly Chewy Chocolate Chip Cookies
If you’ve ever wondered how to make chewy cookies that actually hold their shape, it comes down to a few non-negotiable science tricks we use here. The biggest difference maker is the sugar ratio. We use far more brown sugar than white sugar. Brown sugar has molasses, which is acidic and hygroscopic—basically, it loves water and keeps the cookie soft and chewy long after they cool down. I used to make cookies that were just rock hard the next day! That heartbreak is why I never skimp on the brown sugar now.
The other huge factor is chilling the dough. This step seems like a chore when you are eager to eat cookies, I know! But chilling lets the flour fully absorb the wet ingredients and solidifies the fat, so when they hit the hot oven, they spread less and bake thicker. A thicker cookie equals a softer, chewier center. It’s worth the wait, I promise!
Melted Butter Chewy Cookies Trick Explained
Let’s talk about that melted butter. When you cream room-temperature butter, you pump a lot of air into the dough, which often leads to a puffier, more cake-like cookie. Since we melted the butter first, we skip that aeration step entirely. Melted butter hydrates the flour more intensely and immediately, forming those amazing dense structures that scream ‘chewy.’ It’s the fastest, easiest way to get that fantastic texture into your buttery chewy cookies without any special equipment.
Gathering Ingredients for Ultimate Chewy Chocolate Chip Cookies
Okay, now that we know the science behind why this recipe works—hello, melted butter!—it’s time to gather our supplies. Getting the right ingredients is half the battle for achieving those superior chewy chocolate chip cookies. I know we all have cookie stuff floating around, but pay close attention to the sugars and the eggs. For the best results, make sure your eggs are at room temperature; they incorporate much better into the melted butter mixture that way. Honestly, the quality of your chocolate chips matters a ton here too. You can check out our policies on ingredient sourcing or disclaimers if you want, right here on this page.
Ingredient Notes and Substitutions for Chewy Chocolate Chip Cookies
First up: that brown sugar! Make sure you are packing it down into your measuring cup. If you just spoon it in loosely, you won’t get the molasses-heavy boost we need for maximum chewiness. For the chocolate chips, I strongly suggest grabbing a good quality semi-sweet bag; the better the chocolate, the gooier those molten pockets will be when you bite in. If you absolutely must swap the flour, you could try using bread flour instead of all-purpose. Bread flour has higher protein, which creates more gluten, meaning even a slightly chewier result! But be careful; if you do that, make absolutely sure you don’t overmix, or you’ll end up with a brick!
Step-by-Step Instructions for Bakery Style Chewy Cookies
Alright, let’s get down to business. This is where we turn that gorgeous, sticky dough into what I proudly call the Ultimate Chewy Chocolate Chip Cookie. The steps are straightforward, but you have to respect the process, especially when it comes to mixing and chilling. Don’t rush any part of this; that’s how you end up with flat, greasy mistakes. We are aiming for thick, soft centers and just the right amount of edge crispness here! If you want to see some of my other favorite baked goods in the snacks category, feel free to browse!
Mixing Wet and Dry Components for Chewy Chocolate Chip Cookies
First things first, get your melted butter whisked vigorously with both sugars until it looks totally uniform. Then, beat in those room-temperature eggs one at a time—don’t just dump them in! Add the vanilla. In a separate bowl, this is where you combine your flour, baking soda, and salt. Now, listen closely: add your dry ingredients to your wet ingredients in small batches, mixing on low speed. The absolute, non-negotiable rule is stopping the mixer the second the flour streaks disappear. Don’t even give it an extra two seconds! Overmixing at this stage develops too much gluten, and hello, tough cookies. We want tender chewiness, not bread texture.
The Crucial Dough Chilling Step for Gooey Chocolate Chip Cookies
This is my biggest secret for achieving those gorgeous Gooey Chocolate Chip Cookies with a soft center: you must chill the dough. Yes, I know it’s hard to wait! After folding in all those chocolate chips, cover that bowl tightly. It needs a minimum of two hours in the fridge, but honestly, 24 hours is even better for flavor development. If you can manage to keep it in there for up to 72 hours, wow—you will get the thickest, most flavorful cookies imaginable. Chilling prevents spreading, which keeps the cookie high for that perfect Thick and Chewy Cookies profile.
Baking and Cooling the Perfectly Chewy Dessert
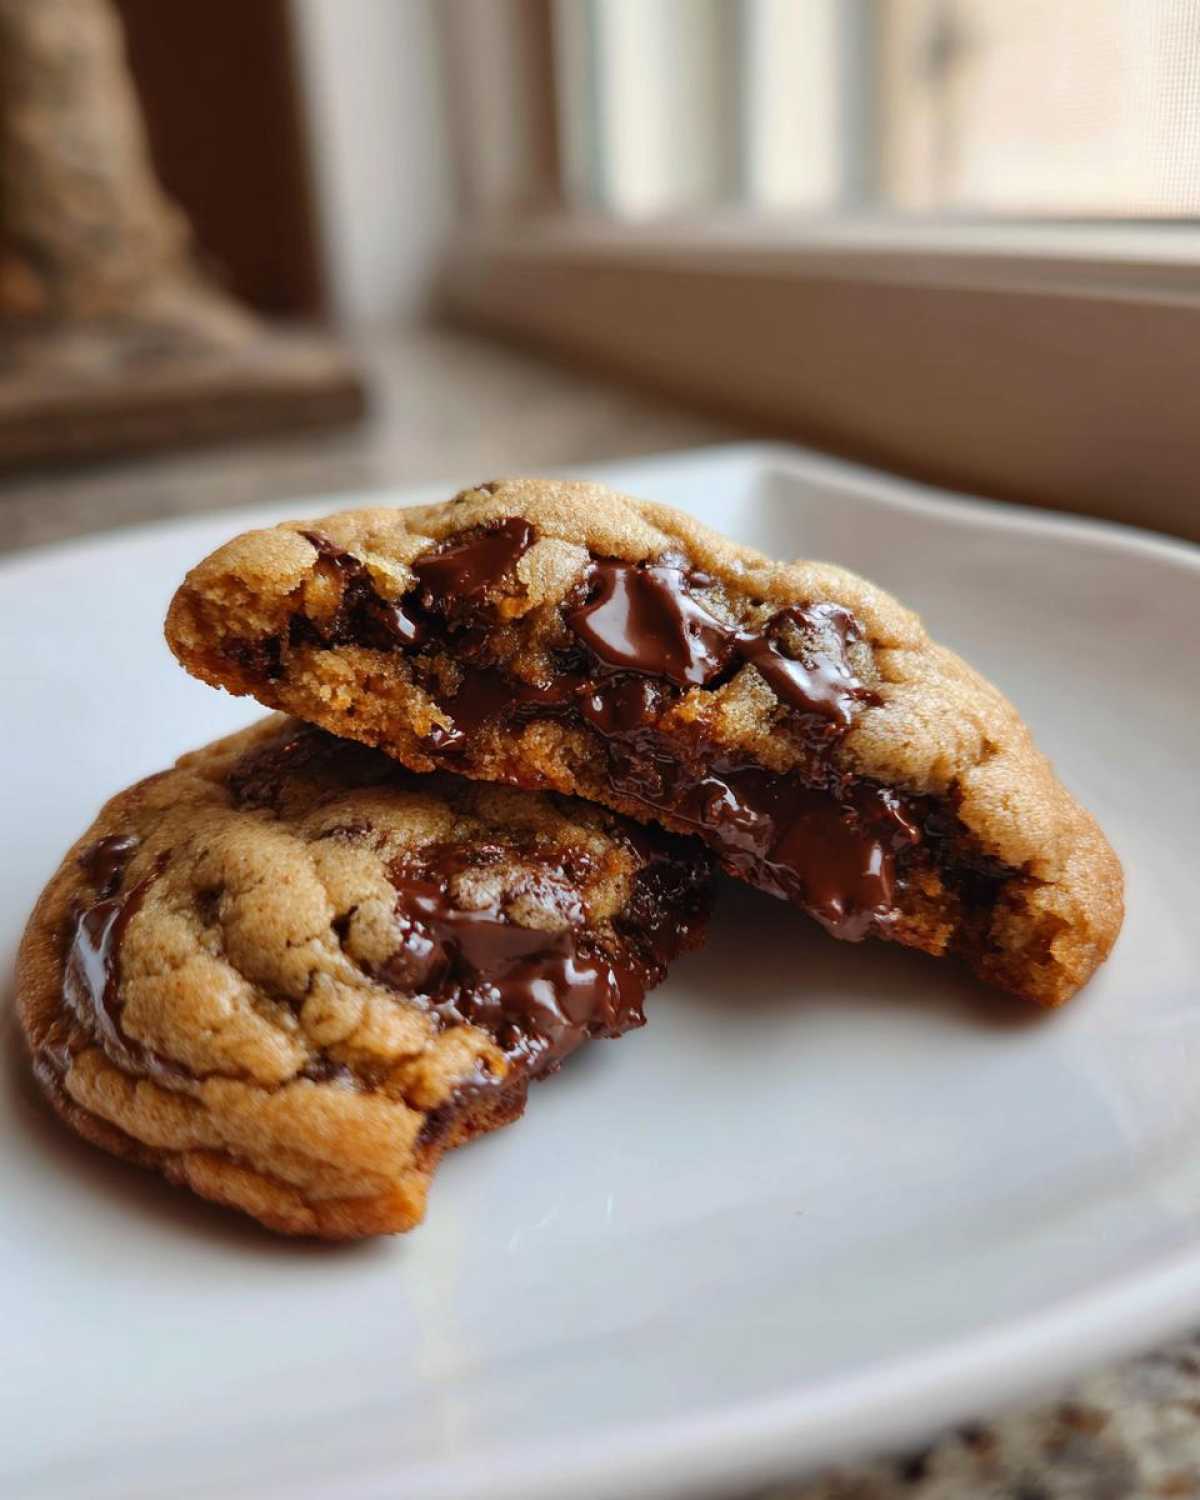
When you’re ready, preheat your oven to 350°F. Scoop out your dough balls—I use about three tablespoons per cookie to keep them substantial—and place them on parchment-lined sheets, giving them space to breathe. Bake for 10 to 13 minutes. You need to watch them like a hawk! The edges should look set and light gold brown, but the very center should still look slightly puffy and underbaked when you pull them out. This is critical for that gooey middle. Leave them right there on the hot pan for exactly five minutes. This carry-over baking sets the edges further without drying out the center. Then, gently slide them onto a wire rack to finish cooling.
Tips for Success: Achieving Crispy Edge Chewy Cookie Perfection
We’ve nailed the dough, but let’s talk about those finishing touches that elevate these from great to legendary cookies. If you want that perfect contrast—a slight snap on the outside giving way to pure gooeyness inside—you need these extra steps. This is how you guarantee a true Crispy Edge Chewy Cookie every time. Don’t skip this next part; it really makes a difference in the final presentation!
Here’s my favorite little trick: right before those cookie dough balls go into the oven, grab about a quarter cup of extra chocolate chips. Gently press a few extra right on top of each mound. When they bake, those surface chips melt and create those beautiful dark, shiny puddles against the golden dough. It just screams quality! Also, remember that five-minute rest period I mentioned? That’s when the edges firm up just enough to get that nice, delicate crispness without hardening the center. Bake them slightly underdone, and trust the residual heat in that pan to finish the bake perfectly. You can find more of my general baking ideas over at the Tastytribune blog!
Storage and Reheating Instructions for Buttery Chewy Cookies
Now that you’ve made the Best Chewy Cookies Ever—and I know you have—you need to know how to keep them tasting like they just came out of the oven tomorrow. Luckily, because of all that brown sugar and melted butter we put in there, these Buttery Chewy Cookies hold up really well!
The best place for them is just an airtight container right there on your counter at room temperature. Do not stick them in the fridge! Cold makes cookies hard, and we worked too hard for hard cookies, right? They should stay wonderfully soft and chewy for a solid five days. If you can stretch that long, that is—mine usually disappear by day three!
But what about day six? Or maybe you just want that perfect, warm, melty bite right now without waiting for a whole batch? Here is your secret weapon for instant gratification: the microwave! Seriously, it works like magic on these.
Take one cookie, place it on a microwave-safe plate. Now, zap it for just 8 to 10 seconds on medium power. That quick blast of heat relaxes the fats and sugars just enough to bring back that fresh-from-the-oven, soft-center texture we love. They’ll be molten and gooey in the middle. Just watch the clock; 15 seconds and you might be crossing the line into ‘warm cookie’ territory instead of ‘gooey cookie perfection!’
Frequently Asked Questions About Chewy Chocolate Chip Cookies Recipe
I know you might still have a few panics swirling around about whether this recipe will work for your kitchen! That’s totally normal when you are attempting to make the absolute Best Chewy Cookies Ever. I tried to cover all the main texture concerns right in the main recipe steps, but here are a few quick answers to the burning questions I always get asked when people try this batch!
Why are my cookies cakey instead of chewy?
Oh, that’s the worst! Cakey cookies usually come from a problem in the mixing phase or the ingredient ratios. If you used too much flour, or if you accidentally added too much baking powder instead of soda, you’re boosting the lift too much, which results in a lighter, cake-like texture. Also, and this is huge, if you creamed softened butter instead of using melted butter, you’ve added too much air, leading to too much puffiness. We want density for chewiness, remember?
Can I make these cookies without chilling the dough?
You technically *can* skip the chill time, but then we enter the danger zone for flat cookies. If you bake the dough straight from the mixer, the melted butter hasn’t had time to solidify again. When those warm fats hit the oven, the dough collapses almost instantly. You get a huge spread, which results in a thin, crispy cookie—not the thick, No Spread Chewy Cookies we’re aiming for! Give it that minimum two-hour rest; your payoff will be worth the patience, I promise. I developed this recipe around that chilling time because it truly locks in that chewy texture.
I hope these pointers help you achieve cookie nirvana! If you need to reach out with specific disaster reports or amazing success stories, you can always send me a message here!
Estimated Nutritional Data for Homemade Chocolate Chip Cookies
Now, I know some of you are watching your macros, and others are just trying to decide if one cookie is enough (spoiler: it never is!). Since every ingredient brand varies slightly, just know that this data is my best educated guess based on the amounts listed in the recipe. This is just to give you a ballpark overview of what you are enjoying when you devour these amazing treats.
These estimates are based on one cookie (when the recipe yields about 20) and use standard ingredients. If you use fancy gourmet chocolate or premium butter, your numbers might shift a tiny bit!
- Serving Size: 1 cookie
- Calories: 220
- Sugar: 18g (That’s where the chewiness magic happens, folks!)
- Fat: 12g
- Protein: 3g
- Carbohydrates: 27g
- Sodium: 110mg
I have to put in a little quick disclaimer here because my lawyer friends insist! Because you might use different brands of chocolate chips or measure your brown sugar slightly differently, these are just estimates for reference. If you need ultra-precise tracking, you’d have to log every single specific item you use. For real-world baking enjoyment, these averages are perfect! You can check out my overall privacy stance on sharing recipe data over at the privacy page.
Share Your Ultimate Chocolate Chip Cookie Recipe Experience
Now that you’re officially armed with the secrets to the Ultimate Chocolate Chip Cookie Recipe, I don’t want you to bake this batch in silence! Baking is supposed to be a celebration, and I absolutely love hearing how these tips transform your cookie game. Seriously, my favorite part of running this little kitchen adventure is seeing your results!
Please, please, please come back here after you’ve tested them out. Let me know how long you chilled the dough and what kind of chocolate you used. Did you get those perfect crispy edges? Did the center stay gooey? Drop a rating right down in the comments below—give it five stars if they were the best chewy chocolate chip cookies you’ve ever had!
And if you managed to snap a picture before everyone devoured them (which is tough, I know!), tag me on social media! Seeing your golden-brown, thick cookies pop up in my feed absolutely makes my week. It proves that these tried-and-true methods really do work for everyone. Let’s build a community of cookie perfectionists together! When you’re ready to browse my notes on site standards and how we handle cookies here, you can check out my full cookie policy.
PrintThe Ultimate Chewy Chocolate Chip Cookies
A recipe designed to produce thick, bakery-style chocolate chip cookies with a perfectly chewy center and slightly crisp edges, focusing on techniques that maximize chewiness.
- Prep Time: 20 min
- Cook Time: 12 min
- Total Time: 2 hours 32 min
- Yield: About 20 cookies
- Category: Dessert
- Method: Baking
- Cuisine: American
- Diet: Vegetarian
Ingredients
- 1 cup (2 sticks) unsalted butter, melted
- 1 cup packed light brown sugar
- 1/2 cup granulated sugar
- 2 large eggs, room temperature
- 1 tablespoon vanilla extract
- 2 1/4 cups all-purpose flour
- 1 teaspoon baking soda
- 1/2 teaspoon salt
- 2 cups semi-sweet chocolate chips
Instructions
- Whisk the melted butter, brown sugar, and granulated sugar together in a large bowl until fully combined.
- Beat in the eggs one at a time, then stir in the vanilla extract.
- In a separate bowl, whisk together the flour, baking soda, and salt.
- Gradually add the dry ingredients to the wet ingredients, mixing on low speed until just combined. Do not overmix.
- Fold in the chocolate chips using a spatula.
- Cover the dough and chill in the refrigerator for at least 2 hours, or up to 72 hours, for best texture.
- Preheat your oven to 350°F (175°C). Line baking sheets with parchment paper.
- Scoop dough balls (about 3 tablespoons each) onto the prepared sheets, leaving 2 inches between them.
- Bake for 10 to 13 minutes. The edges should look set and golden brown, but the centers should still look slightly underbaked and soft.
- Let the cookies cool on the baking sheet for 5 minutes before transferring them to a wire rack to cool completely.
Notes
- Using melted butter and a higher ratio of brown sugar to white sugar is key for chewiness.
- Chilling the dough solidifies the fat, which prevents excessive spreading and concentrates flavor, leading to a thicker, chewer cookie.
- For extra gooey centers, press a few extra chocolate chips onto the tops of the dough balls right before baking.
Nutrition
- Serving Size: 1 cookie
- Calories: 220
- Sugar: 18g
- Sodium: 110mg
- Fat: 12g
- Saturated Fat: 7g
- Unsaturated Fat: 5g
- Trans Fat: 0.1g
- Carbohydrates: 27g
- Fiber: 1g
- Protein: 3g
- Cholesterol: 35mg