

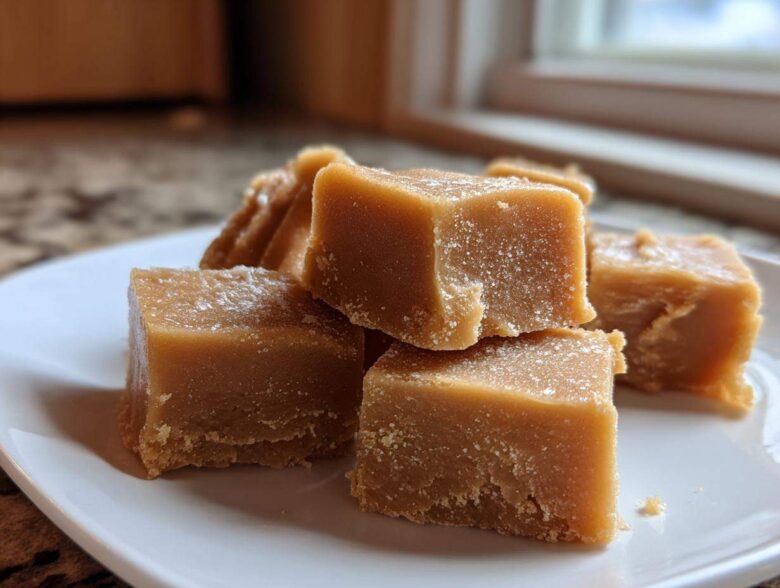
Oh, my friend, there is nothing quite like the sweet, comforting hug of old-fashioned candy, and honestly, nothing beats a perfect square of penuche fudge. If you grew up with candy dishes at Christmas or just crave that taste of nostalgia, you’ve landed in the right spot! This isn’t some complicated, finicky confection. Nope. This is my go-to, rock-solid easy recipe for authentic penuche. The secret, of course, is swimming deep in that rich, caramel goodness only perfectly cooked brown sugar can give you. Seriously, making this batch reminded me of helping my Aunt Carol haul out her heavy copper pots when I was little. It’s the simplest way to make incredible sweet dessert squares!
Since we are making this creamy confection, make sure you check out my tips for amazing brown butter maple blondies when you need a chewy break from candy making!
Why This Old-Fashioned Penuche Fudge Recipe Works
I get asked all the time how I manage to get my creamy fudge so unbelievably smooth every single time. Well, trust me, it’s all in the physics, not magic! This old fashioned fudge is all about respecting the temperature and the cooling process. If you skip the thermometer or rush the cooling, you end up with crumbs instead of squares! I’ve tested this method, and it’s the only way I trust when I’m making a big batch for holiday gifting.
Achieving Creamy Fudge Texture
The absolute key to avoiding grainy fudge is hitting that sweet spot: 234 degrees Fahrenheit, which is the soft-ball stage. You have to let the sugars and cream boil undisturbed until that thermometer tells you it’s ready. After it hits the temp and you stir in the butter, you absolutely must be patient! It needs to cool down to about 110 degrees before you start whipping it. When you beat it hard, the crystals form small and uniform, which means a silky texture, not crunchy sugar grains. That’s how you know you’re making real, traditional fudge.
Quick Fudge Preparation Overview
Even though we have a couple of cooling steps, the active time here is super low. You’re mostly just monitoring a pot on the stove and then beating it for a few minutes—it’s honestly so fast! You’ll get about 36 perfect, sweet dessert squares out of one batch, which is great if you’re trying to make enough fudge for the whole family or a bake sale without spending all day in the kitchen.
Ingredients for Perfect Penuche Fudge
You only need a handful of simple things to get this amazing brown sugar fudge recipe going, and the star, without a doubt, is that beautiful, rich brown sugar. We use two cups of granulated sugar, a full cup of packed light brown sugar—that’s where all the flavor comes from, don’t skimp! Then we pair that with one cup of heavy cream, a tablespoon of butter for shine, a teaspoon of vanilla, and a tiny pinch of salt to keep the sweetness honest. Don’t forget to check out my recipe for pumpkin pie fudge if you want another decadent option!
Ingredient Notes and Substitutions for Penuche Fudge
Now, the nuts are entirely up to you. I usually grab about a cup of chopped pecans, but walnuts work just as wonderfully for a great crunch. If you happen to run out of nuts, or if you have a peanut butter craving that just won’t quit, listen up! The notes say you can swap out half a cup of those nuts for half a cup of smooth peanut butter. Just fold that in right when you add the vanilla extract. It totally changes the profile but keeps that perfect creamy fudge texture we are looking for.
Step-by-Step Instructions for Traditional Penuche Fudge
Alright, time to get serious! This part needs your full attention, but honestly, if you follow these steps, you’ll have the best traditional fudge you’ve ever tasted. When you’re ready to start, don’t forget to line that 8×8 inch pan with parchment paper first, leaving the overhang—that little sling makes cutting so much easier later on! If you want to check out how I make my apple cider caramels, they are fantastic for layering flavors alongside this fudge too: apple cider caramels.
Cooking the Penuche Fudge Base
First, dump the sugars and the heavy cream into your thickest saucepan. Get that over medium heat, stirring gently until everything looks totally dissolved. Now, this is critical: once it starts bubbling, you stop stirring! Put your candy thermometer in and let it boil until it hits exactly 234 degrees Fahrenheit. That’s your soft-ball stage, and it usually takes about 10 to 15 minutes after that initial boil starts. The second it hits temp, pull that pan right off the heat immediately. Don’t let it sit for a second longer!
Cooling and Achieving the Right Consistency for Penuche Fudge
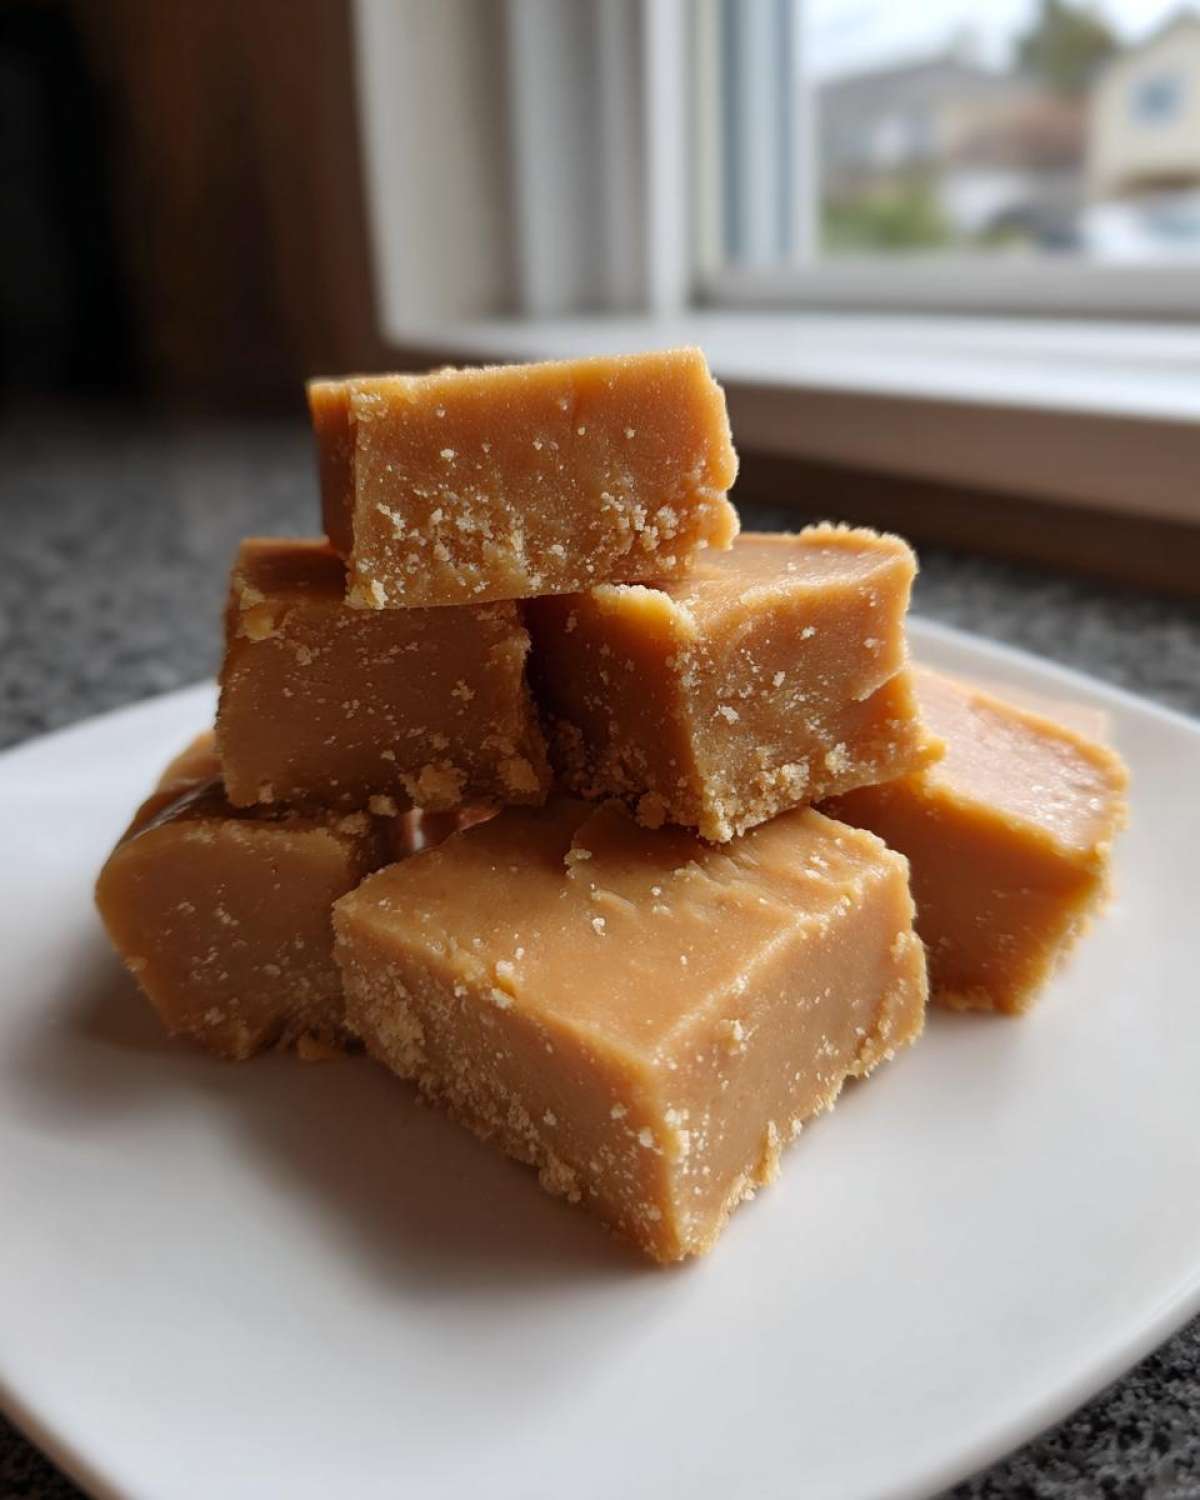
Once it’s off the burner, quickly stir in the butter, vanilla, and salt until that butter melts away. Now, the hardest part: waiting! The mixture has to cool down undisturbed until it sinks to 110 degrees Fahrenheit; this usually takes a good 30 to 40 minutes. Don’t peek! Once it’s cooled, grab your wooden spoon or an electric mixer and beat it like crazy! You’ll beat it constantly for 5 to 10 minutes until you see it lose that shiny gloss and start looking thick and dull—that’s the sign of perfect creamy fudge! Quickly fold in any nuts you’re using, pour it into your prepared pan, spread it smooth, and just let it chill out on the counter until it’s completely set. Magic!
Tips for Perfect Old Fashioned Fudge Every Time
Even though this is such a straightforward brown sugar fudge recipe, there are little tricks that keep it in the “easy” category and away from the “sugary disaster” category! My biggest tip, which I mentioned above but it bears repeating, is don’t even *think* about stirring while it’s boiling on the stove. That’s how you get those annoying crystals that make your beautiful candy gritty. If you look at my link for brown sugar bundt cake, you’ll see I feel the same way about overheating sugar in baking, too!
Also, candy making is temperature sensitive, and sometimes your kitchen is just plain hot. If you feel like the fudge is hardening up way too fast before you get to that 110-degree mark for beating, don’t panic! You absolutely can put it back on very low heat—like, the absolute lowest setting—just until it loosens up enough. Then cool it down and beat it again. Patience guarantees that amazing, melt-in-your-mouth texture we want!
Serving Suggestions for Your Penuche Fudge
Okay, now that you have these perfect sweet dessert squares, what do you do with them? Honestly, just eating them standing over the counter works for me! But if you’re feeling fancy, these make the absolute best **fudge for gifting**. Wrap a few squares in little parchment paper bundles tied with twine—they look so rustic and homemade.
They pair wonderfully with a hot cup of coffee, or if you are feeling really indulgent, you can stack a piece of this penuche fudge right on top of one of my amazing maple cinnamon scones. They are fantastic as part of any holiday fudge treats platter because that warm brown sugar flavor just screams cozy season!
Storage and Keeping Your Penuche Fudge Fresh
This is probably the easiest part of the whole process, which is fantastic after all that precise temperature work! The great news about penuche fudge is that it stores like a dream, provided you keep it cool and dry. Since this is traditional, cooked fudge made with heavy cream, it’s surprisingly sturdy.
For the best texture—that soft, creamy chew that doesn’t get hard—I absolutely recommend keeping your fudge at room temperature. Just wrap those squares tightly in plastic wrap or foil, or place them snugly in an airtight container. If you stack them, make sure you put a small square of wax paper between the layers so the squares don’t stick together. Stored correctly, it should stay perfectly delicious for at least a week, sometimes even ten days! That long shelf life makes it a prime candidate for fudge for gifting long before the big holidays hit.
Now, what if your house is just blazing hot, or you made way too much and need it to last longer? You can chill it. Pop it in the fridge, still tightly wrapped. It will firm up quite a bit, which some people actually prefer, but when you go to eat it, let it sit on the counter for about 20 minutes first. That little bit of warm-up time brings back that lovely, soft bite. Just avoid freezing it if you can—the texture usually gets a little weird when it thaws out, and we want that creamy fudge experience every time!
Frequently Asked Questions About Penuche Fudge
I know when you get into candy making, you start having a million little worries! It’s totally normal, especially with recipes as old as this traditional fudge. Don’t stress! Most of the time, texture issues come down to rushing or guessing, so let’s nail down those last few tricky spots on this brown sugar fudge recipe.
Can I make this penuche fudge without a candy thermometer?
Oh, I really, really wouldn’t recommend it for this specific recipe. Since we are dealing with the delicate chemistry of brown sugar, hitting that 234°F mark is everything for the texture. If you absolutely cannot use one, you can try the cold water soft-ball test—drop a tiny bit of the mixture into cold water and see if it forms a soft, pliable ball that flattens when you press it. But honestly, for the one time you make this, grabbing a cheap thermometer is worth it to guarantee perfect results.
How do I prevent my penuche fudge from becoming grainy?
This goes back to the two most important rules! First, you must not stir the mixture once it starts boiling over the heat—that stirring introduces premature crystals. Second, you must let it cool completely to 110 degrees Fahrenheit before you even start beating it. If you start whipping lukewarm sugar syrup, you encourage all the sugar molecules to clump up into big, crunchy grains instead of those teensy, smooth ones we want for creamy fudge!
Is this recipe suitable for holiday fudge treats?
Are you kidding? This is the absolute king of holiday fudge treats! The buttery, caramel flavor is way more comforting than standard chocolate fudge, and that brown sugar note just pairs perfectly with winter spices. Plus, since it holds up so well, it’s fantastic for **fudge for gifting**. Just wrap those beautiful squares tightly in cellophane or tuck them into little tins, and everyone will think you spent days fussing over them. They keep beautifully!
If you’re looking for more ways to impress your guests, make sure you check out my guide on traditional fudge basics!
Estimated Nutritional Data for Penuche Fudge
Okay, now that we’ve talked about how delicious this penuche fudge is, let’s touch on the fuel factor! Since this is a classic, old-fashioned candy made primarily of sugar, cream, and butter, it is definitely a treat, not a health food. But hey, everything in moderation, right? When you cut this recipe into the 36 small squares we aimed for, here is what you can expect per serving.
These numbers are just estimates based on the ingredients I listed, so if you add a ton of pecans or use a different type of cream, the totals will shift around a little bit!
- Calories: About 160 per square
- Total Fat: 4 grams (and 2 grams of that is saturated fat)
- Carbohydrates: Roughly 31 grams
- Sugar: Yep, 28 grams—that’s the brown sugar goodness shining through!
- Protein: A small boost, around 1 gram
I want to be super clear: these are just estimates for one sweet bite. If you decide to double up on a square, well, you’ll double the numbers too! Don’t worry too much about the macros when you are enjoying this amazing brown sugar fudge recipe; just make sure you eat it slowly and savor every single nostalgic bite!
Share Your Homemade Candy Recipes
Well, that’s it! You’ve made perfect, creamy, old-fashioned penuche fudge! I truly hope the process was as fun and rewarding as mine always is. Now that you have these incredible sweet dessert squares cooling on your counter, I sincerely want to know how they turned out for you!
Did you go with the crunchy pecans or sneak in that peanut butter? Did your candy thermometer cooperate? Please, please leave a comment down below telling me all about your batch. Hearing about your successes with these homemade candy recipes really makes my day!
If you happened to snap a photo of your finished, beautifully set fudge, tag me on social media! I love seeing your creations, especially when they are destined to be wonderful holiday fudge treats. You can find me over on the main blog site right here where I share all my latest kitchen adventures.
Thank you so much for trusting me with this fantastic piece of family candy history. Go forth and share the brown sugar magic!
PrintOld-Fashioned Brown Sugar Penuche Fudge
Make creamy, traditional Penuche fudge using brown sugar for a rich, distinct flavor. This recipe yields soft, sweet dessert squares.
- Prep Time: 15 min
- Cook Time: 15 min
- Total Time: 70 min
- Yield: 36 small squares
- Category: Dessert
- Method: Stovetop Cooking
- Cuisine: American
- Diet: Vegetarian
Ingredients
- 2 cups granulated sugar
- 1 cup packed light brown sugar
- 1 cup heavy cream
- 1 tablespoon butter
- 1 teaspoon vanilla extract
- 1/4 teaspoon salt
- 1 cup chopped pecans or walnuts (optional)
Instructions
- Line an 8×8 inch baking pan with parchment paper, leaving an overhang on two sides for easy removal. Lightly grease the paper.
- Combine the granulated sugar, brown sugar, and heavy cream in a heavy-bottomed saucepan.
- Stir the mixture over medium heat until the sugars dissolve completely.
- Insert a candy thermometer and bring the mixture to a boil without stirring once boiling starts.
- Continue cooking until the mixture reaches 234 degrees Fahrenheit (soft-ball stage). This usually takes 10 to 15 minutes after boiling begins.
- Remove the pan from the heat immediately.
- Stir in the butter, vanilla extract, and salt until the butter melts.
- Let the mixture cool undisturbed until it reaches 110 degrees Fahrenheit (about 30 to 40 minutes). Do not rush this cooling step.
- Once cooled, beat the mixture vigorously with a wooden spoon or an electric mixer on medium speed. Beat until the fudge loses its glossy shine and becomes thick and slightly dull. This takes about 5 to 10 minutes.
- If using, quickly fold in the chopped nuts.
- Pour the thickened fudge into the prepared pan and spread evenly.
- Let the fudge set completely at room temperature for several hours, or chill briefly to speed setting.
- Once firm, lift the fudge out using the parchment overhang and cut into squares.
Notes
- For the creamiest texture, ensure you do not stir the sugar mixture while it is boiling on the stove.
- If you prefer peanut butter flavor, substitute 1/2 cup of the nuts with 1/2 cup of smooth peanut butter, adding it when you add the vanilla.
- If the fudge sets too quickly before you finish beating, you can gently reheat it slightly to loosen it, then cool and beat again.
Nutrition
- Serving Size: 1 square
- Calories: 160
- Sugar: 28g
- Sodium: 45mg
- Fat: 4g
- Saturated Fat: 2g
- Unsaturated Fat: 2g
- Trans Fat: 0g
- Carbohydrates: 31g
- Fiber: 0g
- Protein: 1g
- Cholesterol: 10mg