

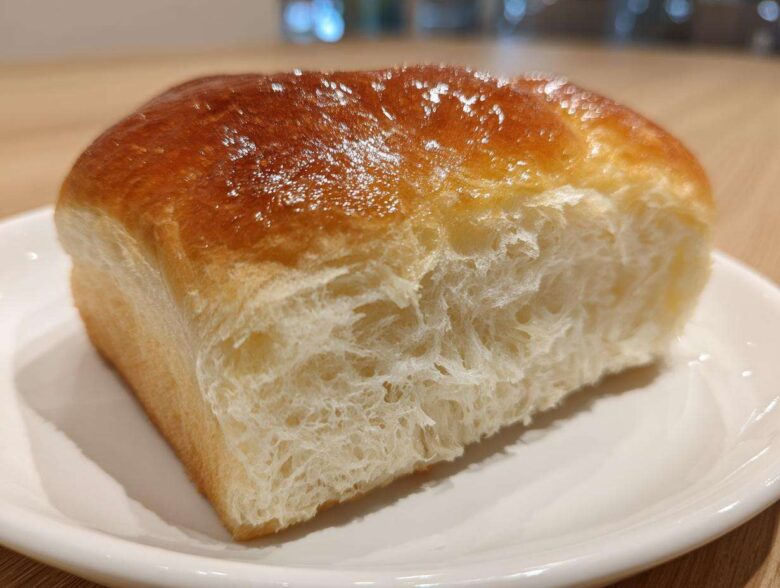
Stop dreaming about those impossibly tall, fluffy loaves you see in bakeries—we are making that happen right here, right now! I spent years chasing that perfect, pillowy crumb, and honestly, I almost gave up. But then I cracked the code on the Tangzhong method, and suddenly, professional-level **japanese milk bread** was appearing on my counter. Trust me, this is the foolproof recipe that finally delivered that cloud-like texture I craved. If you’re looking for the secret to the softest bread possible, you’re in exactly the right hands. I’ve done the trial and error so you don’t have to!
We bakers know that consistency is everything, and mastering this **japanese milk bread recipe** means understanding the science. I’ve spent years experimenting with hydration levels and proofing times to ensure your loaf rises beautifully and stays shelf-fresh for days. Check out my background here: I’ve been deep in the world of baking, and this technique is what sets true Shokupan apart.
Why This Foolproof Japanese Milk Bread Recipe Delivers Cloud Bread Texture
What makes this **japanese milk bread recipe** different from regular sandwich bread? It all comes down to a little piece of magic called Tangzhong. Honestly, before I tried this, my homemade loaves were good, but they weren’t *great*. They just didn’t have that incredible moistness that lasts past day one. This technique is the entire reason we achieve that ethereal **cloud bread texture**.
The science isn’t complicated, I promise! It just requires one extra, small cooking step at the beginning. It sounds fussy, but trust me, it pays off huge dividends in the final loaf.
Understanding the Tangzhong Bread Tutorial
So, what is Tangzhong? It’s basically a thick paste or roux made by cooking a small portion of the designated flour and liquid from the recipe. When you cook that flour slurry, you’re gelatinizing the starches. These cooked starches can hold way more moisture than uncooked flour can! That means that the cooked Tangzhong acts like a tiny moisture sponge baked right into your dough. This is how your **japanese milk bread** stays soft and fluffy for days longer than bread made the standard way.
Achieving the Soft Fluffy Bread Crumb
When you pull this loaf out, you’ll see exactly what I mean. It’s so tender you almost don’t want to touch it! It’s not light and airy like an angel food cake; it’s dense, resilient, and wonderfully springy. If you press down gently, it will slowly bounce back. That’s the sign of a perfect rise and great gluten development. This method is absolutely the secret to getting incredible **Shokupan at home** without needing professional bakery equipment.
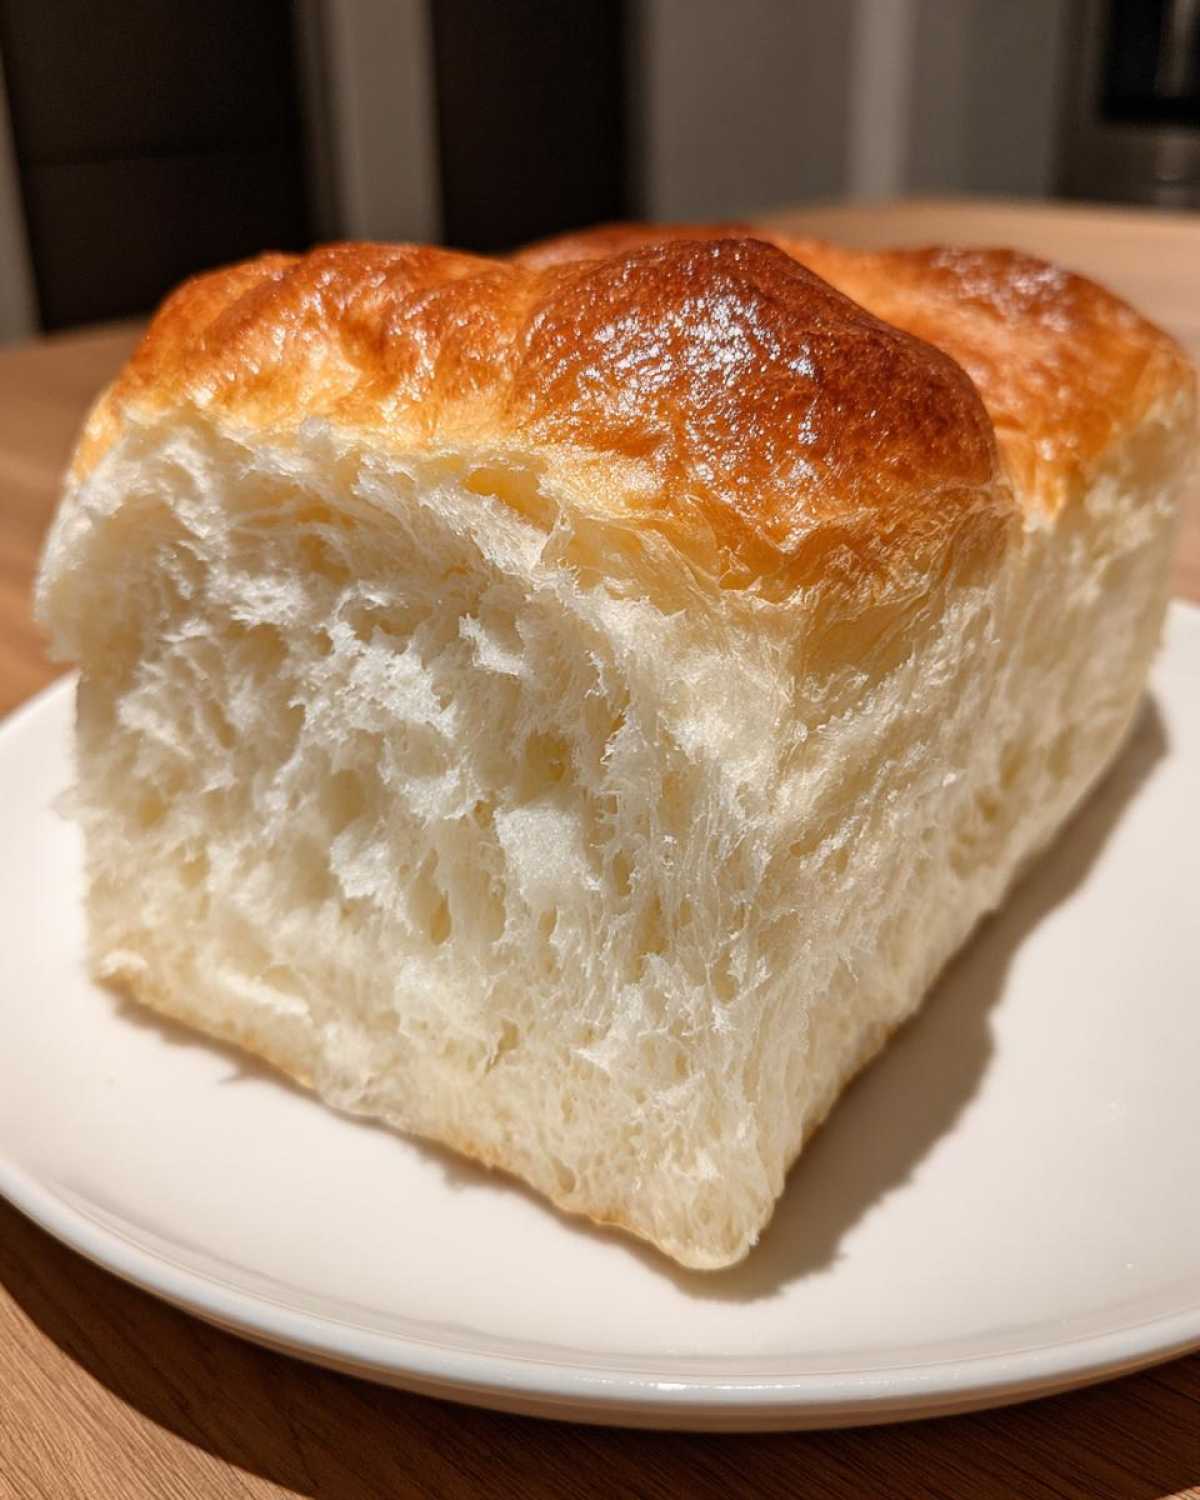
Ingredients for Your Japanese Milk Bread Loaf
Alright, gather your supplies! Making this amazing **japanese milk bread** is surprisingly straightforward once you have everything measured out. Don’t let the two groups—the Tangzhong ingredients and the main dough ingredients—intimidate you. They are all going into the mixer shortly! We need precise ingredients here, especially when developing that perfect structure, so measure carefully. These quantities give you one beautiful, impressive loaf.
- 60g Bread Flour (this is just for the starter paste!)
- 240ml Whole Milk (for Tangzhong)
- 300g Bread Flour (for your main dough)
- 100g Milk (the rest of the liquid for the dough)
- 50g Granulated Sugar
- 1 teaspoon Instant Dry Yeast
- 1 teaspoon Salt
- 30g Unsalted Butter, softened (make sure it’s soft, not melted!)
- 1 large Egg
Ingredient Notes and Substitutions for Tender Butter Bread
To get that signature stretch that makes **japanese milk bread** so unique, you absolutely need bread flour. It has higher protein content, which builds the strong gluten network necessary for the windowpane test. Don’t try to swap this for all-purpose flour if you want that towering rise; it just won’t hold up as well against the moisture from the Tangzhong.
Also, use whole milk whenever possible! The fat content really contributes to that rich, soft mouthfeel we are aiming for in this **tender butter bread**. If you use low-fat milk, you might lose a little bit of that plush quality. If you’re making **milk bread rolls** instead of a loaf, those ratios still hold up beautifully!
Step-by-Step How to Make Shokupan Using the Tangzhong Method
Now for the part where the actual baking magic happens! This process requires a little patience, but remember, we are building structure step-by-step to ensure an **incredibly soft loaf**. Follow these steps precisely, especially around the cooling of the Tangzhong, and your **japanese milk bread** will be a showstopper. I’ve made a few mistakes in my time, like rushing the cool-down, which led to a slightly heavy dough. Don’t let that happen to you!
We start by creating that starter paste before moving into the mixer for the main dough. You can check out some of my general baking thoughts and tips over on my main blog page, but for now, let’s focus on these results!
Preparing the Essential Tangzhong
Grab a small saucepan for Step 1, that’s where we make our starter. Whisk together that small bit of bread flour and 240ml of milk until it looks perfectly smooth—no lumps allowed! Then, you gently heat this mix over medium-low heat. You cannot walk away from this part! You need to stir constantly until it gets thick. I look for the moment where it coats the back of my spoon, and if I drag my finger across the spoon, the line stays clean and doesn’t immediately blend back together. That usually means we hit around 140°F (60°C). Once it’s thick, kill the heat! The absolute most important rule here is that you must cover the surface directly with plastic wrap before letting it cool down completely. Seriously, if you don’t cover the top, you get a weird skin, and that’s not what we want in our **japanese milk bread**!
Mixing and Kneading for the Pillowy Sandwich Loaf
Once that Tangzhong is stone-cold—I often just pop it in the fridge to hurry things along—we move to the stand mixer. Whisk your main dry flour, sugar, yeast, and salt into the bowl first. Then, dump in that cooled paste, the remaining milk, and the egg. Mix it low until it’s just a messy collection of clumps, which we call a shaggy dough. Now, we knead! After about five minutes, add that softened butter—don’t forget it! Continue kneading for another 8 to 10 minutes. You are aiming for the gluten to be perfectly developed. The proof of success is the famous **windowpane test**: you should be able to stretch a small piece of the dough thin enough to see light through it without it tearing. That perfect elasticity is what makes this a **pillowy sandwich loaf**.
Proofing and Shaping Your Japanese Milk Bread Loaf
Time for the dough to rest and build flavor. Pop the dough into a lightly oiled bowl, cover it, and let it double in size. This first proof usually takes about an hour to 90 minutes, depending on how warm your kitchen is. When it’s ready, gently deflate it—don’t punch it down aggressively, we don’t want to crush all that air we just built! Divide the dough into three equal chunks. Your goal is to roll each piece tightly into a small log. They should feel taut. Then, you arrange those three logs side-by-side in your greased 9×5 inch loaf pan. They need another nap now—the second proof. Cover it again and watch patiently; you want the dough to rise until the top domes about one inch over the edge of the pan. This intense second rise is what gives your **japanese milk bread** that incredible height!
Baking and Cooling Your Incredibly Soft Loaf
We’ve kneaded, we’ve proofed, now it’s time to bake your **japanese milk bread**! Preheat the oven to 350°F (175°C). Slide that perfectly crowned loaf onto the middle rack. You’re looking for about 30 to 35 minutes of baking time until the top is a beautiful golden brown. Don’t just rely on the color, though! For expert results—and to truly confirm that structure is set—stick an instant-read thermometer right into the center. When it hits 200°F (93°C), it’s done! That little peek inside shows you the crumb is fully cooked.
The very last step is crucial for keeping your **incredibly soft loaf** perfect. Don’t let it sit in that hot metal pan! Immediately turn the loaf out onto a wire cooling rack. If you leave it in the pan, the residual heat traps steam underneath, and you’ll end up with a sad, soggy bottom. We worked too hard for a soggy bottom on this **soft fluffy bread**! Let it cool completely before slicing; I know it’s tough to wait, but trust me, slicing it hot messes up those gorgeous internal strands.
Tips for Perfect Shokupan at Home
You’ve mastered the Tangzhong, you’ve kneaded until your arms ached, and you’ve got a beautifully risen loaf. Fantastic! But before you slice into this **japanese milk bread**, here are a few extra tricks I’ve picked up over the years to guarantee those bakery-quality results every single time you make **shokupan at home**. These little details, inherited from seasoned bakers, make the difference between good bread and *the best* bread.
First, let’s talk crust. If you want that classic, deep golden, slightly shiny top that professional **bakery style bread recipe** loaves have, you need an egg wash! Just whisk one egg yolk together with about a teaspoon of milk. Before the loaf goes into the oven for its final bake, gently brush this mixture all over the top. Don’t let it glob too thickly in the crevices, just a light, even coat. It transforms the look entirely, making your **incredibly soft loaf** look like it came straight from a Japanese bakery case. For more great baking ideas, especially for breakfast treats, you can check out what I’ve been whipping up lately in my breakfast category.
If your final loaf comes out a little dense, even though you thought you kneaded enough—don’t fret. Often, this happens because the dough got too cold during the first rise, slowing down the yeast activity too much. On a cold day, I always warm my mixing bowl slightly with hot water first, or I use the oven with *just* the light on to create a cozy proofing spot!
Variations: Making Milk Bread Rolls
Not every day calls for a giant loaf, right? Sometimes you just want individual, fluffy delights perfect for grabbing on the go. Good news: this recipe pivots beautifully into **milk bread rolls**! Take the dough right after Step 7—instead of placing the three logs in the loaf pan, divide the entire dough batch into 8 or 9 equal portions.
Roll each portion into a smooth, tight ball. Arrange them snuggly in a lightly greased square baking dish, making sure they are touching a little bit. Because the rolls are smaller and have more surface area exposed to the heat, they will bake much faster than the loaf. Keep an eye on them! They usually take only about 20 to 25 minutes. They bake up into these adorable, pull-apart clouds that are incredible straight from the oven.
Serving Suggestions for Your Japanese Milk Bread
Now comes the hard part: resisting the urge to eat the whole loaf immediately! That soft, buttery interior is just begging to be used. My absolute favorite way to enjoy this **japanese milk bread** is lightly toasted. Because it’s so moist, it toasts evenly without drying out—perfect for slathering with butter and jam. It makes the most amazing, slightly sweet base for breakfast toast.
But wow, does this shine in sandwiches! Forget soggy bread; this **pillowy sandwich loaf** structure holds up to savory fillings or thick spreads. Think egg salad or creamy peanut butter. If you are looking for other bakery-style recipes that really wow a crowd, check out these apple turnovers—but the bread is perfect on its own too!
Storage and Reheating Instructions for Bakery Style Bread Recipe
You’ve finished the loaf, and now it’s time to protect that amazing softness we worked so hard to create. With the Tangzhong method built right in, this **japanese milk bread** is designed to stay fresh longer, but you still have to treat it right! This bread, being so rich in moisture, dries out if left unprotected on the counter for too long. It’s my personal challenge to keep it soft for at least four days!
When it comes to room temperature storage, freshness is all about sealing out that enemy: air! Do not store this bread in the plastic bag it came in if it was bakery-bought—that traps humidity and makes the crust soggy. Instead, wait until the bread is completely cool, then wrap the entire loaf tightly in plastic wrap. Two or three tight layers is best. Keep it at cool room temperature, away from direct sunlight. Stored this way, you should enjoy that **incredibly soft loaf** texture for three to four days. It truly lasts!
If you know you won’t finish it within four days, you absolutely must freeze it. Freezing halts the staling process completely. Slice the entire loaf first, which means you don’t have to try chipping away at a frozen rock later! Wrap the slices tightly in plastic wrap, and then slide the whole package into a heavy-duty freezer bag, squeezing out as much air as you can. It freezes beautifully for up to three months.
Reheating is what brings back that fresh-baked flavor instantly. If you’re grabbing a frozen slice, tear off the plastic and pop it directly from the freezer onto a toaster setting—it works great! If you have the whole loaf stored at room temperature and it’s starting to feel a tiny bit less pillowy, just sprinkle a few drops of water over the crust, wrap it loosely in foil, and pop it into a 300°F (150°C) oven for about 10 minutes. The steam from the foil rehydrates the crust while the bread warms through. When you unwrap it, you’ll swear you just pulled a fresh **bakery style bread recipe** loaf out of your oven!
Frequently Asked Questions About Japanese Milk Bread
I get so many questions about getting this **japanese milk bread** just right, and honestly, it makes me so happy that everyone is excited to try their hand at **easy japanese baking**! I tried to cover everything in the steps above, but sometimes those little lingering questions pop up. Here are the ones I hear most often from fellow bakers trying to achieve that perfect **soft fluffy bread** at home.
Can I use the Yudane Method instead of Tangzhong?
That’s a great question! Yes, you absolutely can swap them out, and many people love the **Yudane Method Baking**! Yudane is technically simpler because you pour boiling water over the flour mixture instead of cooking it on the stove. Both methods achieve gelatinization, which is why they produce such fantastic results for **shokupan at home**. The Tangzhong method typically yields a slightly more moist and tender crumb, which is why I recommend it for this recipe, but Yudane is a fantastic, quicker alternative if you’re in a hurry!
Why didn’t my loaf rise properly?
Oh, that’s the worst feeling! If your **japanese milk bread** loaf didn’t rise—or didn’t spring up in the oven—it usually boils down to two things. First, check your yeast! Instant yeast doesn’t last forever. Make sure it’s active by maybe proofing it for five minutes in a little warm water and sugar before adding it to the main mixture. Second, check the temperature during proofing. If it’s too cold, those yeasties get lazy and won’t produce enough gas for that **pillowy sandwich loaf** height. Try to keep your kitchen warm—around 80°F (27°C) is perfect for a happy rise!
How long does this bread stay soft?
This is where the Tangzhong really shines! Because the cooked starch holds onto moisture so well, this bread stays remarkably soft far longer than standard white bread. If you wrap it up tightly (remember my advice on double-wrapping it in plastic wrap?), you can usually count on it being soft and pliable for a good three to four days at room temperature. After that, it’s fantastic frozen, too! This long freshness window is one reason it’s my go-to **bakery style bread recipe**.
What’s the difference between this and Hokkaido Milk Bread?
That’s an insider question! Honestly, for most home bakers, there’s very little difference once you use the Tangzhong method. **Hokkaido Milk Bread** is traditionally known for being enriched with even more dairy or cream, making it perhaps slightly richer than the standard Shokupan. However, this recipe, using whole milk and butter, gives you that gorgeous richness and unparalleled softness that defines the Hokkaido style, so you’re getting the best of both worlds!
If you need any more help troubleshooting your bake or just want to say hello, feel free to reach out through my contact page!
Estimated Nutritional Data for Easy Japanese Baking
For those of you tracking macros or just curious about what goes into this rich, beautiful **japanese milk bread**, here’s the breakdown. Since we are focusing on that **tender butter bread** texture, it’s slightly more decadent than a lean dough, but packed with rewarding flavor! Please remember these are just estimates based on the ingredients listed above for one full loaf.
- Serving Size: 1 slice
- Calories: 180
- Fat: 5g
- Protein: 6g
- Carbohydrates: 28g
For more specific information regarding data usage and sourcing, please refer to my site disclaimer.
PrintFoolproof Japanese Milk Bread (Shokupan) using Tangzhong
Make incredibly soft, fluffy, and cloud-like Japanese Milk Bread at home using the Tangzhong method for a tender crumb.
- Prep Time: 30 min
- Cook Time: 35 min
- Total Time: 185 min
- Yield: 1 loaf
- Category: Baking
- Method: Baking
- Cuisine: Japanese
- Diet: Vegetarian
Ingredients
- 60g Bread Flour (for Tangzhong)
- 240ml Whole Milk (for Tangzhong)
- 300g Bread Flour (for main dough)
- 100g Milk (for main dough)
- 50g Granulated Sugar
- 1 teaspoon Instant Dry Yeast
- 1 teaspoon Salt
- 30g Unsalted Butter, softened
- 1 large Egg
Instructions
- Prepare the Tangzhong: Whisk the 60g bread flour and 240ml milk in a small saucepan until smooth. Heat over medium-low, stirring constantly, until the mixture thickens significantly, reaching about 140°F (60°C). It should coat the back of a spoon. Remove from heat, cover the surface directly with plastic wrap, and let it cool completely.
- Combine Dry Ingredients: In a large bowl or stand mixer, whisk together the 300g bread flour, sugar, yeast, and salt.
- Add Wet Ingredients: Add the cooled Tangzhong, the remaining 100ml milk, and the egg to the dry ingredients. Mix on low speed until a shaggy dough forms.
- Knead: Increase the speed to medium-low and knead for 5 minutes. Add the softened butter and continue kneading for another 8 to 10 minutes until the dough is smooth, elastic, and passes the windowpane test.
- First Proof: Place the dough in a lightly oiled bowl, cover, and let it rise in a warm place until doubled in size, about 60 to 90 minutes.
- Shape the Loaf: Gently deflate the dough. Divide it into three equal pieces. Roll each piece into a tight log. Place the three logs side-by-side in a greased 9×5 inch loaf pan.
- Second Proof: Cover the pan loosely and let it rise again in a warm spot until the dough has crowned about 1 inch over the rim of the pan, about 45 to 60 minutes.
- Bake: Preheat your oven to 350°F (175°C). Bake for 30 to 35 minutes, or until the top is golden brown and the internal temperature reaches 200°F (93°C).
- Cool: Immediately remove the bread from the pan and cool completely on a wire rack before slicing.
Notes
- For an extra shiny crust, brush the top of the loaf with a mixture of 1 egg yolk and 1 teaspoon of milk before baking.
- If you prefer rolls instead of a loaf, divide the dough into 8 or 9 smaller pieces and arrange them in a square baking dish.
- The Tangzhong must be completely cool before adding it to the main dough mixture.
Nutrition
- Serving Size: 1 slice
- Calories: 180
- Sugar: 7
- Sodium: 150
- Fat: 5
- Saturated Fat: 3
- Unsaturated Fat: 2
- Trans Fat: 0
- Carbohydrates: 28
- Fiber: 1
- Protein: 6
- Cholesterol: 30