

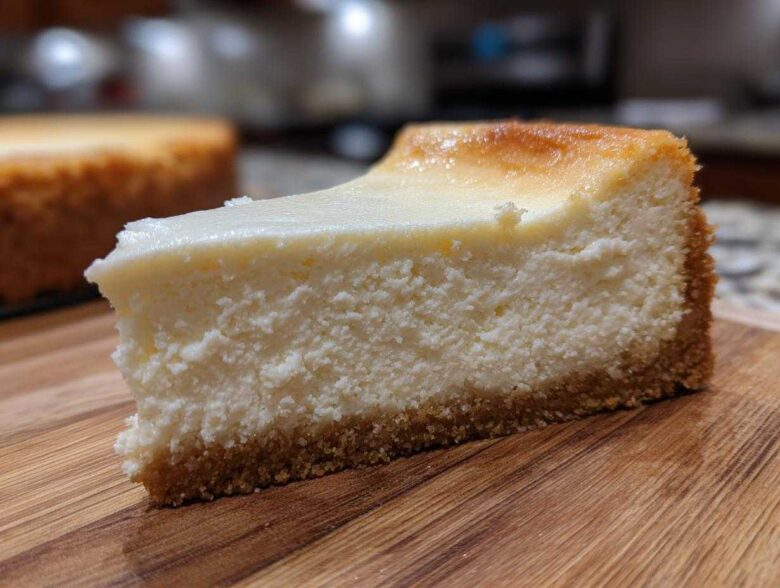
Look, I’m going to be honest with you: making a truly spectacular classic dessert like a true New York cheesecake used to intimidate me. I burned the edges, I worried about the dreaded crack, and my fillings were never quite dense enough. But after years of messing around, trying every trick from those fancy baking shows, I finally cracked the code! This isn’t just any recipe; this is the definitive blueprint for a perfectly tall, impossibly creamy, and velvety new york cheesecake. Trust me, once you nail the slow cooling technique, you’ll wonder why you ever feared this showstopper dessert. It’s rich, it’s decadent, and it’s yours to master today!
Why This Is the Best Creamy Cheesecake Recipe
What sets this recipe apart from all the others? Well, it’s all about structure and texture, isn’t it? We aren’t making a light, fluffy dessert here. We’re aiming for that signature New York density—something so rich it practically melts on your tongue. This method guarantees a taller bake, which just makes it look amazing on the counter.
Honestly, finding the Best Creamy Cheesecake is all about following the cooling instructions exactly. The water bath sets the edges perfectly, and the slow cool-down means you get that velvety smooth top without any unsightly cracks. It’s the simple steps that make all the difference in delivering a showstopper every single time.
Ingredients for Your Classic New York Cheesecake Recipe
Okay, let’s talk ingredients! For a genuine new york cheesecake, you absolutely cannot rush the prep work on your filling ingredients, and I mean this from the bottom of my heart. If your cream cheese or eggs are even slightly chilly, you might end up with lumps, and we are shooting for that glorious, smooth texture here!
Take everything out at least two hours before you plan to mix. This is my absolute number one rule for an easy, lump-free batter. Using full-fat ingredients, please promise me that! It makes all the difference in getting that dense, rich quality that defines this dessert.
For the Buttery Graham Cracker Crust
- 1 1/2 cups graham cracker crumbs
- 1/4 cup granulated sugar
- 6 tablespoons unsalted butter, melted
When you mix this up, make sure that butter coats every single crumb. You want it to feel like damp sand. Then, press it firmly into that springform pan—really push it down so you have a solid foundation for your tall cheesecake!
For the Rich Cream Cheese Filling
- 4 (8 ounce) packages full-fat cream cheese, softened
- 1 1/2 cups granulated sugar
- 1/4 cup all-purpose flour
- 1 teaspoon vanilla extract
- 1/4 teaspoon salt
- 1/4 cup heavy cream
- 4 large eggs, room temperature
- 1 large egg yolk, room temperature
See those eggs? Room temperature! Repeat after me: room temp eggs blend beautifully, resulting in a Dense and Velvety Cheesecake. We keep the flour low to prevent it from drying out, and that little bit of heavy cream just adds richness. Don’t skip that extra yolk either; it’s the secret to that perfect, almost custardy mouthfeel in the finished product.
Step-by-Step Instructions for Homemade New York Style Cheesecake
We’re officially done prepping! Now it’s time for the real magic. Since we took our time getting those ingredients right, this next part is actually pretty straightforward, which is why I call this a foolproof cheesecake recipe. Just follow these steps exactly, and you’ll feel like a professional baker when you pull this beauty out of the oven.
Preparing the Crust and Preheating
First things first, we need to wrap that pan. Grab heavy-duty foil—and I mean heavy-duty! Wrap your 9-inch springform pan completely, bottom and sides. This shield is everything because it keeps water from your bath seeping in while creating the perfect cozy environment for your new york cheesecake.
Press your crust mixture firmly into the bottom and bake it at 350 degrees F for just 10 minutes. Once that’s done, pull it out, let it cool a touch, go ahead and drop the oven temperature down to 325 degrees F. We want a gentle bake next time!
Mixing the Smooth Filling for Your New York Cheesecake
Remember how smooth we needed that cream cheese? Now we start layering things in carefully. Beat that softened cream cheese until it looks like clouds—no lumps allowed! Scrape the bowl down obsessively; don’t let any cream cheese hide out on the sides.
Now, add the sugar and flour mixture, mixing just until it comes together. The most critical part? Adding the eggs and that single yolk one by one. Use the absolute lowest speed on your mixer, and stop mixing the second you see the yellow disappear. Seriously, if you overbeat once the eggs are in, you’re whipping air in, and that air expands and then collapses, which leads directly to those dreaded cracks! We are striving for those treasured No Crack Cheesecake Instructions being followed to the letter.
Baking the Tall Cheesecake Recipe with a Water Bath
Time to build the water bath, which is key to achieving that impressive height and creamy interior. Set your foil-wrapped springform pan inside a larger roasting pan. Then, carefully pour hot water into the roasting pan until it comes about halfway up the sides of your cheesecake pan. This steamy environment ensures the heat is even and gentle.
Bake at 325 degrees F for about 60 to 75 minutes. You’re looking for the edges to be firm, but when you gently nudge the pan, the center two inches should still have a slight, beautiful wobble. It’s baking, but it’s not quite done setting—that’s perfection!
The Secret to No Crack Cheesecake Instructions: Slow Cooling
Alright, listen up, because this next part is non-negotiable. If you skip this slow cooling sequence, you might as well have saved yourself the effort of wrapping the pan! We’ve done all the hard work making that gorgeous, rich batter for our new york cheesecake, and we cannot shock it just as it’s finishing up.
The temperature shock is what causes the proteins in the cream cheese filling to seize up too quickly, leading to those awful fissures right across the top. We need to gently transition it from ‘hot oven time’ to ‘refrigerator time.’
Here’s my foolproof technique that guarantees a perfectly smooth, uncracked surface:
First, when that wobble test passed (edges set, center jiggling slightly), turn the oven OFF. Don’t touch the temperature setting, just kill the heat source.
Second, prop the oven door open about two inches. I always use a thick wooden spoon handle for this—just wedge it in securely so the heat can slowly escape. Think of it as giving your cheesecake some air to breathe as it chills out.
Leave it in there like that for a full sixty minutes. Sixty minutes of gentle, residual warmth. This slow decrease in temperature is the key to the whole experience!
Once that hour is up, you can carefully remove the pan, take off all that foil—isn’t that satisfying?—and set it on a wire rack to finish cooling to room temperature. Only once it’s totally cool to the touch do you cover it and slide it into the fridge for its mandatory overnight nap. That patience pays off, trust me, every single time!
Tips for Success When Making Your Ultimate Cheesecake Dessert
You’ve nailed the baking, and you survived the slow cool-down—you’re practically a cheesecake legend! But before you slice into that gorgeous creation, there are just a few insider tips I rely on whenever I make this ultimate cheesecake dessert to ensure it tastes exactly right.
First off, let’s revisit ingredient temperature. We talked about room temperature earlier, but it bears repeating: if your cream cheese is cold, you will get lumps. Cold ingredients don’t emulsify properly. They resist mixing, and that uneven texture shows up big time when you cut that first slice. Make sure those bricks of cream cheese are genuinely soft when they hit the bowl.
Second, please, please do not skip the water bath. I know it seems like extra work, and yes, you have to wrap that pan like you’re shipping fragile glassware, but that steam is the difference between a dry, cracked top and that beautiful, dense, creamy fulfillment we are after. The water bath is the master key to the new york cheesecake experience.
And finally, we need to talk about chilling. This is where people always get impatient! You cannot just let this set on the counter for an hour and slice it. That custard needs time to firm up completely under refrigeration. I aim for a minimum of eight hours, but honestly? Making it the day before is the best move you can make.
When it’s chilled overnight, the flavor deepens—it just tastes more refined, more sophisticated, if that makes sense. Plus, it guarantees those clean, beautiful slices. Nobody wants a sloppy slice of cheesecake when they’re expecting that classic New York slice!
Ingredient Notes and Substitutions for New York Cheesecake
Let’s quickly dive into the ingredients one more time because when you’re making something as legendary as the new york cheesecake, the quality of what goes in really dictates what comes out. I’ve had a few friends try to tweak this classic because they ran out of something, and trust me, it never ends well.
The biggest point of contention always seems to be the cream cheese. I cannot stress this enough: you must use the blocks of full-fat cream cheese. Don’t even think about those whipped tubs or the low-fat versions! Those versions have too much water content. If you mess with the fat ratio, you fundamentally change the chemical structure needed to achieve that signature dense, almost buttery texture. We need the full, glorious fat content for that smooth result!
If you’re curious about the crust, though, sometimes those easy graham crackers are hard to find. While I prefer them because they give the best texture, if you’re stuck, you can sometimes use crushed vanilla wafers or even shortbread cookies. Just remember, you’ll probably need to adjust the sugar down a tiny bit in the crust mix since shortbread is already sweetened. But for the filling? Stick to the plan!
If you’re interested in learning more about other fantastic pastries you can make at home, check out these apple turnovers recipes I’ve tested. It’s always fun to switch gears in the kitchen!
Serving Suggestions for Your Showstopper Cheesecake
Congratulations! You’ve made it through the bake, the slow cool, and the long chill. Now, the fun part: deciding how you want to present this ridiculously creamy new york cheesecake. I know you are staring at that perfect, untouched surface, and you might feel guilty slicing into it, but trust me, it’s meant to be eaten!
For me, the very best way to present this dessert is actually the simplest way. Why hide perfection? A plain slice—maybe slightly warmed if you prefer it that way, though I usually like it straight from the fridge—is divine on its own. The richness of the cream cheese and the buttery crust speak for themselves. If you want to see my favorite way to serve something completely different, check out this amazing chicken caesar pasta salad recipe—it’s a totally different vibe, but equally impressive!
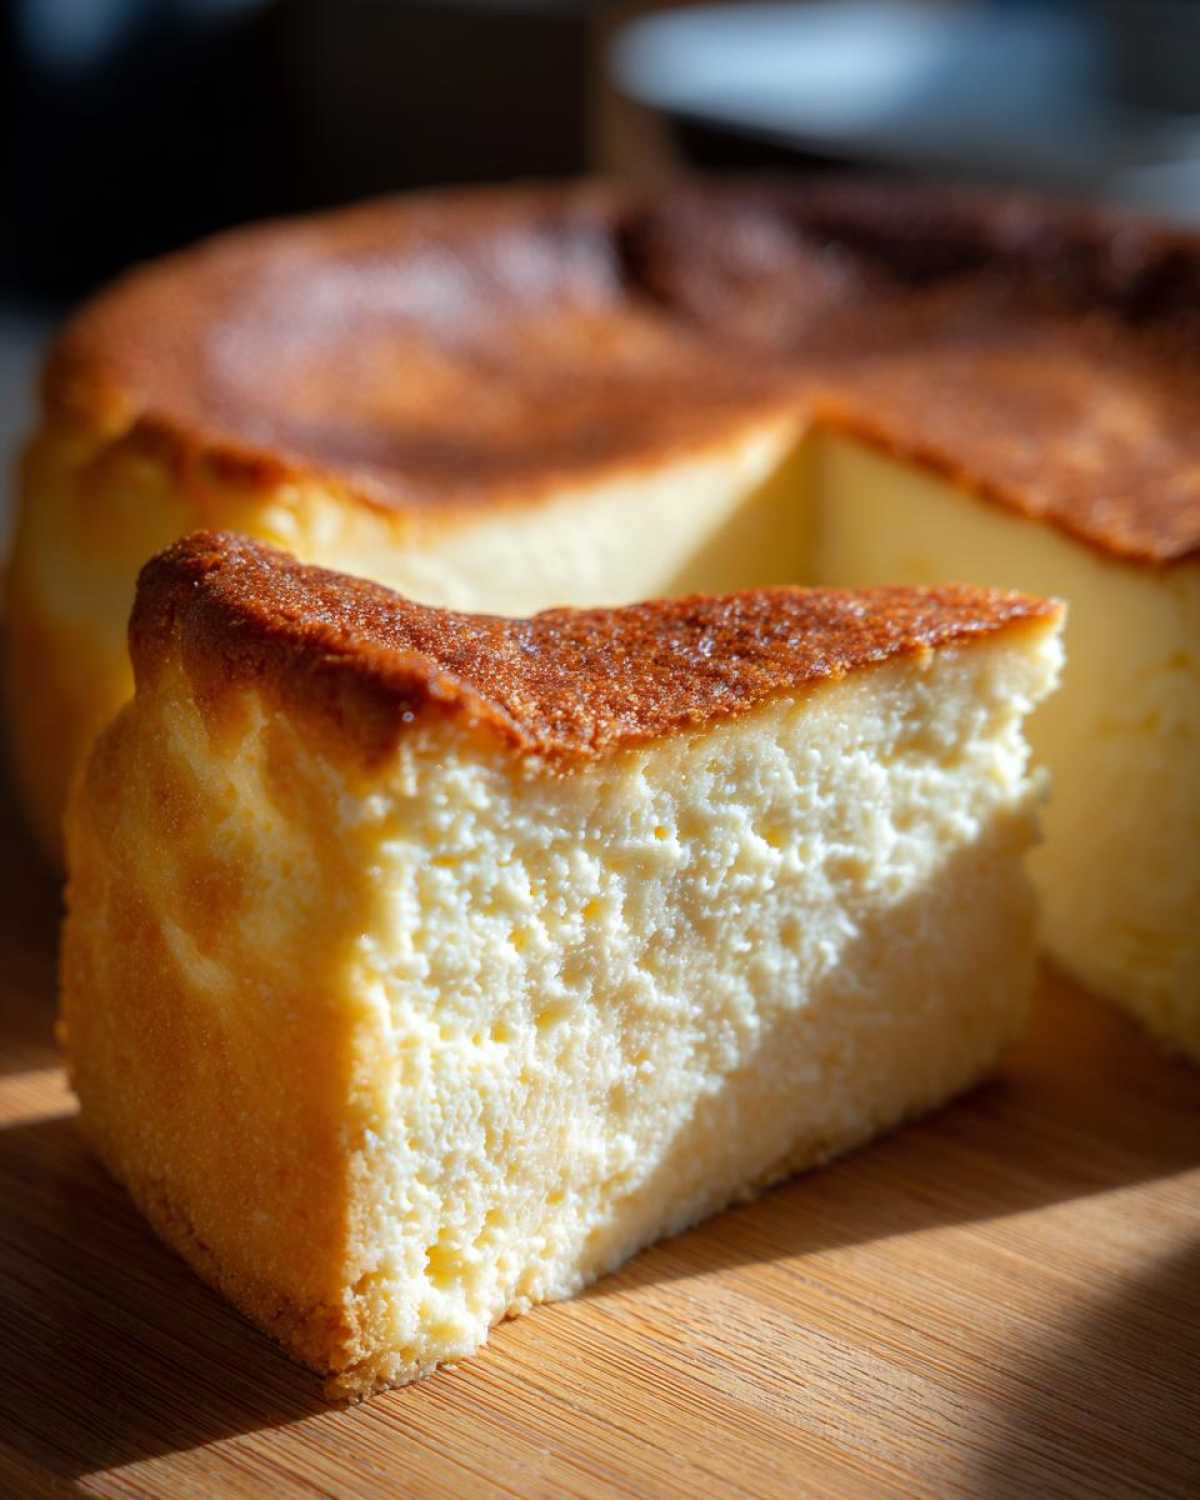
However, if the occasion demands a little topping, you don’t want anything too heavy that fights with that tangy, dense flavor. Here are the three ways I always serve my cheesecake:
The Classic Sour Cream Topping: This is truly timeless, and it adds a lovely, gentle tanginess back to the richness of the filling. You just whisk a cup of sour cream with two tablespoons of sugar and a splash of vanilla. You spread this gently over the *chilled* cheesecake about 30 minutes before serving. It cools down the slight heat your room temperature slice might have picked up, keeping that perfect cold snap.
Fresh Berry Compote: If you want color and brightness, you can’t beat fresh fruit. I highly recommend quickly simmering some gorgeous raspberries or mixed berries with a little sugar until they just start to break down into a light syrup. Let that cool completely—hot topping on cold cheesecake is a disaster, believe me! The tartness of the berries cuts through the richness so beautifully.
A Drizzle of Simple Caramel: Keep it restrained here. Use a high-quality, small-batch caramel sauce, and just drizzle it lightly over the serving plate or top of the slice. A tiny, contrasting salty note against that sweet, smooth filling is divine. Remember, this is the star of the show; any topping is just there to whisper hello to the flavor, not shout over it!
Storage and Reheating Instructions for Leftover New York Cheesecake
Now this is going to sound scary, but stay with me: this fantastic new york cheesecake really doesn’t like being reheated. At all! It’s such a delicate, dense custard structure that trying to warm it back up usually just causes it to weep or, worse, get grainy. Trust me on this one—save your energy, because this cake is honestly better cold.
The main thing you need to focus on is storage, because you want to keep that creamy texture locked in for as long as possible. Once you’ve chilled it overnight and sliced into it, the top might dry out slightly if left uncovered in the fridge.
Here’s my protocol for making sure those leftovers taste almost as good as Day One:
- Covering is Key: Once you cut into the cake, take plastic wrap and gently press it directly onto the exposed cut surface of the cheesecake. Don’t just drape it over the top of the whole thing! You want that plastic touching the filling to prevent a skin from forming. Cover the entire springform pan (or whatever container you put the leftovers in) loosely after that initial direct cover.
- Fridge Dweller: Keep it refrigerated! Cheesecake hates room temperature for long periods once it’s cut. The cold temperature keeps that dense structure firm and luxurious.
- How Long Does It Last?: You can safely keep leftovers stored this way for about four to five days. If you find yourself having to push past five days, it’s better to toss it, although honestly, my family usually devours it faster than that!
If someone absolutely insists on having a slice that isn’t ice-cold, I have a mild compromise for you, but you have to be gentle. Take the slice you want about 20 minutes before you plan to eat it and set it on a small plate on the counter. This just takes the sharp refrigerator chill off, allowing the flavors to bloom slightly without warming it up enough to lose its form. If you absolutely must use heat—and I mean *must*—try setting a slice on a microwave-safe plate and warming it on the absolute lowest power setting (like 20% power) for just 10 seconds at a time. Watch it like a hawk! That’s the closest you’ll get to warming this rich cream cheese filling without ruining all the hard work!
Frequently Asked Questions About This Timeless Dessert Recipe
I get so many amazing messages asking about the finer points of baking this cheesecake. It’s wonderful that everyone is trying to make their own Easy New York Cheesecake From Scratch! Here are some of the most common questions I get about humidity, texture, and flavor.
Can I make this new york cheesecake without a water bath?
Oh, honey, I wish you could, but no! This is where we have to draw the line on substitutions. If you want that incredibly dense, creamy texture and those guaranteed No Crack Cheesecake Instructions to work, you simply have to use the water bath. Think about it: the oven is dry, and the water bath creates this perfectly humid, even cooking environment. Without it, the edges cook way faster than the center, and that thermal shock is what causes the top to bake too fast and then ultimately crack when it cools down. It’s the non-negotiable secret to that beautiful, smooth top!
How do I ensure my cheesecake has a tangy cheesecake flavor?
That beautiful, slightly sharp, refreshing flavor that makes the new york cheesecake so memorable? That comes almost entirely from the star ingredient: the cream cheese! You need to use the best, full-fat blocks you can find. Good quality cream cheese, especially if it has a slight natural acidity, will give you that signature, sophisticated tang.
The high fat content helps carry that flavor, too, contrasting perfectly with the sugar. There’s no need for a ton of lemon juice or sour cream in the main batter for this classic version—the tang comes naturally from the dairy itself. Just buy the good stuff, and the flavor profile handles itself!
If you need to reach out with more baking questions, please feel free to pop over to my contact page!
Estimated Nutritional Data for This Rich Cream Cheese Filling
Okay, real talk time. We are making an indulgence here, right? This new york cheesecake is rich, it’s dense, and frankly, it’s not sticking to any diet plan that counts every single calorie! But I think it’s important to know roughly what you’re getting into when you serve up a slice of this perfection.
I ran the numbers based on the ingredients list for a standard, medium-sized slice from the full recipe. Please remember these figures are based on using full-fat dairy and standard sugars—this is my best guess, not a lab analysis!
This is a showstopper, and sometimes you just need to embrace the delicious decadence. If you want to check out my disclaimer page for more info on food blogging standards, you can find it right here.
Here’s the estimated breakdown for one average serving:
- Serving Size: 1 slice
- Calories: 450
- Fat: 30g (That includes about 18g of saturated fat, because butter and cream cheese are essential!)
- Carbohydrates: 40g (Most of that is sugar, naturally—we use 1 1/2 cups for the filling alone!)
- Sugar: 35g
- Protein: 8g
- Cholesterol: 150mg
- Sodium: 300mg
See? It’s a treat! That’s why we insist on the slow cooling process, because every single calorie needs to be worth it, and a cracked, sad cheesecake just isn’t acceptable in my book. You deserve that perfect, creamy slice after all that care you put into wrapping the pan and mixing on low speed!
Share Your Perfect New York Cheesecake Experience
Whew! You did it! You tackled the water bath, you mastered the agonizingly slow cooling process, and you’ve likely been staring at that perfectly smooth, dense cheesecake in the fridge for hours waiting for the right moment to cut into it. I am so incredibly proud of you for taking on this culinary challenge!
Baking a true new york cheesecake really is about technique, and I want to hear all about your success! When you finally slice into it, tell me—did you get that beautiful, tall edge? Does it feel as velvety and rich as you dreamed? Did those careful, slow steps pay off with absolutely no cracks?
Sharing your results helps everyone else who is nervous about trying this recipe for the first time. Seriously, don’t be shy! Head down to the comments section below and tell me what you thought.
If you have any suggestions for toppings or ways you served it—maybe you went completely minimalist, or perhaps you tried a simple berry drizzle—I want to know! Every review helps me tweak and improve content here on the site, and nothing makes me happier than knowing I helped someone conquer a dessert they thought was too complicated.
If you want to read about my policies regarding privacy and how I keep this site running smoothly, you can check out the privacy policy, but honestly, right now, I’d much rather hear about the gorgeous cheesecake you just made!
Leave a rating, leave a comment, and let’s celebrate this amazing, creamy, timeless dessert you created!
PrintClassic Tall New York Cheesecake
A recipe for a dense, creamy, and velvety New York style cheesecake with a buttery graham cracker crust, designed to bake without cracking.
- Prep Time: 30 min
- Cook Time: 75 min
- Total Time: 10 hours 45 min
- Yield: 12 servings
- Category: Dessert
- Method: Baking
- Cuisine: American
- Diet: Vegetarian
Ingredients
- 1 1/2 cups graham cracker crumbs
- 1/4 cup granulated sugar
- 6 tablespoons unsalted butter, melted
- 4 (8 ounce) packages full-fat cream cheese, softened
- 1 1/2 cups granulated sugar
- 1/4 cup all-purpose flour
- 1 teaspoon vanilla extract
- 1/4 teaspoon salt
- 1/4 cup heavy cream
- 4 large eggs, room temperature
- 1 large egg yolk, room temperature
Instructions
- Preheat your oven to 350 degrees F. Wrap the outside of a 9-inch springform pan tightly with heavy-duty aluminum foil, covering the bottom and sides completely.
- Prepare the crust: Mix graham cracker crumbs, 1/4 cup sugar, and melted butter until evenly moistened. Press the mixture firmly and evenly into the bottom of the prepared springform pan.
- Bake the crust for 10 minutes. Remove from the oven and let it cool while you prepare the filling. Reduce the oven temperature to 325 degrees F.
- Prepare the filling: In a large bowl, beat the softened cream cheese with an electric mixer on medium speed until completely smooth. Scrape down the sides of the bowl.
- Add 1 1/2 cups sugar and flour to the cream cheese mixture. Beat until just combined. Do not overmix.
- Mix in vanilla extract and salt. Beat in the heavy cream until smooth.
- Add the eggs and the extra egg yolk one at a time, mixing on low speed after each addition only until the yolk disappears into the batter. Stop mixing as soon as the last yolk is incorporated.
- Pour the filling over the cooled crust. Smooth the top with a spatula.
- Bake using a water bath: Place the foil-wrapped springform pan inside a larger roasting pan. Carefully pour hot water into the roasting pan until the water reaches about halfway up the sides of the springform pan.
- Bake for 60 to 75 minutes. The edges should look set, but the center 2 inches should still wobble slightly when gently nudged.
- Turn off the oven. Prop the oven door open slightly (about 2 inches) using a wooden spoon. Let the cheesecake cool inside the turned-off oven for 1 hour. This slow cooling prevents cracking.
- Remove the cheesecake from the water bath and remove the foil. Let it cool completely on a wire rack at room temperature.
- Once cool, cover the pan loosely with plastic wrap and refrigerate for at least 8 hours, or preferably overnight, before serving.
Notes
- Use room temperature ingredients for the filling to prevent lumps and ensure a smooth texture.
- Do not overbeat the batter once the eggs are added; this incorporates air which causes cracking during cooling.
- The water bath provides moist, even heat, which is key to a creamy, dense texture.
Nutrition
- Serving Size: 1 slice
- Calories: 450
- Sugar: 35
- Sodium: 300
- Fat: 30
- Saturated Fat: 18
- Unsaturated Fat: 12
- Trans Fat: 0.5
- Carbohydrates: 40
- Fiber: 1
- Protein: 8
- Cholesterol: 150