

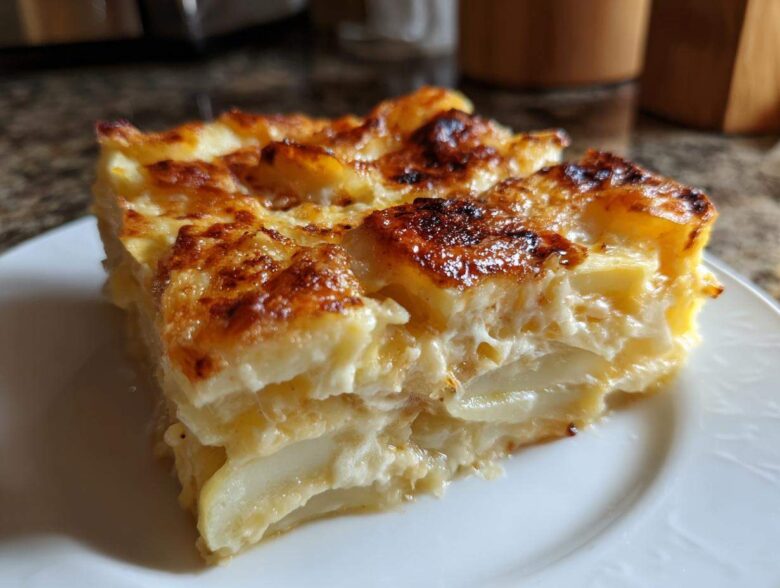
When the air gets crisp and everyone starts thinking about big family dinners, there’s only one side dish that truly satisfies that deep-down comfort craving: potatoes, smothered in cheese. Forget those bland, watery versions you might’ve tried years ago! I’m sharing my absolute favorite formula for the ultimate creamy cheesy scalloped potatoes. Trust me, this isn’t just a side dish; it’s the star of the show. This recipe is my absolute go-to for Thanksgiving, Christmas, and any night I need serious comfort food on the table. We’re making everything from scratch, and I promise you, the small effort is rewarded tenfold!
I’ve tweaked the sauce base over years of testing, and this version delivers perfectly tender layered potatoes bathed in a sauce so rich, you might need a nap afterward. We’re talking sharp Cheddar, salty Parmesan, and that perfect blanket of creamy goodness you dream about. You can check out some of my other kitchen adventures over at my kitchen story if you want to see how I developed this passion!
Why This Ultimate Creamy Cheesy Scalloped Potatoes Recipe Works (E-E-A-T)
Why mess with perfection? I think this recipe wins because we never cut corners on the sauce. We’re making a proper Béchamel base first—that requires a careful roux—before we even think about adding the cheese! This is what separates the truly marvelous best cheesy side dish from everything else. That creamy texture goal? It’s all about getting the potato slices uniformly thin so they cook evenly in that gorgeous liquid blanket.
It just screams quality, and that’s why I rely on it for big holiday spreads every year.
Achieving Tender Layered Potatoes Every Time
Listen, you absolutely need Russets for this job—they have the starch content to absorb all that lovely sauce without turning to mush. My biggest tip? If you own a mandoline, use it! You need those slices to be about 1/8 of an inch—paper thin. If your knife skills are spotty, don’t stress, but aim for consistent thickness. This consistency means every single piece of baked sliced potato cooks perfectly through, giving you that melt-in-your-mouth experience instead of some hard, undercooked layers hiding in the middle.
Ingredients for Perfect Creamy Scalloped Potatoes
Okay, so here’s what you’ll need to gather before you get started. Keep everything measured out; this way, when we start making that glorious cheese sauce, you won’t panic while you try to measure milk! The key players here are the Russets, obviously, but the star power comes from the cheese. We really need sharp Cheddar and good Parmesan for that truly fantastic cheesy potato bake payoff.
- 3 lbs Russet potatoes, peeled and thinly sliced
- 4 tablespoons unsalted butter
- 1/4 cup all-purpose flour
- 3 cups whole milk, warmed
- 1 teaspoon salt
- 1/2 teaspoon black pepper
- 1/4 teaspoon nutmeg (don’t skip this, I swear!)
- 1 cup sharp Cheddar cheese, shredded
- 1/2 cup Parmesan cheese, grated
- 1 clove garlic, minced
Make sure your milk is warm—it really helps the sauce come together smoothly without lumps. You can find some inspiration for what to pair these beauties with over in my weeknight dinner ideas section, but honestly, they’re perfect just on their own too!
Step-by-Step Instructions for Rich Potato Gratin
Alright, let’s get cooking! We start by getting the oven buzzing at 375°F, and make sure you grease that 9×13 dish—nobody wants stuck potatoes! Now, the most important bit: making the magic sauce for this rich potato gratin. You assemble this just like any classic creamy base before we load it up with cheese.
Creating the Homemade Cheese Sauce Base
We melt the butter in a saucepan, then whisk in the flour immediately—that’s our roux, the secret weapon for thickness! While stirring constantly, slowly drizzle in that warm milk. Keep whisking until it coats the back of your spoon nicely. Take it off the heat, and then stir in the salt, pepper, that tiny pinch of nutmeg, the garlic, and both cheeses until everything is melted and glossy. This builds the incredible foundation for our creamy potato casserole.
Assembling and Baking Your Scalloped Potatoes
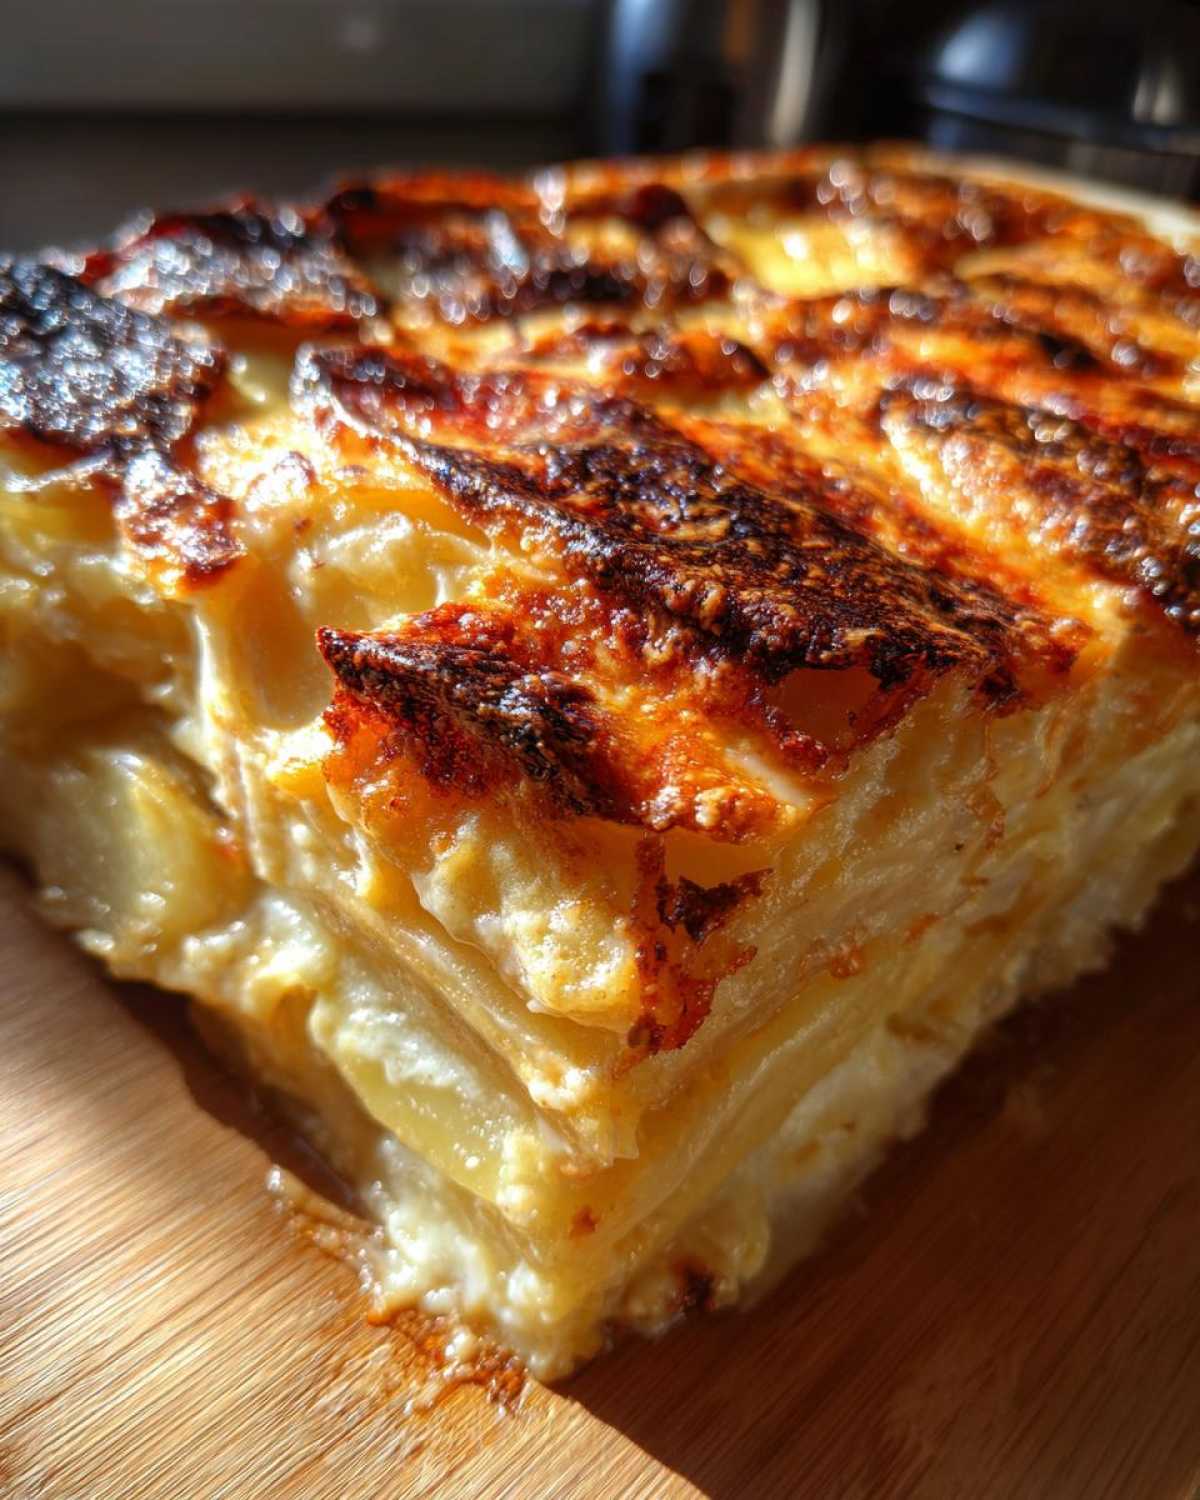
Time to layer! Put half of your thinly sliced potatoes into the prepared dish, pour half the sauce over them, and then repeat with the rest of the potatoes and the remaining sauce. Make sure those top layers are submerged as much as possible—they need that bath! Pop it into the oven and let it bake for around 50 to 60 minutes. You’re done when a fork slides through like butter and the top is looking beautifully golden brown. Don’t forget to let them settle for ten minutes before serving!
Tips for Make Ahead Scalloped Potatoes Success
If you’re hosting for the holidays, every minute counts on the actual serving day, right? That’s why I love that this recipe works so beautifully as a make ahead scalloped potatoes option. It is a total lifesaver!
Here’s my foolproof method: assemble the entire casserole exactly as the recipe says—potatoes layered, sauce poured over everything. Cover it tightly with plastic wrap or foil. You can tuck this beauty into the fridge for up to 24 hours. Don’t skip the foil, or the top might get a little dry.
When it’s ready to bake, pull it out of the fridge while you’re cleaning up from your morning chores to let it warm up slightly—about 30 minutes at room temperature. Then, pop it in the oven, but be patient; you’ll need to add an extra 10 to 15 minutes onto the standard baking time since it’s starting cold. You absolutely want that deep, bubbly, cheesy flavor that only slow baking provides. You can read all the fine print about my kitchen standards over at my disclaimer page, but trust me on this make-ahead trick!
Variations on Classic Scalloped Potatoes
Now, while I absolutely swear by the classic baked version we just covered, I know sometimes the oven is fully booked, especially on those big holiday cooking days. That’s where a little creativity comes in handy for these fantastic casserole side recipes!
If you’re looking for hands-off perfection, you have to try the slow cooker scalloped potatoes method. You layer everything exactly the same way—potatoes, sauce, cheese—but instead of baking, you cook on low for about four to five hours. It’s glorious because you get that super tender texture without drying out the edges.
If you want to change up the flavor slightly but keep that rich potato gratin feel, swap out some of your Cheddar for Gruyère. Gruyère melts beautifully and brings a slightly nutty, earthy tone that pairs wonderfully with thyme. I love sprinkling in about a teaspoon of fresh thyme leaves right when I add the cheese. You can get in touch with me via my contact page if you have any questions about swapping cheeses!
Serving Suggestions for Your Holiday Side Dish Potatoes
Because this dish is so unbelievably rich and decadent, you need to balance it out with your main course and sides. These holiday side dish potatoes are definitely for when you want to pull out all the stops! For Thanksgiving, they look heavenly next to a perfectly roasted turkey, or they shine just as brightly next to a glazed ham at Christmas.
When planning your plates, remember they are heavy hitters, flavor-wise. I always pair them with something bright and a little sharp to cut through that glorious cheese sauce. Think crisp green beans tossed with lemon zest, or perhaps some roasted Brussels sprouts that have a nice char on them. For a purely carnivorous pairing, my Greek Lemon Chicken Skewers offers a totally different, zesty profile that contrasts nicely with this cheesy potato bake. It makes for a fantastic Thanksgiving potato recipe that breaks up all the traditional squash and stuffing!
Frequently Asked Questions About Cheesy Potato Bake
It’s totally normal to have questions swirling around when tackling homemade layered potatoes! People ask me all the time how to tweak things or if they’re messing up. I’ve compiled a few of the most common ones I get about making the best cheesy side dish.
You can check the recipe details over on my privacy page if you want to review how I handle information, but let’s get these baking questions sorted out!
What is the difference between scalloped potatoes and potatoes au gratin recipe?
Oh, that’s a classic kitchen debate! Traditionally, true scalloped potatoes use just a simple white sauce, maybe just milk and a thickener, seasoned lightly. But honestly? Nobody makes those anymore because they lack that cheesy punch! My recipe definitely leans into the richer side—we’re piling on the sharp Cheddar and Parmesan. So, because we have that glorious cheese incorporated right into the sauce that bathes every layer, we are basically making a supremely creamy potatoes au gratin recipe disguised under a historic name. I just call them delicious!
Can I skip the roux step and just use cornstarch?
You totally can try it, but I have to warn you: the texture won’t be the same! The roux—cooking the flour into the butter first—is essential because it toasts the flour slightly and cooks out that raw flour taste. Cornstarch thickens faster, but it can sometimes create that slightly gelatinous, almost slimy texture when cooled and reheated. For that perfect creamy texture that holds up when you cut into it, stick with the butter and flour roux, I promise!
My sauce split after adding the cheese, what went wrong?
Ugh, that’s the saddest feeling when you see all that beautiful cheese break away into an oily mess! Usually, this happens if the sauce is too hot when you introduce the cheese, or sometimes if you use a low-quality cheese that isn’t finely shredded. The secret is taking the sauce completely off the heat—I mean, remove the saucepan from the burner—before stirring in that Cheddar and Parmesan. Stir gently until it melts. If all else fails, a gentle splash of very hot water or milk can sometimes bring an oily sauce back together!
Storage and Reheating Instructions for Scalloped Potatoes
Phew! If you managed to have any leftovers—which is a minor miracle in my house—don’t worry about drying them out the next day. These baked sliced potatoes actually taste even better the second day once the flavors have completely married!
For the fridge, just pop the leftovers into an airtight container. They’ll be good for about three or four days. When you want to reheat, the oven is always friendlier than the microwave. Cover your portion loosely with foil and heat at about 325°F until warmed through, maybe 15 minutes. If they seem a little stiff, add a tiny splash of milk right over the top before you cover them with the foil. That steam keeps everything nice and creamy!
Share Your Ultimate Creamy Cheesy Scalloped Potatoes Experience
Well, that’s it! You’ve mastered the ultimate creamy potato casserole. I truly hope this recipe becomes a cherished tradition in your house, just like it is in mine.
Now, I really want to hear from you! Did you stick with the sharp Cheddar, or did you try crushing some Gruyère in there? Let me know how it went! Please leave a rating below and consider sharing a photo of your beautiful holiday side dish.
For more kitchen inspiration and new favorite recipes, take a peek at the rest of my latest posts!
PrintUltimate Creamy Cheesy Scalloped Potatoes

A classic recipe for rich, tender sliced potatoes baked in a homemade, sharp Cheddar and Parmesan cheese sauce.
- Prep Time: 25 min
- Cook Time: 60 min
- Total Time: 85 min
- Yield: 8 servings
- Category: Side Dish
- Method: Baking
- Cuisine: American
- Diet: Vegetarian
Ingredients
- 3 lbs Russet potatoes, peeled and thinly sliced
- 4 tablespoons unsalted butter
- 1/4 cup all-purpose flour
- 3 cups whole milk, warmed
- 1 teaspoon salt
- 1/2 teaspoon black pepper
- 1/4 teaspoon nutmeg
- 1 cup sharp Cheddar cheese, shredded
- 1/2 cup Parmesan cheese, grated
- 1 clove garlic, minced
Instructions
- Preheat your oven to 375°F (190°C). Lightly grease a 9×13 inch baking dish.
- Peel and slice the potatoes very thinly, about 1/8 inch thick. Set aside.
- Make the cheese sauce: In a medium saucepan over medium heat, melt the butter. Whisk in the flour and cook for one minute, stirring constantly to form a roux.
- Gradually whisk in the warm milk until the mixture is smooth. Continue cooking, stirring often, until the sauce thickens enough to coat the back of a spoon (about 5-7 minutes).
- Remove the sauce from the heat. Stir in the salt, pepper, nutmeg, minced garlic, Cheddar cheese, and Parmesan cheese until the cheese is fully melted and the sauce is smooth.
- Arrange half of the sliced potatoes in an even layer in the prepared baking dish. Pour half of the cheese sauce evenly over the potatoes.
- Layer the remaining potatoes over the sauce. Pour the remaining cheese sauce over the top layer, ensuring all potatoes are mostly covered.
- Bake for 50 to 60 minutes, or until the potatoes are tender when pierced with a fork and the top is golden brown.
- Let the potatoes rest for 10 minutes before serving.
Notes
- For make-ahead preparation, assemble the entire dish, cover it tightly with foil, and refrigerate for up to 24 hours. Before baking, let it sit at room temperature for 30 minutes, then add 10-15 minutes to the baking time.
- If you prefer a crispier top, sprinkle 1/4 cup extra shredded Cheddar cheese over the casserole for the last 10 minutes of baking.
- For a slow cooker version, layer the potatoes and sauce in the slow cooker, cover, and cook on low for 4-5 hours or high for 2-3 hours.
Nutrition
- Serving Size: 1 serving
- Calories: 380
- Sugar: 6
- Sodium: 450
- Fat: 22
- Saturated Fat: 13
- Unsaturated Fat: 9
- Trans Fat: 0.5
- Carbohydrates: 35
- Fiber: 3
- Protein: 14
- Cholesterol: 65