

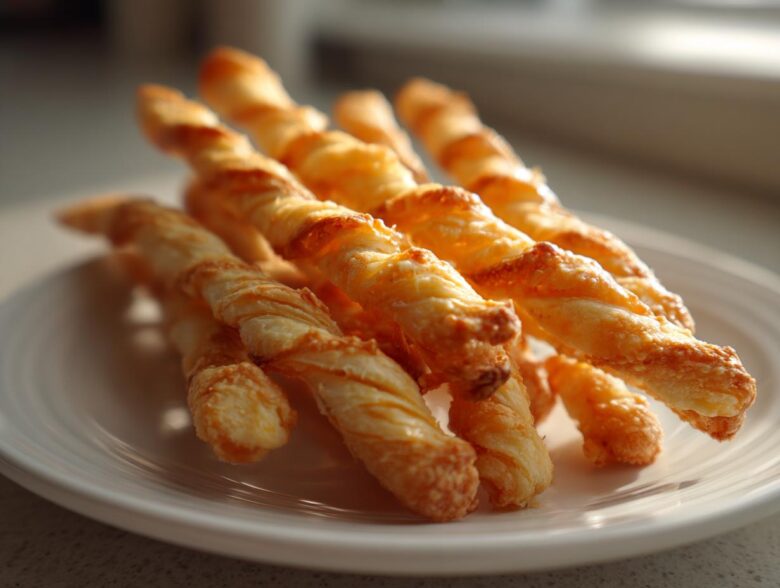
If you’re like me, you always need that one perfect savory snack ready when company unexpectedly drops by. Forget those tired old store-bought crackers! I’m handing you my absolute best recipe today for the real deal: traditional, buttery Southern cheese straws. They have this amazing snap that just melts in your mouth, and that little warmth of spice makes them addicting.
I swear the first time I made these homemade cheese straws for my church’s annual potluck, they vanished before the main course was served. It’s that kind of appetizer! I always make sure I have at least three dozen chilling in the fridge whenever football season rolls around. Trust me, once you master this recipe, you’ll never look back. Did you know you can check out more about how we bake with love over at our little corner of the internet?
Why You Will Make These Classic Cheese Straws Every Time
I know there are a million quick appetizers out there, especially those silly puff pastry versions that are fun in a pinch, but nothing beats the structure and flavor of these dough-based delights. When you put in the effort for this classic recipe, you get a snack that lasts and tastes infinitely better. Here’s why these savory cheese straws will become your go-to:
- The Perfect Snap: Because we use that cold butter worked into the flour just right, you get that beautiful, dense, and incredibly crispy cheese straws texture. It’s not flaky like a cracker; it’s sturdy!
- Sharp Cheddar Power: We insist on sharp cheddar here—no mild stuff allowed! That strong cheese flavor cuts right through the richness of the butter, making them totally addictive.
- Buttery Richness: Honestly, they just taste superior because of the high butter content. They are almost like a savory shortbread that snaps instead of crumbles when you bite into it.
- They Last Longer: Unlike dips or soft appetizers, properly cooled and stored, these stay wonderfully crisp for days, making them perfect for making ahead of time for your holiday appetizers.
Gathering Ingredients for Authentic Cheese Straws
Okay, before we even think about mixing, let’s talk quality. With a recipe this simple, every single ingredient really shines through, especially in these cheddar cheese straws. My number one rule, which I learned the hard way mixing things up for my first big party, is the temperature of your fat and the sharpness of your cheese.
You absolutely must start with very cold butter, cut into little cubes. If the butter is soft, it just smears into the flour instead of creating those little pockets of flavor we need for the right texture. Also, don’t even look at that bag of pre-shredded cheese! It’s dusted with stuff to keep it from clumping, which ruins the dough flow. You want a block of sharp cheddar cheese, grated finely right before you use it. That sharpness is what keeps these savory snacks from tasting too heavy!
Ingredient List for Homemade Cheese Straws
Grab everything before you start mixing—this is a fast process once you get going!
- 1 cup all-purpose flour
- 1/2 teaspoon salt
- 1/4 teaspoon cayenne pepper (optional, for spice)
- 1/2 cup (1 stick) cold unsalted butter, cut into small pieces
- 1 cup sharp cheddar cheese, finely shredded
- 1 large egg yolk
- 1 tablespoon cold water
Mastering the Dough: Steps for Perfect Cheese Straws
Alright, now that we’ve got our star ingredient—sharp cheddar—we move into mixing the dough for these incredible cheese straws. This part moves fast, so have everything measured out and ready to go! First, we cut that cold butter into your flour and salt mixture. You want it to look like very fine cornmeal, maybe slightly chunkier. Use a pastry blender if you have one, or just use your fingertips if you’re quick. The main thing is avoiding warm hands melting that butter!
Next is adding the shredded cheese and then the liquid—that egg yolk and water mixed together. Once that liquid hits the dry stuff, you stop mixing almost immediately. Seriously! If you overmix the dough, those lovely gluten strands develop, and instead of getting a delicate, snappy texture, you end up with something tough. We are aiming for crispy cheese straws here, not chewy ones. Just bring it together until *just* combined—a shaggy mess is fine.
Wrap that dough up tight in plastic wrap and pop it into the fridge. Don’t skip this 30-minute chill time! It lets the butter firm up again so it doesn’t melt everywhere when you try to roll it out later. You can check out some other fun recipe ideas over on the blog while you wait for that dough to get happily cold!
Shaping and Baking Your Savory Cheese Straws
Okay, time to get fancy! You’ve chilled your dough, and now we transform that buttery block into those beautiful, irresistible cheese straws. First things first: get that oven cranked up to 400 degrees Fahrenheit. This high heat is crucial for getting that speedy bake that results in maximum crunch.
Line those baking sheets with parchment paper, please! It saves you headaches later, trust me. When you roll out the dough, aim for thinness—about 1/8 of an inch. If you roll it too thick, they will puff up too much and won’t get that signature, snappy texture we are after. Flour your surface lightly; this dough can be a little sticky because of the cheese.
Now for the fun part: cutting! You want strips about a half-inch wide and anywhere from four to six inches long. If you want the classic look—the one that makes them instantly recognizable as Southern savory snacks—gently pick up each strip and give it a little half-twist before setting it on the parchment. It looks so much more professional, right?
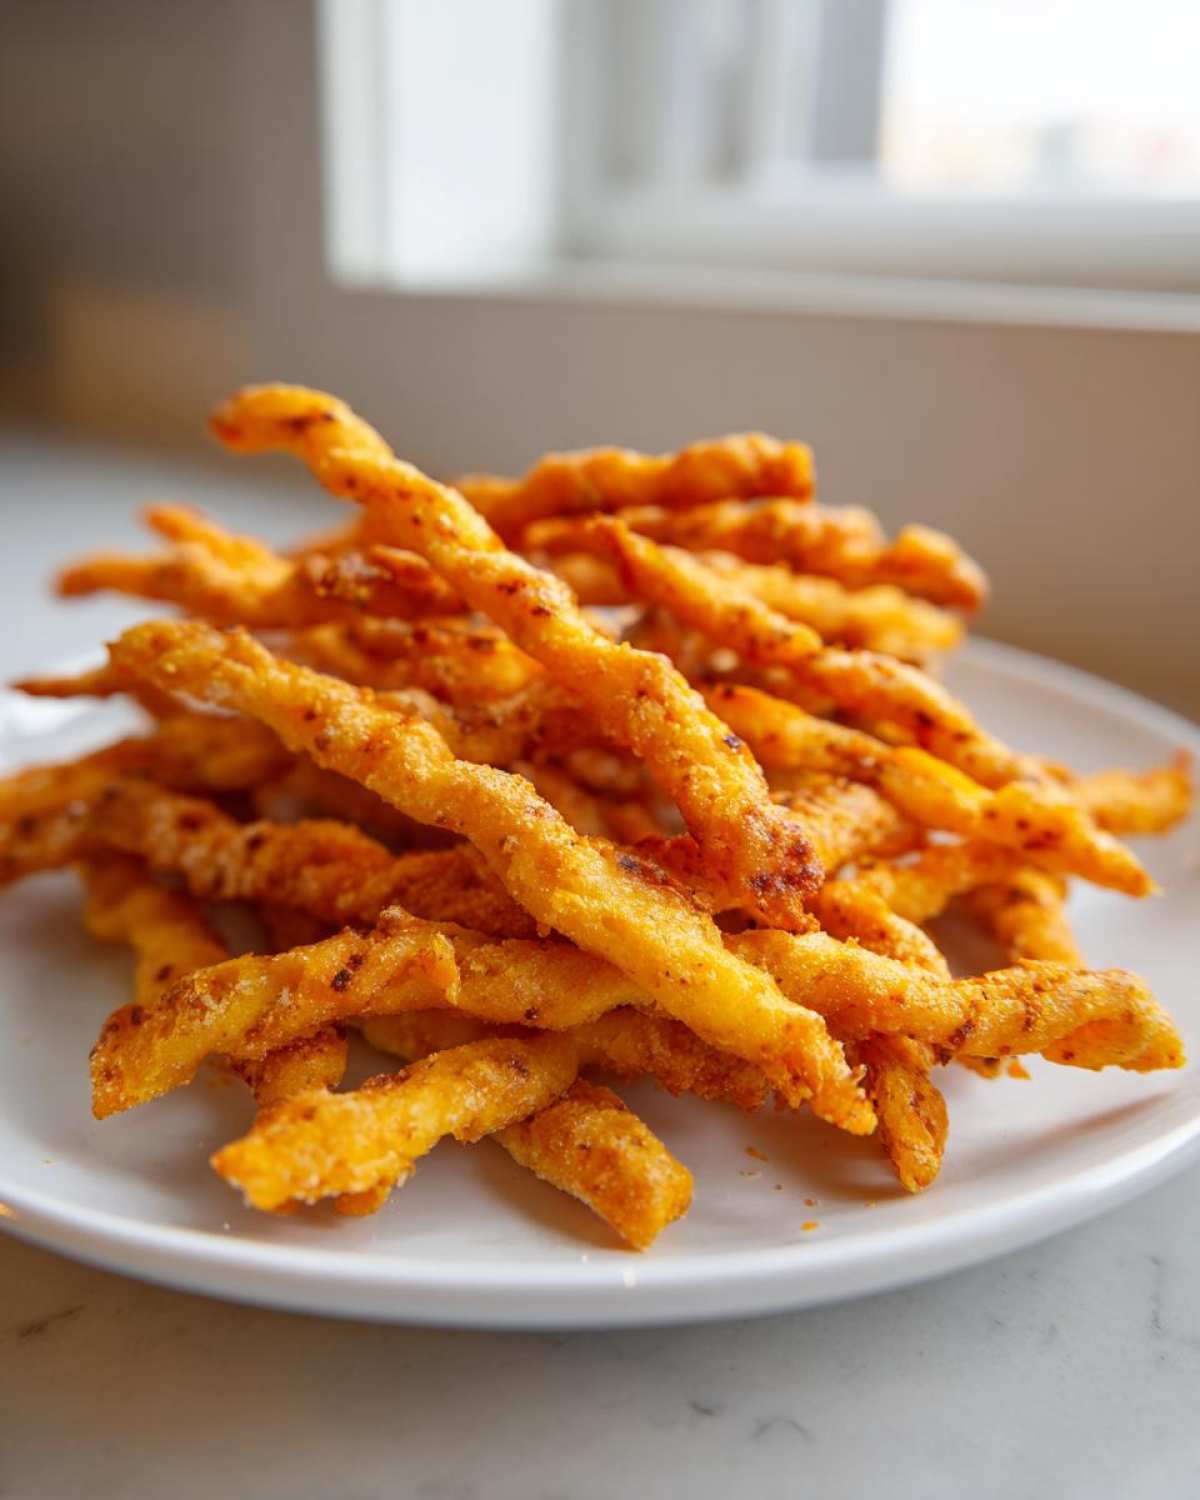
Into the hot oven they go for about 10 to 14 minutes. Keep an eye on them, though, because every oven is different. You’re looking for a lovely golden brown color on the edges. If you see them starting to deeply brown, pull them out! You can find more tips on baking perfect appetizers over at our snacks category.
Here’s the big secret about achieving that ultimate crispiness that I’ll repeat later: they won’t feel totally firm right when you pull them out. They are still tender then! You have to let the cheese straws cool completely on the baking sheet. As the residual heat leaves them, that last bit of moisture evaporates, and *that’s* when they turn into that perfect crunchy bite. Don’t rush the coolness!
Tips for Achieving Crispy Cheese Straws
Listen, the absolute biggest complaint I hear about homemade cheese straws is that they turn out too soft. Nobody wants a bendy cheese stick! We are going for that satisfying, audible snap when you bite into it, and that comes down to two things: proper baking and perfect cooling. Never underestimate the cooling process!
Make sure your oven thermometer is accurate, or use one you trust. If your oven runs cold, you end up steaming the dough instead of baking it quickly, and that guarantees a soft result. For these classic, buttery sticks, a fast, hot bake is your friend. Another little trick I picked up over the years? I always use my lighter-colored aluminum baking sheets for these. Darker pans suck up too much heat and can cause the bottoms of the straws to brown too fast before the inside dries out properly.
And remember what I said before, but I’ll say it again because it’s THAT important: do not touch them once they come out of the oven! They will feel slightly soft when you first pull them onto the cooling rack, but they firm up like magic as they cool down to room temperature. Let them sit for a good 15 minutes before you even try sampling one. Patience makes perfect cheddar cheese straws!
Ingredient Notes and Substitutions for Cheese Straws
While we are committed to this amazing traditional recipe, I know sometimes you need to shake things up a bit, or maybe you just ran out of sharp cheddar at the store. If you want to swap out just half of that sharp cheddar, go right ahead and use Parmesan cheese instead! It adds a lovely salty nuttiness that works beautifully in these savory cheese straws. Just make sure if you use Parmesan, you grate it yourself, too!
Now, I am very loyal to this dough method—it yields the best texture for a true Southern experience. But, if you are in an absolute panic and need something cheesy *right now*, you could use a sheet of store-bought puff pastry. Just flatten it a bit, sprinkle on your cheese and cayenne, roll it thin, cut, and bake. Those are easy cheese straws, for sure, but they will be much flakier and puffier, closer to a cheesy pastry than the dense snack we are aiming for here. Keep those puff pastry cheese straws for another day; today, we stick to the classic!
Serving Suggestions for These Appetizer Recipes
Honestly, when do you *not* serve cheese straws? That’s the real question! These are the definition of a classic party snack. They’re sturdy enough that they don’t get soggy sitting out on a platter, and they just beg to be picked up, making them perfect for any gathering. I always triple the batch if I know a crowd is coming over.
For big events, I like to arrange them artfully on a wooden board. I mix them right in with some crunchy little pretzels and maybe some spicy nuts—that crunch contrast is just heavenly. They are also fantastic as part of a larger platter for game day food, right next to some sliced ham or turkey if you want a little savory bite between the big meals. Check out how I make my amazing sliders; they are the perfect counterpoint to these salty straws!
Because these cheddar cheese straws have that sharp, buttery depth, they pair surprisingly well with tangy or slightly sweet dips if you must have a dip! A little dollop of something bright like a sweet pepper jelly or even a very mild, creamy ranch dressing on the side can be a real winner. They stand up well to bolder flavors, so don’t be afraid to serve them alongside olives or little pieces of strong, smelly cheese. They just elevate any plate of appetizer recipes instantly!
Storing Your Homemade Cheese Straws
Phew! You made it! You conquered the dough, you twisted them just right, and now they are golden brown and cooling on the rack. You are probably wondering, “How long can I keep these glorious homemade cheese straws around before they lose that magical crunch?” That’s a smart question, and the answer is great news for party planning!
Because these straws are baked until they are thoroughly dry and crispy—thanks to that high-heat blast we gave them—they are fantastic for making ahead! You absolutely do not need to worry about refrigeration for texture, at least not for the first week. Refrigeration is actually the enemy of crispiness because the environment traps moisture. Keep them out on the counter, not near the stove!
The key to maintaining that perfect savory snap is an airtight container. I use good quality glass canisters with latching lids for mine. Make sure they are completely cooled to room temperature before sealing them up. If you trap even a tiny bit of warm air inside, you invite sogginess faster than you can say “cheesy crackers recipe.” Stored correctly in a cool, dry place away from the humidity of the sink, these cheddar cheese straws will stay perfectly crisp for a solid week. If you find they lose a little snap after day five, just pop them on a baking sheet for five minutes at 300 degrees—it usually revives them right up!
Frequently Asked Questions About Cheddar Cheese Straws
I always get so many wonderful messages after people try making these, but sometimes folks have quick questions before they roll up their sleeves! Having made these cheese straws what feels like a thousand times now, I’ve picked up a few pointers that might help you avoid any little hiccups along the way. If you ever need to get in touch about a recipe, don’t hesitate to reach out via our contact page!
Can I use pre-shredded cheese in my cheese straws recipe?
Oh, please, try with all your might not to! I know it seems like a time-saver, but those bags of pre-shredded cheese are coated in starches and anti-caking agents—usually potato starch or cellulose. The minute you add that to our beautiful, buttery dough, those starches interfere with how the fat and flour combine. It’s not the end of the world if you absolutely must, but trust me, it results in a slightly less tender, slightly tougher final product. For true cheddar cheese straws, freshly grated from a block is the only way to get that authentic, melt-in-your-mouth quality.
How do I make spicy cheese straws recipe?
This is where we customize it for every palate! The recipe calls for 1/4 teaspoon of cayenne pepper, which gives you just a lovely background warmth—you definitely notice it, but it isn’t aggressively hot. If you want to ramp up the heat for your next batch of spicy cheese straws recipe, you have a couple of great options! First, just double the cayenne pepper; it’s safe to go up to a full half teaspoon if you have a high tolerance. Secondly, instead of using regular cheddar, substitute half or all of it with pepper jack cheese for a built-in spice factor. A third trick, which I sometimes use when I’m feeling extra bold, is whisking a tiny dash of your favorite hot sauce right into the egg yolk and water mixture before adding it to the flour.
What is the difference between these and savory cheese straws made with puff pastry?
This is an excellent question, particularly since the puff pastry versions have gotten so popular lately! The difference is almost entirely textural, and it comes down to the base ingredient. These traditional savory cheese straws use a classic enriched dough—flour, butter, cheese, and just enough binder (the egg yolk/water) to hold it together. When baked, this creates a dense, buttery, shortbread-like structure that results in a satisfying, straightforward *snap*. They are sturdy and rich.
The puff pastry version, on the other hand, relies on layering fat and dough that steams during baking to create hundreds of thin, flaky layers. Those are usually much lighter, more airy, and they shatter into flakes when you bite them. They are delicious in their own right, but they don’t have the deep, satisfying chew or the classic rich heartiness of real homemade cheese straws.
Nutritional Estimate for These Cheesy Baked Snacks
Now, I always tell my friends that when you’re making something this delicious and buttery, you probably aren’t reaching for it because it’s calorie-free! These cheesy baked snacks are rich, indulgent, and made with real sharp cheddar and butter, so they certainly pack a punch in terms of flavor and fat content.
I pulled together the best estimate I could using the standard ingredient breakdown for this batch. Please know that this is just a general guideline, especially since cheese brands vary so much in fat content, and the exact amount of cayenne pepper affects sodium slightly. But this gives you a good starting idea!
This estimate is based on making about 3 dozen straws, meaning one serving is just three of these glorious little bites:
- Calories: Around 85 per serving (3 straws)
- Total Fat: About 7 grams, with 4.5 grams coming from saturated fat—that’s the butter and cheese doing their work!
- Carbohydrates: Very low carbs, only around 3 grams, mostly from that small bit of flour.
- Protein: A nice bonus of about 3 grams per serving, thanks to all that cheddar cheese!
- Sodium: A touch over 100mg, mostly from added salt and natural cheese.
So, while these are certainly a treat and not a low-fat replacement for celery sticks, they are perfect for satisfying those savory cravings! Enjoy them responsibly, knowing you made them with the best ingredients possible!
PrintClassic Southern Cheddar Cheese Straws

A recipe for traditional, savory, and crispy cheddar cheese straws, perfect as a party appetizer.
- Prep Time: 20 min
- Cook Time: 14 min
- Total Time: 34 min
- Yield: About 3 dozen
- Category: Appetizer
- Method: Baking
- Cuisine: American (Southern)
- Diet: Vegetarian
Ingredients
- 1 cup all-purpose flour
- 1/2 teaspoon salt
- 1/4 teaspoon cayenne pepper (optional, for spice)
- 1/2 cup (1 stick) cold unsalted butter, cut into small pieces
- 1 cup sharp cheddar cheese, finely shredded
- 1 large egg yolk
- 1 tablespoon cold water
Instructions
- In a large bowl, whisk together the flour, salt, and cayenne pepper.
- Cut the cold butter into the flour mixture using a pastry blender or your fingers until the mixture resembles coarse crumbs.
- Stir in the shredded cheddar cheese until evenly distributed.
- In a small bowl, whisk the egg yolk and cold water together. Add this liquid mixture to the flour and cheese mixture. Mix until a stiff dough forms. Do not overmix.
- Wrap the dough in plastic wrap and chill in the refrigerator for at least 30 minutes.
- Preheat your oven to 400 degrees Fahrenheit (200 degrees Celsius). Line baking sheets with parchment paper.
- On a lightly floured surface, roll the chilled dough out to about 1/8 inch thickness.
- Cut the dough into strips about 1/2 inch wide and 4 to 6 inches long. You can twist the strips slightly for a classic look.
- Place the strips on the prepared baking sheets.
- Bake for 10 to 14 minutes, or until the straws are golden brown and crisp.
- Let the cheese straws cool completely on the baking sheet before serving. They will crisp up as they cool.
Notes
- For a Parmesan variation, substitute half of the cheddar cheese with grated Parmesan cheese.
- If you prefer a quicker method, use one sheet of store-bought puff pastry, mix in the cheese and seasonings, roll thin, cut, and bake according to package directions for puff pastry.
- Store cooled cheese straws in an airtight container at room temperature for up to one week.
Nutrition
- Serving Size: 3 straws
- Calories: 85
- Sugar: 0.2
- Sodium: 110
- Fat: 7
- Saturated Fat: 4.5
- Unsaturated Fat: 2.5
- Trans Fat: 0.1
- Carbohydrates: 3
- Fiber: 0.2
- Protein: 3
- Cholesterol: 25