

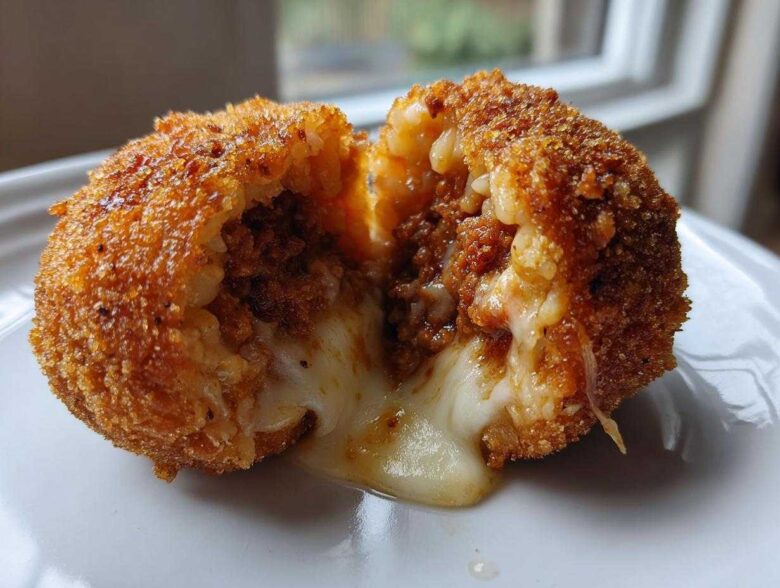
Oh my goodness, if there is one snack that instantly transports me straight to a bustling, wonderful Italian kitchen, it’s a perfect bite of Arancini. Forget dry, bland leftovers—we are talking about the absolute pinnacle of comfort food here! Today, I’m sharing my recipe for the Ultimate Crispy & Cheesy Arancini Rice Balls. I spent ages fiddling with the breading because, honestly, that golden, shatteringly crisp exterior hugging that warm, gooey center is everything.
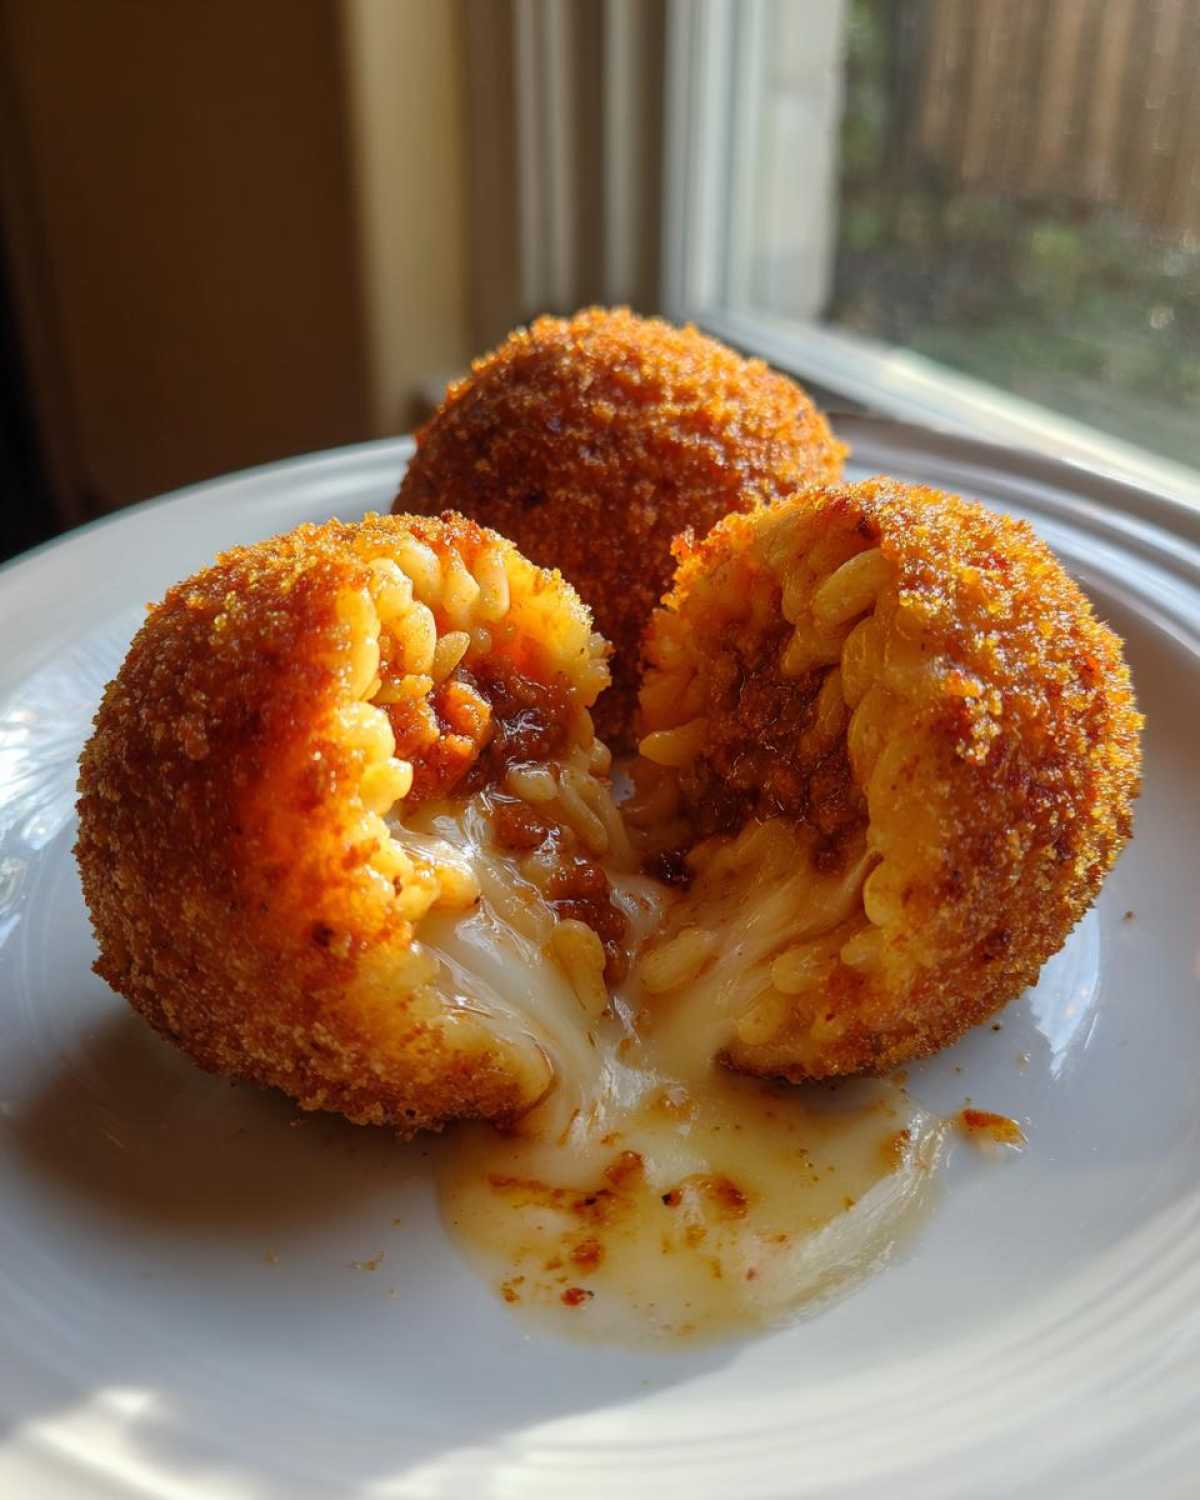
Getting that crust right takes a little finesse, but trust me, once you nail the breading station setup, these magnificent savory rice balls are surprisingly straightforward to make. They fly right off the plate at any gathering, so you might want to double the batch! I learned this method from my neighbor, Maria. She said you have to treat that fried coating like gold. I think you’ll see why when you take that first bite.
We’ll combine leftover risotto with delicious fillings and then send them for a quick, hot swim in oil to become the best homemade rice balls recipe you’ll ever try. You can even peek at my story over on the About Page if you want to know more about my kitchen philosophy!
Why You Will Love These Crispy & Cheesy Rice Balls
Seriously, once you try these homemade rice balls recipe, you’ll never look at leftover rice the same way again. They satisfy every textural craving!
- That incredible texture contrast: Think shatteringly crisp Panko crust giving way to soft, starchy, warm risotto. It’s pure magic!
- Gooey, melted cheese filling every single time—those little mozzarella pockets are worth all the effort.
- They are the ultimate way to repurpose leftover risotto! Don’t let that perfectly cooked rice go to waste.
- They make fantastic, impressive party snacks rice balls that look like you spent hours rolling and frying (even if you didn’t!).
- The savory ragu filling gives it that authentic, rich Italian flavor profile that just spells comfort food.
- These savory rice bites freeze beautifully, making weeknight appetizers super quick whenever the craving hits!
If that list doesn’t convince you to fire up the stove, I don’t know what will! Next up, let’s talk about making sure you have the absolute best ingredients on hand.
Essential Ingredients for Perfect Arancini Rice Balls
Okay, ingredient prep is key here, especially since we are dealing with tricky, sticky rice that needs to hold its shape! For these Italian rice balls, every component plays a role in getting that signature crunch without falling apart.
The single most important thing you need is your cooked risotto, and I can’t stress this enough: it must be completely cold. I always make a big batch of risotto, let it cool on a sheet pan, and chill it overnight. Cold risotto is firm and manageable; warm risotto turns into a sad, gloppy mess when you try to shape it!
Here is what you need to gather for your filling and breading station:
- 3 cups leftover cooked risotto (saffron is lovely, but plain works just fine!)
- 1 cup shredded mozzarella cheese—make sure it’s low-moisture, or it will leak too much!
- 1/2 cup cooked ground beef or sausage ragu for that classic stuffed rice balls flavor.
- 1 large egg, lightly beaten (this helps bind the initial mixture).
- 1/2 cup all-purpose flour for the first dredge.
- 2 large eggs, beaten separately for the dredging bath.
- 1 1/2 cups fine breadcrumbs (Seriously, use Panko if you can find it; it makes the coating so much lighter and crispier).
- Vegetable oil, we need plenty of this for deep frying.
- Salt and black pepper to taste—do a quick taste check on your cold risotto first!
Having everything ready before you start rolling makes the assembly process so much smoother. Don’t skip that overnight chill!
Expert Tips for Making Homemade Rice Balls Recipe (Arancini)
Listen, just following the steps is fine, but knowing *why* we do things is what separates a good batch from a truly exceptional batch of Arancini. My biggest secret is focusing on consistency and temperature. If you respect these two things, you’ll get that perfect, uniform crust every single time. We want that satisfying crunch when we bite into our savory homemade rice balls!
Achieving the Right Risotto Texture for Rice Balls
The starch from the rice is your natural glue! That’s why leftover risotto works best—it’s dense, sticky, and holds its shape under pressure. If you made your risotto immediately before and it seems a little loose or soupy, don’t panic. Just mix in about one extra tablespoon of stock while cool, or slightly more grated Parmesan until it feels firm enough to comfortably squeeze into a tight ball. That density is what prevents leaks!
Vegetarian Substitutions for Stuffed Rice Balls
If you’re skipping the meat for your stuffed rice balls, you still want a savory element to balance the cheese. Instead of the ragu, I recommend sautéing some earthy cremini mushrooms until almost all moisture has cooked out. Mix those with some fresh, chopped spinach and a little extra Parmesan cheese. This gives your vegetarian rice balls fantastic depth!
Step-by-Step Instructions for Crispy Fried Rice Balls
Alright, let’s get rolling! Once your risotto is chilled—and I mean freezer-cold, not just ‘I left it on the counter’ cold—the actual assembly only takes about 20 minutes. The whole process flows beautifully once you organize your station. Think of yourself as an assembly line worker, but way more stylish!
Preparing and Stuffing the Rice Balls
First, grab about two tablespoons of that cold rice. Press it flat in your palm. Now, this is the fun part: place a tiny bit of mozzarella and a dab of your yummy ragu right in the middle. Don’t go crazy with the filling, or they will explode on you! Gently curve the rice around the filling, sealing it completely, and roll it tight into a perfect little sphere, maybe an inch and a half wide. That tight seal is vital to keeping all that glorious cheese locked inside while frying. Repeat until all your filling is gone!
The Breading Process for Maximum Crunch on Rice Balls
Set up your station right now: Flour in the first dish, the two beaten eggs in the middle, and those beautiful Panko breadcrumbs in the last dish. You need three passes for a proper crust. First, roll each rice ball in the flour—tap off any big clumps. Next, dip it quickly into the egg wash, letting the excess drip back. Finally, roll it heavily in the Panko, pressing gently with your fingers to make sure those flakes stick everywhere. They need a good coat to be truly perfect homemade rice balls recipe.
Frying Technique for Golden Brown Italian Rice Balls
Get your oil ready. You must heat about three inches of vegetable oil in a heavy pot until it hits exactly 350°F (175°C). If you don’t have a thermometer, you’ll burn the outside before the cheese melts! Carefully lower only three or four rice balls at a time—we cannot overcrowd the pot! Fry them for about 3 to 5 minutes, turning them gently until they look perfectly deep golden brown. Scoop them out immediately with a slotted spoon and drain them on paper towels right away. A little sprinkle of salt while they are hot is a must!
Serving Suggestions for Your Appetizer Rice Balls
You have successfully fried the best party snacks rice balls! Now we need something to dip them into because a crispy Arancini deserves the perfect companion. Since these are rich and savory, you want dips that cut through the oiliness a bit.
Honestly, you cannot go wrong just serving them piping hot alongside a bowl of warmed, slightly chunky marinara sauce. That classic tomato acidity is the perfect foil for the mozzarella and ragu inside.
But if you’re feeling a little fancier, try a creamy garlic aioli. Seriously, whisk a little crushed garlic, lemon juice, and maybe a touch of Dijon mustard into some good mayonnaise. Those savory rice bites disappear so fast when you offer a good dip!
Storage and Reheating Instructions for Leftover Rice Balls
Don’t worry if you have leftovers because these savory rice bites taste almost as good the next day, provided you reheat them correctly! Never, ever use the microwave if you value that beautiful crispy shell we worked so hard to achieve. The microwave just turns them into sad, soggy mush. Nobody wants that!
For the best texture, let any cooled rice balls sit in an airtight container in the fridge for up to three days. If you want to save them longer, these freeze wonderfully! Just arrange the cooled balls on a tray, flash freeze them until solid, then transfer them to a freezer bag. They’ll keep for about a month.
To bring back that glorious crunch, skip the microwave entirely. Pop them on a baking sheet in a 375°F oven for about 10 minutes, or use an air fryer at 350°F for 5 to 7 minutes. That quick blast of dry heat crisps up the crust again perfectly!
Frequently Asked Questions About Making Rice Balls
I get so many questions about these Arancini, which makes total sense! They seem super complicated, but once you know the secrets to shaping and frying, you’ll mix up these savory rice bites all the time. Here are some things I hear often about our favorite Italian Rice Balls.
Can I make these Italian Rice Balls ahead of time?
Oh yes, this is one of the best parts! You can absolutely assemble the entire rice ball—fill it, seal it, and bread it—and then keep the raw, breaded balls on a tray in the fridge overnight. That way, the coating sets up nicely. Don’t fry them ahead of time, though! The magic happens when that breading hits hot oil. If you do bread them ahead, just make sure your oil is extra hot when you finally fry them because the cold ball will drop the oil temperature quickly.
What is the best oil type for frying these rice balls?
Safety first when deep-frying, my friends! You need an oil with a high smoke point, which means it can get hot enough to crisp the outside quickly without burning or smoking up your kitchen. I always grab plain old vegetable oil because it’s neutral tasting and budget-friendly. Canola oil is also fantastic. Peanut oil is traditional in some places and works beautifully, but if anyone has nut allergies, steer clear! Vegetable or canola are your safest, most reliable bets for these golden crispy fried rice balls.
Nutritional Estimates for Cheesy Arancini Rice Balls
Now, I know some of you sweet friends are tracking macros, and I want to be totally transparent! Since these are glorious cheese-stuffed, deep-fried bundles of joy, they definitely lean towards the indulgent side of things. I always count them as a special occasion treat, not an everyday snack!
These numbers are strictly estimates based on our specific ingredient ratios and how much oil might absorb during frying. Treat these as a general guide for one single Arancini rice ball, okay? If you use less mozzarella or skip the ragu, your totals will change!
Here is a look at the estimates:
- Serving Size: 1 ball
- Calories: 280
- Fat: 15g (Don’t forget that’s mostly healthy fats if you stick to good oil!)
- Saturated Fat: 6g
- Carbohydrates: 25g
- Protein: 12g
- Sugar: 2g (Mostly natural from the rice and tomato paste in the ragu)
- Sodium: 450mg
Remember, these are rich, savory rice bites! If you’re looking for something lighter, maybe stick to just having one or two as your appetizer rice balls, or try the vegetarian filling swap we talked about earlier. Enjoy them guilt-free, because homemade is always better than takeout!
Share Your Experience with These Homemade Rice Balls Recipe
Well phew, that was a delicious trip through Italy! I really hope you loved learning how to master these Ultimate Crispy & Cheesy Arancini rice balls. I want to hear all about it!
Did you stick with the classic ragu, or did you try that mushroom filling? Let me know in the comments below how they turned out for you, and please drop a star rating! Seeing your golden-brown savory rice bites makes my day!
PrintUltimate Crispy & Cheesy Arancini Rice Balls

Make classic Italian Arancini, which are deep-fried risotto balls stuffed with mozzarella and meat sauce, resulting in a crispy exterior and a soft, cheesy center.
- Prep Time: 25 min
- Cook Time: 15 min
- Total Time: 40 min
- Yield: About 12 rice balls
- Category: Appetizer
- Method: Deep Frying
- Cuisine: Italian
- Diet: Vegetarian
Ingredients
- 3 cups leftover cooked risotto (preferably saffron or plain)
- 1 cup shredded mozzarella cheese
- 1/2 cup cooked ground beef or sausage ragu
- 1 large egg, lightly beaten
- 1/2 cup all-purpose flour
- 2 large eggs, beaten for dredging
- 1 1/2 cups fine breadcrumbs (Panko recommended)
- Vegetable oil, for deep frying
- Salt and black pepper to taste
Instructions
- Ensure your leftover risotto is completely cold, ideally refrigerated overnight.
- Take about 2 tablespoons of cold risotto and flatten it in your palm. Place a small spoonful of mozzarella and a small spoonful of ragu in the center.
- Carefully fold the risotto around the filling, shaping it into a tight ball, about 1.5 inches in diameter. Repeat until all filling is used.
- Set up a standard breading station: one shallow dish with flour, one with the 2 beaten eggs, and one with the breadcrumbs.
- Dredge each rice ball first in the flour, shaking off excess. Dip it into the egg mixture, letting excess drip off. Finally, roll it thoroughly in the breadcrumbs, pressing lightly to adhere.
- Heat about 3 inches of vegetable oil in a deep, heavy-bottomed pot to 350°F (175°C). Use a thermometer to monitor the temperature.
- Carefully lower 3 or 4 rice balls into the hot oil, ensuring you do not overcrowd the pot.
- Fry for 3 to 5 minutes, turning occasionally, until they are deep golden brown and crispy.
- Remove the Arancini with a slotted spoon and place them on a wire rack lined with paper towels to drain excess oil. Sprinkle lightly with salt immediately.
- Serve hot so the cheese filling is melted.
Notes
- For the best texture, use risotto that has a high starch content. If your risotto is too dry, add 1 tablespoon of stock before shaping.
- If you prefer vegetarian Arancini, substitute the meat ragu with sautéed mushrooms or spinach mixed with Parmesan cheese.
- If you do not have a deep fryer, you can bake these at 400°F (200°C) for 15-20 minutes, brushing them lightly with oil first, but the texture will not be as authentic.
Nutrition
- Serving Size: 1 ball
- Calories: 280
- Sugar: 2
- Sodium: 450
- Fat: 15
- Saturated Fat: 6
- Unsaturated Fat: 9
- Trans Fat: 0.1
- Carbohydrates: 25
- Fiber: 1
- Protein: 12
- Cholesterol: 55