

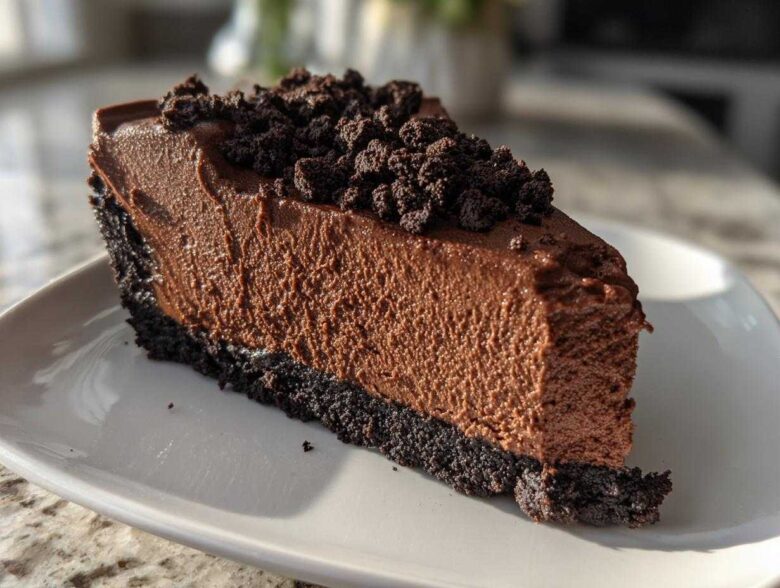
I totally get it. Sometimes you just need that incredible, rich flavor hit of a spectacular dessert, but the thought of wrestling with water baths and cracked tops on a baked cheesecake makes you want to run for the hills. Trust me, I’ve been there! That’s why I spent a whole summer perfecting this recipe. It’s the Ultimate Creamy No Bake Chocolate Cheesecake, and it’s seriously the best dessert I make when company shows up.
The secret to making this the superior chocolate cheesecake is nailing the texture—it has to be velvety, smooth, and intensely chocolatey, but you don’t even need to turn on the oven. After trying about a dozen slightly-too-runny or grainy attempts, I finally figured out the exact balance of cold cream and room-temperature cream cheese that gives this filling that glorious, bakery-quality structure.
If you want that showstopping finish with none of the stress, you absolutely have to try this recipe. You can read a little more about our site philosophy over here at Tasty Tribune if you’re curious!
Why This No Bake Chocolate Cheesecake is Your New Favorite Dessert
Seriously, where has this recipe been all my life? This isn’t just a dessert; it’s the peak of effortless chocolate sweets. You get that deep, rich flavor that usually requires hours of careful temperature monitoring, but we skip all that drama. What we’re left with is pure, decadent chocolate flavor with zero oven anxiety.
My favorite result is how wonderfully thick and sturdy the filling sets up. We nailed the technique for guaranteed silky smooth cheesecake every single time. Head on over to check out our no-bake peach cheesecake jars for another easy win!
Achieving Creamy Cheesecake Filling Without Baking
The magic here isn’t cheating; it’s smart chemistry! Because we aren’t introducing heat that can seize the cocoa or curdle the dairy, we keep that filling perfectly emulsified. Whipping the cream stiff separately and then folding it in gently traps so much air. That’s how you bypass the oven and still hit that ultra-creamy texture.
Perfect for Parties and Holidays
If you’re hosting, this is your secret weapon. It completely removes one major item from your day-of cooking to-do list. Since it has to chill anyway, you can whip this up the day before your event. It’s always my go-to party dessert recipe because everyone asks for a second slice!
Ingredients for the Ultimate Chocolate Cheesecake Recipe
Okay, listen up—the success of any decadent chocolate dessert hinges entirely on the quality of what you throw in there. Since we aren’t baking this one, every single ingredient pulls double duty to make sure the filling is unbelievably thick and rich. Please, don’t eyeball these measurements! Especially when it comes to the cream cheese and the heavy cream, precision is key to hitting that perfect, no-bake structure.
I’ve listed everything out below. Make sure your cream cheese is truly softened—like, sink-your-finger-in-it soft. And your heavy cream? It needs to be cold, like ice cold, straight from the back of the fridge. These two temperature rules are non-negotiable!
For the Oreo Crust Cheesecake Base
This crust is just so simple, and it provides that perfect crunchy, slightly salty contrast to the sweet filling. You’ll need:
- 1 3/4 cups crushed Oreo cookies (that’s about a whole sleeve of cookies, give or take! Don’t worry if you have a few bigger chunks left over, it adds character.)
- 1/4 cup unsalted butter, melted and cooled just a touch so it doesn’t melt the cookies too fast.
For the Creamy Cheesecake Filling
This is where the magic happens. Don’t rush the mixing on these parts, especially the chocolate.
- 16 ounces cream cheese, softened to true room temperature (this is the most important thing, seriously!)
- 1 1/2 cups powdered sugar, sifted if yours is super clumpy
- 1/2 cup unsweetened cocoa powder (I use high quality unsweetened—it makes a world of difference in depth!)
- 1 teaspoon vanilla extract
- 1/4 teaspoon salt (yep, salt! It wakes up the chocolate flavor.)
- 1 1/2 cups heavy whipping cream, cold, cold, cold
- 4 ounces dark chocolate, melted gently and then allowed to cool slightly before mixing in. If it’s hot, it ruins the cream!
- Optional addition: 1/2 cup mini chocolate chips to fold in for extra bursts of chocolate.
Step-by-Step Instructions for No Bake Chocolate Cheesecake
Alright, buckle up, because this is where we turn ingredients into dessert magic. Remember, because this is a no-bake Chocolate Cheesecake Recipe, our focus is gentle mixing and plenty of chill time. Trust me, taking the time now means you get that beautiful, dense slice later. Don’t even think about rushing the chilling process! For more behind-the-scenes baking talk, check out our general blog here.
Preparing and Chilling the Oreo Crust
First thing’s first: the base. Take those crushed Oreos and that melted butter and combine them really well—you want it looking like wet sand, not dry crumbs. Press that mixture firmly into the bottom of your 9-inch springform pan. Use the bottom of a measuring cup to really pack it down tight; that’s what keeps your Oreo crust cheesecake foundation stable! Pop that entire pan into the freezer. Fifteen minutes in the freezer wakes it up and sets it firmly so it doesn’t try to slide around when we add the filling.
Mixing the Silky Smooth Cheesecake Filling
While the crust is chilling, tackle the filling. Grab your stand mixer or a big bowl and beat that room-temperature cream cheese until it looks unbelievably smooth. I mean zero lumps allowed—scrape the bowl down a couple of times to make sure. Next, slowly beat in the powdered sugar, cocoa powder, vanilla, and salt until everything looks uniform and you’ve got that gorgeous chocolate base. DO NOT stop there, though!
In a separate, clean bowl, whip your *cold* heavy cream until you have stiff peaks, just like making whipped topping. Now, gently fold that whipped cream into your chocolate base. Be careful! You want to keep all that lovely air in there. Finally, stream in your slightly cooled melted dark chocolate and fold it in just until no streaks remain. We are aiming for uniform, deep color and airy volume here.
Setting and Serving Your Chocolate Cheesecake
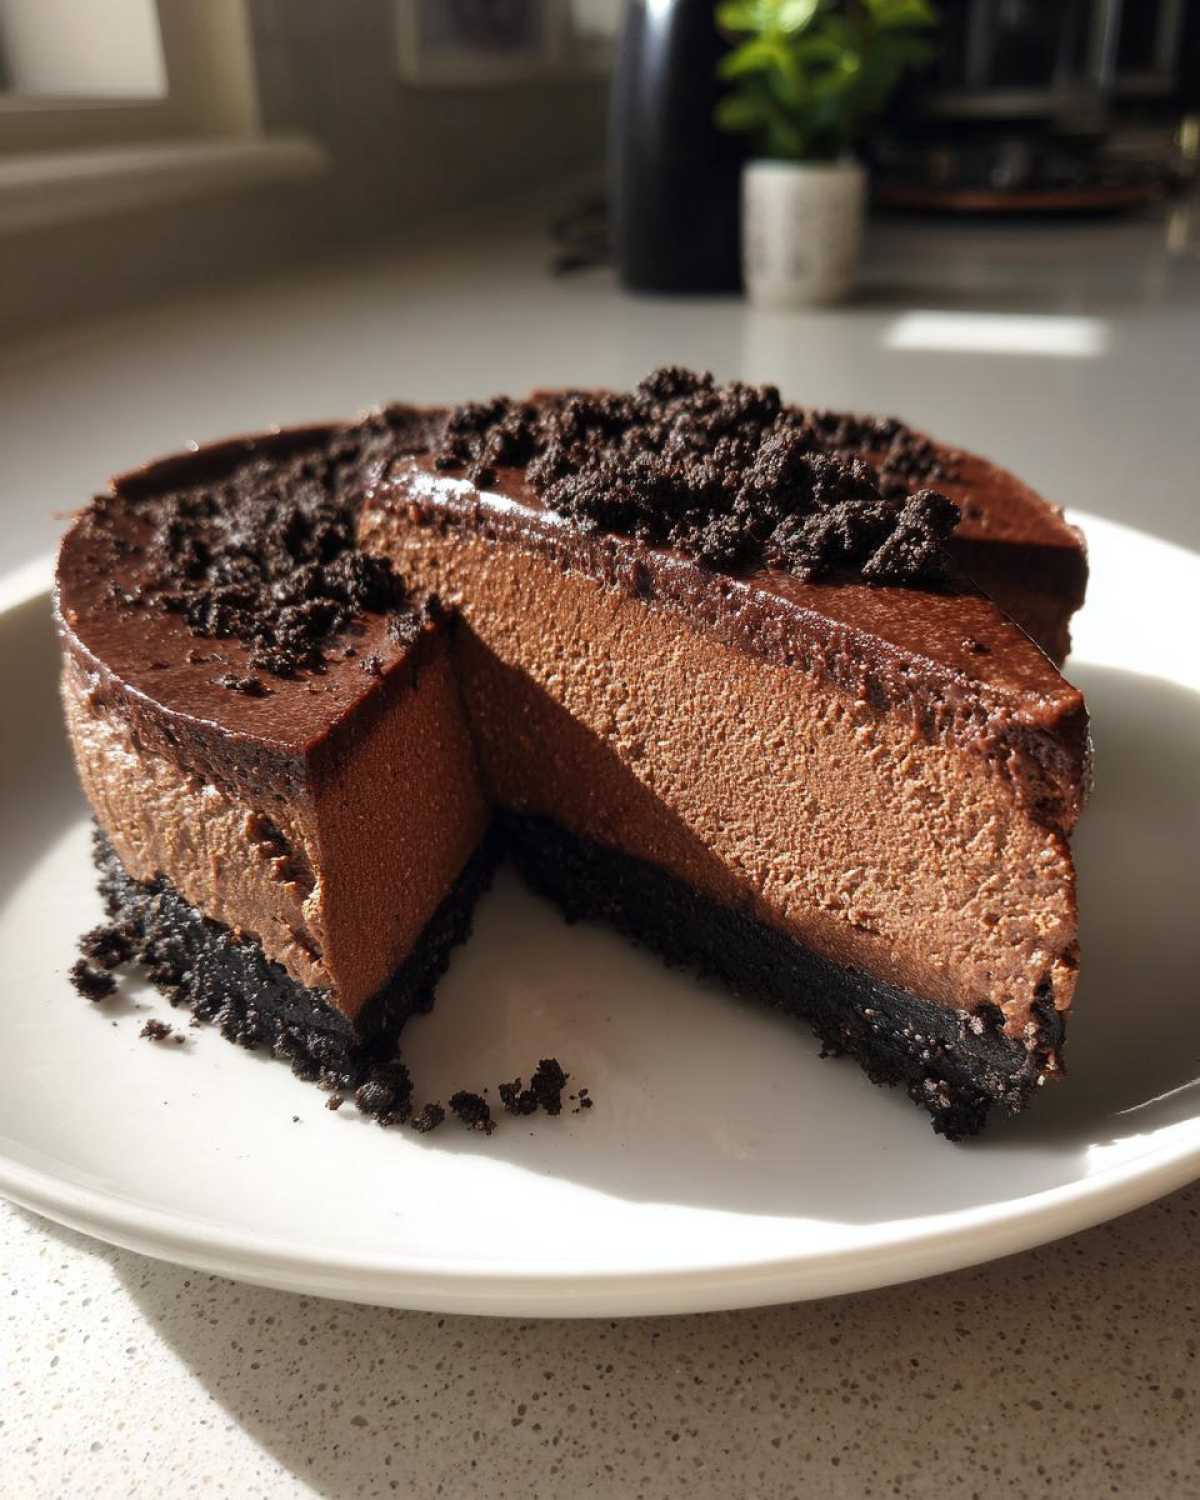
Time to assemble! Pour that voluminous filling right over your chilled crust and smooth the top with an offset spatula. It’s going to look tall and glorious! Cover it loosely with plastic wrap—don’t let the plastic touch the top surface, or it’ll mess up your texture. You absolutely must refrigerate this for a minimum of 6 hours, but honestly, overnight is the secret handshake for the best structure. When it’s ready to serve, carefully undo the springform ring and prepare for compliments!
Expert Tips for the Best Chocolate Cheesecake Ever
I’ve made this recipe so many times now that I swear I can mix the crust ingredients while half-asleep. But even with a straightforward recipe like this Chocolate Cheesecake, little tricks separate a good result from the *best result ever*. These tips are the things I learned the hard way so you don’t have to!
If you’re aiming for a really intense, slightly bitter kick—more like what you’d find at a fancy bakery—go ahead and use 70% cacao dark chocolate instead of the 55% I sometimes default to. That switch instantly transforms it into a true Dark Chocolate Cheesecake experience. For more dinner party ideas, you can check out my quick teriyaki beef recipe!
Ingredient Temperature Matters for Creamy Cheesecake Filling
Listen, I cannot stress this enough: your cream cheese must be the right temperature. If you try to beat room-temperature cream cheese with cold, hard lumps in it, you will end up with lumps, period. No amount of beating will fix it after that point, and it ruins the beautiful structure we worked so hard to create.
Take it out early. I mean, *really* early. If your kitchen is chilly, leave it on the counter for a full two hours before starting the filling prep. It should feel pliable and yield easily when you gently press it. That softness is what allows the sugar and cocoa to incorporate fully without leaving little pockets of uncooked cheese. That’s the secret handshake for that truly gorgeous, creamy cheesecake filling.
Creating a Simple Chocolate Ganache Topping
While a sprinkle of chips is nice, sometimes you need that glossy, drippy finish, right? This is where a quick ganache comes in, and it’s super simple—it’s just two ingredients! This topping makes it look like you spent all day slaving over it, but really, it’s ready in five minutes.
To get that perfect chocolate ganache topping, heat up half a cup of heavy whipping cream until it’s just simmering—watch it carefully! Then, pour that hot cream right over four ounces of finely chopped dark chocolate in a heat-safe bowl. Don’t stir immediately! Let it sit undisturbed for five full minutes to let the heat do its work. Then, stir slowly from the center outward until it’s lusciously smooth. Let that mixture cool on the counter until it’s thickened up just enough to pour nicely over your set cheesecake. It’s pure decadence!
Variations on This Decadent Chocolate Dessert
Now that you have mastered the base chocolate cheesecake recipe, you might be wondering how to jazz it up next time. Because this filling is so easy to manipulate while cold, it’s perfect for experimentation. I love having a reliable core recipe so I can try out new things without worrying about the whole thing collapsing into a puddle.
We’ve covered the basic dark chocolate version, but maybe you’re serving someone who truly believes that more chocolate is always the answer! Or maybe you want a more elegant look. These little tweaks change the whole presentation and flavor profile without adding any baking time at all. If you want a completely different bakery treat, check out my bakery-style apple turnovers!
Making a Triple Chocolate Cheesecake
If you are looking to go full-tilt, the Triple Chocolate Cheesecake variation is your ticket. This is so simple but feels incredibly indulgent. We’ve already got the chocolate in the crust (Oreos are chocolate, remember?) and the cocoa and melted dark chocolate in the filling. For the third layer of chocolate goodness, we just need to fold in some goodies!
Right before you pour the filling into the crust—that’s Step 7 in the main instructions—gently fold in about half a cup of mini chocolate chips. They’ll distribute throughout the batter. When it sets up, you get chocolate creaminess, chocolate depth, and then little pockets of solid chocolate flavor throughout. It’s totally over-the-top, and I wholeheartedly approve.
Ideas for a Chocolate Marble Cheesecake Swirl
This variation gives you that beautiful, slightly dramatic look, perfect for a holiday centerpiece. To do this, you need to prepare a little extra melted chocolate—maybe just two ounces mixed with a teaspoon of that room-temperature cream cheese, just enough to make it pourable but still very thick.
Once you’ve poured your main filling into the crust, drizzle that extra chocolate mixture over the top in random ribbons. Then, take a thin knife or a skewer and gently drag it through the top layer a few times to create that gorgeous, messy swirl pattern. Don’t over-swirl it, or you’ll just end up with a dark brown cake! You want distinct layers of lighter and darker chocolate visible on the surface before you chill it. It’s stunning!
Storing and Reheating Your Homemade Cheesecake Perfection
This is the best part about making a no bake chocolate cheesecake—storage is actually straightforward! Since we aren’t battling baked egg proteins, these tend to keep beautifully in the fridge, which is a huge win for planning ahead. You’ve worked hard for this gorgeous dessert, so let’s make sure it stays perfect until you want to eat it. For more on how we handle user data and digital safety, you can read our privacy policy.
For simple refrigeration, wrap your finished cheesecake (once it’s completely firm and the springform ring is off) tightly in plastic wrap. If you’ve already sliced it, you can press small squares of parchment paper between the slices before wrapping the whole thing to keep them from sticking together—though honestly, mine never lasts long enough for that to be an issue!
In the fridge, this beauty will stay fresh and delicious for about four to five days. That’s almost a full week of easy access to this rich dessert! If you are looking for longer-term storage, freezing is totally possible, and it’s one of the reasons this is such a great holiday cheesecake recipe because you can make it weeks ahead.
How to Freeze Your No Bake Chocolate Cheesecake
Freezing is the key to maintaining that unbelievably creamy texture, provided you wrap it correctly. Do not skip the initial tight plastic seal! Once the cheesecake is fully set and removed from the pan, wrap the entire thing tightly in a double layer of plastic wrap. After that, wrap it again in a layer of aluminum foil. Foil is great because it blocks out any freezer smells or flavors.
When you are ready to thaw your homemade cheesecake perfection, just move it from the freezer directly to the refrigerator. It needs a good 12 to 24 hours to thaw slowly and safely. Don’t try to rush it too much on the counter, or you risk moisture pooling on the surface. Once thawed in the fridge, it tastes just as wonderful as the day it was made!
Shelf Life and Best Eating Experience
Realistically, the best flavor is always in the first 48 hours after it’s set. The flavor deepens overnight, which is why I always recommend chilling it completely before serving the next day. After day three, the crust might start absorbing a tiny bit of moisture from the filling, but it’s still perfectly delicious, just slightly softer around the edges.
If you made it for a big party and have leftovers, throwing those wrapped slices into the freezer extends their life up to two months! Just remember that slow thaw time in the fridge, and you’ll keep enjoying this incredible treat long after the party ends.
Frequently Asked Questions About No Bake Cheesecake
It always happens! When you find a recipe you love that works perfectly, a million little questions pop up about substitutions or troubleshooting. That’s totally normal, especially when dealing with a specific texture like our no bake chocolate cheesecake. I’ve tried to cover all the things that tripped me up when I was first developing this recipe. If you have other questions, feel free to reach out via my contact page!
Can I use graham crackers instead of Oreos for the crust?
Yes, you absolutely can switch out the Oreos! If you prefer a standard crust for your rich dessert ideas, graham crackers work wonderfully. However, graham crackers are drier than Oreos, so you’ll need to make a small adjustment to keep that base holding together.
I usually substitute 1 3/4 cups of finely crushed graham crackers, but you’ll need to increase the melted butter to 6 tablespoons instead of 4. Sometimes, I even throw in a tablespoon of white sugar with the graham crackers to balance that slightly less sweet cracker against our rich filling. Press it the same way, and bake it for 10 minutes at 350°F if you want it extra crisp—though the no-bake version is still delicious!
Why is my no bake chocolate cheesecake not setting?
Ugh, seeing a soft center when you’re ready to slice is the worst feeling! This almost always comes down to one of two things: the cold cream or the chilling time. Remember, we don’t have baking time to set the structure; we rely entirely on the fats chilling firm.
First, check the cream cheese. Was it truly room temperature? If it’s too cold, it won’t incorporate smoothly with the sugar and cocoa, leaving you with a loose, almost grainy base. Second, did you whip your heavy cream long enough? It needs to hit stiff peaks before you fold it in. Third, and most commonly, was it chilled long enough? Six hours is the absolute minimum, but if your kitchen is warm or if you want that perfect sliceable texture, leave it in the fridge overnight. Seriously, the long chill time guarantees that silky smooth cheesecake finish.
How do I make this recipe baked instead of no bake?
That’s a great question, and I totally understand wanting to try the classic baked version! However, this specific recipe is truly optimized for the no-bake method. Because the filling relies so heavily on stabilized whipped cream and the way cold fat sets, baking it would dramatically change the texture. Honestly, the results would likely be watery or just totally different than what you are expecting from this recipe.
If you are looking for a guide on the baked route, I suggest searching for a specific baked chocolate cheesecake guide, as those recipes use eggs and often a water bath to achieve their unique structure. For *this* recipe, cling to the no-bake instructions; it’s foolproof when you follow them!
Nutritional Estimate for One Slice
Now, I know what some of you are thinking! This is a rich, decadent cheesecake, and honestly, it’s totally worth every single bite. But for those of you keeping track, I pulled together the estimated nutrition facts based on the standard ingredients listed above. Just a quick heads-up: since we’re using store-bought Oreos and melted chocolate, these numbers are just an estimate, but they’ll give you a good ballpark idea!
This data is based on cutting the yield into 10 generous slices. If you cut it into 12, the sugar and fat numbers will drop just a bit. Enjoy responsibly!
- Serving Size: 1 slice
- Calories: 450
- Sugar: 35g
- Sodium: 280mg
- Fat: 30g
- Saturated Fat: 18g
- Trans Fat: 0.5g
- Carbohydrates: 42g
- Fiber: 2g
- Protein: 6g
- Cholesterol: 95mg
See? Still amazing! It’s a treat, no doubt about it, but remember that the dark chocolate is packed with antioxidants. When you make something this delicious from scratch—even a no-bake dessert—you’re always going to win over anything pre-packaged.
Share Your Results and Rate This Recipe
I truly hope you’ve gathered everything you needed to make what I think is honestly the best cheesecake ever. Now that you have your Ultimate Creamy No Bake Chocolate Cheesecake chilling perfectly in the fridge, my favorite part is hearing from you wonderful bakers!
Did you manage to keep your hands off it overnight? Did you add the ganache or stick to a simple dusting of cocoa? Whether you made it for a huge family gathering or just for a Tuesday night treat, I want to know how it turned out!
Please, take a moment to leave a star rating right below this post—it helps other folks see how great this recipe truly is. If you took any drool-worthy pictures, snap them up and tag me on social media! I absolutely love seeing your creations. If you are curious about our site guidelines before sharing content, you can review the terms and conditions here. Happy baking (or, well, happy *no-baking*)!
PrintUltimate Creamy No Bake Chocolate Cheesecake with Oreo Crust
Make a rich, creamy, and decadent chocolate cheesecake without turning on your oven. This easy recipe uses a simple Oreo crust and a velvety smooth filling perfect for any occasion.
- Prep Time: 20 min
- Cook Time: 0 min
- Total Time: 6 hr 20 min
- Yield: 10 servings
- Category: Dessert
- Method: No Bake
- Cuisine: American
- Diet: Vegetarian
Ingredients
- 1 3/4 cups crushed Oreo cookies (about 30 cookies)
- 1/4 cup unsalted butter, melted
- 16 ounces cream cheese, softened
- 1 1/2 cups powdered sugar
- 1/2 cup unsweetened cocoa powder
- 1 teaspoon vanilla extract
- 1/4 teaspoon salt
- 1 1/2 cups heavy whipping cream, cold
- 4 ounces dark chocolate, melted and cooled slightly
- Optional: 1/2 cup chocolate chips for topping
Instructions
- Prepare the crust: Mix the crushed Oreos and melted butter in a bowl until combined. Press the mixture firmly into the bottom of a 9-inch springform pan. Chill the crust in the freezer for 15 minutes while you prepare the filling.
- Beat the cream cheese: In a large bowl, use an electric mixer to beat the softened cream cheese until it is completely smooth and lump-free.
- Add dry ingredients: Gradually beat in the powdered sugar, cocoa powder, vanilla extract, and salt until fully incorporated and smooth. Scrape down the sides of the bowl as needed.
- In a separate, clean bowl, whip the cold heavy whipping cream until stiff peaks form.
- Fold together: Gently fold the whipped cream into the cream cheese mixture until just combined. Do not overmix.
- Add chocolate: Gently fold in the slightly cooled melted dark chocolate until streaks disappear and the mixture is uniform in color.
- Assemble: Pour the filling over the chilled Oreo crust and spread evenly with a spatula.
- Chill: Cover the cheesecake loosely with plastic wrap and refrigerate for at least 6 hours, or preferably overnight, until firm.
- Serve: Before serving, carefully remove the springform ring. Top with chocolate chips or a chocolate ganache if desired.
Notes
- For the creamiest texture, ensure your cream cheese is truly at room temperature before mixing.
- If you prefer a triple chocolate version, fold in 1/2 cup of mini chocolate chips along with the melted chocolate.
- To make a quick ganache topping, heat 1/2 cup of heavy cream until simmering, pour over 4 ounces of chopped chocolate, let sit for 5 minutes, then stir until smooth. Let cool slightly before pouring over the set cheesecake.
Nutrition
- Serving Size: 1 slice
- Calories: 450
- Sugar: 35g
- Sodium: 280mg
- Fat: 30g
- Saturated Fat: 18g
- Unsaturated Fat: 12g
- Trans Fat: 0.5g
- Carbohydrates: 42g
- Fiber: 2g
- Protein: 6g
- Cholesterol: 95mg