

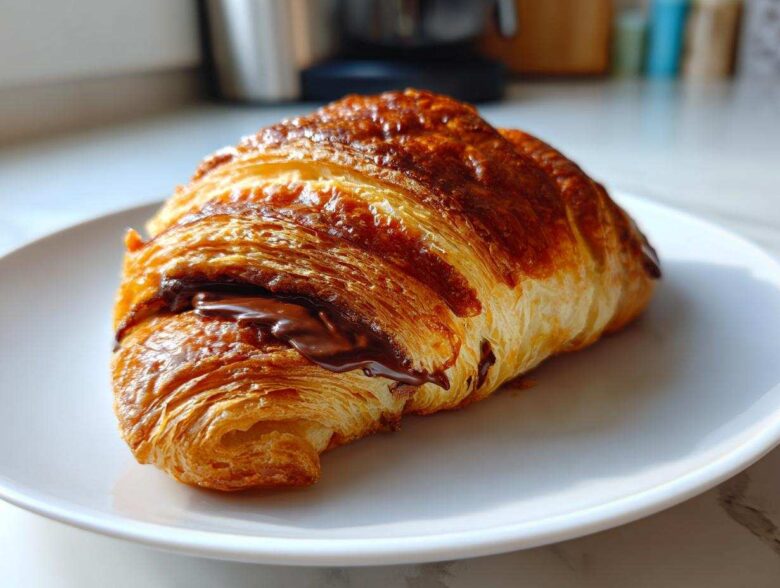
Okay, listen up, because I’m about to let you in on the biggest secret for a lazy weekend morning: the perfect bakery-style chocolate croissant without spending three days laminating dough! Seriously, you won’t believe that these flaky, buttery pastries—bursting with melty chocolate—come from a box. I spent years trying to master that delicate French technique and honestly, who has the time? This recipe uses ready-made puff pastry and gets you that incredible result in under 40 minutes total. Trust me, once you try these easy chocolate croissants, you’ll be making them every single Saturday. They are pure magic, and they are so simple!
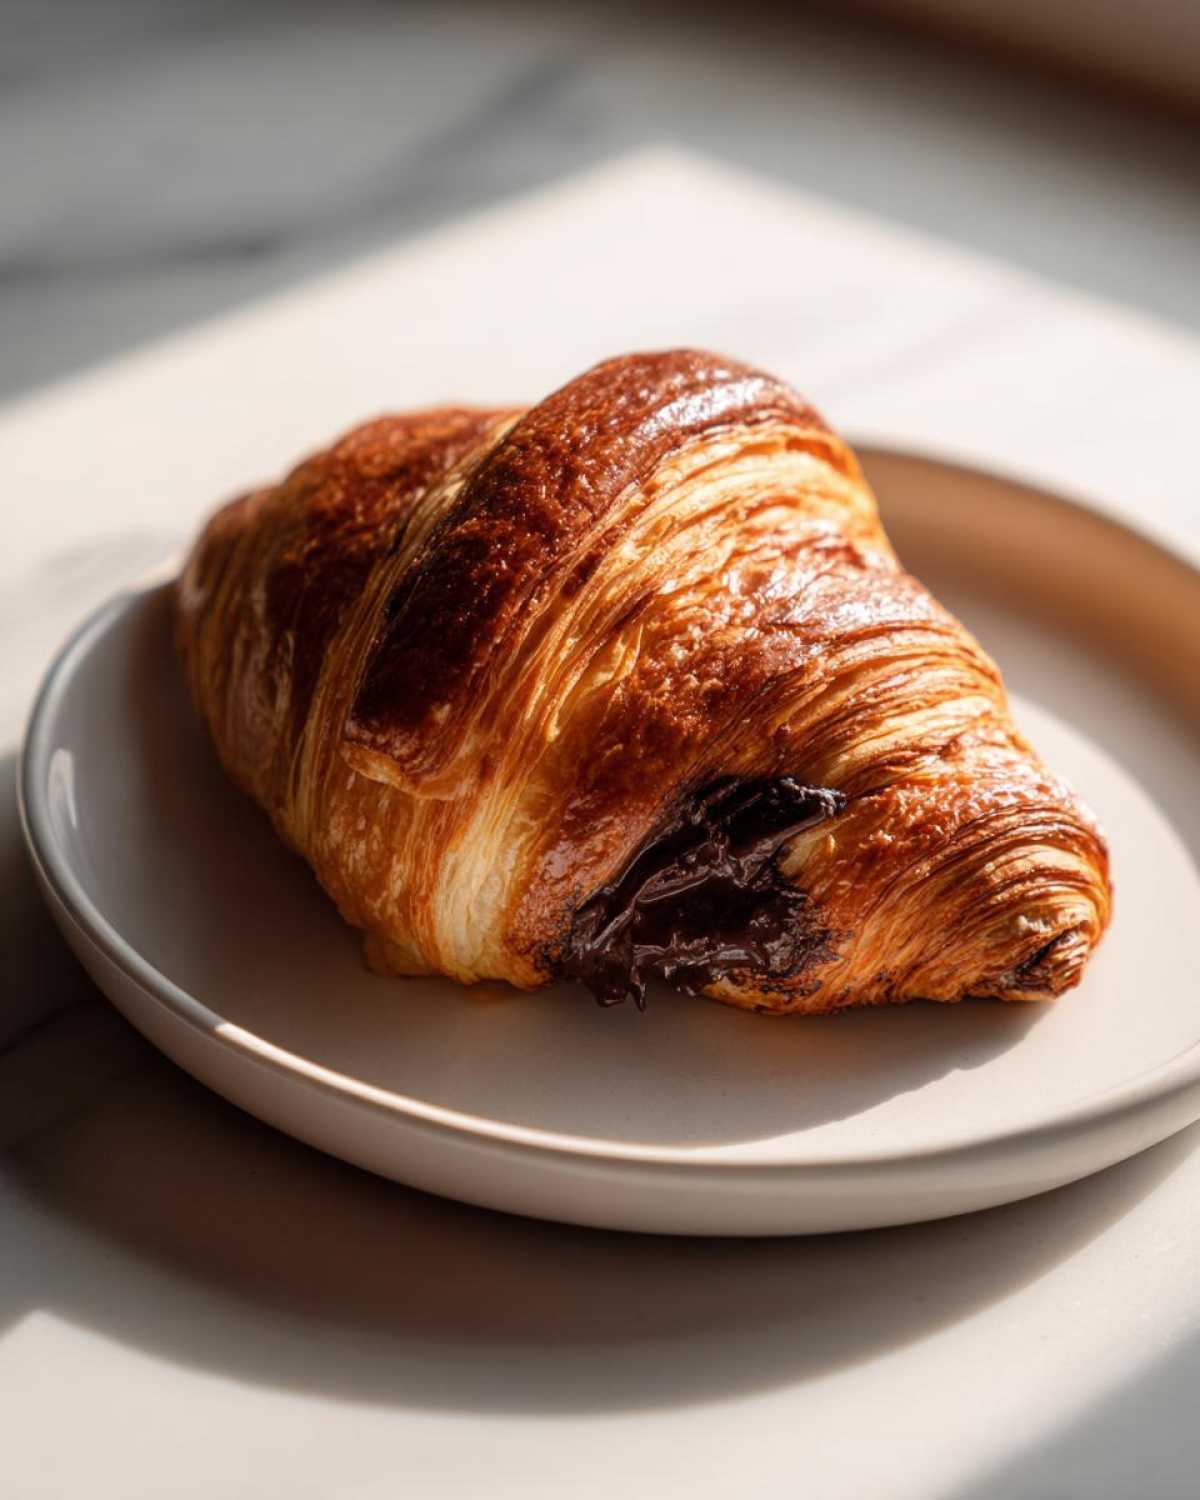
You can find all my favorite quick ideas for the morning over here in my simple breakfast recipes section, but bookmark this one first!
Why This Puff Pastry Chocolate Croissant Recipe Works So Well
I know what you’re thinking: aren’t real croissants impossible? That’s what I thought, too! But wow, this method is honestly cheating in the best possible way. We rely on that fantastic store-bought puff pastry, and it absolutely delivers.
Achieving Bakery Style Croissants At Home
That gorgeous, flaky, buttery texture that just melts in your mouth? That’s lamination, and it usually means folding butter into dough 800 times! But frozen puff pastry already has those beautiful butter layers locked in place. When the oven hits that cold butter layer, it steams itself into beautiful separation. You get genuine bakery style croissants at home without all the fuss. It’s my favorite kitchen magic trick.
Quick Breakfast Pastries Ready in Under 40 Minutes
The biggest win here is the speed. We’re talking 15 minutes prep and 18 minutes baking time, which means you can have spectacular easy chocolate croissants on the table in about 33 minutes total! These are legitimate quick breakfast pastries, perfect when the craving hits hard or when company shows up unexpectedly. No more compromising on quality because you are short on time!
Essential Ingredients for Your Chocolate Croissant
You don’t need a pantry full of exotic French imports to nail this recipe, which is part of what makes it so wonderful. We are keeping this streamlined, so you likely have most of this stuff waiting for you already! You only need four main components to make these stellar treats happen, plus the egg wash for that beautiful golden shine.
Ingredient Clarity and Preparation Notes
The most important thing to get right is the chocolate. You need about 4 ounces of good quality bittersweet or semi-sweet chocolate, and you must cut it into thin sticks, about half an inch thick. Don’t go grabbing chocolate chips; they melt too fast and leak out everywhere! The pastry itself comes from one standard package of frozen puff pastry, and you must remember to thaw it completely before you start—nobody wants stiff, uncooperative dough. Using great chocolate is the secret to getting that incredible melty chocolate pastry center!
Step-by-Step Guide to Perfect Puff Pastry Chocolate Croissants
Alright, now for the fun part! This is where the magic happens, and honestly, it moves so fast you’ll want to have everything measured out before you even turn the oven on. We’re moving through this assembly line quickly to earn ourselves that wonderful shortcut croissant recipe experience. Make sure your oven is hot—we need 400°F (200°C)—and line those baking sheets with parchment paper. I swear, parchment paper is the best investment you can make for easy cleanup when making these flaky buttery pastries.
Preparing the Puff Pastry and Cutting Rectangles
Take your thawed puff pastry sheets and lay them flat on a lightly floured surface. If they seem really thick right out of the box, don’t hesitate to gently roll them out a little bit more—just enough to make them even, maybe an eighth of an inch thinner. Now, grab your knife and cut each sheet straight down the middle, lengthwise, and then continue cutting until you have 12 perfect rectangles. Uniformity helps them bake evenly, so try to keep them close to the same size!
Rolling Technique for the Chocolate Croissant
This is the only part that needs a tiny bit of concentration, but you’ve got this! Take one chocolate stick and place it right near the short edge of your rectangle. Roll the pastry over that chocolate just once. Then, place your second chocolate stick right near that new curved edge and keep rolling until you hit the end of the pastry. You want that second layer of dough hugging that second piece of chocolate in the middle. Then, flip the whole thing over so the seam is snug against the baking sheet. I sometimes pop these assembled croissants into the fridge for 15 minutes right here—it helps them hold their shape beautifully before baking!
Egg Wash Application and Baking Times
Now for the golden touch! Whisk one large egg with just one tablespoon of water—that’s your super simple egg wash. Brush this mixture gently over the tops and sides of every chocolate croissant. Don’t let it pool up! Pop these beauties into your hot oven for about 15 to 18 minutes. You’ll know they are done when they are puffed up like little pillows and a deep, gorgeous golden brown color. Don’t forget to check out how I make those lovely apple turnovers, because once you master this dough, you’ll want to try everything!
Tips for the Flakiest Chocolate Croissant Every Time
So, you’ve rolled them and they look good, but how do we guarantee those amazing layers for your pain au chocolat recipe? It’s all about temperature control, my friends. The secret weapon I mentioned earlier—the quick chill time—is crucial for maximum flakiness. If you have even five minutes to spare after you assemble them (before brushing with the egg wash), pop those beauties into the fridge.
This quick rest lets the butter inside the puff pastry firm up again. When it hits the piping hot oven, the contrast between the cold butter and the hot air forces the dough layers apart violently—in a good way! That separation is what creates that incredible lift and shatter when you bite into your chocolate croissant. It’s a super tiny step, but it lifts this recipe from ‘good’ to ‘I can’t believe I baked this!’. Don’t skip it if you want truly flaky results!
Variations on the Classic Chocolate Croissant
Just because this is an easy puff pastry chocolate croissant recipe doesn’t mean we can’t have a little fun with it! Once you nail the basic assembly, you can start experimenting with different flavors. I love jazzing these up depending on what mood hits me for my weekend brunch ideas. It’s amazing how much flavor you can add without adding much time at all.
For instance, if you’re using dark chocolate, a tiny sprinkle of flaky sea salt right on top before baking gives you that addictive sweet-and-salty contrast. Or, if you’re feeling extra decadent, use white chocolate or even a peanut butter baking cup instead of the standard bittersweet sticks. The key is making sure whatever you use is solid enough to hold its shape when you start the rolling process.
Turning Your Chocolate Croissant into a Chocolate Breakfast Treats Bake
Okay, sometimes I’m feeling lazy but I need something for a whole crowd, and that’s when I turn this into a glorious chocolate croissant bake! This is next-level easy comfort food. Don’t worry about shaping them perfectly. Just cut all your assembled croissants (the chocolate stuffed ones!) into big, chunky pieces—maybe one inch squares. Throw them into a greased 8×8 inch baking dish.
Then, you just need a simple liquid binder. I whisk together about three eggs, a half cup of milk or cream, a splash of vanilla, and maybe two tablespoons of sugar. Pour that over the cut-up pastries. You want the liquid to soak down between the pieces. Bake this mixture at about 375°F (190°C) until it’s set up and golden on top. It transforms into a puffy, bread-pudding-like casserole. It’s the ultimate in chocolate breakfast treats and tastes like you spent hours on it!
Serving Suggestions for Your Homemade Chocolate Croissant
Now that you’ve made the easiest, flakiest chocolate croissant ever, the only question left is what to serve them with! Honestly, they are perfect solo—fresh out of the oven—but they become the star of any morning spread.
These are obviously fantastic for impromptu weekend brunch ideas. If you’re laying out a spread, just place them on a lovely tiered stand. If you want a slight boost of sweetness without covering up that gorgeous golden pastry, a simple dusting of powdered sugar is the way to go. Just use a fine-mesh sieve and tap lightly over the top once they have cooled just slightly—it gives them that professional bakery finish! It’s always my default setting.
To make it a fuller meal, pair them with something slightly tart or warm to balance the rich chocolate and butter. Think about serving them alongside a big bowl of fresh berries, or maybe a savory side like scrambled eggs or crispy bacon. If you’re looking for another sweet item to round out the brunch without turning it into a sugar bomb, you should check out my recipe for cinnamon apple baked oatmeal—it’s warm, comforting, and doesn’t compete with the main event!
And of course, for the authentic French experience? Just steam some milk for a café au lait. Dipping the corner of a warm puff pastry chocolate croissant into hot coffee is just pure bliss. Don’t overthink the plating; these babies shine all on their own!
Storing and Reheating Your Chocolate Croissant
It’s rare that we have leftovers because truly, these easy chocolate croissants disappear fast, but if you happen to be blessed with more than you can eat in one sitting, you need to know how to store them right. Because we are dealing with flaky layers and butter, keeping them fresh is important if you want to enjoy them the next day.
If you have leftovers, let them cool completely on a wire rack first. Seriously, don’t try to wrap them up warm, or that delicious steam will turn into sogginess. Once fully cool, I wrap them tightly in plastic wrap, one or two per wrap, and tuck them into an airtight container. They stay good at room temperature for about two days, or you can pop them in the fridge for up to four days. Don’t leave them out too long, though; that butter gets a little sad!
Now, the important part: reheating! You absolutely cannot microwave a croissant unless you enjoy eating warm, chewy bread—and we definitely don’t want that texture after making such amazing flaky buttery pastries.
To bring back that crisp, fresh-from-the-oven quality, you need dry heat. Pop them onto a baking sheet—make sure they aren’t touching!—and put them into an oven that’s been warmed up to about 300°F (150°C). Give them about 6 to 8 minutes. This gentle heat warms the chocolate through so it gets gooey again, but more importantly, it re-crisps all those beautiful layers from the puff pastry. Take them out right when you start smelling that wonderful hint of buttery baking aroma! That’s how you enjoy the very best version of your pain au chocolat recipe the next morning—perfection!
Frequently Asked Questions About Your Chocolate Croissant
I get tons of emails about these little guys, which just proves how much everyone loves a quick fix for amazing French pastry! Don’t worry if you have questions; that’s why I put together this little FAQ section for our favorite easy baked goods.
Can I make these chocolate croissants ahead of time?
Yes, you absolutely can do some of the work ahead of time, which is great for busy mornings or if you’re hosting! You assemble them completely—cut the pastry, place the chocolate, and roll them up perfectly—and then you stop right before brushing with the egg wash. Cover the tray tightly with plastic wrap and pop them in the fridge. They can chill like that for up to 24 hours. Do not ever bake them ahead of time, though! For the absolute best, flakiest result, you want that butter super cold before it hits the hot oven. When you’re ready to go, take them out, let them sit on the counter for about 20 minutes to lose the deep chill, brush on the egg wash, and bake them right away. That’s the best way to get that genuine bakery style croissants at home experience!
What kind of chocolate works best for the melty center?
This is so important for achieving that *perfect* gooey center without making a huge mess everywhere! Forget chocolate chips; they have stabilizers that sometimes prevent a smooth melt, and they are usually too small anyway. I strongly recommend buying a good quality bar of bittersweet or semi-sweet chocolate and cutting it yourself into little ½-inch thick batons or sticks. This is why the recipe calls for ‘sticks’! Because the chocolate is thick and solid when it goes in, it melts slowly and stays somewhat contained as the pastry puffs around it. That creates the most wonderful, deeply flavored, melty chocolate pastry pocket when you finally cut into it. It’s worth the extra two minutes of chopping, trust me!
If you have any other burning questions about making these puff pastry chocolate croissants, please don’t hesitate to send me a message through my contact page. I love hearing from fellow bakers!
Nutritional Estimates for This Chocolate Croissant Recipe
I always get asked about the numbers, and while I’m not a nutritionist—I’m a butter-and-chocolate enthusiast, obviously—I figure it’s only fair to give you a general idea of what you’re eating when you whip up these decadent chocolate breakfast treats. Remember, because we are using store-bought puff pastry (which is wonderfully rich!), these are going to lean toward the indulgent side, but that’s okay! We’re making these for enjoyment, right?
The following estimates are based on the recipe yielding 12 servings, using standard bittersweet chocolate, and accounting for one pastry per serving. If you use a different fat content in your pastry or a higher sugar chocolate, the totals will shift. Always use these figures as general guidance, and if you need precise data for specific dietary tracking, be sure to check out my full recipe disclaimer!
Here’s the rough breakdown for one single, glorious, flaky chocolate croissant:
- Serving Size: 1 croissant
- Calories: About 250
- Fat: Around 15g (Yes, that’s the delicious butter doing its job!)
- Saturated Fat: Roughly 8g
- Carbohydrates: About 25g
- Sugar: At approximately 10g (This is mostly coming from the rich chocolate center!)
- Protein: About 4g
- Cholesterol: Around 45mg
See? Not too scary for a total show-stopping breakfast pastry! If you are worried about the fat content, remember that chilling the pastries before baking helps seal in the steam, ensuring you get a lighter overall look for your final product. Enjoy every buttery bite!
Share Your Quick Breakfast Pastries Success
Seriously, I spilled all my secrets for making these ridiculously delicious and easy chocolate croissant delights! Now it’s your turn to try them out. There is honestly nothing better than seeing your beautiful, flaky creations lighting up my feed. This is why I love sharing these quick breakfast pastries with you all—it’s a proven winner!
When you make this shortcut croissant recipe, I really want to know how it went for you. Did the chocolate melt perfectly? Were your layers extra flaky? Don’t be shy! Drop a rating right below this section—even just five stars tells me you loved it enough to make it for your next weekend brunch.
And please, please tag me if you share a photo of your golden-brown masterpieces on social media! Seeing those puffed-up pastries makes my whole day. Use the hashtag that feels right, or just let me know I inspired your morning. I’m always cheering you on in the kitchen!
PrintEasy Puff Pastry Chocolate Croissants

Make bakery-style chocolate croissants quickly using store-bought puff pastry for flaky, buttery results.
- Prep Time: 15 min
- Cook Time: 18 min
- Total Time: 33 min
- Yield: 12 servings
- Category: Breakfast
- Method: Baking
- Cuisine: French
- Diet: Vegetarian
Ingredients
- 1 package (14.1 ounces) frozen puff pastry, thawed
- 4 ounces bittersweet or semi-sweet chocolate, cut into 1/2-inch thick sticks (about 12 sticks)
- 1 large egg
- 1 tablespoon water
Instructions
- Preheat your oven to 400°F (200°C). Line two baking sheets with parchment paper.
- Unfold the thawed puff pastry sheets onto a lightly floured surface. If the pastry is thick, gently roll each sheet slightly thinner.
- Cut each pastry sheet lengthwise into 6 equal rectangles, resulting in 12 rectangles total.
- Place one chocolate stick near the short edge of a rectangle. Roll the pastry over the chocolate once, then place a second chocolate stick near the new edge and continue rolling until you reach the end of the rectangle. You should have one chocolate stick encased in the center of the roll.
- Place the rolled croissant seam-side down on the prepared baking sheet. Repeat with the remaining pastry and chocolate.
- In a small bowl, whisk together the egg and water to create an egg wash. Brush the tops and sides of each croissant lightly with the egg wash.
- Bake for 15 to 18 minutes, or until the croissants are puffed and golden brown.
- Remove from the oven and let cool on the baking sheet for 5 minutes before transferring to a wire rack.
Notes
- For extra flakiness, chill the assembled croissants for 15 minutes before brushing with egg wash and baking.
- Use high-quality chocolate for the best flavor in your melty chocolate pastry.
- If you want a sweeter finish, dust the cooled croissants with powdered sugar.
Nutrition
- Serving Size: 1 croissant
- Calories: 250
- Sugar: 10g
- Sodium: 250mg
- Fat: 15g
- Saturated Fat: 8g
- Unsaturated Fat: 7g
- Trans Fat: 0g
- Carbohydrates: 25g
- Fiber: 1g
- Protein: 4g
- Cholesterol: 45mg